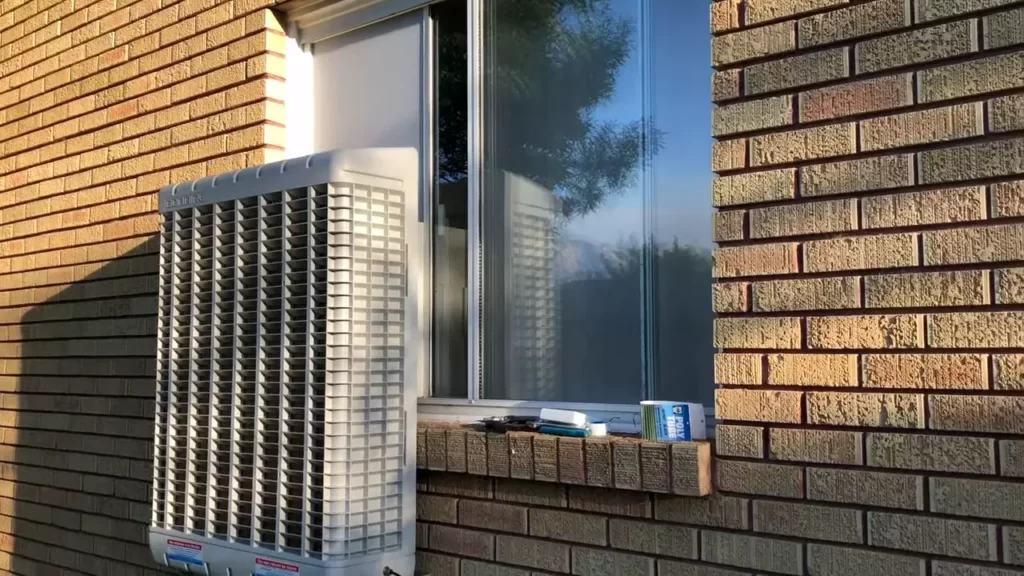
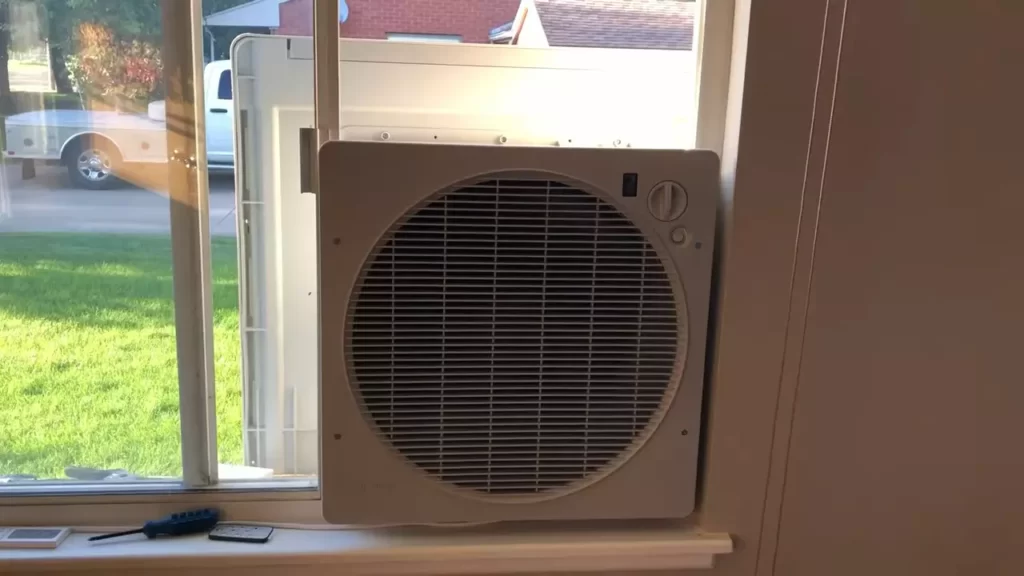
To install a swamp cooler in a window, follow the steps: measure the window opening, purchase the right size cooler, attach the mounting bracket, secure the cooler into the window, and connect the electrical and water supply. Installing a swamp cooler in a window is a cost-effective and energy-efficient way to cool a room or a small space.
A swamp cooler, also known as an evaporative cooler, works by drawing in hot air from outside and passing it through water-soaked pads, resulting in cooled air blown into the room. In this guide, we will walk you through the process of installing a swamp cooler in a window, ensuring optimal cooling and comfort for your space.
Understanding The Different Types Of Swamp Coolers
As you embark on your journey to install a swamp cooler in a window, it’s essential to understand the different types of swamp coolers available in the market. Each type comes with its own set of advantages and installation requirements. In this section, we will explore three popular types of swamp coolers: portable swamp coolers, window-mounted swamp coolers, and rooftop swamp coolers.

Portable Swamp Coolers
Portable swamp coolers are versatile and convenient cooling solutions that can be easily moved from one room to another. These units come equipped with wheels or handles, making them highly portable. Whether you’re looking to cool a small office space or bring relief to your living room during hot summer days, a portable swamp cooler may be the ideal choice.
One of the primary advantages of portable swamp coolers is that they do not require any installation or mounting. All you need is an electrical outlet and access to a water source to power up the unit. However, keep in mind that these coolers have limited cooling capacity, making them suitable for smaller areas.
Window-Mounted Swamp Coolers
Window-mounted swamp coolers are designed specifically to be installed in windows, providing effective and efficient cooling for a single room or a smaller area. These units are sleek, space-saving, and offer a higher cooling capacity compared to portable swamp coolers.
The installation process for window-mounted swamp coolers involves securing the unit in a window opening and connecting it to a power source and a water supply. It’s important to ensure that the window is properly sealed to prevent any air leakage. Window-mounted swamp coolers are an excellent choice if you’re looking for a more permanent cooling solution for a specific space.
Rooftop Swamp Coolers
Rooftop swamp coolers, as the name suggests, are installed on the roof of a building. These units are designed to cool larger areas or even entire buildings, making them suitable for commercial or industrial settings.
The installation of rooftop swamp coolers is more complex and usually requires professional assistance. It involves connecting the unit to a water supply, an electrical source, and routing the cooling ducts to various parts of the building. While rooftop swamp coolers can be more expensive than other types, they are highly efficient in cooling large spaces and can potentially lower energy costs in the long run.
Now that you have an understanding of the different types of swamp coolers, you can make an informed decision based on your specific cooling needs and installation requirements. Whether you opt for a portable swamp cooler, a window-mounted unit, or a rooftop swamp cooler, these cooling solutions can provide much-needed relief during hot summer months.
Factors To Consider When Selecting A Swamp Cooler
Installing a swamp cooler in your window can be a cost-effective and efficient way to cool your home during the hot summer months. However, with so many options available on the market, it’s important to consider a few key factors before making a purchase. By taking into account the window size and dimensions, cooling capacity and airflow, as well as energy efficiency and power consumption, you can ensure that you select a swamp cooler that fits your needs perfectly.

Window size and dimensions
One of the first things you need to consider when selecting a swamp cooler for window installation is the size and dimensions of your window. Not all swamp coolers are designed to fit in all types of windows, so it’s crucial to measure the size of your window accurately. Measure both the width and height of your window opening to ensure a proper fit. Additionally, consider the depth of the cooler and whether it will protrude too much into your living space once installed.
Cooling capacity and airflow
The cooling capacity and airflow of a swamp cooler are important factors to consider when selecting the right one for your window. Cooling capacity refers to the amount of air the cooler can cool effectively. This is typically measured in cubic feet per minute (CFM). Evaluate the size of the room you want to cool and choose a swamp cooler with a suitable CFM rating.
The airflow is also important as it determines how well the cooler can distribute the cool air throughout the room. Look for coolers with adjustable fan speeds and directional louvers to optimize airflow.
Energy efficiency and power consumption
Being conscious of energy efficiency and power consumption is not only good for the environment but also for your wallet. When selecting a swamp cooler, pay attention to the energy efficiency rating. Look for models that are Energy Star certified, as these are designed to consume less electricity while still providing effective cooling.
Additionally, check the power consumption of the cooler to ensure it aligns with your energy usage requirements. A higher power consumption cooler might be more suitable for larger rooms, while a lower power consumption cooler may be adequate for smaller spaces.
Considering these factors when selecting a swamp cooler for window installation will help you make an informed decision and choose a model that suits your specific needs. By measuring your window dimensions accurately, assessing cooling capacity and airflow, and prioritizing energy efficiency and power consumption, you can ensure that your new swamp cooler keeps you cool and comfortable all summer long.
Measuring And Assessing Your Window
Taking Accurate Measurements
Before installing a swamp cooler in your window, it is crucial to take accurate measurements. This step ensures that the cooler fits perfectly and functions efficiently. Here’s how you can measure your window accurately:
- Start by opening your window and removing any window screens or other obstructions that may affect the measurements.
- Using a tape measure, measure the width of the window from one side to the other. Take note of this measurement.
- Next, measure the height of the window from the top to the bottom. Make sure to record this measurement as well.
- Check if your window has any irregularities or uneven surfaces. If so, take additional measurements to ensure a precise fit.
Taking accurate measurements is crucial in avoiding any complications during the installation process. By measuring your window properly, you can ensure that your swamp cooler fits snugly and operates efficiently.

Determining Window Compatibility
Not all windows are compatible with swamp cooler installations. It is essential to determine if your window is suitable for this type of setup. Here’s how you can determine window compatibility:
- Check if your window has a sliding or casement design. Swamp coolers are typically designed for windows that open vertically, such as sliding windows.
- Ensure that there is enough space in your window frame to accommodate the swamp cooler. Measure the depth of the window frame to confirm this.
- Consider the weight of the swamp cooler. Make sure your window can support it without any strain or risk of damage.
By assessing the compatibility of your window, you can determine whether installing a swamp cooler is feasible and safe. Take these factors into account to ensure a successful installation process.
Inspecting the Window Frame and Condition
Before proceeding with the installation, it is essential to inspect the condition of your window frame. Here are the steps to follow for a thorough inspection:
- Check for any cracks, warping, or rotting in the window frame. These issues can compromise the integrity of the installation and may require repairs before proceeding.
- Inspect the window sill and tracks for any debris or obstructions that could hinder the proper functioning of the swamp cooler.
- Ensure that the window frame is securely attached and in good condition. Loose or damaged frames may not provide the necessary support for the swamp cooler.
By inspecting the window frame, you can identify any potential issues that need to be addressed before installing the swamp cooler. This step ensures a secure and reliable installation process.
Gathering Tools And Materials
Before you begin installing a swamp cooler in a window, it’s important to gather all the necessary tools and materials. Having everything ready beforehand will save you time and ensure a smooth installation process.
Essential tools for installation
To successfully install a swamp cooler in a window, you will need the following tools:
- Screwdriver set with various sizes of Phillips and flathead screwdrivers
- Adjustable wrench
- Tape measure
- Drill with a drill bit set
- Pliers
- Caulking gun
- Utility knife
Having these tools readily available will help you tackle any part of the installation process with ease.
Required materials and supplies
In addition to the tools mentioned above, you will also need the following materials and supplies:
- Swamp cooler unit
- Window installation kit (includes mounting brackets, foam weatherstripping, and screws)
- Water supply line and valve
- Ductwork and fittings
- Electrical wire and connectors
- Water pump
- PVC cement and primer
- Weatherproofing caulk
- Water pan and drain
Having all the necessary materials and supplies ensures that you won’t be left searching for items in the middle of the installation process.
Safety equipment and precautions
When installing a swamp cooler in a window, it’s important to prioritize safety. Make sure you have the following safety equipment and take the necessary precautions:
- Safety goggles to protect your eyes from debris
- Work gloves to protect your hands
- Respirator mask to prevent inhalation of dust or fumes
- Ladder or step stool for easy access to the window
Additionally, before starting the installation process, make sure to turn off the power to the area where you’ll be working and follow all manufacturer instructions carefully to ensure a safe installation.
By gathering all the essential tools and materials, as well as taking the necessary safety precautions, you’ll be well-prepared to successfully install a swamp cooler in a window.

Preparing The Swamp Cooler Unit
Before you can enjoy the benefits of a swamp cooler in your window, there are a few essential steps you need to take to prepare the unit. By following this guide, you’ll ensure a smooth and successful installation process.
Unboxing and inspecting the unit
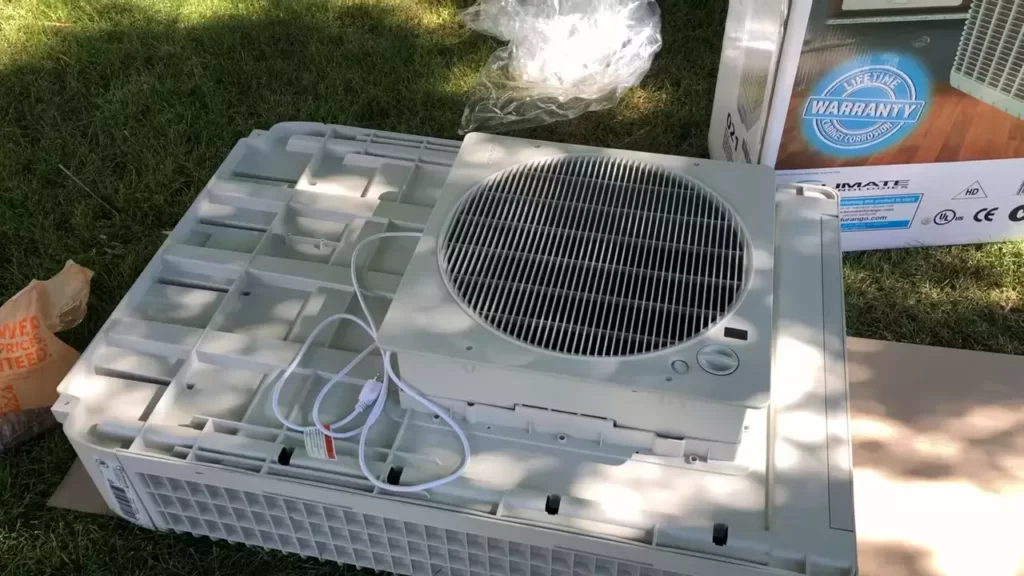
The first step in preparing your swamp cooler is to unbox and inspect the unit. This is important to ensure that all the necessary components are included and there are no visible damages or defects.
Assembling the necessary components
Once you have checked that everything is in order, it’s time to assemble the necessary components of the swamp cooler. Refer to the manufacturer’s instructions for detailed guidance on how to properly assemble the unit.
In most cases, you will need to connect the water supply line, attach the float valve, and secure the pump to the designated area. Make sure each component is properly aligned and securely fitted, as any loose connections can lead to leaks or inefficiencies during operation.
Checking for any pre-installation requirements
Before installing the swamp cooler in your window, it’s crucial to check for any pre-installation requirements. Ensure that the window frame is clean and structurally sound, as the weight of the unit can put stress on the frame. Additionally, verify that there is a power outlet nearby to connect the swamp cooler.
If you are unsure about any specific requirements, refer to the installation manual provided by the manufacturer.
Ensuring proper ventilation
Proper ventilation is essential for efficient cooling with a swamp cooler. Before installing the unit, make sure there is adequate airflow in the area where it will be placed. This could involve removing any obstructions, such as furniture or curtains, that could hinder the circulation of air.
Furthermore, consider installing a vent in the adjacent room to allow the cooled air to flow freely throughout your home or office.
In conclusion, preparing the swamp cooler unit involves unboxing and inspecting the unit, assembling the necessary components, checking for any pre-installation requirements, and ensuring proper ventilation. By following these steps, you will be well on your way to enjoying a comfortable and cool environment with your new swamp cooler in the window.

Mounting The Swamp Cooler In The Window
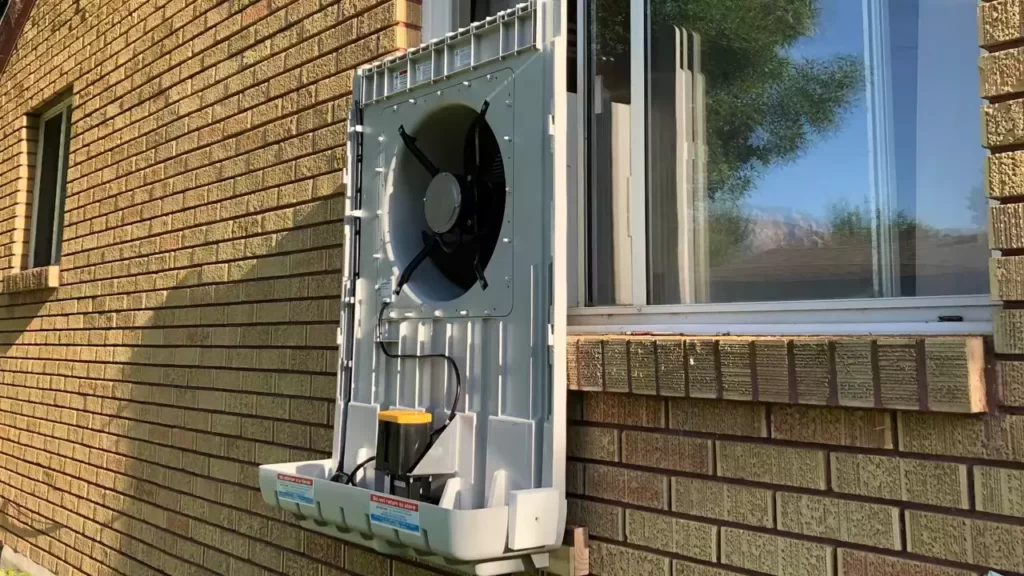
Once you have chosen the optimal location for your swamp cooler, the next step is to mount it securely in the window. This process will involve securing the mounting brackets or frame and attaching the swamp cooler to the window frame.
Choosing the optimal location
Before mounting your swamp cooler, it is crucial to choose the optimal location. Here are a few things to consider:
- The window should be near an electrical outlet for easy access to power.
- Ensure that the window is large enough to accommodate the size of the swamp cooler you have.
- Check that the window has a solid and secure frame to support the weight of the cooler.
- Consider the proximity to water sources, as the cooler will require a constant water supply.
Securing the mounting brackets or frame
To mount your swamp cooler securely in the window, follow these steps:
- Start by assembling the mounting brackets or frame according to the manufacturer’s instructions.
- Place the brackets or frame in the window, ensuring they are level and centered.
- Using a drill, screw the brackets or frame securely into the window frame. Make sure they are tightly fastened to provide stability for the swamp cooler.
Attaching the swamp cooler to the window frame
Once the mounting brackets or frame are securely in place, it’s time to attach the swamp cooler. Here’s how:
- With the help of a friend or family member, carefully lift the swamp cooler and position it on the mounting brackets or frame. Be cautious to avoid any damage to the cooler during this process.
- Align the mounting holes on the cooler with the corresponding holes on the brackets or frame.
- Using the provided screws or bolts, attach the cooler firmly to the brackets or frame. Make sure each screw is tightened securely but avoid over-tightening to prevent damage.
- Once the cooler is securely attached, double-check that it is level and stable. Adjust the mounting brackets if necessary.
By following these steps, you can successfully mount your swamp cooler in the window, ensuring it is properly secured and ready to provide you with cool and refreshing air.
Connecting The Necessary Components
After successfully installing your swamp cooler in a window, the next step is to connect the necessary components. This entails making sure that each part is properly connected and in working order to ensure optimal functionality. In this section, we will discuss the three essential components that need to be connected: the water supply line, the ducts or vents, and the control panel or thermostat.
Connecting the water supply line
The water supply line is an integral part of your swamp cooler as it constantly supplies water for proper cooling. To connect the water supply line, follow these steps:
- Locate the water supply valve on your swamp cooler.
- Attach one end of the water supply line to the water supply valve.
- Ensure that the water supply line is securely tightened to prevent any leaks.
- Connect the other end of the water supply line to a water source, such as a faucet or water valve.
- Once connected, turn on the water supply and check for any leaks. If any leaks are detected, tighten the connections as necessary.
Attaching the ducts or vents
The ducts or vents play a crucial role in distributing the cool air throughout your space. To attach the ducts or vents, follow these steps:
- Identify the outlets on your swamp cooler where the ducts or vents will be attached.
- Securely connect the ducts or vents to the outlets using duct tape or zip ties. Ensure that the connections are tight to prevent any air leakage.
- Position the ducts or vents in the desired locations within the room, ensuring proper airflow and coverage.
- If using multiple ducts or vents, consider using a Y-adapter or other appropriate connectors to ensure even distribution of air.

Setting up the control panel or thermostat
The control panel or thermostat allows you to regulate the temperature and settings of your swamp cooler. To set it up, follow these steps:
- Identify the control panel or thermostat on your swamp cooler.
- Ensure that the power to the swamp cooler is switched off before proceeding.
- Connect the control panel or thermostat to the appropriate connectors on your swamp cooler, following the manufacturer’s instructions.
- Once properly connected, switch on the power to the swamp cooler.
- Adjust the settings on the control panel or thermostat as desired, such as temperature, fan speed, and timer settings.
By following these steps and properly connecting the necessary components, you will ensure the efficient and effective operation of your swamp cooler. Take the time to double-check all connections and settings to avoid any issues, and enjoy the cool and refreshing air that your swamp cooler provides.
Testing And Adjusting The Installation
The testing and adjusting phase is a crucial step after installing a swamp cooler in a window. This step ensures that the installation is properly done, all settings and air directions are adjusted correctly, and the cooler functions efficiently to provide a comfortable environment. In this section, we will walk you through the process of running a test on your new swamp cooler, adjusting the settings and air direction for optimal performance, and ensuring the proper functionality of your newly installed window swamp cooler.
Running a test of the swamp cooler
After successfully installing the swamp cooler in your window, it’s important to run a test to ensure everything is functioning as intended. Here’s how:
- Turn on the cooler by flipping the switch or pressing the power button.
- Set the temperature to the desired level, typically below the room temperature.
- Make sure the water pump is working by checking for the sound of water flowing through the system.
- Observe if cool air starts blowing out from the unit.
- Wait for a few minutes to gauge the effectiveness of cooling in the room.
- If the cooler is working properly and you feel a noticeable drop in temperature, proceed to the next step. Otherwise, check the connections and troubleshoot any issues before proceeding.
Adjusting the settings and air direction
Now that you have tested the swamp cooler and it is working fine, it’s time to fine-tune the settings and air direction for maximum comfort. Follow these steps:
- Adjust the fan speed according to your preference. Higher settings provide stronger air circulation, while lower settings offer quieter operation.
- Experiment with the air direction by adjusting the louvers. The aim is to achieve an even distribution of cool air throughout the room. Observe the airflow pattern and make adjustments accordingly.
- Ensure the airflow is not obstructed by any objects, furniture, or curtains. This allows for efficient cooling and helps maintain the cooler’s performance.
- If necessary, consult the user manual provided by the manufacturer for specific instructions on adjusting the settings of your particular swamp cooler model.
Ensuring proper functionality and performance
To ensure the swamp cooler continues to operate optimally, follow these guidelines:
- Clean or replace the cooling pads regularly as per the manufacturer’s recommendations. This helps maintain proper airflow and prevents bacterial growth.
- Check the water level regularly and refill if necessary. Adequate water supply is crucial for efficient cooling.
- Inspect and clean the filters to remove any dust or debris that might hinder performance.
- Perform routine maintenance tasks like lubricating the fan motor and tightening loose connections.
- Keep the area around the window cooler clean and free from obstacles for uninterrupted airflow.
By following these steps, you can ensure that your swamp cooler will provide you with reliable and efficient cooling during those hot summer months. Regular maintenance and occasional adjustments will help maintain the proper functionality and performance of your window-installed swamp cooler.
Frequently Asked Questions Of How To Install A Swamp Cooler In A Window
Can You Put A Swamp Cooler In A Window?
Yes, a swamp cooler can be installed in a window. It provides a cooling effect through evaporative cooling, making it suitable for areas with low humidity.
Where Should A Swamp Cooler Be Placed In A Window?
Place the swamp cooler in the center of the window for optimal cooling. Make sure it is securely sealed and leveled to prevent any air leaks. Additionally, position it away from any electrical outlets or cords for safety.
Should Windows Be Open Or Closed With A Swamp Cooler?
To effectively use a swamp cooler, keep windows open to allow for proper air circulation and exhaust hot air. This will maximize the cooling effect and improve efficiency.
Why Do You Have To Crack A Window With A Swamp Cooler?
Cracking a window with a swamp cooler is necessary to allow proper air circulation. The cooler pulls in warm air from outside, cools it using water and releases it into the room. An open window allows the hot air to escape, ensuring efficient cooling.
Conclusion
Installing a swamp cooler in a window can be a cost-effective and efficient way to cool your home. By following these step-by-step instructions, you can easily enjoy a comfortable and refreshing atmosphere during those hot summer months. Remember to choose a suitable location, gather the necessary tools, and carefully follow the installation process.
With proper maintenance and regular cleaning, your swamp cooler will continue to provide relief from the heat for years to come. Stay cool!
