To install a split system air conditioner, follow these steps for a successful installation. First, choose a suitable location for the indoor and outdoor units.
Then, mount the indoor unit on the wall and connect it to the outdoor unit using refrigerant lines and electrical cables. Finally, test the system to ensure it is functioning properly. Welcoming the cooler months often requires an efficient cooling system, and a split system air conditioner can be the perfect solution.
Whether you’re a homeowner looking to install one yourself or a professional looking for a refresher, this guide will provide you with the essential steps to set up a split system air conditioner. By following these instructions carefully, you can enjoy a comfortable and cool environment in your home or office all summer long. So, let’s dive in and learn how to install a split system air conditioner properly.

Planning Your Split System Air Conditioner Installation
Consider the size and requirements of your space
When it comes to installing a split system air conditioner, it’s essential to consider the size and requirements of your space. Before making a purchase, take the time to evaluate the dimensions, layout, and usage of the area where the air conditioner will be installed. This is crucial for determining the appropriate size and capacity of the unit to ensure optimal cooling efficiency. By thoroughly understanding the needs of your space, you can make an informed decision that will result in the most comfortable indoor environment.
Measure the area to determine the appropriate unit size
One of the key factors in planning your split system air conditioner installation is measuring the area accurately. It’s essential to determine the appropriate unit size based on the square footage of the room or space you want to cool. To measure the area accurately, use a measuring tape to calculate the length and width of the room. Multiply these measurements together to get the total square footage. Once you have this information, you can refer to the manufacturer’s specifications or consult with a professional to determine the appropriate unit size that will effectively cool your space.
Assess the electrical capacity and requirements of your space
Another important aspect to consider when planning your split system air conditioner installation is the electrical capacity and requirements of your space. Air conditioners require a sufficient power supply to function correctly. Before installing the unit, make sure you know the electrical voltage and amperage capacity of your space. This information will help determine whether your electrical system can handle the additional load of an air conditioner. If necessary, consult with an electrician to ensure proper wiring and circuitry are in place to support the air conditioner’s electrical needs.
Gathering The Necessary Tools And Materials
To install a split system air conditioner, you first need to gather the necessary tools and materials. Having everything ready beforehand will make the installation process smoother and more efficient. In this section, we will discuss the tools and materials required to install a split system air conditioner.
Obtain the required tools
To get started, make sure you have the following tools at hand:
- Screwdriver: A screwdriver is essential for removing and installing screws.
- Wrench: A wrench is useful for tightening nuts and bolts.
- Drill: A drill is necessary for making holes in the wall or other surfaces for installation purposes.
Level, tape measure, and electrical tester
In addition to the basic tools, you will also need:
- Level: A level helps ensure that the air conditioner unit is correctly mounted and positioned.
- Tape measure: A tape measure is used to measure the dimensions and distances accurately.
- Electrical tester: An electrical tester is essential for checking the voltage and ensuring a safe installation.
Gather the necessary materials
Aside from the tools, be sure to gather the materials required for the installation:
- Split system air conditioner unit: The main component of the installation, the air conditioner unit contains the compressor, condenser, and fan.
- Mounting brackets, anchors, and screws: These items are necessary for securely attaching the air conditioner unit to the wall or ceiling.
- Insulation tape and electrical wire: Insulating tape is used to secure and protect the wires, while electrical wire connects the indoor and outdoor components of the unit.
Gathering these tools and materials before you begin the installation process is crucial. Remember to double-check that you have everything you need so that you can complete the installation smoothly and efficiently.

Preparing The Installation Site
Before installing a split system air conditioner, it is crucial to prepare the installation site properly. This step ensures that the units are positioned correctly for optimal performance and longevity. In this section, we will guide you through the process of selecting the ideal location, evaluating proximity to power sources and accessibility, as well as checking for obstructions and adequate airflow.
Select the ideal location for your indoor and outdoor units
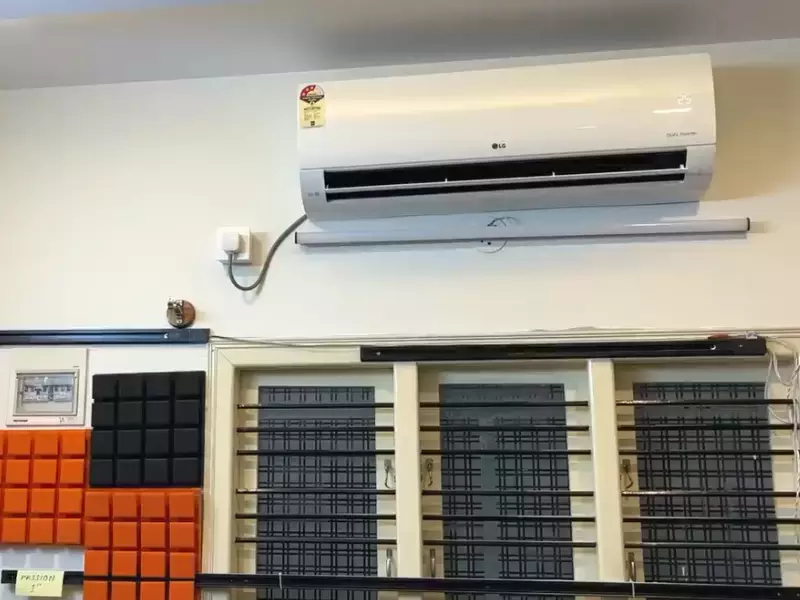
When selecting the location for your split system air conditioner, it is important to consider both the indoor and outdoor units. For the indoor unit, look for a spot that allows for easy airflow within the room. Avoid placing it near sources of heat or direct sunlight, as this can affect its cooling efficiency. Additionally, ensure that the location provides easy access for maintenance and cleaning.
For the outdoor unit, choose a location that is away from areas that accumulate debris, such as falling leaves or excessive dust. This will help prevent clogging of the unit and ensure proper functioning. It is also advisable to position the unit where it is shielded from strong winds to avoid unnecessary strain on the fan.
Evaluate the proximity to power sources and accessibility
Before finalizing the location of your split system air conditioner, evaluate the proximity to power sources. Ensure that the location allows for easy connection to electrical outlets without the need for long and exposed wiring, which can pose safety hazards. Additionally, consider the accessibility of the site for future maintenance and repairs. A well-positioned unit will make it easier for technicians to conduct any necessary servicing.
Check for obstructions and adequate airflow
One of the critical factors to consider in preparing the installation site is checking for obstructions and ensuring adequate airflow. Remove any furniture, plants, or other objects that may block the airflow from reaching the unit. This will allow the air conditioner to operate efficiently and prevent any unnecessary strain on the system.
It is also essential to ensure that the outdoor unit has enough space around it for proper airflow. Check that there are no objects, such as fences, walls, or bushes, in close proximity to the unit. The manufacturer’s guidelines usually provide recommended clearance distances, which should be followed to maintain optimal performance.
By carefully selecting the ideal location, evaluating proximity to power sources, and checking for obstructions and adequate airflow, you are laying the foundation for a successful installation of your split system air conditioner.
Installing The Indoor Unit
Installing the indoor unit of a split system air conditioner is a crucial step in ensuring an efficient and functional cooling system. In this section, we will guide you through the process of mounting the indoor unit on the wall, marking the appropriate height, drilling holes for the bracket, securing the bracket, and attaching the unit.
Mount the indoor unit on the wall
The first step in installing the indoor unit is to mount it securely on the wall. Ensure that the location you choose provides sufficient space and is easily accessible for maintenance purposes. The indoor unit should be placed at least 7 feet above the floor to achieve proper air circulation and distribution.

Mark the appropriate height and drill holes for the bracket
Use a measuring tape to mark the appropriate height for the indoor unit on the wall. Once you have determined the height, use a pencil to mark the spots where the holes for the mounting bracket will be drilled. Make sure to double-check the accuracy of your measurements before drilling the holes.
Secure the bracket and attach the unit
After you have marked the holes, it’s time to secure the bracket on the wall. Insert the screws provided with the indoor unit through the back of the bracket and into the pre-drilled holes. Use appropriate tools, such as a screwdriver or a drill, to tighten the screws securely.
With the bracket in place, carefully attach the indoor unit to it. Align the unit’s mounting holes with the screws on the bracket, and gently slide it into position. Once the unit is properly aligned, use a screwdriver to fasten the unit to the bracket. Make sure each screw is tightened snugly but not overly tightened to avoid damaging the unit.
Congratulations! You have successfully installed the indoor unit of your split system air conditioner. The next step is to connect the indoor unit to the outdoor unit, which we will cover in the next section.
Remember, proper installation of the indoor unit is essential for optimal cooling performance and longevity of your split system air conditioner. If you are unsure about any step of the installation process, it is always recommended to consult a professional HVAC technician.
Connecting The Indoor And Outdoor Units
Create an Opening for the Refrigerant Lines and Electrical Cable
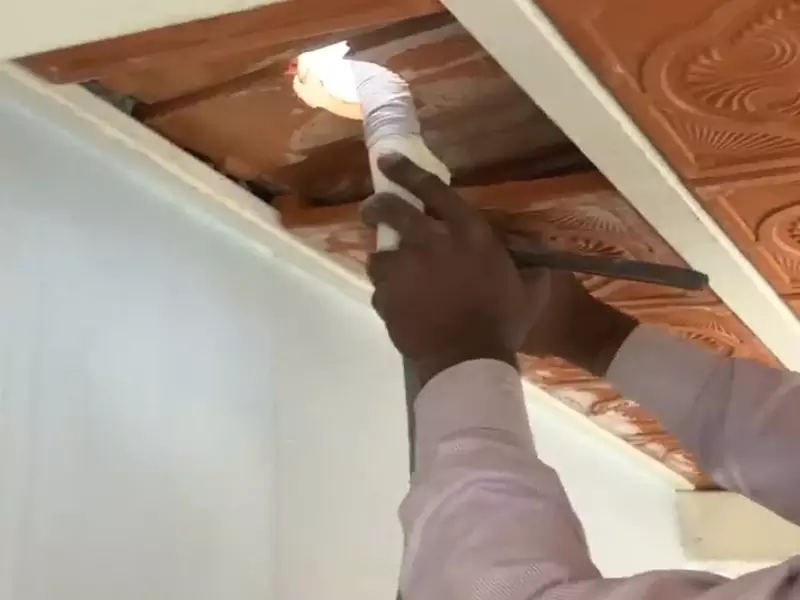
Once you have determined the ideal locations for your indoor and outdoor units, it’s time to connect them. Before doing so, you’ll need to create an opening for the refrigerant lines and electrical cable to pass through. This step is crucial to ensure a proper connection and efficient operation of your split system air conditioner.
To create the opening, start by marking the desired location on the wall where you want the lines and cable to go through. Make sure to measure and double-check the positions to avoid any errors. Once you have the markings, use a stud finder to locate any studs or obstacles behind the wall. This will help you avoid drilling in the wrong place.
Drill a Hole through the Wall as Required
With the markings and stud positions in mind, it’s time to drill a hole through the wall. Use a drill with a suitable diameter according to the size of the refrigerant lines and electrical cable. Start by drilling from the inside of your home and slowly work your way through to the outside.
Be cautious when drilling and make sure to wear proper protective gear, such as safety goggles. It’s essential to keep the drill steady and apply even pressure to avoid any damage to the wall or obstruction behind it. Once the hole is drilled, remove any debris or excess material to ensure a clean passage for the lines and cable.
Seal the Hole Properly to Prevent Air Leaks
To maintain the energy efficiency of your split system air conditioner and prevent unwanted air leaks, it’s crucial to seal the drilled hole properly. Begin by inserting a foam insulation sleeve or rubber grommet into the hole to protect the lines and cable from any sharp edges.
Next, seal the gap around the lines and cable with a high-quality weatherproof sealant. This will help prevent air leakage and maintain the integrity of your home’s insulation. Apply the sealant generously, ensuring complete coverage around the hole. Smooth out the sealant with a putty knife to create a neat finish.
Finally, inspect the sealed hole from both the inside and outside of your home. Look for any gaps or areas where the sealant may not have adhered properly. If necessary, apply additional sealant to ensure a secure and airtight connection between the indoor and outdoor units.
By following these steps and creating a proper opening for the refrigerant lines and electrical cable, you can ensure a successful installation of your split system air conditioner. Remember, proper sealing is essential to prevent air leaks and optimize the performance of your cooling system, so take the time to do it right.

Installing The Outdoor Unit
Once you have determined the ideal location for your split system air conditioner’s outdoor unit, it is time to install it properly. This crucial step ensures the efficient functioning of your air conditioning system. Here is a step-by-step guide to help you get started:
Place the outdoor unit on a stable, level surface
The first step in installing the outdoor unit is to find a stable and level surface to place it on. This could be a concrete pad or a solid platform. Ensuring the unit is on a stable surface helps to minimize vibration and noise, prevent damage to the unit, and ensure efficient operation.
Connect the refrigerant lines and electrical cable
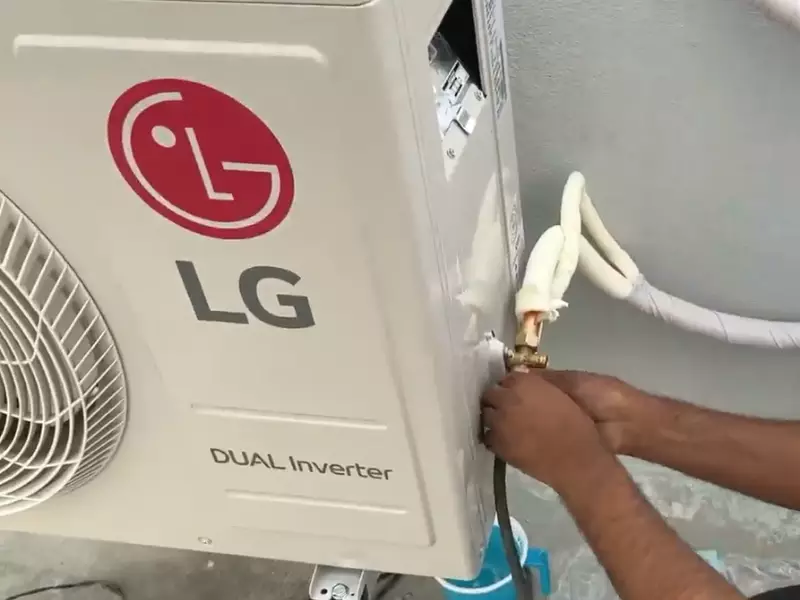
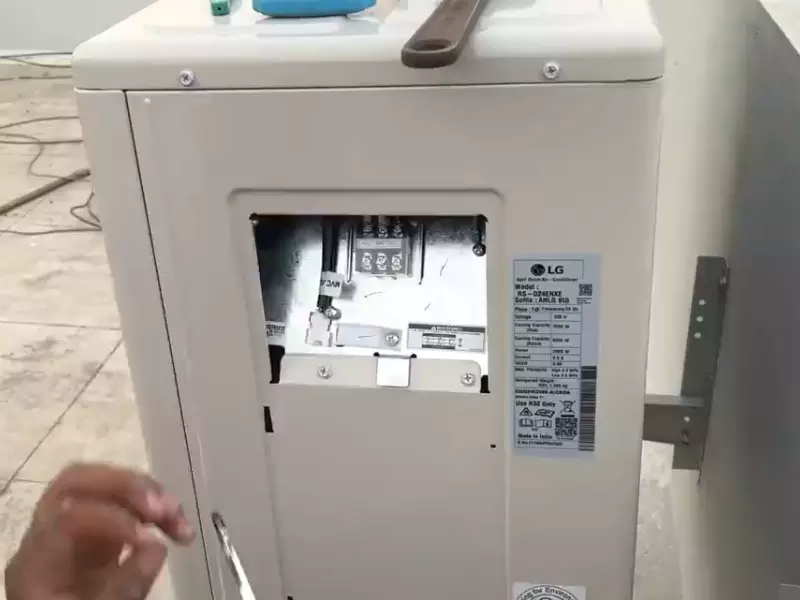
After you have placed the outdoor unit on a stable surface, it is time to connect the refrigerant lines and electrical cable. The refrigerant lines are responsible for carrying the refrigerant between the outdoor and indoor units, while the electrical cable provides power to the unit. Follow the manufacturer’s instructions carefully to ensure proper connection and avoid any potential leaks or electrical issues.
Ensure proper insulation and secure the connections
Proper insulation and secure connections are vital to the efficient performance of your split system air conditioner. Insulate all refrigerant lines using foam insulation sleeves or tape to prevent heat loss or gain, ensuring optimal cooling or heating efficiency. Additionally, make sure all connections are securely tightened to prevent any leaks or loss of refrigerant.
By following these steps to install the outdoor unit of your split system air conditioner, you can ensure efficient operation and maximum comfort in your space.
Testing And Finishing The Installation
Testing and Finishing the Installation – Now that you have successfully installed your split system air conditioner, it’s time to test the unit and ensure everything is functioning properly. This crucial step will help you identify any abnormalities and make necessary adjustments to guarantee optimal performance. In this section, we will guide you through the testing process and provide tips to monitor the cooling and heating capabilities of your brand-new air conditioner.
- Test the unit to ensure proper functioning – After completing the installation of your split system air conditioner, it’s essential to test the unit to ensure it is running smoothly. Follow these steps to execute a comprehensive test:
- Power on the system and check for any abnormalities: Once you have connected the unit to the power source, switch it on and carefully observe for any irregularities. Pay close attention to any strange noises, vibrations, or burning smells, as these could indicate potential issues. If you notice anything out of the ordinary, it may be necessary to call a professional technician for further examination.
- Monitor the cooling and heating capabilities: Now that the air conditioner is powered on, it’s time to assess its performance. Use a thermometer to measure the air temperature entering and exiting the unit. This will help you determine if the cooling and heating capabilities meet your expectations.
- Adjust the thermostat settings: To test the cooling capabilities, set the thermostat to a lower temperature than the ambient room temperature. Allow the air conditioner to run for a few minutes and check if the air exiting the unit feels significantly cooler. Repeat the process for testing the heating capabilities, setting the thermostat to a higher temperature.
- Check the airflow: While testing the unit, ensure that the airflow from the air conditioner is steady and consistent. Place your hand near the vents to feel if the air is being distributed evenly throughout the room. If you notice weak airflow or if certain areas of the room are not adequately cooled or heated, it may be necessary to adjust the direction or position of the vents.
- Inspect the condensate drainage: One more crucial aspect of the test is to ensure the proper drainage of the condensate. Check that the condensate drainage system is functioning effectively, without any leaks or blockages. A faulty drainage system can cause water damage to the air conditioner and the surrounding area.
By conducting a thorough test of your split system air conditioner, you can rest assured that the installation is successful and the unit is functioning optimally. Following these steps will help you identify and address any issues early on, ensuring proper cooling and heating capabilities for your comfort throughout the year.

Maintaining Your Split System Air Conditioner
Maintaining your split system air conditioner is crucial to ensure its optimal performance and longevity. Regular cleaning and inspection, cleaning the filters, and checking for leaks or other issues with the refrigerant lines are important maintenance tasks that should be carried out to keep your air conditioner running smoothly.
Regularly clean and inspect the unit
Regular cleaning and inspection of your split system air conditioner help to prevent dust and debris buildup, which can hinder the unit’s efficiency. Start by turning off the power to the unit. Using a soft cloth or brush, gently wipe the exterior surfaces of the indoor and outdoor units to remove any dust. Ensure that the area around the unit is clear of any obstructions, such as leaves or other debris.
Clean the filters and remove any debris
The filters in your split system air conditioner play a vital role in maintaining good air quality and proper airflow. Dirty filters can restrict airflow, decrease cooling efficiency, and even damage the unit. To clean the filters, locate them in the indoor unit. Depending on the model, you may need to remove a cover or panel to access the filters. Once removed, gently vacuum or wash the filters with mild soap and water, then allow them to air dry completely before reinserting them into the unit.
It’s also important to regularly check for any debris that may have accumulated inside the unit, such as leaves, dirt, or dust. This can be done by carefully removing the front cover or panel and using a soft brush or vacuum cleaner with a brush attachment to clean the interior surfaces. Avoid using water or any liquid cleaner as this can damage the electrical components of the unit.
Check for any leaks or issues with the refrigerant lines
Inspecting the refrigerant lines of your split system air conditioner is essential to ensure there are no leaks or other issues that can affect its performance. Start by visually checking the refrigerant lines for any signs of damage, such as corrosion, cracks, or loose fittings. If you notice any issues, it’s important to contact a professional technician to repair or replace the affected parts.
Additionally, you should also check the refrigerant levels. Low refrigerant levels can indicate a leak in the system. If you suspect a refrigerant leak, it’s crucial to contact a licensed technician to conduct a thorough inspection and perform any necessary repairs.
In conclusion, maintaining your split system air conditioner through regular cleaning, filter maintenance, and refrigerant line inspection is essential for optimal performance and a longer lifespan. By adhering to these simple maintenance tasks, you can enjoy cool and comfortable indoor spaces for years to come.
Frequently Asked Questions On How To Install A Split System Air Conditioner
Can I Install A Split System Air Conditioner Myself?
No, it is not recommended to install a split system air conditioner yourself. It is a complex task that requires professional knowledge and experience. Incorrect installation can lead to performance issues, safety hazards, and void warranties. It is best to hire a licensed technician for proper installation and ensure the system operates efficiently and safely.
Is It Hard To Install A Split System Air Conditioner?
Installing a split system air conditioner is not difficult. It requires basic knowledge of electrical and plumbing work. Follow the manufacturer’s instructions, use proper tools, and seek professional help if needed.
Is A Split System Easy To Install?
Yes, a split system is easy to install. It requires basic installation skills and can be quickly set up in most homes.
How Much Does It Cost To Install An AC Split?
The cost of installing an AC split varies depending on factors such as the size of the unit and the complexity of the installation. On average, you can expect to pay anywhere from $1,500 to $5,000 for a professional installation.
Conclusion
Installing a split system air conditioner may seem daunting, but with the right guidance, it can be a breeze. By following the step-by-step instructions in this blog post, you’ll be able to efficiently and effectively install your own split system air conditioner.
Remember to always prioritize safety and consult with a professional if you’re unsure. With these tips, you’ll soon be enjoying the benefits of a cool and comfortable home. Get ready to beat the heat!
