To install a second RV air conditioner, begin by identifying the ideal location for the unit on the roof and ensuring there is enough space and proper wiring for installation. Then, carefully mount the unit and connect it to the electrical supply and ductwork, following the manufacturer’s instructions.
Planning The Installation
Installing a second RV air conditioner can greatly improve the comfort of your recreational vehicle, especially during those scorching hot summer days. However, before diving into the installation process, it is essential to plan it thoroughly. This includes assessing the need for a second air conditioner, choosing the right model, and determining the ideal location.
Assessing the need for a second RV air conditioner
The first step in planning the installation of a second RV air conditioner is to assess whether it is necessary. Factors such as the size of your RV, the number of occupants, and the climate conditions you typically encounter will determine if an additional unit is required.
Start by considering the size of your RV. If you own a larger motorhome or travel trailer, a single air conditioner may struggle to cool the entire space efficiently. Additionally, if you frequently travel with a large group of people or have pets on board, the existing air conditioner might not be sufficient to maintain a comfortable temperature. Lastly, if you often find yourself camping in regions with extremely high temperatures, a second air conditioner can provide relief from the intense heat.
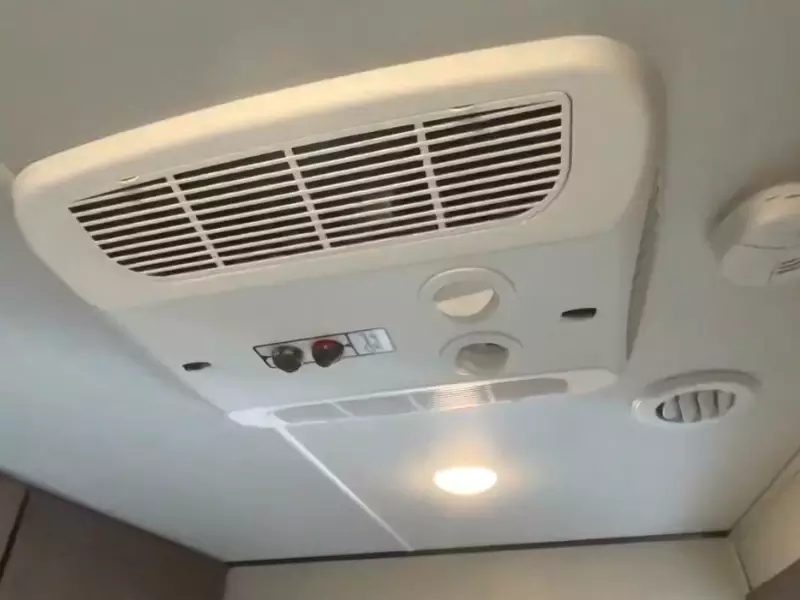
Choosing the right air conditioner model for your RV
Once you have determined the need for a second air conditioner, the next step is to choose the appropriate model. There are several factors to consider when making this decision, including BTU rating, power requirements, and compatibility with your RV’s electrical system.
Firstly, consider the BTU rating of the air conditioner. BTU (British Thermal Unit) is a measurement of cooling capacity. The size of your RV and the intended usage will help determine the appropriate BTU rating for your needs. A larger RV or more extreme climate conditions will require a higher BTU rating to effectively cool the space.
In addition to the BTU rating, you must ensure that the power requirements of the new air conditioner are compatible with your RV’s electrical system. Determine the available power capacity in your RV and check the specifications of the air conditioner to ensure they match. This information can usually be found in the product manual or on the manufacturer’s website.
Determining the ideal location for the second unit
Lastly, it is crucial to determine the ideal location for the installation of the second air conditioner. This will ensure efficient cooling throughout your RV and avoid any potential issues.
Consider the layout of your RV and identify areas that may benefit from additional airflow. It is recommended to install the second unit in a centrally located area to ensure even distribution of cool air. Additionally, it is crucial to account for the availability of power and proper ventilation in the chosen location.
Take note of any existing air ducts in your RV and plan the installation to integrate with the ventilation system. This will help maximize the efficiency of both air conditioners.
By carefully assessing the need for a second air conditioner, choosing the right model, and identifying the ideal location, you can ensure a successful installation process. With proper planning, you will be well on your way to enjoying cool comfort in your RV no matter how extreme the weather gets.
Preparing For The Installation
Before installing a second RV air conditioner, it’s important to properly prepare the installation area. This includes gathering the necessary tools and materials, shutting off the electrical power to the RV, and removing any obstructions from the installation area. By following these steps, you can ensure a smooth and successful installation process for your second RV air conditioner.
Gathering the necessary tools and materials
To properly install a second RV air conditioner, it’s essential to have all the necessary tools and materials on hand. Here’s a list of what you’ll need:
| Tools | Materials |
| Drill | The second RV air conditioner unit |
| Screwdriver set | Mounting brackets |
| Butyl tape | Electrical wiring |
| Measuring tape | Mounting hardware |
| Level | Sealant |
| Caulking gun | Electrical connectors |
By gathering these tools and materials beforehand, you can ensure a smooth and efficient installation process.
Shutting off the electrical power to the RV
Before starting the installation process, it’s crucial to shut off the electrical power to your RV. This step is essential for your safety and to prevent any electrical damage during the installation. Here’s how you can do it:
- Locate the main electrical panel of your RV.
- Identify the circuit breaker that controls the power supply to the air conditioning units.
- Flip the switch of the circuit breaker to the “Off” position to shut off the power.
Double-check to ensure that the power is truly off by testing the outlets and the air conditioner controls. This precautionary measure will help prevent any accidents or damage during the installation process.
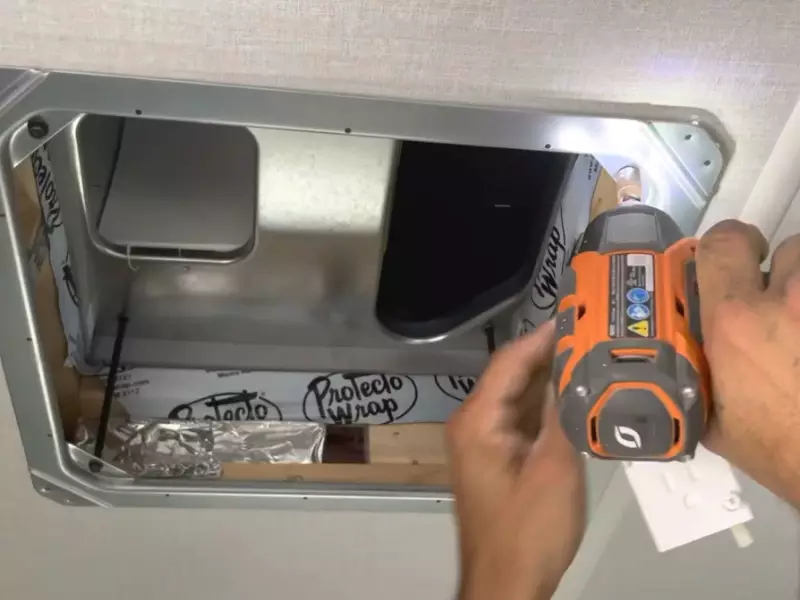
Removing obstructions and cleaning the installation area
Prior to installing the second RV air conditioner, it’s important to remove any obstructions and clean the installation area. By doing so, you’ll ensure optimal performance and maximize the effectiveness of your new unit. Follow these steps:
- Inspect the installation area, both interior, and exterior, for any debris or dirt that may hinder the installation.
- Clean the area using a mild detergent and water to remove any dirt or residue.
- Remove any obstructions such as vents, grilles, or decorative panels that may interfere with the installation process.
- Ensure the area is free from any loose screws or other objects that may cause damage to the new unit or hinder its efficiency.
By removing obstructions and cleaning the installation area, you’ll create an ideal environment for installing your second RV air conditioner, promoting its longevity and performance.
Installing The Second Rv Air Conditioner
If you’re an avid RVer, you know how crucial a properly functioning air conditioner is to the overall comfort of your vehicle. However, during those hot summer days when the temperatures soar, one air conditioner may not be enough to keep your RV cool and comfortable. That’s where installing a second RV air conditioner comes in. In this guide, we’ll walk you through the step-by-step process of mounting the unit, connecting the refrigerant lines and electrical wiring, and securing the unit while ensuring a tight seal to prevent any gaps or openings.
Mounting the unit on the roof of the RV
The first step in installing the second RV air conditioner is to mount the unit securely on the roof of your vehicle. This requires careful planning and consideration to ensure proper weight distribution and stability. Here’s a breakdown of the process:
- Choose a suitable location on the roof of your RV for the second air conditioner. Make sure it is away from any obstructions such as vents or roof-mounted accessories.
- Using the appropriate tools, carefully cut a hole in the roof that matches the dimensions of the air conditioner unit. Be sure to follow any manufacturer guidelines or recommendations for hole size and placement.
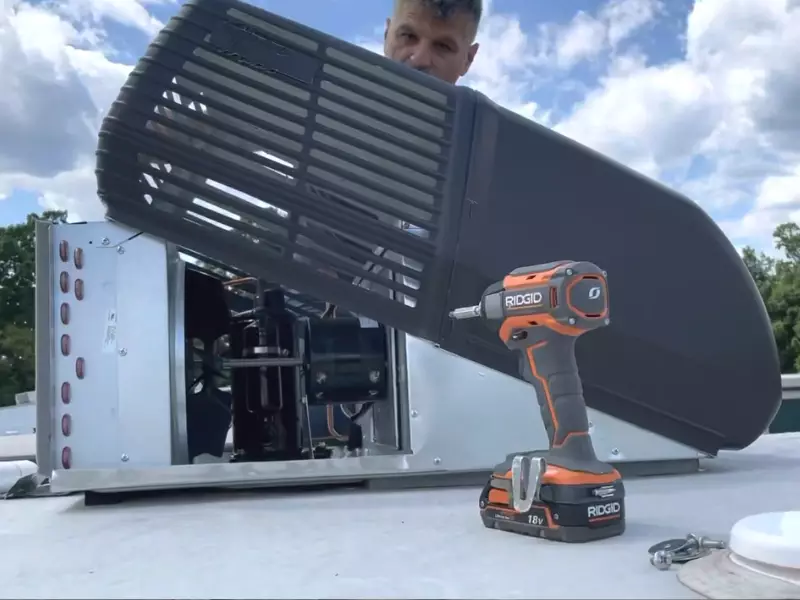
- Carefully lift the unit onto the roof and position it over the hole. Ensure that it is level and aligns properly with the opening.
- Secure the unit in place using screws or bolts, following the manufacturer’s instructions. Make sure it is tightly fastened to prevent any movement during travel.
Connecting the refrigerant lines and electrical wiring
Once the unit is securely mounted on the roof, the next step is to connect the refrigerant lines and electrical wiring. This is a vital part of the installation process, as it ensures proper functioning of the air conditioner. Here’s a breakdown of what needs to be done:
- Locate the existing refrigerant lines and electrical wiring from the first air conditioner.
- Connect the refrigerant lines from the second unit to the existing lines. This may require cutting and splicing the lines, so make sure to use the appropriate tools and materials to ensure a secure connection.
- Connect the electrical wiring from the second unit to the existing wiring. Again, ensure that the connections are secure and properly insulated.
- Test the connections to ensure proper functionality and check for any leaks or electrical issues. If everything is in order, proceed to the next step.
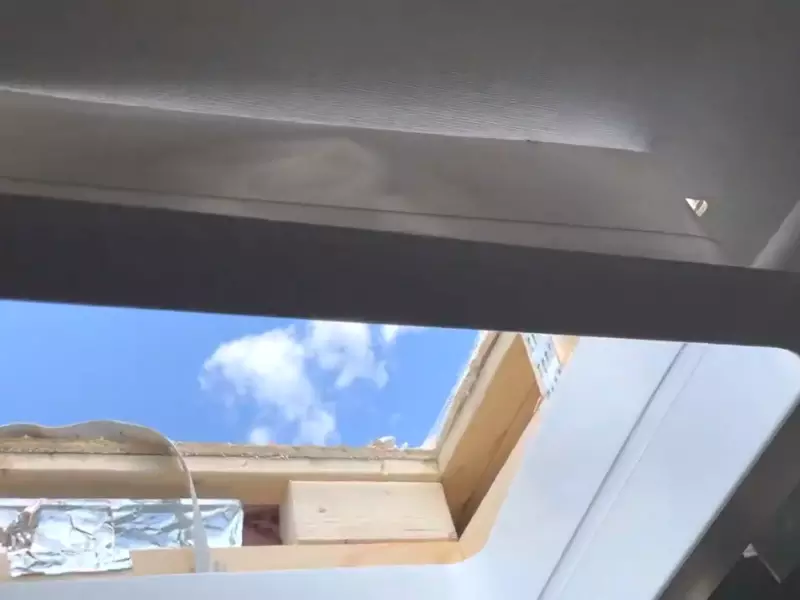
Securing the unit and sealing any gaps or openings
With the unit mounted and the connections made, the final step is to secure the unit and seal any gaps or openings to prevent air leakage. Here’s what you need to do:
- Apply a generous amount of sealant around the edges of the unit to create a watertight seal. Use a sealant recommended by the manufacturer for RV applications.
- Inspect the area around the unit for any gaps or openings and seal them using the appropriate sealant or weatherstripping material.
- Double-check the mounting screws or bolts to ensure they are tight and secure.
- Test the air conditioner to ensure it is working properly and producing cold air.
Remember, proper installation of the second RV air conditioner is crucial to its overall performance and longevity. If you’re unsure about any step of the process, it’s always best to consult a professional or refer to the manufacturer’s instructions. With a properly installed second air conditioner, you can enjoy a cool and comfortable RV even on the hottest of days.
Testing And Troubleshooting
After successfully installing a second air conditioner in your RV, it is crucial to thoroughly test and troubleshoot the system to ensure it is functioning optimally. This step is essential to identify any issues that may arise and to make necessary adjustments for a comfortable and enjoyable camping experience. In this section, we will cover the steps involved in testing and troubleshooting your newly installed RV air conditioner.
Turning on the RV’s Electrical Power and Air Conditioning System
Before proceeding with the testing and troubleshooting process, it is important to ensure that the RV’s electrical power is turned on. Here’s how you can do it:
- Connect your RV to a reliable power source, such as a campground pedestal or generator.
- Locate the main power switch or breaker panel in your RV.
- Turn on the main power switch or reset any tripped breakers.
Once the electrical power is properly connected and turned on, you can proceed to turn on the air conditioning system by following these steps:
- Locate the thermostat control panel inside your RV.
- Adjust the thermostat to the desired temperature setting.
- Switch on the air conditioning unit by pressing the power button or flipping the corresponding switch.
Checking for Proper Installation and Functionality
After turning on the air conditioning system, it is essential to check for proper installation and functionality. Here are the key steps to perform:
- Inspect the air conditioner unit and ensure it is securely mounted on the roof of your RV. Look out for any loose screws or connections.
- Check the air filters and clean or replace them if necessary. Clogged filters can lead to reduced airflow and inefficient cooling.
- Observe the air vents inside your RV to ensure steady airflow. Uneven airflow or weak cooling could indicate installation or ductwork issues.
- Listen for unusual noises coming from the air conditioning unit, such as rattling or squeaking. These noises may suggest loose components or mechanical problems.
- Measure the temperature inside your RV using a reliable thermometer. Compare it with the temperature set on the thermostat to verify accurate cooling performance.
Troubleshooting Common Issues and Making Necessary Adjustments
While testing your second RV air conditioner, you may encounter common issues that require troubleshooting. Here are some common problems and the steps to resolve them:
| Issue | Troubleshooting Steps |
|---|---|
| The air conditioner does not turn on. |
|
| The air coming out of the vents is not cold. |
|
| Uneven cooling throughout the RV. |
|
By following these troubleshooting steps and making necessary adjustments, you can address common issues and ensure the proper functioning of your second RV air conditioner. Remember, a well-maintained and functional air conditioning system is essential for a comfortable camping experience.
Ensuring Optimal Performance
Maintaining regular maintenance of the air conditioner
Regular maintenance of your RV air conditioner is crucial to ensure optimal performance. By performing routine maintenance tasks, you can keep your second RV air conditioner running efficiently for years to come.
Maintenance tasks for your second RV air conditioner include:
- Cleaning the air filters
- Inspecting and cleaning the coils
- Checking the fan blades for any signs of damage
- Tightening any loose connections
By incorporating these tasks into your RV maintenance routine, you can prevent any potential issues and enjoy the cool and crisp air from your second air conditioner.
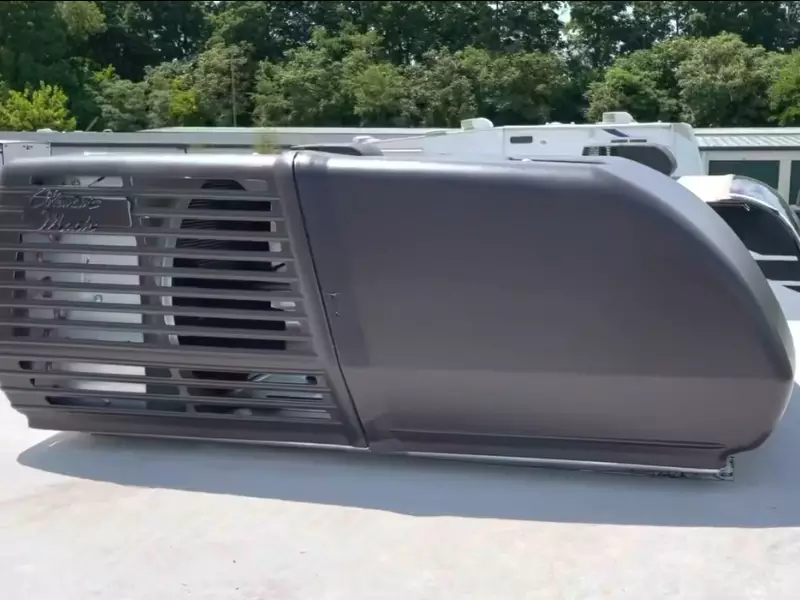
Cleaning filters and coils
Regularly cleaning the air filters and coils of your second RV air conditioner is crucial for its optimal performance. Over time, dirt, dust, and debris can accumulate in these areas, obstructing airflow and affecting the cooling efficiency.
To clean the air filters, you can follow these simple steps:
- Turn off the air conditioner and disconnect the power supply.
- Locate the air filter panel and remove it.
- Gently remove the air filters from their slots.
- Rinse the filters under running water, ensuring to remove any visible dirt and debris.
- Allow the filters to air dry completely before reinstalling them.
When it comes to cleaning the coils, you can follow these steps:
- Disconnect the power supply and remove the air filter panel.
- Using a soft brush or vacuum cleaner, gently remove any dirt or debris from the coils.
- If there are stubborn stains or dirt buildup, you can use a coil cleaner specifically designed for air conditioners.
- Once the coils are clean, reinstall the air filter panel and restore the power supply.
Tips for increasing energy efficiency and prolonging the lifespan
Aside from regular maintenance, there are several tips you can follow to increase energy efficiency and prolong the lifespan of your second RV air conditioner.
Here are some essential tips:
- Install a programmable thermostat to regulate the temperature and reduce energy wastage.
- Consider adding insulation to your RV to minimize heat transfer and improve cooling efficiency.
- Keep the doors and windows tightly sealed to prevent air leakage.
- Avoid setting the temperature too low, as it can strain the air conditioner and lead to excessive energy consumption.
- When the air conditioner is not in use, ensure it is covered to protect it from dust and debris accumulation.
By implementing these tips, you can not only save energy but also extend the lifespan of your second RV air conditioner, ultimately saving you money in the long run.
Safety Considerations
Installing a second RV air conditioner can greatly improve the comfort of your recreational vehicle, especially during hot summer days. However, it is crucial to prioritize safety throughout the installation process. By following safety protocols, being aware of electrical hazards, and knowing when to seek professional assistance, you can ensure a smooth and secure installation. Let’s delve into the key safety considerations you should keep in mind.
Following safety protocols throughout the installation process
Installing a second RV air conditioner requires precision and adherence to safety protocols. To begin with, make sure to read and understand the installation instructions provided by the manufacturer. Familiarize yourself with the necessary tools and equipment before proceeding with the installation. To prevent accidents or injuries, always wear appropriate personal protective equipment (PPE), such as safety goggles and gloves.
Moreover, creating a clutter-free work environment can significantly reduce the risk of accidents. Before starting the installation, remove any unnecessary items from the area and ensure there is sufficient space to maneuver. By taking these simple precautions, you can ensure your safety throughout the process.
Being aware of electrical hazards and taking precautions
Electrical hazards are an inherent risk when installing an RV air conditioner. As you work with electrical components and wiring, it is vital to exercise caution. Begin by disconnecting the RV’s electrical power source to avoid any potential shocks. This can typically be done by unplugging the RV from a power outlet or disconnecting the battery.
When handling electrical wiring, always use insulated tools to minimize the risk of electrical shock. Double-check that your tools are in good condition and free from any defects. Additionally, avoid wearing any metal accessories or loose clothing that could potentially come into contact with live wires.
It is also crucial to be mindful of water and moisture during the installation process. Keep all components dry and ensure proper sealing to prevent any potential electrical shorts or damage. By being aware of these electrical hazards and taking necessary precautions, you can mitigate risks effectively.
Knowing when to seek professional assistance or advice
While many RV owners enjoy tackling DIY projects, it is essential to recognize when professional assistance or advice is required. If you are unsure about any aspect of the installation process, it is best to seek guidance from an experienced professional. They can not only provide valuable insights but also ensure that the installation meets safety standards and requirements.
Furthermore, if you encounter any complications or electrical issues during the installation, it is wise to reach out to an expert. Attempting to fix complex electrical problems without the proper knowledge and experience can pose serious risks to your safety and the integrity of your RV’s electrical system. Don’t hesitate to enlist professional assistance when needed.
Frequently Asked Questions For How To Install A Second RV Air Conditioner
Can You Add A 2Nd Ac To An Rv?
Yes, you can add a 2nd AC to an RV. It provides more cooling power and comfort during hot weather. Adding the AC should be done by a professional to ensure proper installation and compatibility with the RV’s electrical system.
Always consult with an expert before making modifications to your RV.
Can You Add A Second Ac To A 30 Amp Rv?
Yes, it is possible to add a second AC to a 30-amp RV. However, it is important to consider the electrical capacity of your RV and consult with a professional to ensure proper installation and avoid overloading your electrical system.
Can You Add A Second AC unit?
Yes, you can add a second AC unit to your home or business. Adding a second unit can provide more cooling power and help distribute air more effectively. Ensure to hire a professional HVAC technician to properly assess your needs and install the additional unit.
Do I Need 2 Ac Units In My RV?
Yes, you may need 2 AC units in your RV if you want to effectively cool a larger space or have separate temperature control for different areas. Having multiple AC units can help maintain a comfortable environment throughout your RV.
Conclusion
Installing a second RV air conditioner can greatly enhance your comfort during hot summer days. By following the step-by-step instructions mentioned in this blog post, you can navigate through the process effortlessly. Whether you’re a beginner or an experienced DIY enthusiast, the tips and tricks provided here will help you complete the installation successfully.
Remember to gather the necessary tools, measure the space properly, and consult the user manual for your specific RV model. Enhance your RV experience with a second air conditioner and enjoy a cool and pleasant journey.
