To install an RV AC unit, first, choose an appropriate location on your RV’s roof and mark it. Then, drill holes and mount the unit using brackets.
Finally, connect the unit to the electrical system and secure all wiring. Looking forward to hitting the road in your RV during the hot summer months? Installing an RV AC unit can make your journey much more comfortable by keeping the interior cool and pleasant.
However, correctly installing an RV AC unit requires some technical know-how. In this guide, we will provide you with step-by-step instructions to install an RV AC unit hassle-free. So, get ready to beat the heat and enjoy your RV adventures to the fullest!
Factors To Consider For RV Ac Unit Selection
Choosing the right RV AC unit is crucial to ensure your comfort while on the road. There are several factors you need to consider before making your purchase. From BTU requirements based on RV size and insulation to power requirements and compatibility to deciding between ducted or non-ducted AC systems, each element plays a vital role in determining the best AC unit for your needs.
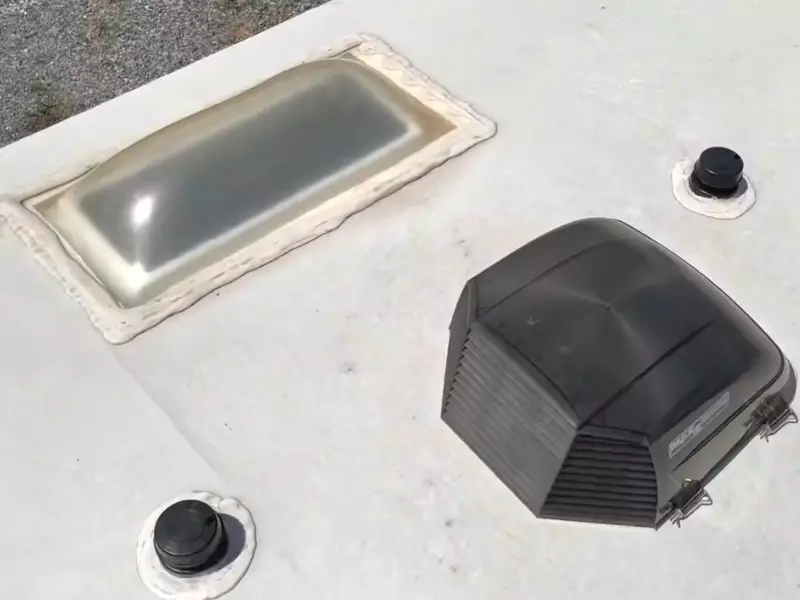
BTU requirements based on RV size and insulation
One of the primary factors to consider when selecting an RV AC unit is the BTU requirement. BTU, or British Thermal Units, is a measurement of cooling capacity. To ensure optimal cooling, you need to determine the BTU requirements based on the size of your RV and the insulation level.
Table:
| RV Size (feet) | Insulation Level | Required BTU |
|---|---|---|
| Up to 20 | Poor | 5,000-7,000 |
| 20-30 | Fair | 7,000-12,000 |
| Above 30 | Good | 12,000-15,000+ |
It is important to note that if your RV is poorly insulated, you may need a higher BTU rating to compensate for the loss of cooling efficiency. On the other hand, if your RV is well-insulated, you can opt for a unit with a lower BTU rating.
Power requirements and compatibility
When choosing an RV AC unit, it is crucial to consider your power requirements and the compatibility with your RV’s electrical system. RV AC units usually require a dedicated power source and may need to be connected directly to the RV’s generator or electrical panel.
Before making a purchase, check the electrical specifications of the unit and ensure that it is compatible with your RV’s power supply. If you are unsure, consult the manufacturer’s guidelines or seek professional assistance to avoid any electrical issues.
Ducted or non-ducted AC systems
Another important consideration is whether to install a ducted or non-ducted AC system in your RV. Ducted AC systems distribute cool air through a series of ducts and vents, providing even cooling throughout the RV. On the other hand, non-ducted AC systems release cool air directly into the living area without the need for ductwork.
Unordered List:
- Ducted AC systems offer better air distribution and can be more efficient.
- Non-ducted AC systems are generally easier to install and have a more compact design.
- Consider your specific RV layout and your cooling preferences before making a decision.
By considering these factors, you can ensure that the RV AC unit you select is the right fit for your RV, providing optimal cooling performance and comfort as you embark on your adventures.
Gathering The Necessary Tools And Materials
Before you start installing an RV AC unit, it’s important to gather all the necessary tools and materials. Having everything ready and easily accessible will save you time and frustration during the installation process. Here is a list of the essential items you will need:
Screwdriver
A screwdriver is a must-have tool for installing an RV AC unit. It will be used to loosen and tighten screws that secure the unit in place. Ensure you have a variety of screwdrivers, including flathead and Phillips head, as different screws may require different types of screwdrivers.
Drill
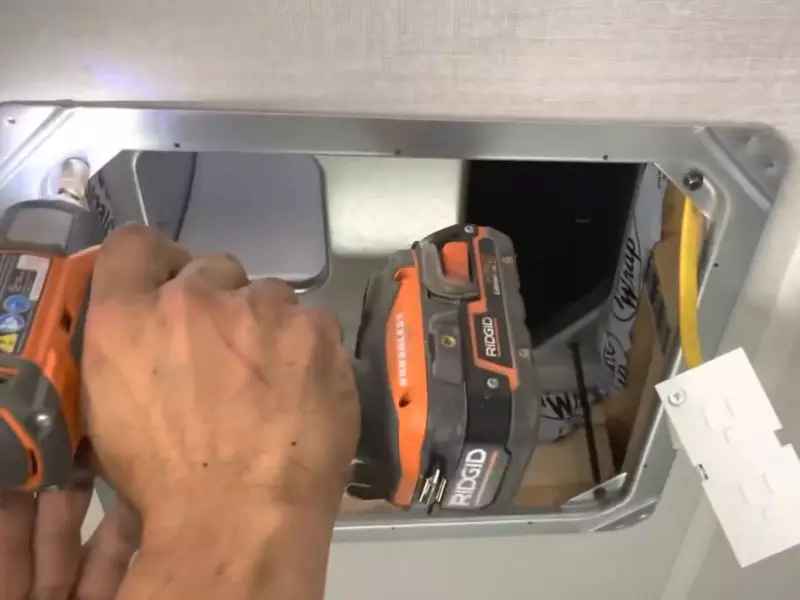
A drill will come in handy when mounting brackets for the RV AC unit. It allows you to create holes and secure the brackets firmly. Make sure you have a drill with the appropriate drill bits for the specific material you will be drilling into, whether it’s wood or metal.
Sealant
Sealant is an essential material for ensuring a watertight and airtight installation of the RV AC unit. It helps prevent any leaks or drafts, keeping your RV interior comfortable and protected. Look for a sealant that is compatible with your RV’s roof material, such as rubber or fiberglass.
Mounting brackets
Mounting brackets are necessary for securely attaching the RV AC unit to the roof. They provide stability and support, ensuring that the unit stays in place during travel. Depending on the specific requirements of your RV AC unit, you may need different types and sizes of mounting brackets.
Having all these tools and materials ready before you begin installing your RV AC unit will make the process smoother. Keep them within reach so that you don’t have to interrupt your work to search for something you need. With everything prepared, you’ll be ready to move on to the next steps of the installation process smoothly and efficiently.
Assessing The RV’s Electrical System
Before installing a new RV AC unit, it is essential to assess the RV’s electrical system to ensure it can handle the additional load. By understanding the RV’s electrical capacity and wiring layout, you can determine if any upgrades or adjustments are needed to support the new AC unit effectively.
This step is crucial in ensuring a smooth installation process and preventing any electrical issues down the road. Let’s explore the three key aspects of assessing the RV’s electrical system.
Ensuring the RV has sufficient electrical capacity
First and foremost, you need to verify that the RV’s electrical system has enough capacity to support the AC unit’s electrical requirements. Start by checking the RV’s owner’s manual or consulting the manufacturer for information on the recommended electrical capacity.
Typically, AC units require a specific amperage and voltage rating to function optimally. Using a multimeter, measure the available power at the RV’s power source to ensure it matches the AC unit’s requirements. If the RV’s electrical capacity falls short, you may need to consider upgrading to a higher amperage service to accommodate the new AC unit.
Understanding the RV’s electrical wiring layout
To proceed with the installation, you must have a clear understanding of the RV’s electrical wiring layout. Locate the main electrical panel within the RV, which houses the circuit breakers or fuses. Take note of the amperage ratings of each circuit breaker or fuse, as they indicate the maximum amount of electrical load each circuit can handle.
Additionally, examine the wiring path from the electrical panel to the desired location of the AC unit. This step will help you determine if any modifications or adjustments are necessary to properly connect the AC unit to the RV’s electrical system.
Determining if any upgrades or adjustments are needed
Based on your assessment of the RV’s electrical capacity and wiring layout, it is important to evaluate if any upgrades or adjustments are required. If the AC unit’s electrical requirements exceed the current capacity of the RV’s electrical system, upgrading to a higher amperage service may be necessary.
Additionally, you may need to install a dedicated circuit for the AC unit to prevent overload and ensure consistent performance. It is crucial to consult a professional electrician or RV technician to accurately assess and implement any necessary upgrades or adjustments to the RV’s electrical system.
By thoroughly assessing the RV’s electrical system, you can determine if it is ready to support the installation of a new AC unit. Ensuring sufficient electrical capacity, understanding the electrical wiring layout, and making any necessary upgrades or adjustments will set the foundation for a successful and efficient AC unit installation. Take the time to assess the electrical system before proceeding to ensure a smooth and trouble-free installation process.
Positioning The RV AC Unit
Locating the Ideal Spot for the AC Unit on the Roof
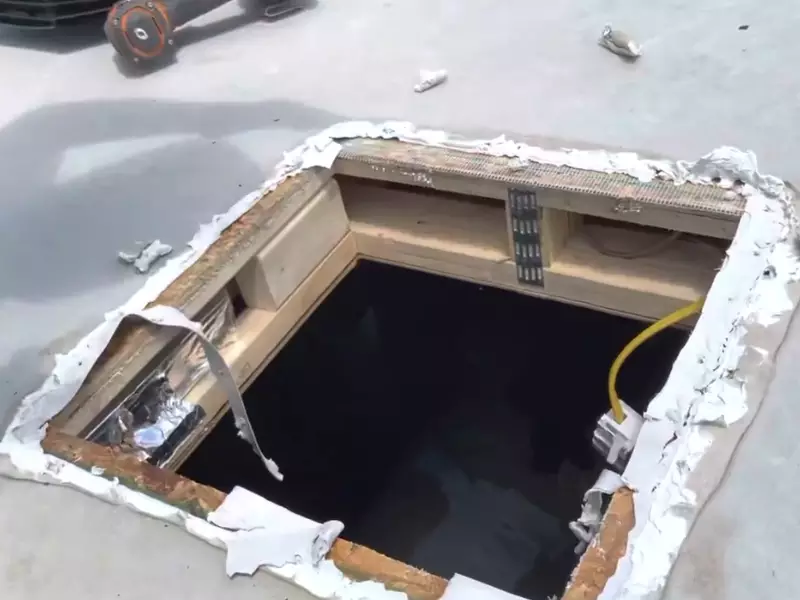
Positioning the RV AC unit on the roof is a crucial step in ensuring optimal cooling and comfort during your trips. Choosing the right location requires careful consideration of several factors, such as roof space, structural integrity, and overall functionality.
Ensuring Proper Clearance and Stability
To ensure your RV AC unit functions efficiently and maintains stability while on the road, it’s essential to provide adequate clearance and stability. Here are a few key points to keep in mind:
- Clearance: The AC unit requires sufficient clearance in all directions to operate effectively and avoid obstructions. This includes ensuring ample space above the unit to allow for proper airflow. Additionally, consider any nearby structures or equipment on the roof that might impede the cooling performance.
- Stability: The stability of the RV AC unit is crucial to its longevity and reliable operation. It’s important to secure the unit firmly to the roof to prevent vibrations, which can lead to damage and inefficient cooling. Utilizing appropriate mounting hardware, such as brackets or frames, will help ensure stability and reduce the risk of dislodgment during travel.
By prioritizing proper clearance and stability, you can optimize the performance and lifespan of your RV AC unit, ensuring years of comfortable camping adventures.
Installing The Mounting Brackets And Sealing
As you embark on the process of installing an RV AC unit, it’s important to pay close attention to the mounting brackets and sealing to ensure a secure and leak-free installation. Attaching the mounting brackets securely to the roof and applying sealant are crucial steps in this process.
Attaching the Mounting Brackets Securely to the Roof
Before you begin attaching the mounting brackets to your RV’s roof, make sure you have chosen the appropriate location for your AC unit. Take into consideration factors such as the unit’s weight distribution, proximity to other rooftop components, and access to electrical connections.
To attach the mounting brackets, follow these steps:
- Using a measuring tape, mark the desired locations for the brackets on the roof. It’s recommended to place them near the corners of the AC unit for optimal stability.
- Drill pilot holes in the marked locations to prevent the roof from splintering or cracking during installation.
- Secure the brackets onto the roof using stainless steel screws or self-tapping screws, ensuring they are tight and flush against the surface.
- Double-check the brackets’ positioning and stability, making any necessary adjustments before proceeding.
Attaching the mounting brackets securely is essential to prevent the AC unit from shifting or becoming dislodged while your RV is in motion. By following these steps and ensuring a tight fit, you can enjoy peace of mind knowing your AC unit is firmly in place.
Applying Sealant to Prevent Water Leaks
Sealing the area around the AC unit is vital to prevent water leaks that can lead to costly damage and a decrease in the unit’s efficiency. The sealant creates a waterproof barrier that protects your RV’s interior from any potential water infiltration.
To apply sealant around your AC unit, use the following guidelines:
- Clean the mounting brackets, roof surface, and surrounding area thoroughly with mild detergent and water. Ensure there is no debris or dirt that could compromise the sealant’s effectiveness.
- Apply a generous amount of RV roof sealant or silicone caulk around the edges of the brackets, ensuring complete coverage.
- Smooth out the sealant using a caulk smoothing tool or your finger, ensuring a consistent and even application.
- Allow the sealant to dry completely before testing the AC unit for any potential leaks or applying additional sealant if needed.
By applying sealant carefully and evenly, you create a tight seal that guards against water intrusion. Regularly inspect and maintain the sealant to ensure its effectiveness over time.
With the mounting brackets securely attached and the sealant perfectly applied, you’re one step closer to enjoying cool and comfortable adventures in your RV. Remember to follow the manufacturer’s instructions and consult a professional if you encounter any difficulties during the installation process.
Connecting The Electrical Wiring
Connecting the AC unit to the RV’s electrical system
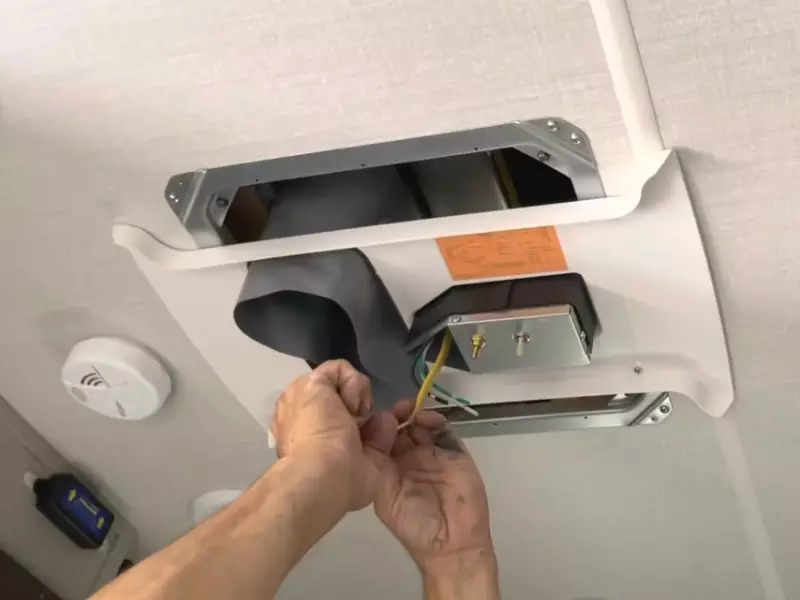
One of the crucial steps in installing an RV AC unit is connecting it to your RV’s electrical system. This ensures that the AC unit receives the necessary power to cool your RV effectively. It’s important to pay attention to proper wire connections and electrical safety measures to prevent any mishaps or damage to your AC unit or RV’s electrical system. Let’s take a closer look at how to connect the AC unit to your RV’s electrical system.
Ensuring proper wire connections
Before connecting the AC unit, it’s important to ensure that you have the necessary wires and connectors. Check your RV’s user manual or consult a professional if you’re unsure about the specific wire and connector requirements for your AC unit and RV’s electrical system.
Once you have the right wires and connectors, it’s time to make the connections. Follow these steps for proper wire connections:
- Turn off the power: Before working with any electrical connections, be sure to turn off the power supply to your RV. This will ensure your safety and prevent any potential electrical hazards.
- Strip the wires: Carefully strip the insulation from the ends of the wires that need to be connected.
- Connect the wires: Match the corresponding wires from the AC unit to the RV’s electrical system. Use wire connectors or electrical tape to secure the connections. Ensure that each wire is securely connected to its respective terminal.
- Double-check the connections: Once the connections are made, double-check each one to ensure they are properly secured. This will help prevent loose connections that could lead to electrical issues.
Electrical safety measures
Connecting electrical wiring requires utmost attention to safety. Here are some important electrical safety measures to follow:
- Use insulated tools: When working with electrical connections, it’s crucial to use insulated tools. This will prevent electrical shocks and potential damage to your AC unit or RV’s electrical system.
- Secure loose wires: Ensure that all wires are properly secured and not left dangling. Loose wires can create a safety hazard and may lead to electrical short circuits.
- Regularly inspect connections: It’s essential to periodically inspect the wire connections to ensure they remain secure. Loose wires or signs of wear and tear should be addressed immediately.
- Consult a professional: If you’re unsure about the electrical connections or lack experience in handling electrical wiring, it’s best to consult a professional. They can provide guidance and ensure the connections are made correctly and safely.
By following these steps and adhering to the necessary electrical safety measures, you can confidently connect your AC unit to your RV’s electrical system. This will ensure a hassle-free and efficient cooling experience during your RV adventures.
Sealing And Insulating The AC Unit
Properly sealing and insulating your RV AC unit is crucial for optimal performance and energy efficiency, as well as reducing noise. By applying weatherproof sealant and insulating the unit, you can ensure a tight and secure fit while improving overall cooling efficiency. Here’s how:
Applying weatherproof sealant around the unit and mounting brackets
To prevent any potential leaks and ensure a watertight seal, it’s important to apply weatherproof sealant around the RV AC unit and its mounting brackets. This will help keep out rainwater, dust, and other elements that can potentially damage the unit or compromise its performance.
To apply the sealant:
- Clean the area around the AC unit and mounting brackets, removing any dirt or debris that may interfere with the adhesion of the sealant.
- Using a caulk gun, apply a continuous bead of weatherproof sealant along the perimeter of the unit, paying close attention to the gaps and edges.
- Smooth out the sealant using a caulk smoothing tool or your finger, ensuring a tight seal and eliminating any excess sealant.
- Allow the sealant to cure as per the manufacturer’s instructions before proceeding with the installation of the AC unit.
Insulating the AC unit for maximum efficiency and reduced noise
Insulating the RV AC unit not only helps improve cooling efficiency but also helps minimize noise, allowing for a more peaceful and comfortable environment inside your RV. Here are the steps to insulate your AC unit:
- Purchase foam insulation specifically designed for AC units, ensuring it is compatible with your specific model.
- Carefully measure and cut the foam insulation to fit around the sides, top, and bottom of the AC unit.
- Remove the adhesive backing from the foam insulation and firmly press it against the AC unit, ensuring a snug fit.
- Pay extra attention to sealing any gaps or openings between the foam insulation and the AC unit, as this will contribute to better insulation and noise reduction.
- Repeat these steps for all sides of the AC unit, ensuring complete coverage.
By properly sealing and insulating your RV AC unit, you can enhance its performance, improve energy efficiency, and create a quieter and more comfortable RV experience. Take the time to complete these steps during the installation process for optimal results.
Testing And Troubleshooting
When it comes to installing an RV AC unit, testing and troubleshooting are crucial steps to ensure that everything is functioning properly before hitting the road. Testing the functionality of the AC unit and troubleshooting any common installation issues will help you identify and resolve problems, ensuring a comfortable and hassle-free journey. In this section, we’ll cover the necessary steps for testing and troubleshooting your RV AC unit.
Testing the Functionality of the AC Unit
Before you begin testing the functionality of your RV AC unit, make sure that it is properly installed and connected to a power source. Here are the steps to follow:
- Ensure that the RV is plugged into a suitable power source, such as a generator or a shore power outlet.
- Set the thermostat to the desired temperature and turn on the AC unit.
- Listen for the compressor to kick in. You should hear a distinct humming sound, indicating that the AC unit is functioning properly.
- Check the airflow coming out of the RV vents. The air should feel cool and strong, indicating that the AC unit is producing cold air and distributing it effectively.
- Monitor the temperature inside the RV. Over the course of a few minutes, the temperature should gradually lower, bringing comfort to the interior space.
By following these steps, you can ensure that your RV AC unit is running smoothly and providing the desired cooling effect. If you encounter any issues during the testing process, don’t worry. Troubleshooting common installation issues can help you identify and resolve the problem.
Troubleshooting Common Installation Issues
During the installation of an RV AC unit, certain issues may arise that can hinder the proper functioning of the unit. Here are some common installation issues and how to troubleshoot them:
| Issue | Troubleshooting |
|---|---|
| No power to the AC unit | Check the power source and make sure it is connected properly. Inspect the wiring for any loose or damaged connections. Test the power supply with a multimeter to ensure it is providing the correct voltage. |
| Inadequate cooling | Check the air filter for dirt and debris, as a dirty filter can restrict airflow. Clean or replace the filter if necessary. Ensure that there are no obstructions blocking the vents. Check the thermostat settings to ensure they are at the desired temperature. |
| Strange noises | Inspect the AC unit for any loose or damaged components. Tighten any loose screws or bolts. If the noise persists, contact a professional for further diagnosis and repair. |
| Leakage or condensation | Check the drainage system for any clogs or blockages. Clear any debris from the condensate drain and ensure it is properly connected. If the issue persists, consult a professional to investigate potential refrigerant leaks. |
By troubleshooting these common installation issues, you can overcome any obstacles that may arise and ensure that your RV AC unit is operating effectively and efficiently. Remember to always refer to the manufacturer’s instructions and seek professional assistance if needed.
Cleaning And Maintaining The Filters
Regularly cleaning and replacing the AC unit’s filters
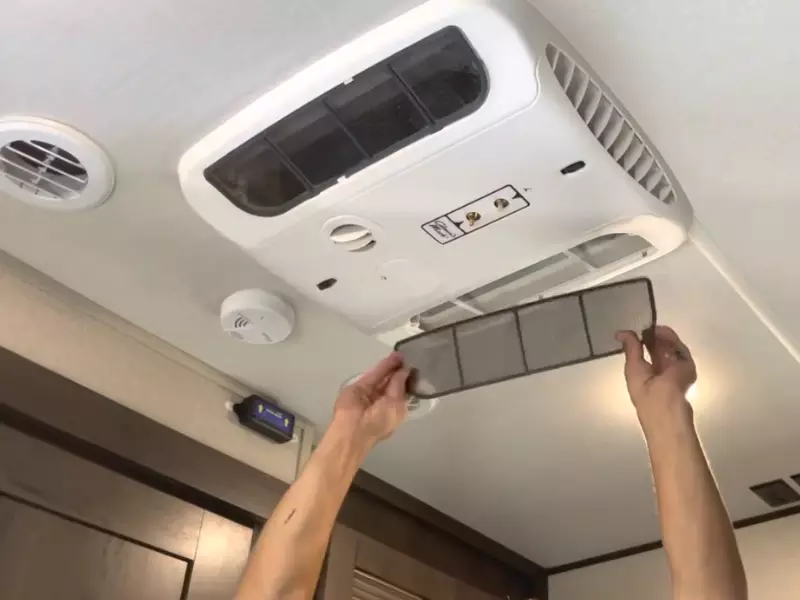
One of the most important aspects of maintaining your RV AC unit is regular cleaning and replacement of the filters. These filters play a crucial role in keeping the air inside your RV clean and fresh. Over time, the filters can become clogged with dust, dirt, and debris, which can hinder the airflow and reduce the cooling efficiency of your AC unit.
To ensure optimum performance and longevity of your RV AC unit, you should aim to clean or replace the filters at least once every month during the peak usage season. This simple maintenance task can go a long way in improving the airflow and the overall cooling efficiency of your AC unit, which in turn keeps your RV comfortable and cool even on scorching summer days.
Importance of clean filters for better airflow and cooling efficiency
Clean filters are much more than just a measure to keep the air inside your RV fresh. They also play a vital role in improving the airflow and cooling efficiency of your RV AC unit. When the filters are dirty and clogged, it restricts the airflow, making it harder for the AC unit to cool the air effectively.
By regularly cleaning and replacing the filters, you are allowing the air to flow freely through the AC unit. This not only helps in better cooling but also reduces the strain on the unit, leading to quieter operation and increased energy efficiency. Additionally, clean filters also help to remove airborne allergens and dust particles, providing you with cleaner and healthier indoor air quality. So, apart from ensuring a comfortable environment, clean filters also contribute to your overall well-being during your RV trips.
Checking And Cleaning The Ac Coils
Inspecting and Cleaning the Evaporator and Condenser Coils
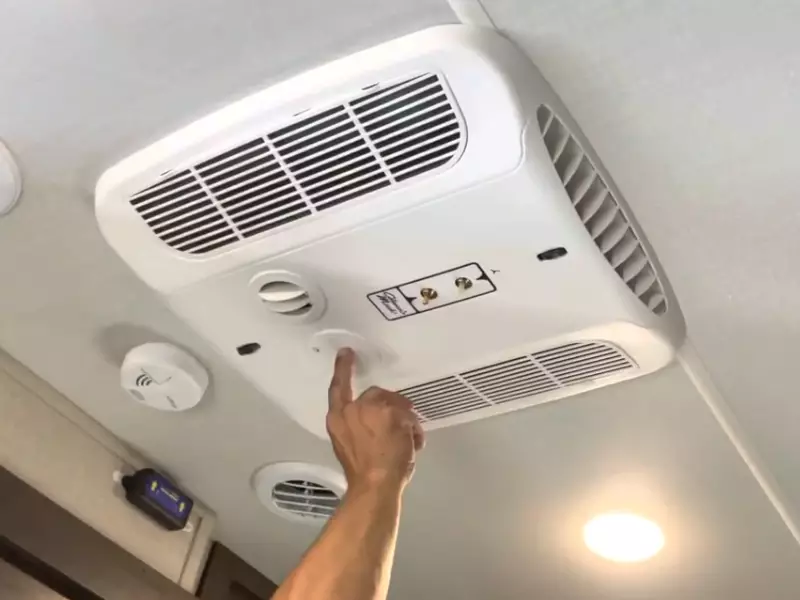
One crucial step in installing an RV AC unit is checking and cleaning the AC coils. The coils, which consist of the evaporator and condenser coils, play a vital role in the cooling process. Over time, these coils can become dirty and clogged with debris, affecting the efficiency and performance of your AC unit. Therefore, it is essential to inspect and clean these coils regularly to ensure proper functioning.
Removing Debris and Preventing Coil Blockages
To begin with, let’s focus on the evaporator coil. This coil is responsible for absorbing heat from the indoor air, cooling it down before the air is blown back into the RV. Over time, dust, dirt, and other particles can accumulate on the coils, hindering their ability to cool the air efficiently. To clean the evaporator coil:
- Shut off the power supply to the AC unit to prevent any accidents.
- Remove the panel covering the evaporator coil, usually located inside the RV near the air vents.
- Carefully examine the coil for any visible dirt, dust, or debris. If you notice any build-up, use a soft brush or compressed air to gently clean the coil, ensuring no damage is done to its delicate fins.
- Once cleaned, replace the panel and restore power to the AC unit.
Now, let’s move on to the condenser coil, which is located in the outdoor unit of your RV AC system. This coil dissipates the heat absorbed from the indoor air, releasing it to the outside environment. Due to its exterior location, the condenser coil is more prone to debris and blockages. To clean the condenser coil:
- Turn off the RV’s power supply to the AC unit to prevent any safety risks.
- Remove any leaves, twigs, or other debris that may have accumulated on or around the condenser unit.
- Gently spray water from a garden hose onto the coil to remove any dirt or residue. Avoid using high-pressure water, as it may damage the fins.
- Inspect the coil for any remaining dirt or blockages. If necessary, use a soft brush to carefully remove any stubborn dirt.
- Once the condenser coil is clean, restore the power supply to the AC unit.
By regularly inspecting and cleaning both the evaporator and condenser coils, you can ensure that your RV AC unit operates at its optimum efficiency, providing you with a comfortable and cool living space during your trips. Remember, a well-maintained AC system not only enhances your comfort but also prolongs the lifespan of the unit.
Monitoring And Maintaining The AC unit’s Performance
Regularly checking temperature and cooling performance
One important aspect of maintaining your RV AC unit’s performance is to regularly monitor its temperature and cooling performance. This will help ensure that the unit is functioning as efficiently as possible and will help you identify any potential issues before they become major problems.
Firstly, it’s important to regularly check the temperature inside your RV when the AC unit is running. Use a reliable indoor thermometer to measure the temperature and compare it to the temperature you have set on the thermostat. This will give you an indication of how well the AC unit is cooling the space.
| Temperature Setting | Actual Temperature | Recommended Action |
|---|---|---|
| Set temperature: Below 75°F | Actual temperature: Above 75°F | Lower the temperature setting |
| Set temperature: Above 75°F | Actual temperature: Below 75°F | Raise the temperature setting |
| Set temperature: Below 75°F | Actual temperature: Below 75°F | No action required |
Note: These recommendations are general guidelines, and the appropriate action may vary depending on the specific conditions and model of your RV AC unit. Always consult the manufacturer’s instructions for proper temperature settings.
Additionally, pay attention to any changes in the cooling performance. If you notice that the AC unit is taking longer than usual to cool the space or if it is struggling to maintain a consistent temperature, it may be a sign of a problem. In such cases, it is recommended to contact a professional technician to assess and address the issue.
Addressing any unusual noises or issues promptly
In order to maintain the optimal performance of your RV AC unit, it is crucial to promptly address any unusual noises or issues that you notice.
If you hear any strange sounds coming from the AC unit, such as rattling, squealing, or grinding noises, it may indicate a problem with the fan motor, compressor, or other components. In such cases, it is advisable to turn off the AC unit and seek professional assistance to avoid further damage or potential hazards.
- Turn off the AC unit – This will prevent any potential damage and ensure your safety.
- Contact a professional technician – They will have the expertise to diagnose and fix the issue, ensuring your AC unit is back up and running smoothly.
- Do not attempt to fix the issue yourself – AC units contain complex electrical and mechanical components that should only be handled by trained professionals. Trying to fix the problem yourself may lead to further damage or void the warranty of your unit.
Note: It is essential to address any unusual noises or issues promptly to prevent further damage and ensure the longevity of your RV AC unit.
Frequently Asked Questions On How To Install A RV AC Unit
Can I Add An AC unit To My RV?
Yes, you can add an AC unit to your RV. It is possible and can provide cooling comfort during your travels.
Can You Duct An RV Air Conditioner?
Yes, you can duct an RV air conditioner to distribute cool air throughout your vehicle.
How Many Batteries Do You Need To Run An RV AC Unit?
To run an RV AC unit, you typically need multiple batteries. The exact number depends on the unit’s power consumption and battery capacity. It’s recommended to consult the AC unit’s specifications or a professional for accurate battery requirements.
How Much Power Does It Take To Run An RV AC Unit?
An RV AC unit typically requires around 13,500 to 15,000 BTU (British Thermal Units) of power to operate efficiently. This translates to approximately 1,200 to 1,500 watts of electrical power consumption.
Conclusion
Installing an RV AC unit may seem daunting, but with the right knowledge and steps, it can be a manageable task. By following the guidelines in this blog post, such as selecting the appropriate unit, preparing the necessary tools, and carefully following the installation instructions, you can ensure a successful and efficient installation process.
Now you’re ready to enjoy the comfort of a cool and comfortable RV during those hot summer days on the road. Happy camping!
