To install a Rheem electric water heater, follow these steps:
- Turn off the power supply.
- Close the water supply valve.
These steps will ensure a safe installation process. If you’re in need of a new water heater, Rheem electric water heaters are a reliable option. With their efficient performance and durability, they can provide hot water for your household needs.
Installing a Rheem electric water heater may seem daunting, but with the right guidance, it can be a fairly straightforward process. We will walk you through the steps of installing a Rheem electric water heater, ensuring that you have hot water flowing in your home in no time. So, let’s get started!
Understanding The Rheem Electric Water Heater
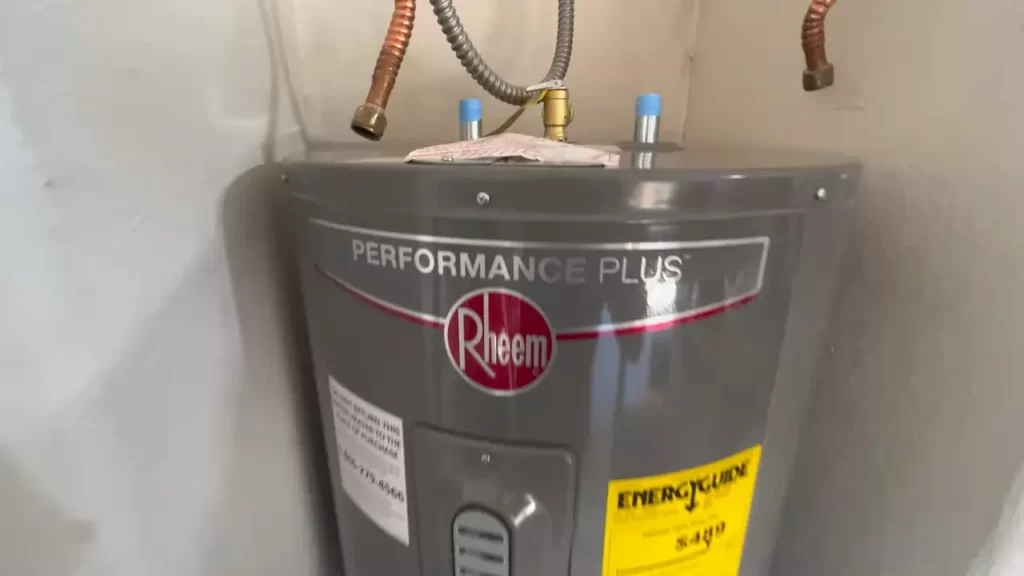
The Rheem Electric Water Heater is an efficient and reliable option for providing hot water in your home. With its advanced technology and high-quality construction, this water heater ensures you have a steady supply of hot water whenever you need it. Understanding the different Rheem Electric Water Heater models, as well as the benefits and key features to consider, can help you make the right choice for your home.
Overview of Rheem Electric Water Heater models
When it comes to choosing a Rheem Electric Water Heater, there are several models available to suit various needs and preferences. These models include:
| Model | Capacity | Energy Efficiency |
|---|---|---|
| Model A | 40 gallons | Energy Star certified |
| Model B | 50 gallons | High energy efficiency rating |
| Model C | 80 gallons | Smart technology for optimal performance |
Each model offers different capacities and energy efficiency levels, allowing you to choose the one that best fits your household’s hot water demands.
Benefits of installing a Rheem Electric Water Heater
Installing a Rheem Electric Water Heater in your home comes with a range of benefits, including:
- Reliable hot water supply: Rheem Electric Water Heaters are known for their consistent and reliable hot water output, ensuring you never have to worry about running out of hot water during peak usage times.
- Energy efficiency: With advanced technology and insulation, Rheem Electric Water Heaters are designed to be energy-efficient, helping you save on your utility bills while reducing your carbon footprint.
- Durability and longevity: Rheem is a trusted brand known for manufacturing durable and long-lasting water heaters. Investing in a Rheem Electric Water Heater means enjoying reliable hot water for many years to come.
- Easy installation and maintenance: These water heaters are designed for easy installation and straightforward maintenance, making it convenient for homeowners and reducing the need for professional assistance.
Key features to consider before installation
Before installing a Rheem Electric Water Heater, it’s important to consider the following key features:
- Capacity: Determine the appropriate capacity based on your household’s hot water usage, ensuring you choose a model that can meet your needs without unnecessary energy consumption.
- Energy efficiency: Look for Energy Star certified models or those with high energy efficiency ratings to maximize energy savings.
- Smart technology: Consider models with smart technology features, such as programmable settings and remote control options, for enhanced convenience and control over your hot water system.
- Warranty: Check the warranty period and coverage offered by the Rheem Electric Water Heater you are considering to ensure you have peace of mind in case of any issues.
By carefully considering these key features, you can choose the most suitable Rheem Electric Water Heater for your home and ensure a smooth installation process.
Preparing For Installation
Before you start installing your Rheem Electric Water Heater, it is crucial to properly prepare for the installation process. This will ensure a smooth and efficient installation, while also ensuring your safety and the longevity of your water heater.
Important Safety Precautions to Follow
Like with any electrical appliance installation, it is important to follow certain safety precautions to prevent accidents and ensure your well-being. Here are some important safety tips to keep in mind:
- Always turn off the power at the circuit breaker before beginning any electrical work. This will help prevent electric shock.
- When working with water, be cautious of wet surfaces and take measures to prevent slipping.
- Before starting the installation, read and carefully follow the safety guidelines provided by the manufacturer. This will give you a clear understanding of any specific safety instructions for your particular model.
- If you are unsure about any step of the installation process, seek professional help from a licensed electrician or plumber.
Tools and Materials Needed for Installation
To ensure a successful installation, you will need a variety of tools and materials. Having these ready beforehand will save you time and ensure a smooth installation process. Here’s a list of the essential tools and materials you will need:
| Tools | Materials |
|---|---|
|
|
Checking Electrical Requirements and Capacity
Prior to installation, it is important to verify that your electrical system meets the requirements for the Rheem Electric Water Heater. Failure to do so may result in complications or even damage to the unit. Here are a few steps to ensure your electrical system is compatible:
- Refer to the water heater’s installation manual or Rheem’s website for the electrical specifications of the model you purchased. This will include information such as voltage, amperage, and wiring requirements.
- Double-check that your circuit breaker and electrical panel can support the electrical load of the water heater.
- If needed, consult with a licensed electrician to determine if any modifications are necessary to meet the electrical requirements.
By following these important steps and guidelines, you will be well-prepared for the installation process of your Rheem Electric Water Heater. Remember to prioritize your safety, gather the necessary tools and materials, and ensure your electrical system is ready to support your new water heater.
Installing The Rheem Electric Water Heater
Installing a water heater can seem like a daunting task, but with the right instructions and a little bit of know-how, it’s a job that you can do yourself. In this article, we’ll guide you through the process of installing a Rheem electric water heater step by step. From choosing the right location for installation to connecting the water heater to the electrical supply, we’ll cover everything you need to know to get your water heater up and running smoothly.
Choosing the right location for installation
The first step in installing your Rheem electric water heater is to choose the right location for it. A water heater needs to be installed in a safe and accessible area, away from any flammable materials or sources of heat. It should also be situated close to the areas where hot water is being used, such as bathrooms and kitchens. Additionally, it’s important to ensure that there is enough space around the water heater for proper ventilation and servicing.
Preparing the water heater for installation
Once you’ve chosen the perfect location for your Rheem electric water heater, it’s time to prepare it for installation. Start by reading the manufacturer’s instructions thoroughly to familiarize yourself with the specific requirements for your model. Next, gather all the necessary tools and materials, such as a wrench, pipe cutter, Teflon tape, and a flexible water supply line. Disconnect the power supply and the water supply to your old water heater before removing it.
Before installing the new Rheem electric water heater, ensure that the area is clean and free from debris. Check the condition of the surrounding pipes and fittings, and replace any damaged or worn-out parts. Install a new temperature and pressure relief valve, and connect the water supply using the appropriate fittings. Use Teflon tape to secure the connections and prevent leaks. Finally, make sure that the water heater is level and stable, using shims if necessary.
Connecting the water heater to the electrical supply
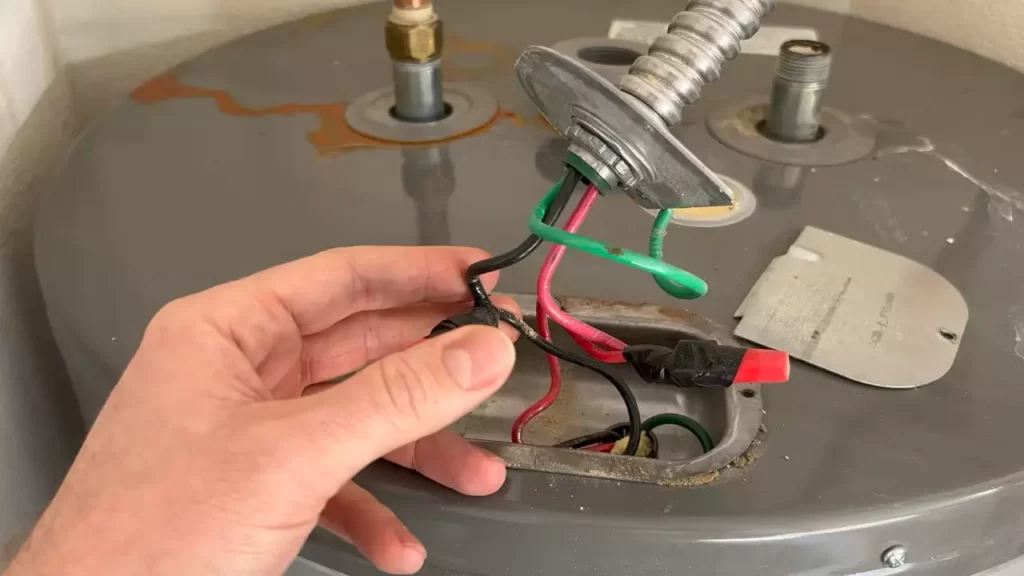
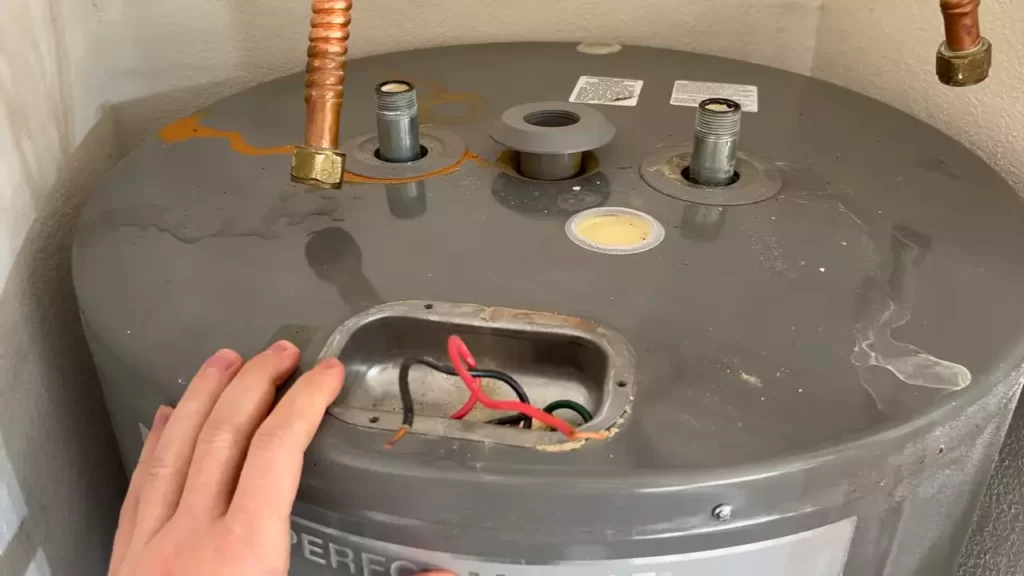
Now that your Rheem electric water heater is prepared and in place, it’s time to connect it to the electrical supply. First, turn off the power to the circuit that will be supplying electricity to the water heater. Remove the access panel on the water heater to expose the electrical connections. It’s important to follow the manufacturer’s instructions and local electrical codes when making these connections.
Using a wire stripper, remove the outer insulation from the wires without damaging the strands. Connect the wires from the circuit to the corresponding terminals on the water heater. Secure the connections with wire nuts and ensure that they are tight and properly insulated. Replace the access panel once the electrical connections are complete.
Before turning on the power to the water heater, double-check all the connections and ensure that there are no loose wires or exposed electrical parts. Once you’re certain that everything is in order, turn on the power to the water heater and wait for it to heat the water.
By following these steps and taking the time to do the installation properly, you can easily install a Rheem electric water heater in your home. Enjoy endless hot water and the peace of mind that comes with a job well done!

Credit: www.empirestateplumbing.com
Connecting The Plumbing
Now that you have successfully mounted your Rheem Electric Water Heater, it’s time to connect the plumbing. This step is crucial for ensuring a steady flow of hot water and overall functionality of the water heater. In this section, we will guide you through the process of connecting the water supply, installing the inlet and outlet pipes, and connecting the pressure relief valve and drain pipe. Let’s get started!
Understanding the water supply connections
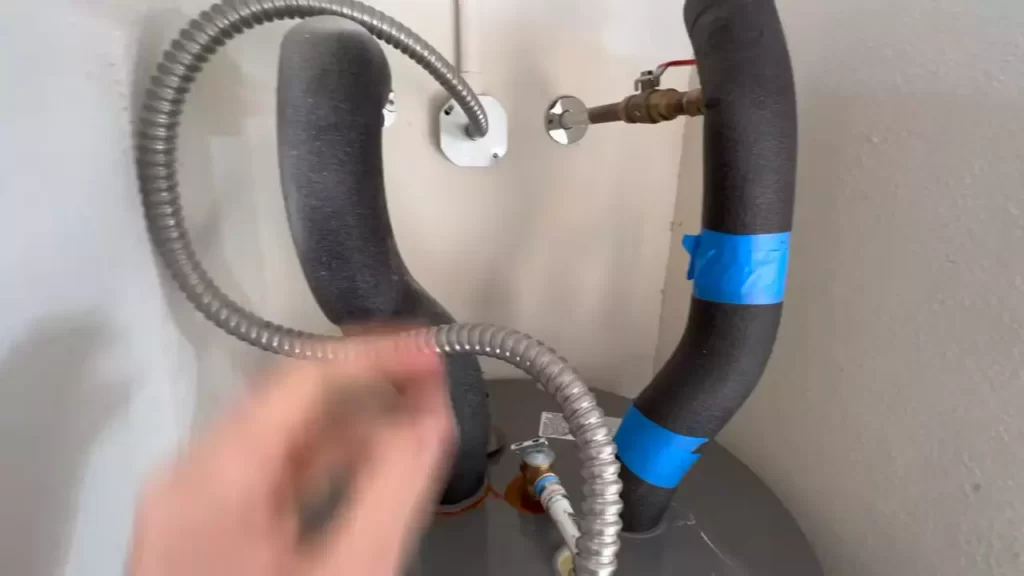
Before you begin connecting the plumbing, it’s important to understand the water supply connections. The Rheem Electric Water Heater features dedicated connections for the cold water inlet and hot water outlet. These connections are typically located at the top of the water heater and are clearly labeled. It’s essential to familiarize yourself with these connections before proceeding.
Installing the cold water inlet and hot water outlet pipes
Once you have identified the cold water inlet and hot water outlet connections, it’s time to install the pipes. Begin by measuring and cutting the pipes to the appropriate length, ensuring a snug fit. Next, attach a threaded adapter or union to each pipe, using a suitable pipe joint compound to create a watertight seal. Then, carefully thread the pipes onto the corresponding water supply connections, making sure to tighten them securely. It’s important to check for any leaks and make any necessary adjustments before moving on to the next step.
Connecting the pressure relief valve and drain pipe
The pressure relief valve and drain pipe are vital components of your Rheem Electric Water Heater. These ensure the release of excess pressure and allow for proper drainage when needed. To connect the pressure relief valve, start by wrapping the threads of the valve with Teflon tape to create a tight seal. Then, carefully thread the valve onto the designated opening on the water heater, making sure it is tightened securely. Next, attach the drain pipe to the valve, ensuring it extends to an appropriate location for drainage.
Note: It is crucial to ensure proper placement of the drain pipe to prevent any potential water damage. Always consult local plumbing codes for specific requirements.
Now that you have successfully connected the plumbing for your Rheem Electric Water Heater, it’s time to move on to the next step in the installation process. Stay tuned for our upcoming blog post where we will guide you through the electrical connections to complete the installation. Until then, enjoy your newly installed water heater and the comfort of hot water at your fingertips!
Testing And Troubleshooting
Once you have successfully installed your Rheem electric water heater, it is important to conduct thorough testing and troubleshooting to ensure proper functioning and performance. This step is crucial in order to identify and address any potential issues or complications before they escalate. In this section, we will cover the steps to fill and test your water heater, troubleshoot common installation issues, and make sure it is functioning optimally.
Filling and Testing the Water Heater
After the installation process is complete, it is essential to properly fill and test your Rheem electric water heater. This ensures that the unit is functioning correctly and ready to provide you with the hot water you need. Follow these steps to fill and test your water heater:
- Close the cold water supply valve and make sure the electrical power is turned off.
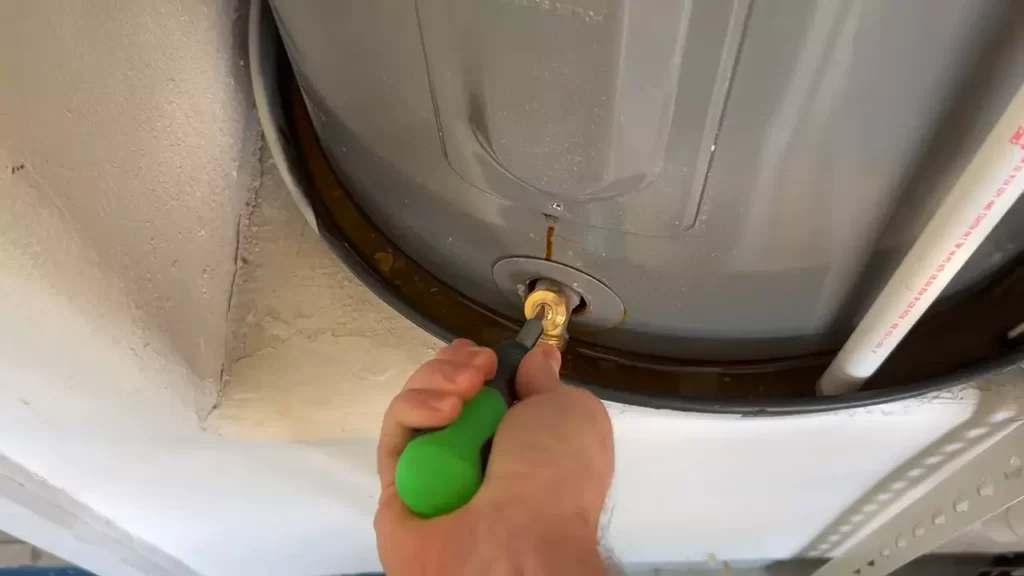
- Connect a hose to the drain valve located at the bottom of the water heater.
- Open the drain valve and allow the tank to completely drain.
- Once drained, close the drain valve and remove the hose.
- Open the cold water supply valve to allow water to fill the tank.
- Check for any leaks around the connections and the tank itself.
- Once the tank is full, you can turn on the electrical power.
- Wait for the water to heat up. This may take some time initially.
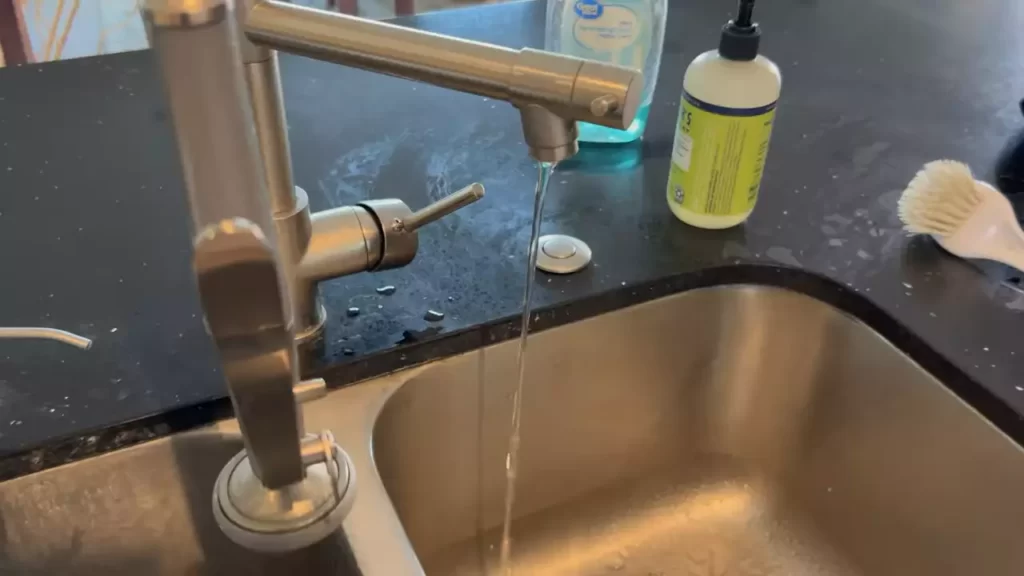
- Test the hot water by turning on a faucet in your home to ensure a steady flow of hot water.
Troubleshooting Common Installation Issues
During the installation process, you may encounter some common issues that can impact the performance of your Rheem electric water heater. Here are some troubleshooting steps to help you address these issues:
| Issue | Troubleshooting Steps |
|---|---|
| No hot water |
|
| Low hot water pressure |
|
| Leaking water heater |
|
Ensuring Proper Functioning and Performance
To ensure your Rheem electric water heater operates properly and delivers optimal performance, there are a few additional checks and maintenance tasks you can perform regularly:
- Monitor the temperature settings and adjust them if necessary to meet your needs.
- Drain and flush the tank periodically to remove any sediment buildup.
- Inspect the anode rod and replace it if it shows signs of corrosion.
- Regularly check for any signs of leakage or unusual noises.
- Keep the area around the water heater clean and free from any flammable materials.
By following these testing and troubleshooting steps and conducting regular maintenance, you can ensure that your Rheem electric water heater functions efficiently and provides you with reliable hot water whenever you need it.
Maintenance And Safety Tips
Regular maintenance and following safety precautions are key to ensuring the longevity and efficient operation of your Rheem Electric Water Heater. In this section, we will outline the regular maintenance requirements, tips for extending the lifespan, and important safety precautions that you need to keep in mind.
Regular maintenance requirements for the water heater
Proper maintenance is essential to keep your Rheem Electric Water Heater running smoothly for years to come. Here are some regular maintenance tasks that you should perform:
- Draining the tank: Sediment buildup can hinder the efficiency of your water heater. By draining the tank annually, you can remove any sediment accumulated at the bottom. To do this, follow the instructions provided by Rheem for your specific model.
- Checking the pressure relief valve: The pressure relief valve is a crucial safety feature of your water heater. Make sure to check it periodically to ensure it is functioning properly. To do this, follow these steps:
- Turn off the power supply to the water heater.
- Place a bucket under the pressure relief valve.
- Lift the lever on the valve to release any water and allow it to flow into the bucket.
- If no water comes out or if the valve continues to leak after releasing the lever, it may need to be replaced. Consult a professional plumber in such cases.
- Inspecting the anode rod: The anode rod helps prevent corrosion inside the tank by attracting corrosive elements. Regularly check the condition of the anode rod and replace it if necessary. To do this, follow these steps:
- Turn off the power supply to the water heater.
- Locate the anode rod on top of the water heater tank.
- Use a socket wrench to loosen the anode rod and remove it.
- If the rod is less than 1/2 inch thick or is coated in calcium deposits, it’s time to replace it.
- Install a new anode rod and tighten it securely.
- Remember to turn the power supply back on after completing the task.
Tips for extending the lifespan of the water heater
By following these tips, you can help extend the lifespan of your Rheem Electric Water Heater:
- Set the temperature to 120 degrees Fahrenheit (or lower) to prevent excessive wear and tear on the unit and conserve energy.
- Insulate the hot water pipes to minimize heat loss and improve efficiency.
- Regularly check for any leaks or signs of corrosion and address them promptly.
- Avoid placing excessive pressure on the pressure relief valve by avoiding prolonged use of excessive hot water.
- Consider installing a water softening system if your area has hard water, as hard water can lead to mineral buildup in your water heater.
Important safety precautions to remember
When dealing with your Rheem Electric Water Heater, it is vital to prioritize safety. Here are some important safety precautions to keep in mind:
- Always read and follow the manufacturer’s instructions and guidelines for installation and operation of the water heater.
- Before performing any maintenance or inspection tasks, make sure to turn off the power supply to the water heater.
- Take caution when working with hot water and hot surfaces. Use appropriate protective gear such as heat-resistant gloves.
- If you are unsure or uncomfortable with any of the maintenance tasks, it is best to seek professional help to avoid accidents or damage to the water heater.
- Keep the space around the water heater clear of any flammable materials.
- Regularly check the carbon monoxide detector if your water heater is located in an enclosed space.
By regularly maintaining your Rheem Electric Water Heater and following the necessary safety precautions, you can ensure the longevity of your unit and enjoy hot water when you need it the most.
Wrapping Up
Final checks and inspections before completion
Before wrapping up the installation process of your Rheem Electric Water Heater, it’s essential to carry out a few final checks and inspections to ensure everything is in perfect working order. These checks will give you peace of mind and ensure that your new water heater is ready to perform efficiently.
- Firstly, inspect the electrical connections to ensure they are secure and properly insulated. Any loose or exposed wires can be dangerous and may lead to electrical issues.
- Next, check for any leaks in the plumbing connections. A small leak can quickly escalate into a major problem, so it’s crucial to fix any leaks before proceeding.
- Double-check the temperature and pressure relief valve to ensure it is functioning correctly. This valve plays a vital role in maintaining the appropriate temperature and pressure levels inside the water heater, so it’s crucial to ensure it is working properly.
- Inspect the water heater’s overall exterior for any damage or dents. While it may not directly affect its functionality, any external damages should be addressed to maintain the aesthetics and longevity of the unit.
- Lastly, turn on the power to your Rheem Electric Water Heater and allow it to heat water for a few hours. Monitor the unit during this time to ensure it is functioning properly and heating the water to the desired temperature.
Additional resources for troubleshooting and support
Although installing a Rheem Electric Water Heater is a relatively straightforward process, you may encounter occasional issues or have questions along the way. To help you overcome any challenges and ensure you have reliable support, Rheem provides additional resources for troubleshooting and assistance.
If you face any difficulties during the installation process or encounter any problems with your water heater, you can reach out to Rheem’s customer support team. They are knowledgeable and ready to assist you with any questions or concerns you may have.
Additionally, Rheem’s website offers a comprehensive FAQ section where you can find answers to common queries. This resource is a valuable tool to help you troubleshoot any minor issues that may arise.
For further troubleshooting guidance and in-depth information, Rheem’s official website also provides access to product manuals and installation guides. These resources will equip you with the necessary knowledge and guidance to address any potential issues effectively.
Enjoying the benefits of your Rheem Electric Water Heater
Now that your Rheem Electric Water Heater installation is complete, it’s time to reap the countless benefits it offers. Your new water heater will provide you with a consistent supply of hot water, enhancing your daily routines and comfort.
With its energy-efficient design, your Rheem Electric Water Heater will not only save you money on utility bills but also contribute towards a greener environment. The advanced features of the Rheem water heater, such as the temperature and pressure control, ensure optimal performance and safety.
Remember to periodically carry out routine maintenance tasks, such as flushing the tank, to keep your water heater in top condition. This will help prolong its lifespan and maintain its efficiency, giving you reliable hot water for years to come.
By following the installation instructions, properly maintaining your Rheem Electric Water Heater, and utilizing the troubleshooting resources provided, you can enjoy a worry-free and efficient hot water supply for your household.
Frequently Asked Questions On How To Install A Rheem Electric Water Heater
Can I Install An Electric Water Heater Myself?
Yes, you can install an electric water heater yourself. However, it requires proper knowledge and skills in electrical and plumbing work. Ensure you follow all safety guidelines and local building codes. If you’re unsure, it’s best to consult a professional to avoid any risks or accidents.
What Are The Electrical Requirements For A Rheem 40 Gallon Electric Water Heater?
The electrical requirements for a Rheem 40 gallon electric water heater are 240 volts with a minimum of a 30 amp circuit, and a three-prong electrical outlet. Please ensure proper wiring and breaker capacity for safe and efficient operation.
How Much Does It Cost To Install A 50 Gallon Rheem Water Heater?
The cost of installing a 50-gallon Rheem water heater varies depending on factors like location and installation complexity. However, the average installation cost typically ranges from $800 to $1,500.
Is Installing An Electric Water Heater Hard?
No, installing an electric water heater is not hard. It can be done by following the manufacturer’s instructions and using basic tools. However, it’s recommended to hire a professional plumber for a safe and proper installation.
Conclusion
Installing a Rheem electric water heater is a straightforward process that can enhance your home’s hot water system. By following the steps outlined in this guide, you can confidently complete the installation on your own. Remember to turn off the power, drain the tank, connect the electrical wiring, and fill the tank before turning it on.
Keep in mind all safety precautions to ensure a successful installation. Enjoy the benefits of continuous hot water in your home with a Rheem electric water heater.