To install a propane wall heater, first, ensure proper gas line installation and sizing, then mount the heater securely on the wall according to the manufacturer’s instructions. Propane wall heaters offer an efficient and convenient heating solution for homes and businesses.
With their compact design and ability to provide warmth even in the absence of electricity, these heaters are a popular choice for many. However, it is important to properly install a propane wall heater to ensure safe and effective operation.
We will provide a step-by-step guide on how to install a propane wall heater, including considerations for gas line installation, mounting the heater securely on the wall, and following the manufacturer’s instructions for a hassle-free experience. By following these guidelines, you can enjoy the comfort and warmth provided by your propane wall heater for years to come.
Preparing For Installation
Before you begin installing a propane wall heater, proper preparation is crucial for a safe and successful installation. This involves considering various factors, such as choosing the right location, ensuring ventilation and safety, measuring the area, and gathering the necessary tools and materials. Let’s dive into each of these aspects in detail:
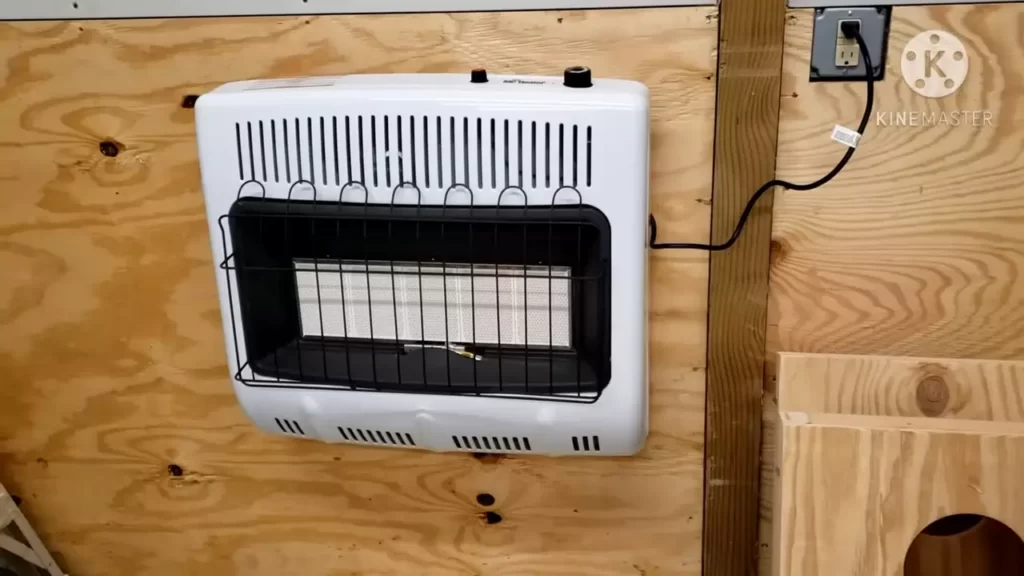
Choosing the Right Location
When choosing the location for your propane wall heater, there are several factors to consider. You want to ensure that the heater is placed in a central location that provides optimum heat distribution throughout the room. Additionally, it’s important to keep the heater away from combustible materials and furniture to minimize the risk of fire hazards.
Ventilation and Safety
Ventilation is crucial for the safe operation of a propane wall heater. Make sure the chosen location allows for proper ventilation to prevent the build-up of harmful gases. Additionally, check for any gas leaks before installation using a gas leak detector to ensure the safety of your home.
Space and Placement
Consider the available space in the room and the placement of furniture when selecting the location for your propane wall heater. Ensure that there is enough space for the heater and that it won’t interfere with the flow of foot traffic or obstruct any doors or windows.
Accessibility to Gas Lines
Place the heater in close proximity to a gas line to ensure easy and convenient access. If necessary, hire a professional plumber to extend the gas line to the desired location.
Measuring the Area
Before purchasing your propane wall heater, measure the area where it will be installed. This will help you choose the right-sized heater that can adequately heat the space.
Calculating BTU Requirements
Calculate the BTU (British Thermal Unit) requirements of the room to determine the appropriate heating capacity of the propane wall heater. This will ensure maximum comfort and efficiency.
Determining Wall Clearance
Check the manufacturer’s guidelines to determine the required wall clearance for your propane wall heater. This clearance is necessary to prevent any damage to the heater and to ensure proper ventilation.
Gathering Necessary Tools and Materials
Before starting the installation process, gather all the necessary tools and materials. Here is a list of tools you will need:
| List of Required Tools |
|---|
| Screwdriver |
| Pipe Wrench |
| Level |
| Tape Measure |
| Gas Leak Detector |
And here is a list of materials you will need:
| List of Required Materials |
|---|
| Propane Wall Heater |
| Gas Line |
| Vent Pipe |
| Wall Fasteners |
| Gas Shut-off Valve |
With these tools and materials at hand, you’ll be well-prepared to install your propane wall heater.
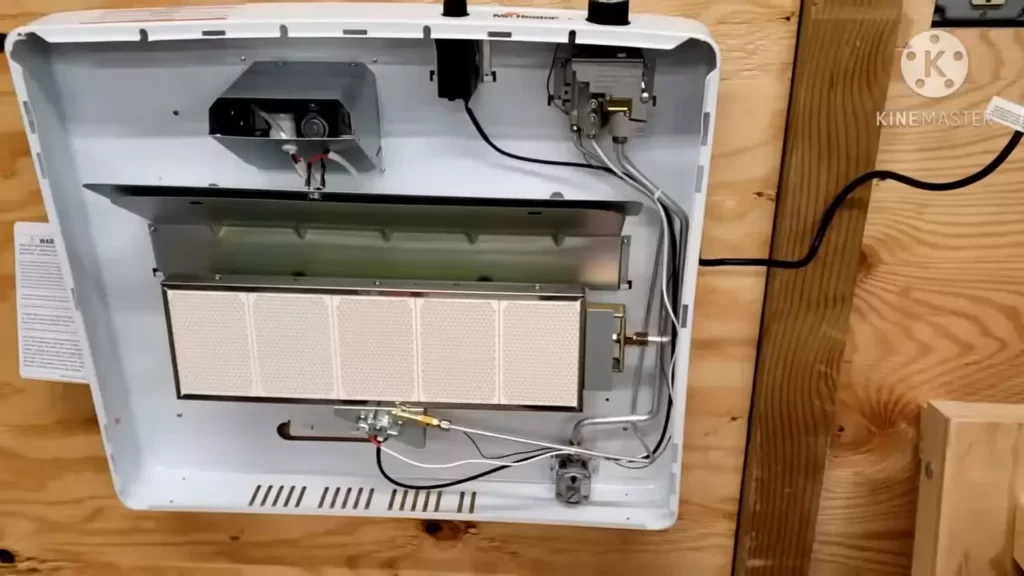
Installing The Propane Wall Heater
Turning Off Gas Supply
Before starting the installation process, the first step is to turn off the gas supply. This is essential to ensure safety during the installation. Locate the gas shut-off valve and make sure it is in the closed position. If you are not sure where the shut-off valve is located, refer to the owner’s manual or contact a professional for assistance. It is crucial to always prioritize safety when working with gas appliances.
Locating the Gas Shut-off Valve
To install a propane wall heater, it is important to locate the gas shut-off valve. The shut-off valve is usually located near the gas meter or propane tank. In homes, it can typically be found in the basement or utility room. Look for a lever or knob on the gas line and ensure it is in the closed position. If you have difficulty finding the shut-off valve, consult a professional for guidance.
Closing the Valve
Once you have located the gas shut-off valve, turn it to the closed position. This will prevent any gas from flowing into the heater during the installation process. It is crucial to make sure the valve is fully closed to ensure proper safety precautions. Take a moment to double-check the valve to ensure it is tightly closed before proceeding with the installation.
Mounting the Wall Heater
Now that the gas supply is turned off and the shut-off valve is closed, it’s time to start mounting the wall heater. This step involves attaching the bracket to the wall where you want the heater to be installed. To do this, follow these steps:
Marking the Mounting Points
Use a pencil or marker to mark the mounting points on the wall. These points should align with the holes on the bracket of the wall heater. Make sure the marks are level and evenly spaced to ensure the heater is securely attached to the wall.
Attaching the Bracket
Using screws or appropriate fasteners, attach the bracket to the wall at the marked mounting points. Make sure the bracket is firmly secured to provide a stable base for the wall heater. Use a level to ensure the bracket is straight and aligned correctly.
Securing the Wall Heater
Carefully lift the wall heater and slide it onto the mounted bracket. The heater should easily slide into place on the bracket. Once in position, use any provided screws or fasteners to secure the heater to the bracket. This step ensures that the heater is securely attached to the wall and properly aligned.
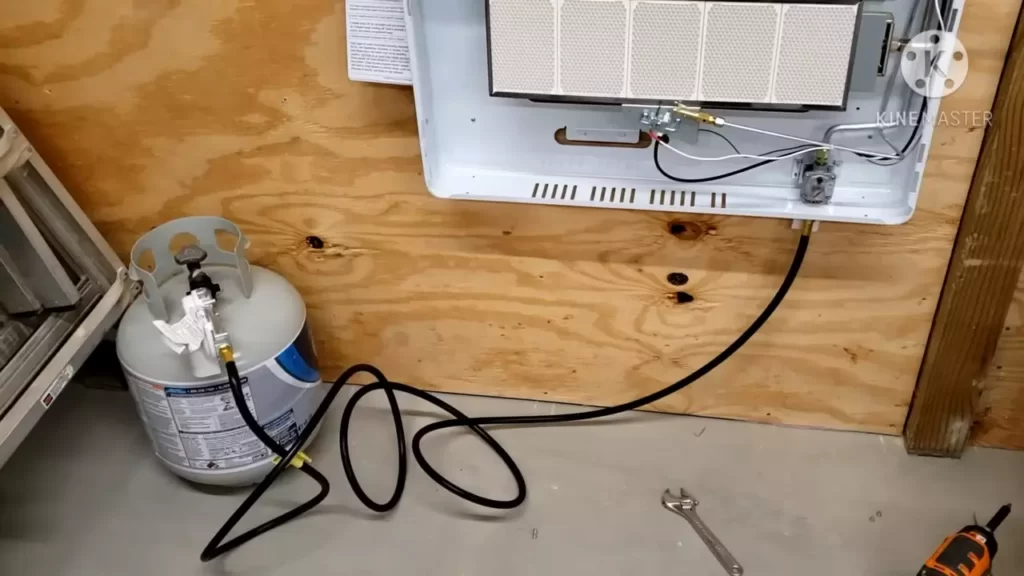
Connecting the Gas Line
With the wall heater securely mounted, it’s time to connect the gas line. This process involves preparing the gas line, cutting the pipe, deburring and cleaning, attaching the gas line to the heater, using Teflon tape or pipe compound, and tightening the connections. Let’s break it down step by step:
Preparing the Gas Line
Before connecting the gas line to the heater, ensure that it is clean and free of any debris or contaminants. Inspect the gas line for any signs of damage or corrosion. If any issues are detected, it is recommended to replace the gas line before proceeding with the installation.
Cutting the Pipe
Measure and mark the gas line to the desired length using a measuring tape and marker. Carefully cut the pipe using a pipe cutter, aligning the cutter around the marked area. Apply steady pressure as you rotate the cutter around the pipe until it is cleanly cut. Ensure the cut is straight and free of burrs or jagged edges.
Deburring and Cleaning
After cutting the pipe, use a deburring tool to remove any burrs or rough edges from the cut end. This step helps create a smooth and clean connection for the gas line. Once deburring is complete, clean the pipe thoroughly to remove any debris or dirt. A clean surface ensures a proper seal when connecting the gas line.
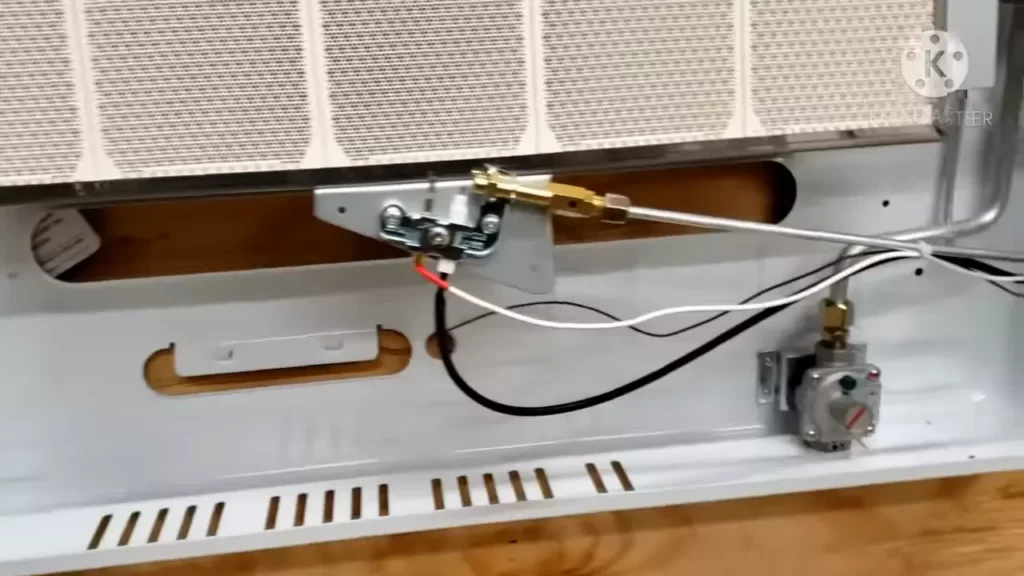
Attaching the Gas Line to the Heater
With the gas line prepared and cleaned, it’s time to attach it to the wall heater. Align the gas line with the gas inlet on the heater, making sure the threads match and connect properly. Apply Teflon tape or pipe compound to the threaded connections to create a secure and leak-free seal.
Tightening the Connections
Using appropriate wrenches or pliers, tighten the connections between the gas line and the wall heater. Ensuring a tight and secure connection is vital to prevent gas leaks. Take care not to overtighten, as this can damage the fittings or cause leaks. Double-check all connections to ensure they are properly tightened.
Installing the Vent Pipe
Installing the vent pipe is an important step in the propane wall heater installation process. It involves cutting the vent pipe, measuring the length, using a pipe cutter, attaching the vent pipe, connecting the sections, and securing with fasteners. Let’s go through each step in detail:
Cutting the Vent Pipe
Measure the required length of the vent pipe based on the manufacturer’s instructions and local building codes. Mark the measurement on the pipe using a measuring tape and marker. Using a pipe cutter, carefully cut the vent pipe to the desired length. Ensure that the cut is straight and clean for a proper fit.
Measuring the Length
Before cutting the vent pipe, measure the distance between the wall heater and the exterior vent location accurately. Take into consideration any required clearances and guidelines specific to the wall heater model and local building codes. Accurate measurements are essential for a safe and efficient venting system.
Using a Pipe Cutter
A pipe cutter is a reliable tool for cutting vent pipe sections accurately. With the marked length in place, position the pipe cutter around the pipe at the proper measurement. Rotate the cutter around the pipe, maintaining steady pressure until the pipe is cut cleanly. Take care to avoid jagged edges or burrs on the cut end.
Attaching the Vent Pipe
Slide one end of the vent pipe onto the exhaust outlet of the wall heater. Ensure a proper fit and alignment with the locking mechanism or attachment method specified by the manufacturer. Repeat the process with additional sections of vent pipe, connecting them securely until reaching the exterior vent location.
Connecting the Sections
Connect each vent pipe section securely using the provided connections or locking mechanisms. Check for proper alignment and ensure a tight fit to prevent any leaks or disconnections. Follow the manufacturer’s instructions for each specific section to ensure a proper and secure connection.
Securing with Fasteners
As each section of the vent pipe is connected, secure them in place using fasteners provided by the manufacturer. These fasteners may include screws, clamps, or other types of attachments. Properly securing the vent pipe ensures stability and prevents any movement or disconnections that may cause potential hazards.
Completing these installation steps will ensure your propane wall heater is correctly installed and functioning optimally. It is crucial to refer to the manufacturer’s instructions and local building codes during the installation process to ensure safety and compliance. Remember to always prioritize safety by turning off the gas supply, following proper installation procedures, and consulting a professional if needed. A properly installed propane wall heater can provide reliable heat and comfort in your home or space for years to come.
Testing And Finishing Up
Once you have successfully installed your propane wall heater, the next step is to ensure that it is working properly and safely. This involves conducting various tests and performing necessary adjustments to optimize its performance. In this section, we will outline the steps you need to take to test the heater for leaks, check the ignition and operation, set the thermostat, fine-tune the flame, adjust the air shutter, optimize heat distribution, and perform regular cleaning and maintenance.
Checking for Leaks
Before you start using your propane wall heater, it is crucial to check for any gas leaks. Gas leaks can be dangerous, so it is imperative to perform this test before igniting the heater. Follow these steps to check for leaks:
- Apply a small amount of propane gas leak detector solution to the connections and fittings.
- Inspect the connections and fittings for any bubbles forming. Bubbles indicate a gas leak.
- If you notice any bubbles, turn off the gas supply, tighten the connections, and retest for leaks.
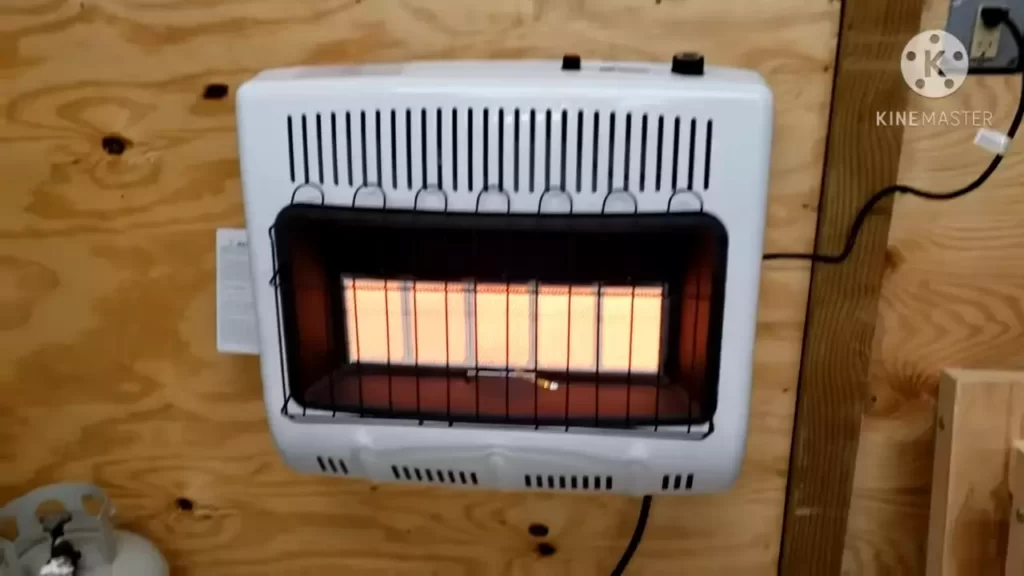
Inspecting and Rectifying Leaks
If you find any gas leaks during the testing process, it is crucial to rectify them immediately to ensure your safety. Here’s what you need to do:
- Turn off the gas supply.
- Release any accumulated gas in the line by turning on a nearby gas appliance.
- Disconnect the leaking fitting and apply pipe-thread sealing tape to the male threads.
- Reconnect the fitting and tighten it securely.
- Re-test for leaks using the gas leak detector solution.
Checking the Ignition and Operation
Once you have confirmed that there are no gas leaks, you can proceed to check the ignition and operation of your propane wall heater. Follow these steps:
- Turn the thermostat to the lowest setting.
- Turn on the gas supply.
- Set the switch or knob to “On” or “Ignite” to begin the ignition process.
- Observe if the heater ignites successfully and the flame is steady.
- If the heater does not ignite or the flame is irregular, consult the manufacturer’s manual for troubleshooting tips.
Setting the Thermostat
Now that you have confirmed the ignition and operation, it’s time to set the thermostat to your desired temperature. Follow these steps:
- Adjust the thermostat knob or switch to your desired temperature.
- Allow some time for the heater to reach the set temperature.
- Monitor the temperature gauge to ensure it is functioning correctly.
Igniting the Heater
With the thermostat set, you can now ignite the heater. Follow these steps:
- Turn the thermostat to the lowest setting.
- Turn on the gas supply.
- Set the switch or knob to “On” or “Ignite” to begin the ignition process.
- Observe the heater as it ignites. Ensure that the flame is consistent and blue in color.
Adjusting and Optimizing Performance
After igniting the heater, you may need to adjust and optimize its performance to ensure optimal heat output and efficiency. Pay attention to the following:
- Fine-tuning the Flame: Adjust the flame control knob to achieve a stable and blue flame.
- Adjusting the Air Shutter: Modify the air shutter to regulate the air-to-fuel ratio and maintain the desired flame intensity.
- Optimizing Heat Distribution: Position the heater in a central location to achieve even heat distribution throughout the room.
Cleaning and Maintenance Tips
Regular cleaning and maintenance are essential to keep your propane wall heater running efficiently and prolong its lifespan. Consider the following tips:
- Regular Cleaning: Wipe down the exterior of the heater with a damp cloth to remove dust and debris. Vacuum or brush the vents to ensure unrestricted airflow.
- Annual Inspection and Servicing: Schedule a professional inspection and servicing at least once a year to address any potential issues and ensure optimum performance.
Enjoying the Benefits of Propane Heating
With your newly installed propane wall heater, you can now enjoy a range of benefits that propane heating offers.
- Cost Savings: Propane heating is often more cost-effective compared to other fuel sources, allowing you to save money on your heating bills.
- Efficiency and Comfort: Propane wall heaters provide efficient and consistent heat, offering greater comfort in your living space.
Safety Precautions
When using a propane wall heater, it’s crucial to follow these safety precautions:
- Ensure proper ventilation in the room to prevent carbon monoxide buildup.
- Keep flammable objects at a safe distance from the heater.
- Install a carbon monoxide detector near the heater.
- Regularly inspect and replace any damaged or worn-out components.
By following these guidelines, you can ensure the safe and efficient operation of your propane wall heater, allowing you to enjoy its warmth and comfort throughout the colder months.
Frequently Asked Questions Of How To Install A Propane Wall Heater
Can I Install A Wall Heater Myself?
No, it is not recommended to install a wall heater yourself. It should be done by a professional to ensure safety and proper installation.
Are Wall Mounted Propane Heaters Efficient?
Yes, wall-mounted propane heaters are efficient as they provide direct heat, minimizing heat loss. They are a cost-effective solution for heating both indoor and outdoor spaces. These heaters are easy to install, operate, and maintain. They offer efficient heating with precise temperature control, making them a popular choice.
Are Propane Wall Heaters Safe Indoors?
Propane wall heaters are safe to use indoors if they are properly installed and ventilated. It is important to ensure that there is proper air circulation and ventilation to prevent the buildup of carbon monoxide. Regular maintenance and following manufacturer instructions are recommended for safe use.
Can You Use A 20 Lb Propane Tank On A Wall Heater?
Yes, you can use a 20 lb propane tank on a wall heater.
Conclusion
Installing a propane wall heater can be a simple and efficient way to keep your home warm during the colder months. By following the step-by-step instructions provided in this blog post, you’ll be able to install your heater safely and effectively.
Remember to always prioritize safety and consult a professional if you encounter any difficulties. Stay warm and cozy this winter with your newly installed propane wall heater.
