To install a portable AC unit, position it near a window or opening and securely attach the exhaust hose. Then, plug in the unit and adjust the settings to your desired temperature.
Welcome to our guide on how to install a portable AC unit. With a few simple steps, you’ll be able to cool down your space quickly and easily. Portable AC units are a convenient and efficient cooling option, especially in areas where traditional air conditioning systems are not feasible.
Whether you’re living in a rental property, an apartment, or a small office, installing a portable AC unit is a straightforward process that you can do on your own. In this guide, we will provide you with detailed instructions on how to install a portable AC unit, so you can enjoy a comfortable and cool environment. Let’s get started!
Factors To Consider
When it comes to installing a portable AC unit, there are several factors that you need to consider. These factors play a crucial role in determining the effectiveness and efficiency of your cooling system. By paying attention to room size, BTU requirements, and energy efficiency, you can ensure that you make the right choice for your space.
Room Size
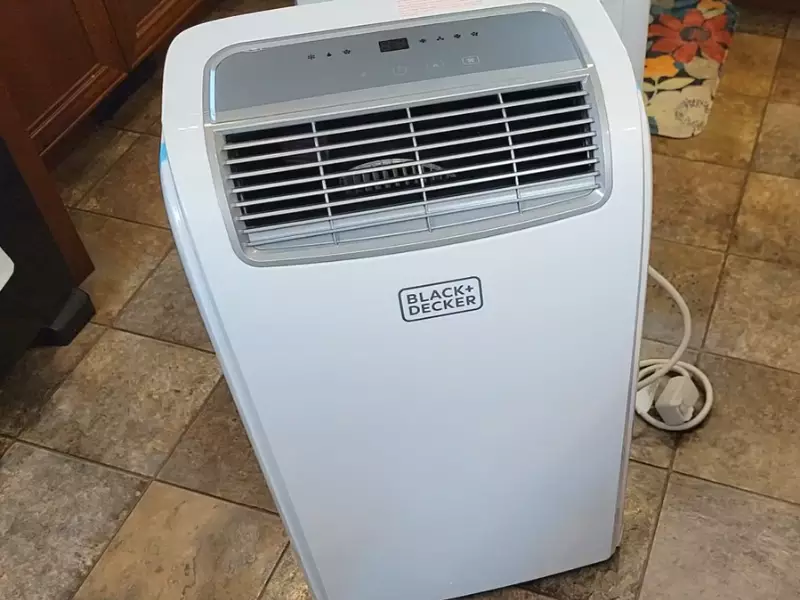
The size of your room is an important factor to consider when installing a portable AC unit. The cooling capacity of an AC unit is measured in British Thermal Units, or BTUs. The larger the room, the higher the BTU requirement for effective cooling. To determine the BTU requirements for your room, you need to consider the square footage and ceiling height.
Here is a table to help you understand the BTU requirements based on room size:
| Room Size (Square Footage) | BTU Requirements |
|---|---|
| 100-300 | 5,000-8,000 |
| 300-500 | 8,000-10,000 |
| 500-700 | 10,000-14,000 |
| 700-1,000 | 14,000-18,000 |
Keep in mind that these figures are approximate. Other factors such as insulation, windows, and sunlight exposure can also affect the cooling needs of your room.
BTU Requirements
The BTU requirements of a portable AC unit depend on several factors, including the room size, insulation, and thermal load. It’s essential to choose an AC unit with the right BTU capacity to cool your room efficiently. If you choose a unit with a lower BTU rating, it may struggle to cool the space adequately. On the other hand, a unit with a higher BTU rating may cool the room too quickly and lead to frequent on/off cycles, resulting in inefficiency and increased energy consumption.
It’s important to note that the BTU requirements can vary based on room usage and climate conditions. For example, kitchens and sunny rooms may require additional BTUs, while well-insulated rooms may need fewer BTUs.
Energy Efficiency
Energy efficiency is a crucial factor to consider when installing a portable AC unit. Choosing an energy-efficient unit not only saves you money on electricity bills but also reduces your environmental impact. Look for AC units with a high EER (Energy Efficiency Ratio) or SEER (Seasonal Energy Efficiency Ratio) rating. These ratings indicate how efficiently the AC unit converts electricity into cooling power.
In addition to EER or SEER ratings, you may also want to consider additional energy-saving features such as programmable timers, sleep mode, and energy-saving settings. These features can help optimize the cooling process and minimize energy wastage.
By considering room size, BTU requirements, and energy efficiency, you can make an informed decision when installing a portable AC unit. Remember to choose a unit that meets your specific needs while keeping energy consumption in check.
Gathering Tools And Materials
Before you dive into the step-by-step process of installing a portable AC unit, it’s crucial to gather all the necessary tools and materials to ensure a smooth installation process. By having everything you need on hand, you’ll be able to complete the task efficiently and minimize any potential delays or hiccups along the way.
Portable AC Unit
The first and most essential item you’ll need is, of course, the portable AC unit itself. Make sure that you have chosen a unit that is suitable for your room size and cooling needs. Additionally, consider factors such as energy efficiency, noise level, and any special features that may be important to you. Once you have the perfect portable AC unit, you’ll be one step closer to a cooler and more comfortable living space.
Window Kit
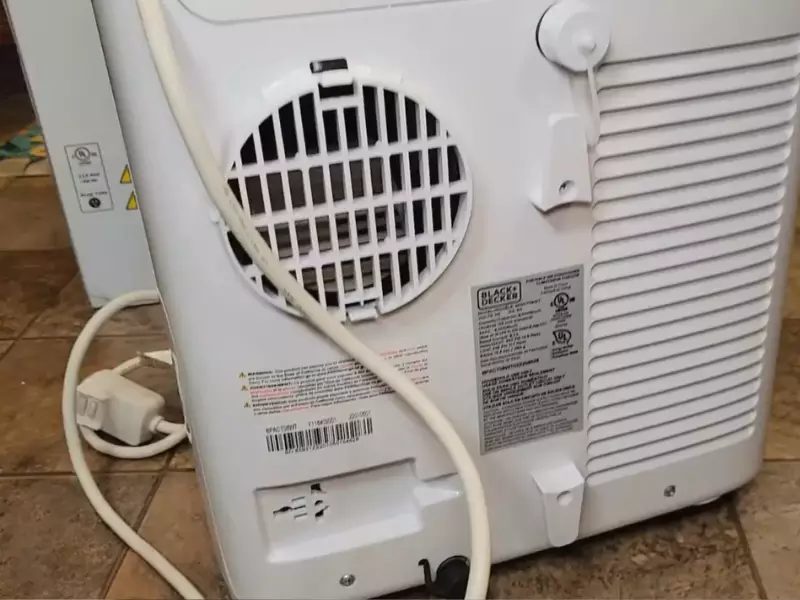
Next up, you’ll need a window kit specifically designed for portable AC units. This kit typically includes a window adapter panel and an adjustable window bracket. The window adapter panel helps to create a seal between the unit and the window, preventing warm air from entering your room and ensuring efficient cooling. The adjustable window bracket, on the other hand, holds the adapter panel securely in place. When purchasing a window kit, ensure it is compatible with both your portable AC unit and the type of window you have in your space.
Exhaust Hose
Lastly, don’t forget about the exhaust hose. This crucial component of your portable AC unit helps to vent warm air from your room to the outside. Typically made of flexible material, the exhaust hose connects to the back of the unit and extends to a window or another suitable venting location. It’s important to measure the length of the hose required for your specific setup and ensure that it is included with your portable AC unit or purchase it separately if necessary.
Now that you have gathered your tools and materials, you are ready to move on to the installation process. In the next section, we will guide you through the step-by-step instructions to ensure a successful installation of your portable AC unit. Stay tuned!
Measuring The Window Opening
Before you begin the installation process for your new portable AC unit, it’s crucial to measure the window opening accurately. This step will ensure a perfect fit, allowing the unit to function efficiently and securely.
Width and Height Adjustments
First, you need to measure the width of the window opening. Position your tape measure at the top of the opening and extend it to the opposite side. Be sure to measure the exact width, including any window frame or molding.
Next, measure the height of the window opening. Place one end of the tape measure at the bottom of the opening and extend it upward until you reach the top. Again, include any frames or molding in your measurement.
If the width and height measurements match the dimensions specified in the portable AC unit’s instructions, you’re good to go. However, if your window opening is slightly larger or smaller, adjustments or modifications may be necessary.
Adjustments and Modifications
If your window opening is too small for the portable AC unit, you may need to make some adjustments. One option is to remove the window sash, which is the panel that holds the glass in place. This will create more space for installation. Alternatively, you can install plexiglass or plywood on either side of the unit to fill in the extra space.
On the other hand, if your window opening is too large, you can use weatherstripping or foam insulation to fill in the gaps. This will ensure a tight and secure fit, preventing any drafts or air leaks.
It’s important to remember that every window opening is unique, and adjustments may vary depending on your specific situation. Take the time to assess your window opening carefully and choose the best method of adjustment or modification for your portable AC unit.
Attaching The Window Kit
Attaching the window kit is a crucial step to ensure proper installation of your portable AC unit. This step involves inserting the exhaust hose and securing the window kit in place. Let’s walk through each of these steps in detail:
Inserting the Exhaust Hose
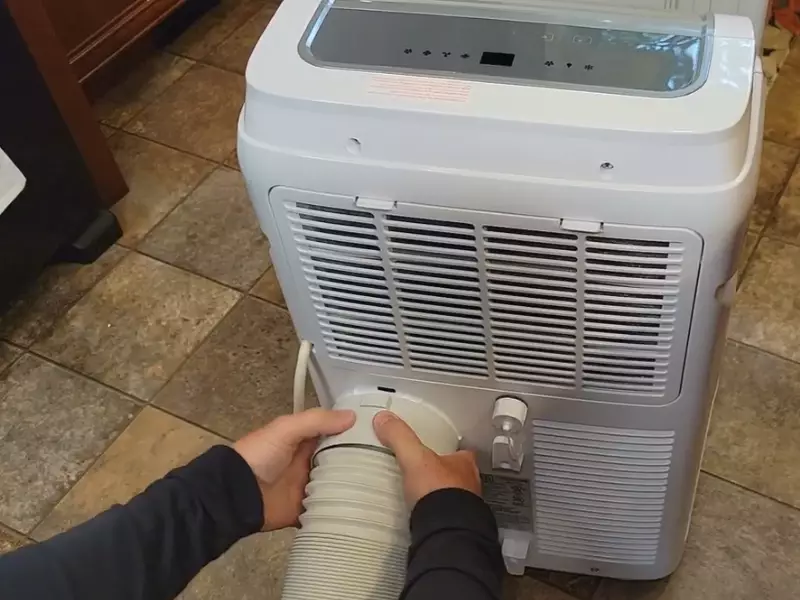
To begin with, locate the end of the exhaust hose that will be attached to the portable AC unit. You will typically find this hose in the package that comes with your AC unit. Remove any caps or covers from the end of the hose.
Next, identify the exhaust opening on the back of your portable AC unit. Gently align the end of the hose with the opening, ensuring a secure and snug fit. Push the hose into the opening until it cannot be inserted any further. You may hear a click or feel it lock into place.
Once the exhaust hose is properly inserted, it’s time to move on to securing the window kit.
Securing the Window Kit in Place
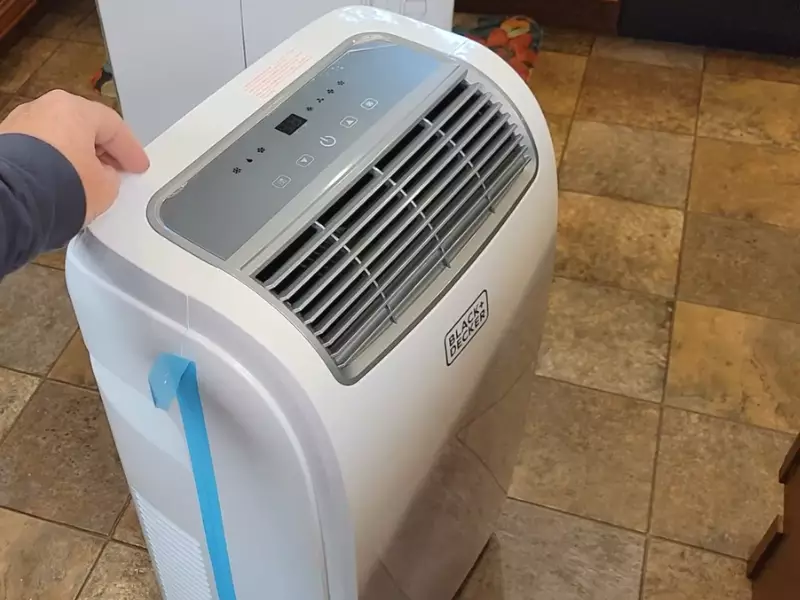
The window kit consists of a panel that fits into your window frame, allowing the exhaust hose to vent outside. Start by measuring the width of your window opening and adjusting the panel accordingly. Most window kits are adjustable to fit various window sizes.
Place the panel into the window frame, ensuring a tight and secure fit. Adjust the window kit to match the width of the window opening. Some kits may require you to use screws or brackets to secure the panel in place. Refer to the manufacturer’s instructions for the specific requirements of your window kit.
Once the panel is securely in place, position the other end of the exhaust hose through the designated opening on the panel. Attach any connectors or adapters provided to ensure a tight seal. This will prevent warm air from entering your room.
Lastly, use weatherstripping or insulation tape to seal any gaps between the panel and the window frame. This step is crucial to maximize the efficiency of your portable AC unit and prevent any air leakage.
With the window kit properly attached, your portable AC unit is now ready to keep you cool and comfortable during those hot summer months.
Connecting The Exhaust Hose To The AC unit
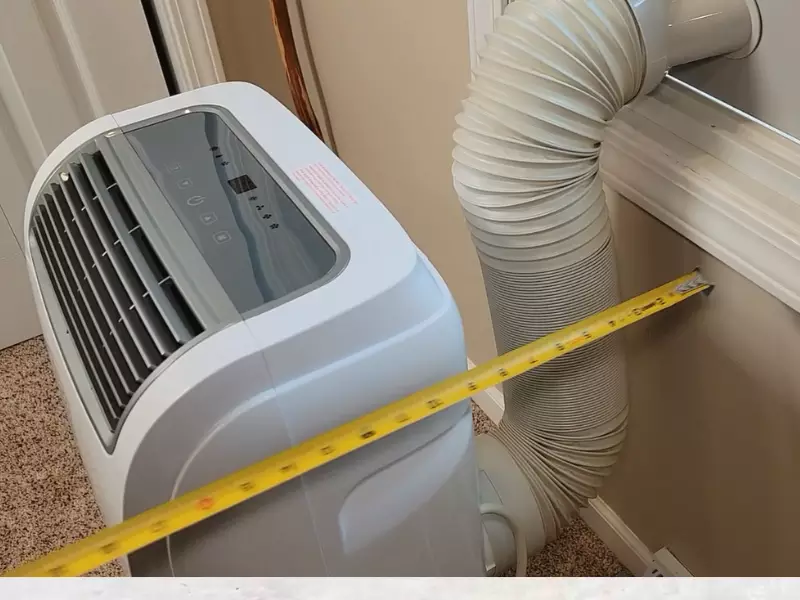
Once you have positioned your portable AC unit in the desired location, the next step is to connect the exhaust hose. This crucial step allows hot air to be vented outside your space, keeping the room cool and comfortable. In this section, we will guide you through the process of connecting the exhaust hose to the AC unit, ensuring proper alignment, and securing the connection.
Proper Alignment
Before connecting the exhaust hose, it is important to ensure proper alignment between the AC unit and the hose. Follow these simple steps:
- Locate the exhaust hose outlet on the back of the AC unit: This is usually a round or rectangular opening that matches the size of the hose.
- Inspect the hose for any twists or kinks: Straighten out the hose to ensure smooth airflow.
- Align the hose with the exhaust outlet: Insert one end of the hose into the outlet, making sure it fits securely.
- Check for any gaps or leaks: Inspect the connection to ensure there are no openings that could cause air leakage.
Securing the Connection
Once the exhaust hose is properly aligned with the AC unit, you need to secure the connection to prevent any movement or dislodgment. Follow these steps to ensure a stable connection:
- Use the provided hose connector or adapter: Some portable AC units come with specialized connectors or adapters to secure the hose. Refer to the manufacturer’s instructions to correctly attach the connector.
- Tighten the hose clamp: If your AC unit does not provide a connector, use a hose clamp to secure the connection between the hose and the exhaust outlet. Slide the clamp over the hose, positioning it near the outlet, and tighten it with a screwdriver or pliers.
- Test the connection: Gently tug on the hose to ensure it is firmly attached to the AC unit.
Once you have successfully connected and secured the exhaust hose to the AC unit, you are ready to enjoy the cooling benefits of your portable air conditioner. Remember to periodically check the connection for any signs of loosening or damage, and make adjustments as necessary to maintain optimal performance.
Powering On And Testing The Unit
Once you have successfully installed your portable AC unit, it’s time to power it on and ensure that it’s working effectively to keep you cool and comfortable. This step is crucial as it allows you to identify any potential issues and make necessary adjustments before using the unit for an extended period. Here, we will go through the process of plugging in and turning on the unit, as well as adjusting the temperature and fan settings.
Plugging In and Turning On
To start, make sure your portable AC unit is plugged into a nearby electrical outlet or a suitable extension cord that can handle its power requirements. It is essential to double-check that the unit is properly grounded to avoid electrical hazards or damage. Once plugged in, locate the power button or switch on the control panel of your AC unit. Give it a moment, and you should hear a reassuring hum that indicates the unit has powered on. If you do not hear anything, verify that the power source is working correctly and check for any blown fuses or tripped circuit breakers.
Adjusting the Temperature and Fan Settings
With the unit powered on, it’s time to set the desired temperature and fan settings according to your preferences. Most portable AC units feature a digital display or control panel that allows you to adjust these settings conveniently. Locate the temperature control button or arrows on the panel and use them to increase or decrease the temperature to your liking.
Remember, the ideal temperature may vary depending on your room size, insulation, and personal comfort level. Similarly, you can find buttons or options to adjust the fan speed – choose from low, medium, or high – to circulate the cooled air more effectively. Take your time to experiment and find the settings that suit you best.
After adjusting the temperature and fan settings, it’s advisable to let the portable AC unit run for a few minutes to gauge its cooling performance. Observe the airflow, ensuring that cold air is being circulated adequately throughout the room. Place your hand near the vents to feel the temperature of the air coming out.
If you encounter any issues, such as insufficient cooling or uneven airflow, verify that doors and windows are properly sealed to prevent warm air infiltration. Additionally, check the air filters for dirt or blockages, as they may impede the unit’s performance.
By following these simple steps of powering on and testing your portable AC unit, you can ensure that it is functioning correctly and providing much-needed cool air during the hot summer months. Remember to keep the unit clean and well-maintained to enjoy its optimal performance throughout the season.
Cleaning And Maintenance Tips
Regular cleaning and maintenance of your portable AC unit are vital to ensure optimal performance and longevity. By following these simple tips, you can keep your unit running efficiently and enjoy cool and refreshing air all summer long.
Regular Filter Cleaning
One of the most important maintenance tasks for your portable AC unit is regular filter cleaning. The filters are responsible for trapping dust, dirt, and other particles from the air, ensuring the air you breathe is clean and free from allergens. Neglecting filter cleaning can lead to reduced airflow and diminished cooling effectiveness.
To clean the filters, carefully remove them from the unit according to the manufacturer’s instructions. If your unit has washable filters, gently rinse them under running water to remove any accumulated debris. Allow the filters to air dry completely before reinserting them into the unit. For disposable filters, it is recommended to replace them as per the manufacturer’s guidelines.
Condensation Draining
During the cooling process, your portable AC unit produces condensation that needs to be drained properly. Failure to do so can result in water leakage and potential damage to your unit and surrounding areas.
Locate the condensation tray or pan beneath the unit and ensure it is not full. If the tray is full, carefully drain the water by placing a shallow container beneath the drainage tube and removing the plug. Allow the water to empty completely before securing the plug back into place.
Exterior Cleaning
Maintaining a clean exterior of your portable AC unit is not only important for aesthetics but also for efficient airflow. Dust and debris can accumulate on the unit’s exterior, hindering proper ventilation and reducing performance.
To clean the exterior, use a soft cloth or brush to gently remove any visible dirt or dust. Avoid using abrasive materials or harsh chemicals that may damage the unit’s surface. Additionally, ensure that the air intake and exhaust vents are clear of any obstructions, such as furniture or curtains, that could obstruct airflow.
Remember to power off and unplug the unit before performing any cleaning or maintenance tasks to prevent accidents and ensure your safety.
By incorporating these cleaning and maintenance tips into your routine, you can prolong the lifespan of your portable AC unit and enjoy comfortable and efficient cooling for years to come.
Troubleshooting Common Issues
If you’ve installed a portable AC unit and are experiencing some issues, don’t worry! It’s not uncommon to encounter a few bumps along the way. In this section, we’ll explore some common problems you may come across and how to troubleshoot them effectively. Let’s dive in!
Unit Not Cooling
One of the most frustrating problems you may encounter with your portable AC unit is when it’s not cooling properly. Before you panic, there are a few things you can check to resolve this issue:
- Check the thermostat settings: Ensure that the thermostat is set to the desired temperature and cooling mode. Sometimes, the unit may switch to fan-only mode, which won’t provide cooling.
- Inspect the air filter: A clogged or dirty air filter can restrict airflow, making it difficult for the unit to cool effectively. Check the filter and clean or replace it if necessary. This simple step can make a huge difference.
- Verify the windows and doors: Make sure that all windows and doors in the room are properly closed. Any gaps or openings can result in air leakage, reducing the cooling efficiency of the unit.
- Keep the unit away from heat sources: Check if the portable AC unit is placed near heat-generating appliances or direct sunlight. Heat sources can interfere with the cooling process, so ensure that the unit is positioned in a cool location.
If you’ve checked all of the above and the problem persists, it might be time to contact a professional technician for further assistance.
Leaks or Excessive Noise
Another common issue that may occur with your portable AC unit is leaks or excessive noise. Here are a few troubleshooting steps to address these problems:
- Inspect the condensate drain: Examine the condensate drain to ensure it’s not clogged or blocked. If there’s a blockage, water may accumulate and eventually leak. Clear any obstructions to resolve this issue.
- Check the drain pan: The drain pan collects condensation and excess moisture. If the pan is full, it can overflow and cause leaks. Empty the drain pan and ensure it’s properly positioned to catch any future drips.
- Tighten loose components: Over time, vibrations and movement can loosen various parts of the unit, leading to excessive noise. Check the screws, panels, and other components to ensure they are properly tightened.
- Inspect the fan blades: If you hear unusual noises, it’s possible that debris or dust has accumulated on the fan blades. Clean the blades carefully, removing any dirt or obstructions.
If the leaks or excessive noise persist even after taking these steps, it’s advisable to seek professional assistance to identify and resolve the underlying issues.
Power Supply Problems
A portable AC unit may also encounter power supply problems, such as failure to start or sudden shutdown. Here’s what you can do to troubleshoot these issues:
- Check the power outlet: Ensure that the unit is properly plugged into a functional power outlet. If the outlet doesn’t have power, try plugging the unit into a different outlet to verify if it’s a power supply problem.
- Inspect the power cord: Check the power cord for any damages or frayed wires. If you notice any issues, it’s essential to replace the cord to prevent any safety hazards.
- Reset the circuit breaker: If the portable AC unit suddenly shuts down, it might be due to a tripped circuit breaker. Locate the breaker panel and reset any tripped breakers associated with the unit to restore power.
- Consider the extension cord: Some portable AC units require sufficient power to function correctly. If you’re using an extension cord, ensure it can handle the unit’s power requirements without any voltage drops.
If you’ve gone through the troubleshooting steps outlined above and the power supply problems persist, it’s advisable to reach out to a qualified electrician to diagnose and address the root cause of the issue.
Frequently Asked Questions Of How To Install A Portable AC Unit
Do All Portable Air Conditioners Have To Be Vented Out A Window?
Yes, all portable air conditioners need to be vented out a window. Venting is necessary to expel hot air and moisture from the room, ensuring proper cooling efficiency. Without venting, the portable AC won’t perform effectively. Ventilation kits are provided with most units to make window venting easy.
Are Portable AC Units Easy To Install?
Installing portable AC units is a breeze. These units are easy to install, requiring minimal effort and time. With a user-friendly design, you can set it up quickly without any technical skills or professional assistance. Enjoy cool air in no time with these convenient and hassle-free portable AC units.
Do Portable Air Conditioners Need To Be Vented Outside?
Yes, portable air conditioners need to be vented outside. It is important to vent the hot air generated by the unit outside to maintain proper cooling and prevent overheating. Make sure to use the provided exhaust hose and window kit to vent the air outside through a window or wall opening.
Does A Portable Air Conditioner Have To Sit On The Floor?
No, a portable air conditioner does not have to sit on the floor. It can be placed on a sturdy table or stand as long as it has proper ventilation and is within the recommended distance from electrical outlets.
Conclusion
Installing a portable AC unit can provide relief during the hot summer months. By following these simple steps, you can easily set up your portable AC unit and enjoy the cool comfort it delivers. Remember to choose the right location, exhaust the hot air properly, and ensure proper insulation to maximize its efficiency.
Proper installation is key to getting the most out of your portable AC unit and maintaining a comfortable indoor environment. Stay cool and beat the heat with a properly installed portable AC unit.
