Installing a Navien tankless water heater can be done by following a simple and straightforward process. In this guide, we will provide you with step-by-step instructions to successfully install your Navien tankless water heater and enjoy its benefits.
Navien tankless water heaters are known for their energy efficiency and on-demand hot water supply. They are compact, versatile, and can be installed in various locations, including residential homes and commercial buildings. By installing a Navien tankless water heater, you can improve energy efficiency, save space, and enjoy hot water whenever you need it.
So, let’s dive into the installation process and get started with enjoying the benefits of your new tankless water heater.
Preparing For Installation
Before starting the installation process of your Navien tankless water heater, it is essential to make adequate preparations. This will ensure a smooth and hassle-free installation, saving you both time and effort in the long run. In this section, we will discuss the necessary tools and materials you’ll need, as well as the crucial checks with regard to electrical and plumbing requirements.
Gathering the necessary tools and materials
Having the right tools and materials at your disposal is crucial for a successful installation. Below is a list of essential items you will need:
| Tools | Materials |
|---|---|
|
|
Ensuring you have these tools and materials ready beforehand will save you from any unnecessary delays during the installation process.
Checking the electrical and plumbing requirements
Before proceeding with the installation, it is crucial to verify the electrical and plumbing requirements for your Navien tankless water heater. Failure to do so may result in improper functioning or even damage to the unit. Here’s what you need to check:
Electrical requirements:
- Make sure you have a dedicated electrical circuit for the water heater.
- Check the voltage and amperage requirements specified by the manufacturer.
- Ensure the electrical connections are secure and meet local electrical codes.
Plumbing requirements:
- Verify the water pressure requirements mentioned in the user manual.
- Check for any leaks or damages in the existing plumbing system.
- If necessary, make changes to the water supply lines to accommodate the tankless water heater.
By conducting these checks, you can ensure that your Navien tankless water heater will function optimally and provide you with a reliable hot water supply.
In conclusion, adequate preparation is essential for a successful installation of your Navien tankless water heater. Gathering the necessary tools and materials, and checking the electrical and plumbing requirements are crucial steps to ensure a smooth and trouble-free installation process.
Assessing The Installation Space
Before diving into the installation process of a Navien Tankless Water Heater, it is crucial to assess the installation space to ensure a seamless and efficient installation. Determining the ideal location for the tankless water heater and ensuring proper ventilation and clearance requirements are essential factors to consider. Let’s delve into these aspects in detail:
Determining the ideal location for the tankless water heater
Choosing the right location for your Navien Tankless Water Heater is pivotal for its optimal functioning and longevity. Here are some key considerations:
- Accessibility: Ensure that the installation location provides easy access for maintenance and repairs in the future. This will save you time and effort down the road.
- Proximity to water source and gas supply: Place the tankless water heater as close as possible to the water source and gas supply to minimize energy loss and reduce the time it takes for hot water to reach your taps.
- Noise considerations: If noise is a concern for you, avoid locating the water heater near living areas or bedrooms. Opt for a spot that minimizes the impact of noise on your daily activities and comfort.
Ensuring proper ventilation and clearance requirements
Proper ventilation is crucial for the safe operation of your Navien Tankless Water Heater. Here’s what you need to keep in mind:
- Adequate clearance: Ensure that the installation space provides sufficient clearance on all sides of the water heater as specified in the manufacturer’s guidelines. This allows for proper airflow and access to the unit for maintenance purposes.
- Combustion air supply: Your tankless water heater needs a reliable source of fresh air for combustion. Make sure the installation space has sufficient air supply, either from outdoor vents or through an adequately sized ventilation system.
- Exhaust venting: Proper exhaust venting is essential to remove combustion byproducts safely. Install the venting system according to the manufacturer’s specifications, ensuring it is free from obstructions and efficiently vents the indoor air outside.
By carefully assessing the installation space and following these guidelines, you can ensure a successful installation of your Navien Tankless Water Heater. Stay tuned for the next section, where we’ll delve into the steps involved in safely and efficiently installing the unit.
Shutting Off The Water Supply
Locating and Shutting Off the Main Water Supply
Before beginning the installation process for your Navien tankless water heater, it is crucial to shut off the water supply completely. This step ensures that you can work on the system safely and without any potential damage or leaks.
To locate the main water shut-off valve, you must first identify the water meter box. Typically, the meter box is located outside your home near the street. It may be situated underground or mounted on a wall. Once you have located the meter box, remove the cover, and you will find the shut-off valve inside.
Note: If you live in an apartment complex or a condominium, the main water shut-off valve may be located in a central utility room instead of the meter box.
Here are the steps to shut off the main water supply:
- Locate the water shut-off valve in the meter box.
- Using a wrench or pliers, turn the valve clockwise until it is completely closed. This action will stop the water flow to your home.
Draining any Remaining Water from the Existing Water Heater
After shutting off the main water supply, it is essential to drain any remaining water from your existing water heater. This step prevents water from spilling out when you disconnect the old unit.
To drain the water heater, follow these instructions:
- Locate the drain valve at the bottom of the water heater tank. It is usually a small faucet-like valve connected to a hose.
- Place a bucket or a large container below the drain valve to catch the water.
- Open the drain valve slowly by turning it counterclockwise. Allow the water to flow out until the tank is completely empty.
- Once all the water has drained, close the drain valve by turning it clockwise.
Note: If you are unsure of how to drain the water heater or experience any difficulties, consult a professional plumber for assistance.
Now that you have successfully shut off the main water supply and drained the remaining water from your existing water heater, you are ready to continue with the installation process of your Navien tankless water heater.
Removing The Old Water Heater
Disconnecting the electrical and plumbing connections
Before you can install your new Navien Tankless Water Heater, you’ll need to remove the old one. This first step involves disconnecting the electrical and plumbing connections. By following these simple instructions, you’ll ensure a smooth and hassle-free transition to your new tankless water heater.
Safely disposing of the old water heater
Once you have successfully disconnected the electrical and plumbing connections, it’s time to properly dispose of the old water heater. Taking the necessary precautions will not only help protect the environment but also ensure a safe and efficient removal process. Here are the steps you need to follow:
- Turn off the main water supply to the old water heater. This will prevent any water from leaking out while you are preparing for disposal.
- Release any residual pressure in the tank by opening a hot water faucet nearby. This step is crucial to avoid any potential accidents during the disposal process.
- Carefully disconnect the water pipes from the old unit. You can use a wrench or pliers to loosen the nuts, ensuring not to damage the pipes in the process.
- Next, disconnect the electrical connections. Turn off the power supply to the water heater from the main electrical panel. By following the manufacturer’s instructions, carefully detach the wires from the old unit.
- Now that the old water heater has been disconnected from both the plumbing and electrical systems, it’s time to safely remove it. Depending on the size of the unit, you may need a dolly or assistance from another person to safely transport it out of your home. Be cautious not to strain your back or damage any surrounding surfaces during this process.
- Once the old water heater is outside, you should check with your local waste management regulations to determine the appropriate way to dispose of it. Most areas have designated recycling centers or waste disposal facilities where you can safely and responsibly discard the old unit.
By following these steps, you can ensure a seamless removal of your old water heater, making way for your new Navien Tankless Water Heater installation. Remember to always prioritize safety and environmental responsibility throughout the process.
Preparing For The New Installation
Before you begin the installation process of your Navien tankless water heater, it’s essential to properly prepare the installation area and gather all the necessary accessories and components. By taking the time to measure and prepare the area and ensure you have everything you need, you’ll be setting yourself up for a smooth and successful installation. In this section, we’ll walk you through the steps to measure and prepare the installation area and assemble any necessary accessories.
Measuring and Preparing the Installation Area for the Navien Tankless Water Heater
To ensure that your Navien tankless water heater fits and functions properly, it’s crucial to measure and prepare the installation area beforehand. Here’s a step-by-step guide to help you with the process:
- Begin by identifying a suitable location for your water heater. It should be easily accessible for maintenance and repairs.
- Measure the dimensions of the area to ensure it can accommodate the size of the Navien tankless water heater you have.
- Make sure there is proper ventilation in the area. Navien tankless water heaters require a sufficient air supply for efficient operation.
- Clear any obstructions or debris from the installation area, ensuring there is ample space for easy installation and future servicing.

Assembling Any Necessary Accessories or Components
Before you begin the installation of your Navien tankless water heater, it’s important to gather all the necessary accessories and components. This will help ensure a smooth installation process without any delays. Here are some key components you may need to assemble:
- Water and gas supply lines: Check if you have the appropriate size and length of water and gas supply lines required for your Navien tankless water heater.
- Ventilation kit: If your installation area requires additional ventilation, make sure you have the appropriate ventilation kit.
- Pipe fittings and connectors: Gather all the necessary pipe fittings and connectors for a secure and leak-free installation.
- Electrical connections: Ensure you have the required electrical connections and wiring in place for the Navien tankless water heater.
- Mounting hardware: If you plan to mount the water heater, gather all the necessary mounting hardware to secure it in place.
By assembling all the necessary accessories and components ahead of time, you can avoid any last-minute trips to the hardware store or delays in the installation process.
Remember, proper preparation is key to a successful installation of your Navien tankless water heater. By measuring and preparing the installation area and gathering all the necessary accessories and components, you’ll be well on your way to enjoying the benefits of a reliable and efficient water heating solution.
Installing The Navien Tankless Water Heater
Installing a Navien tankless water heater in your home can provide countless benefits, from energy efficiency to endless hot water. However, the installation process can be complex if you don’t have the right knowledge and tools. In this guide, we will walk you through the step-by-step installation process, ensuring that you have a safe and secure installation.
Mounting the unit securely on the wall
The first step in installing a Navien tankless water heater is properly mounting the unit on the wall. This not only ensures the stability of the system but also saves valuable floor space. Here’s a breakdown of the process:
- Choose an appropriate location for the water heater, considering factors such as accessibility, ventilation, and proximity to gas and water lines.
- Use a level to ensure that the mounting surface is straight. This will prevent any future issues with the water heater’s performance.
- Mark the mounting points on the wall and drill pilot holes.
- Securely attach the mounting brackets to the wall using screws, making sure they are level and properly aligned.
- Place the Navien tankless water heater on the brackets and ensure it is stable and level. Use a level to double-check.
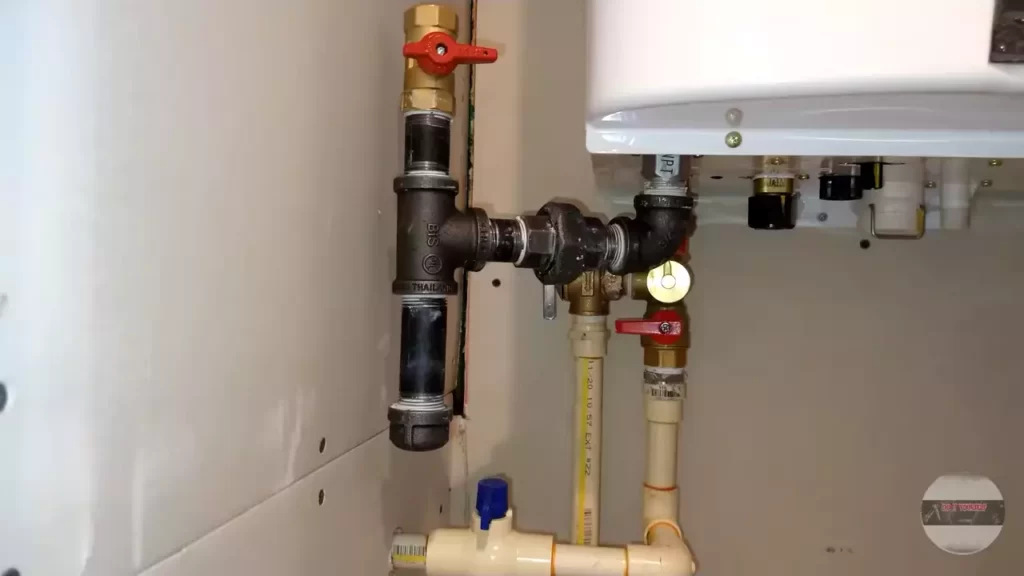
Connecting the water and gas lines
Once the unit is securely mounted, the next step is to connect the water and gas lines. Here’s how to do it:
- Turn off the water supply to your home before starting the installation process.
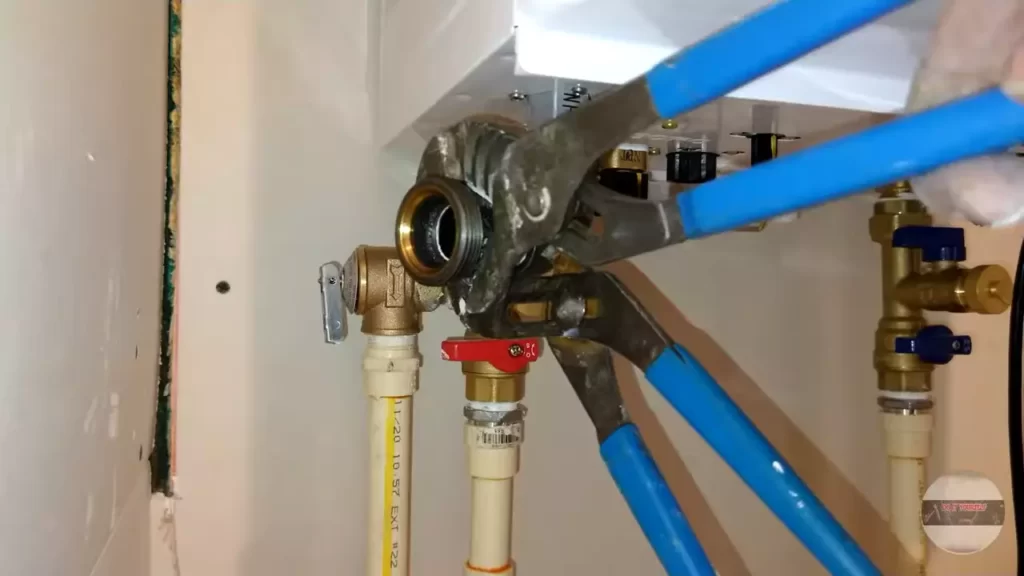
- Locate the water inlet and outlet valves on the unit.
- Attach the appropriate fittings to the water inlet and outlet valves, ensuring they are tightly secured.
- Connect the cold water supply line to the water inlet valve and the hot water output line to the water outlet valve.
- Turn on the water supply and check for any leaks. If there are any, tighten the fittings as necessary.
- For the gas connection, consult the manufacturer’s instructions for specific requirements. Install and connect the gas line to the unit, following safety guidelines.
Installing the venting system
Proper venting is crucial for the safe operation of your Navien tankless water heater. Follow these steps to ensure a proper venting system:
- Determine the appropriate venting material based on the specifications of your unit and local building codes.
- Measure and cut the vent pipe to the required length, making sure to account for any necessary angles or bends.
- Attach the vent pipe to the unit’s exhaust outlet and secure it using the appropriate fittings.
- Ensure that the vent pipe is properly supported and secured to prevent any sagging or disconnections.
- Connect the vent pipe to an exterior vent cap, making sure it is securely sealed to prevent any leaks.
By following these steps, you can successfully install your Navien tankless water heater and enjoy the benefits it brings to your home. Remember to always consult the manufacturer’s instructions and local building codes for specific guidelines and safety requirements.
Connecting The Electrical Wiring
Connecting the electrical wiring is an important step in the installation process of a Navien Tankless Water Heater. This ensures the heater operates safely and efficiently. In this section, we will guide you through the necessary steps to wire the unit according to the manufacturer’s instructions and test the electrical connections for safety.
Wiring the unit according to the manufacturer’s instructions
To begin, it’s crucial to carefully read the manufacturer’s instructions provided with your Navien Tankless Water Heater. These instructions will outline the specific wiring requirements and provide you with the necessary guidelines to follow.
Here’s a step-by-step guide on how to wire the unit according to the manufacturer’s instructions:
- Ensure the power supply to the water heater is turned off at the circuit breaker.
- Locate the electrical junction box on the unit. This box will typically be labeled and attached to the water heater.
- Remove the cover of the electrical junction box using the appropriate tools, such as a screwdriver.
- Inside the junction box, you will find a set of terminal blocks or wires labeled for specific connections.
- Refer to the manufacturer’s instructions to identify the specific wires that need to be connected.
- Using wire strippers, carefully strip the insulation off the ends of the wires to expose the copper conductors.
- Connect the wires according to the labeled terminal blocks or wires.
- Ensure each connection is secure by using the appropriate tools, such as pliers or a screwdriver.
- Replace the cover of the electrical junction box and secure it properly.
Testing the electrical connections for safety
Once the electrical connections are made, it is vital to test them to ensure they are safe and functioning correctly. Follow these steps to test the electrical connections:
- Double-check that the power supply to the water heater is off.
- Inspect each connection for any signs of damage or loose wires.
- If any issues are found, rectify them before proceeding.
- Turn the power supply on at the circuit breaker.
- Observe the water heater to ensure it powers up and operates smoothly.
- Check for any abnormal sounds or overheating during the initial operation.
- If everything appears to be working well, you can proceed with the rest of the installation process.
Remember, it is always recommended to refer to the specific manufacturer’s instructions for your Navien Tankless Water Heater as the wiring requirements may slightly vary. Properly connecting and testing the electrical wiring ensures a safe and effective installation of your tankless water heater.

Testing And Commissioning The Water Heater
One crucial step in the process of installing a Navien Tankless Water Heater is to properly test and commission the unit. After the physical installation and connection of the water and gas lines, it is essential to ensure that the water heater is functioning safely and efficiently. This section will provide a step-by-step guide on how to test and commission your Navien Tankless Water Heater.
Turning on the gas supply and checking for leaks
To begin, it is important to turn on the gas supply to the Navien Tankless Water Heater. This can be done by locating the gas shut-off valve and turning it counterclockwise to open the valve fully. Once the gas supply is turned on, it is necessary to check for any gas leaks.
- Inspect the gas connections and fittings for any signs of damage or loose connections.
- Apply a mixture of soapy water to the gas connections using a spray bottle or a brush.
- If any bubbles appear, it indicates a gas leak. In such cases, tighten the connection or contact a professional plumber for assistance.
- Once the gas connections have been checked and confirmed to be leak-free, continue with the testing and commissioning process.
Flushing the water heater to remove any debris
Before starting the water heater, it is necessary to flush out any debris that may have accumulated during the installation process. Flushing the system will help maintain the longevity and efficiency of the Navien Tankless Water Heater.
- Locate the flush valves on the water heater, typically positioned at the bottom of the unit.
- Connect a hose to each of the flush valves, ensuring a secure connection.
- Place the other end of the hoses into a suitable drainage area, such as a floor drain or an outdoor space.
- Open the flush valves by turning them counterclockwise.
- Allow the water to flow through the unit for approximately 5 minutes, ensuring that any debris is flushed out.
- Once the water runs clear, close the flush valves by turning them clockwise.
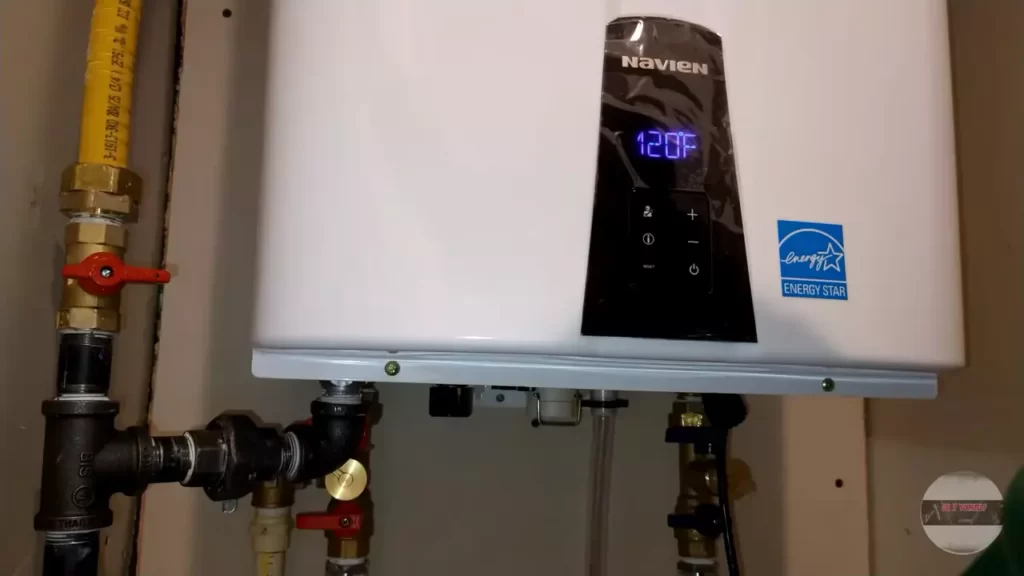
Setting the desired temperature and adjusting the settings
Now that the gas supply has been turned on and any debris has been flushed out, it is essential to set the desired temperature and adjust the settings of the water heater to meet your specific needs.
- Locate the temperature control panel on the Navien Tankless Water Heater.
- Using the controls provided, set the desired water temperature by adjusting the temperature up or down.
- Refer to the manufacturer’s instructions for any additional settings that may need to be adjusted based on your preferences and requirements.
- Ensure that the temperature and settings are adjusted to your satisfaction before proceeding.
By following these steps for testing and commissioning your Navien Tankless Water Heater, you can ensure that the unit is functioning safely and efficiently. Regular maintenance and inspections are recommended to keep the water heater running smoothly and to extend its lifespan.
Checking For Proper Functioning
Verifying that there is hot water flowing from the taps
Once you have successfully installed your Navien Tankless Water Heater, it is important to check for proper functioning by verifying that there is hot water flowing from the taps. To do this, follow these steps:
- Turn on the hot water tap in your kitchen or bathroom. Allow the water to run for a few minutes to ensure that the tankless water heater is fully activated.
- Check the temperature of the water. It should be hot, reaching the desired temperature that you have set on your Navien Tankless Water Heater. Be cautious not to burn yourself while conducting this test.
- If the water is not hot, there may be an issue with the water heater. Before troubleshooting further, ensure that the gas or electricity supply to the unit is turned on. If the supply is fine, you may need to contact a professional technician for assistance.
- Repeat this process in each location where you have hot water taps to ensure that the Navien Tankless Water Heater is providing hot water throughout your home.
Testing the unit’s performance and making any necessary adjustments
After verifying hot water flow, you will need to test the Navien Tankless Water Heater’s performance and make any necessary adjustments to optimize its function. Follow these steps:
- Turn off all hot water taps in your home.
- Locate the temperature control panel on your Navien Tankless Water Heater. This panel allows you to adjust the temperature settings.
- Set the temperature to your desired preference. Be sure to keep safety in mind and avoid setting it too high to prevent scalds.
- Turn on a hot water tap and observe the heater. It should ignite and start producing hot water. If you hear any unusual noises or notice any leaks, it may indicate a problem that requires professional attention.
- Check the water flow to ensure it is consistent and not varying in temperature. If you experience any fluctuations, you may need to adjust the flow sensor or consult a professional.
- If everything appears to be functioning properly, you have successfully installed and tested your Navien Tankless Water Heater!
By following these steps, you can ensure that your Navien Tankless Water Heater is working efficiently, providing you with the hot water you need for your daily activities.
Finalizing The Installation
Once you have successfully installed your Navien tankless water heater, there are a few crucial steps to take in order to finalize the installation process. This includes inspecting the installation for compliance with local codes and regulations, and cleaning up the installation area and disposing of any waste materials.
Inspecting the Installation for Compliance with Local Codes and Regulations
Before considering the installation complete, it’s important to inspect your Navien tankless water heater setup to ensure it adheres to the local codes and regulations. This step is crucial for both safety and legal compliance, as it ensures that your installation is done correctly and follows all necessary guidelines.
Cleaning up the Installation Area and Disposing of any Waste Materials
After completing the installation of your Navien tankless water heater, it’s essential to properly clean up the installation area and dispose of any waste materials generated during the process. This will not only leave your space looking tidy and organized, but it also helps to maintain the functionality of your tankless water heater in the long run.
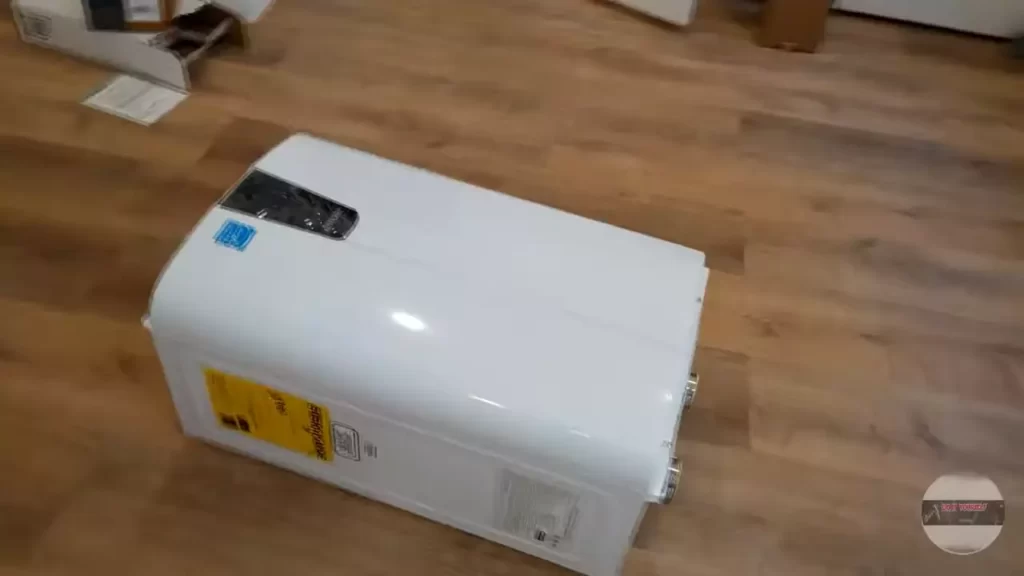
You can start by removing any leftover packaging materials, such as cardboard boxes and plastic wraps. Ensure that these materials are disposed of properly, following your local waste management guidelines. Additionally, check for any tools or equipment that may have been left behind and remove them from the installation area.
Next, give the immediate surroundings of your Navien tankless water heater a thorough cleaning. Use a damp cloth or sponge to wipe away any dust, debris, or dirt that may have accumulated during the installation process. Pay special attention to the vents and filters of the unit, as these can easily attract airborne particles.
Once you have cleaned the area, double-check that your Navien tankless water heater is securely mounted and all connections are properly tightened. Inspect the surrounding area for any signs of leaks or damage, and make any necessary adjustments or repairs to ensure everything is in proper working order.
After completing these final steps, you can admire your newly installed Navien tankless water heater and enjoy the benefits of endless hot water while also saving energy and space in your home.
Conclusion And Tips
Congratulations on successfully installing your Navien tankless water heater! Now that the installation is complete, it’s important to know some key steps to summarize the process and additional tips for maintenance and troubleshooting to ensure the longevity and efficiency of your new system.
Summarizing the key steps for installing a Navien tankless water heater
Let’s quickly recap the key steps you need to follow when installing a Navien tankless water heater:
- Start by carefully reading through the manufacturer’s instructions and familiarize yourself with all the components and tools you’ll need for the installation.
- Choose an appropriate location for your tankless water heater, ensuring it meets all the necessary installation requirements such as proper ventilation and access to fuel or power sources.
- Properly prepare the area by clearing any obstructions and making sure that the installation site is level and can support the weight of the unit.
- Install the necessary plumbing connections, including the hot and cold water lines, gas or electrical connections, and the condensate drain.
- Securely mount the Navien tankless water heater on the wall, making sure it is properly aligned and supported.
- Connect the water and gas or electrical supply lines to the unit, ensuring all connections are tight and leak-free.
- Finally, test the system to ensure it is functioning correctly, checking for any leaks or abnormalities.
Providing additional tips and recommendations for maintenance and troubleshooting
Here are some extra tips and recommendations to help you with the maintenance and troubleshooting of your Navien tankless water heater:
- Regularly inspect your water heater for any signs of leaks, corrosion, or damage. If you notice any issues, consult the manufacturer or a professional plumber to address them promptly.
- Flush the unit annually to remove any mineral build-up that may affect its performance and efficiency. Refer to the manufacturer’s instructions for the proper flushing procedure.
- To ensure efficient operation, set the water heater temperature to an appropriate level. Consult local codes and guidelines for the recommended temperature range.
- Keep the area around the water heater clear of any debris or flammable materials.
- In case of any error codes or malfunctions, refer to the user manual or contact Navien customer support for troubleshooting assistance.
By following these steps and tips, you can enjoy the benefits of your Navien tankless water heater while ensuring its smooth operation and longevity. Remember, proper installation and regular maintenance are key to maximizing the efficiency and reliability of your water heating system.
Frequently Asked Questions For How To Install A Navien Tankless Water Heater
Can I Install A Tankless Water Heater By Myself?
Yes, you can install a tankless water heater by yourself. It is recommended to follow the manufacturer’s instructions, have basic plumbing knowledge, and ensure you have the necessary tools and permits. If you are unsure, it is best to consult a professional for safe installation and to avoid any potential hazards.
How Long Does It Take To Install A Navien Water Heater?
The installation time for a Navien water heater is typically dependent on factors such as existing plumbing, electrical connections, and the complexity of the installation. On average, it can take around 4-6 hours for a professional plumber to install a Navien water heater.
What Size Gas Line Do You Need For A Navien Tankless Water Heater?
For a Navien tankless water heater, the required gas line size depends on the model. It is recommended to consult the manufacturer’s specifications or a qualified professional to determine the appropriate size for your specific model.
Is Navien A Good Tankless Water Heater?
Yes, Navien is a reliable tankless water heater choice. It offers efficient and continuous hot water supply.
Conclusion
Installing a Navien tankless water heater is a relatively straightforward process that can provide homeowners with numerous benefits. By following the step-by-step instructions discussed in this blog post, you can enjoy endless hot water, energy savings, and a more compact and efficient heating system.
Don’t hesitate to make this upgrade to your home, as it can greatly enhance your comfort and convenience. Start enjoying the benefits of a Navien tankless water heater today!