Installing a mini split system yourself is a straightforward process that can be accomplished with basic tools and some technical knowledge. With proper guidance and attention to detail, you can successfully complete this task and enjoy the benefits of a comfortable environment in your home or office.
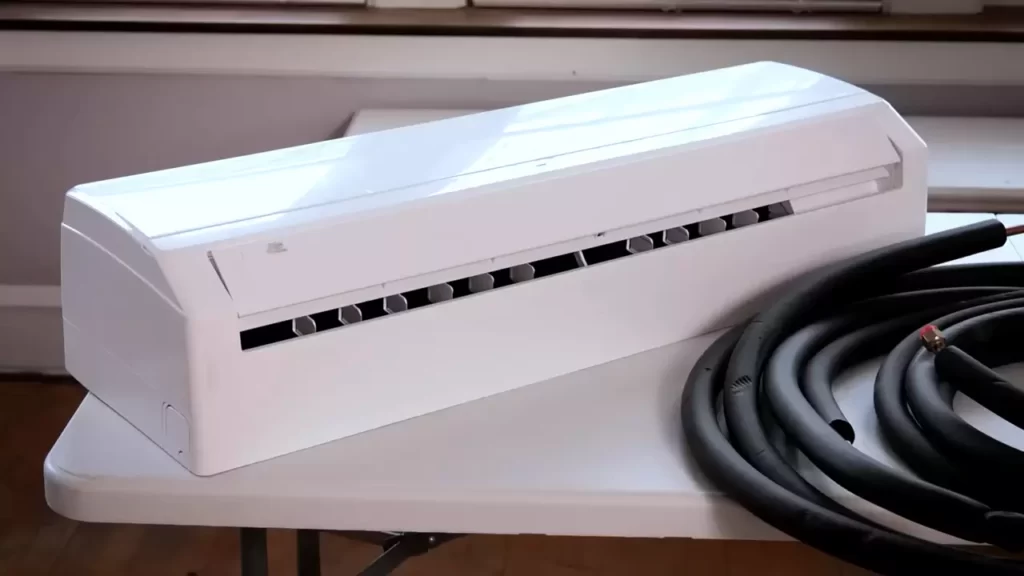
A mini split system, also known as a ductless heat pump or air conditioner, is a versatile and efficient cooling and heating solution. It consists of two main components: an indoor unit and an outdoor unit. The indoor unit is mounted on a wall or ceiling, while the outdoor unit is placed outside the building.
These two units are connected through refrigerant lines and electrical wiring. We will provide a step-by-step guide on how to install a mini split system yourself. By following these instructions, you can save money on professional installation and learn a valuable DIY skill. Before we get started, it is important to note that the exact installation process may vary depending on the mini split system model and manufacturer. Be sure to consult the manufacturer’s installation guide for specific instructions pertaining to your unit.
Benefits Of Installing A Mini Split System Yourself
Are you considering installing a mini split system in your home or office? While hiring a professional to do the job may seem like the easiest option, there are several benefits to taking on the installation yourself. Not only can you save on installation costs, but you also have greater control over the entire process. Additionally, by installing the mini split system yourself, you can customize it to your specific needs, ensuring maximum comfort and efficiency. Let’s explore these benefits in more detail:
Lower installation cost
Hiring a professional to install a mini split system can be quite costly. By opting to do it yourself, you can cut down on expenses significantly. Not only will you save on labor costs, but you will also eliminate the need to pay for any additional services that may be included in a professional installation package. The money you save can then be allocated to other home improvement projects or used to upgrade the quality of the mini split system itself.
Greater control over the installation process
Installing a mini split system yourself gives you complete control over every aspect of the installation process. You can choose the location for the indoor and outdoor units, ensuring they are placed exactly where you want them. You can also determine the routing of the refrigerant lines and electrical connections, ensuring optimal performance and aesthetics. With this level of control, you can tailor the installation to suit your specific preferences, resulting in a mini split system that perfectly complements your property.
Ability to customize the system to your specific needs
When it comes to heating and cooling, everyone’s needs are different. By taking on the installation yourself, you have the freedom to customize the mini split system to meet your specific requirements. Whether you need more cooling power in certain areas or prefer to prioritize energy efficiency, you can fine-tune the system to ensure it operates exactly the way you want it to. From selecting the ideal capacity to adjusting settings and controls, the ability to customize the system guarantees maximum comfort and satisfaction.
In conclusion, installing a mini split system yourself offers several advantages. Not only does it help you save on installation costs, but it also allows for greater control over the entire process and the ability to customize the system to your specific needs. So why not take on the challenge and enjoy the benefits of a DIY mini split system installation?
Choosing The Right Mini Split System For Your Space
Installing a mini split system can be a cost-effective and efficient way to cool and heat your space. However, with so many options available in the market, it can be overwhelming to choose the right one for your needs. In this section, we will guide you through the process of selecting a mini split system that is tailored to your space.
Assessing the cooling and heating needs of your space
Before you dive into the world of mini split systems, it is crucial to determine the cooling and heating needs of your space. You should consider factors such as the square footage, the number of rooms, and the insulation level of your space. This will help you determine the appropriate size and capacity of the mini split system you require. Oversized or undersized units can lead to inefficiency and additional costs in the long run. So, it is essential to accurately assess the cooling and heating requirements of your space to make an informed decision.
Understanding the different types of mini split systems available
Mini split systems come in various configurations to suit different needs. Two main types of mini split systems to consider are single-zone and multi-zone systems. A single-zone system is designed to cool or heat a single room or area, whereas a multi-zone system allows you to control multiple indoor units from a single outdoor unit. Understanding the difference between these types will help you determine which system is the right fit for your space.

Researching and comparing brands and models
Once you have assessed your cooling and heating needs and understood the different types of mini split systems available, it’s time to research and compare brands and models. Look for reputable manufacturers that have a track record of producing high-quality mini split systems. Consider factors such as energy efficiency ratings, warranty coverage, noise levels, and additional features like Wi-Fi connectivity or smart thermostats. Reading reviews from customers and industry professionals can also provide valuable insights into the reliability and performance of different brands and models.
To make your research more manageable, create a comparison table that includes the features and specifications of each mini split system you are considering. This will allow you to visually compare and evaluate the options and make an informed decision based on your specific requirements.
By taking the time to assess the cooling and heating needs of your space, understanding the different types of mini split systems available, and researching and comparing brands and models, you can ensure that you choose the right mini split system that will provide optimal comfort and energy efficiency for your space.
Gathering The Necessary Tools And Materials
Before you plunge into the process of installing a mini split system on your own, it’s crucial to gather all the necessary tools and materials. This will ensure a smooth installation process and prevent any delays or frustrations along the way. Let’s walk through the steps of creating a checklist of required tools and materials, purchasing the necessary equipment, and ensuring all safety equipment is on hand.
Creating a checklist of required tools and materials
The first step in gathering the necessary tools and materials is to create a checklist. This will help you stay organized and ensure you have everything you need before you begin the installation process. Here is a breakdown of the tools and materials you will need:
| Tools | Materials |
|---|---|
| – Screwdriver set | – Mini split system unit |
| – Drill | – Mounting bracket |
| – Pliers | – Refrigerant lines |
| – Level | – Condensate drain tube |
| – Tape measure | – Insulated copper tubing |
| – Pipe cutter | – Electrical wiring |
| – Hole saw | – Power supply |
Purchasing the necessary equipment
Once you have your checklist ready, it’s time to purchase the necessary equipment. There are several options to consider when purchasing a mini split system, including different brands, sizes, and features. It’s recommended to do some research and consult with a professional to ensure you choose the right system for your needs. Don’t forget to check the specifications to confirm that the unit will work with your electrical supply and space requirements.
Besides the mini split system unit itself, you will also need to purchase additional equipment such as a mounting bracket, refrigerant lines, condensate drain tube, insulated copper tubing, and electrical wiring. Make sure to double-check the lengths and sizes of these items to ensure they are compatible with your setup.
Ensuring all safety equipment is on hand
Safety should always be a top priority when performing any DIY project. Before beginning the installation, ensure that you have all the necessary safety equipment on hand. This may include gloves, safety glasses, a face mask, and even a fire extinguisher. While the installation process is not inherently dangerous, it’s always better to be prepared for any unforeseen circumstances.
By gathering all the necessary tools and materials, you set yourself up for a successful installation. With your checklist in hand and the equipment purchased, you are one step closer to enjoying the comfort and convenience of a mini split system in your home.
Preparing Your Space For Installation
Measuring the area for proper unit placement
Before you begin installing your mini split system, it’s essential to measure the space where you plan to place the unit. Accurate measurements will ensure that the installation goes smoothly and that the unit is placed in the most optimal location for efficient cooling and heating.
When measuring the area, be sure to take into account any obstructions that may hinder the airflow, such as furniture or curtains. Measure the length, width, and height of the space, and record these dimensions for reference during the installation process.
Clearing the space of any obstacles or debris
Clearing the area where your mini split system will be installed is crucial for proper operation and longevity of the unit. Remove any furniture, decorations, or other items that may obstruct the unit or impede the airflow. Additionally, clear away any debris, such as dust, dirt, or cobwebs, that may have accumulated in the installation area.
By creating a clean and obstacle-free space, you ensure that your mini split system can function optimally and provide you with the level of comfort you desire.
Ensuring proper electrical and structural requirements are met
Proper electrical and structural requirements are key to the successful installation and functioning of your mini split system. It’s imperative to adhere to these requirements to guarantee safety and efficient operation.
First, make sure your electrical system can accommodate the additional power demand of the mini split system. Consult a licensed electrician if necessary to ensure that the wiring and circuit breaker are appropriate for the unit.
Secondly, assess the structural integrity of the installation area. Ensure that the wall or ceiling is sturdy enough to support the weight of the unit. You may need to reinforce the mounting surface if needed.
Remember, following the proper electrical and structural requirements is essential for the longevity and safety of your mini split system.
Installing The Indoor Unit
As you embark on the journey of installing a mini split system yourself, it is essential to understand the various steps involved. One of the critical aspects is installing the indoor unit, which will determine the effectiveness and efficiency of your cooling and heating system. In this section, we will guide you through the process, starting with determining the optimal location for the indoor unit.
Determining the optimal location for the indoor unit
Before you begin the installation process, carefully consider where to place the indoor unit. Ideally, it should be located in a central area of the room where the conditioned air can evenly distribute throughout the space. Keep in mind that the unit should be mounted at least eight feet away from the floor and away from direct sunlight or heat sources to avoid any interference with its performance.
Installing the mounting bracket
Once you have determined the perfect location, it’s time to install the mounting bracket. The bracket serves as the foundation for your indoor unit, so it is crucial to make sure it is securely attached to the wall. Follow these simple steps:
- Identify the desired height for the unit and mark the position for the bracket on the wall.
- Using a drill and the appropriate screws, secure the bracket onto the wall.
- Ensure that the bracket is level and firmly attached before proceeding.
By properly installing the mounting bracket, you will provide a stable base for your indoor unit, ensuring its longevity and performance.
Connecting the electrical wires
With the mounting bracket securely in place, it is now time to connect the electrical wires for your indoor unit. This step requires caution and attention to detail to guarantee the safety and functionality of your mini-split system. Follow these steps:
- Turn off the power supply before working with any electrical connections.
- Strip the wires and match the colors between the unit’s wiring and the corresponding wires in the electrical box.
- Securely connect the wires using wire nuts, ensuring a tight fit.
- Finally, cover the connections with electrical tape for added protection and to prevent any accidental disconnections.
Remember, safety should be your top priority when dealing with electrical connections. If you are unsure about any step, it is always recommended to consult with a licensed professional.
By following these instructions, you have successfully installed the indoor unit of your mini-split system. The next step involves installing the outdoor unit, which we will cover in detail in the upcoming section.
Installing The Outdoor Unit
Selecting the best location for the outdoor unit placement
Choosing the right location for your mini split outdoor unit is crucial for optimal performance and longevity. Here are a few factors to consider:
- Proximity to the indoor unit: Place the outdoor unit as close as possible to the indoor unit to minimize refrigerant line length and energy loss.
- Accessibility: Ensure easy accessibility for maintenance and repairs. It should have at least 2 feet of clearance around all sides.
- Adequate airflow: Choose an area that allows for proper airflow and ventilation. Avoid obstructed areas or spaces surrounded by tall vegetation.
- Avoidance of direct sunlight and extreme weather: Protect the outdoor unit from direct sunlight and harsh weather conditions by placing it in a shaded area or using a protective cover.
Mounting the outdoor unit on a secure surface
Once you have selected the ideal location for your outdoor unit, it’s time to mount it securely. Follow these steps:
- Prepare a suitable base: Ensure that the surface where the outdoor unit will be mounted is stable, level, and capable of supporting the weight. A concrete pad or a sturdy metal frame can serve as a reliable base.
- Position the outdoor unit: Carefully place the outdoor unit on the prepared base, ensuring that it is centered and securely positioned.
- Secure the unit: Use appropriate screws or brackets to attach the outdoor unit to the base, ensuring stability and preventing movement or vibration.
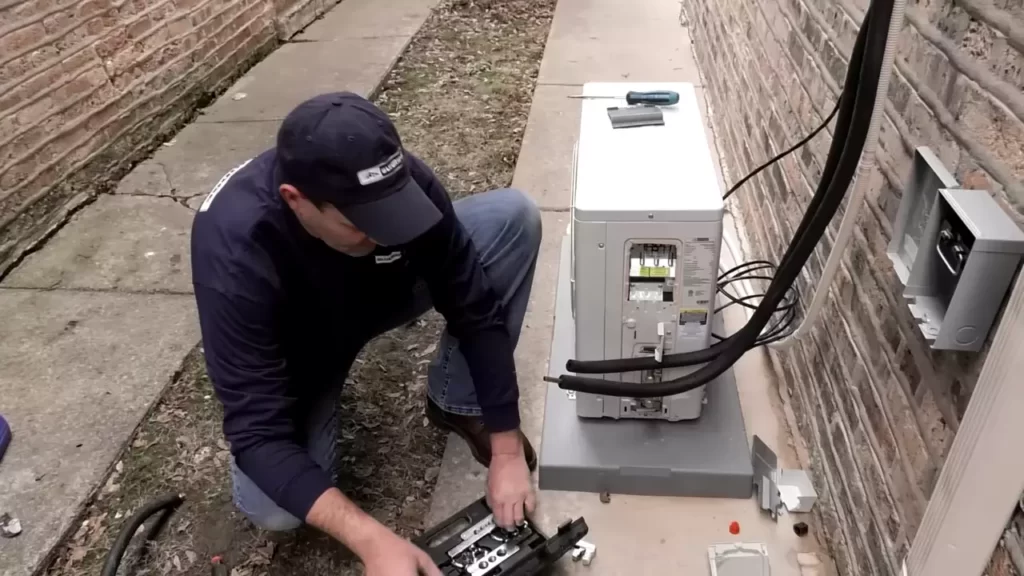
Connecting the refrigerant lines and electrical wiring
After securely mounting the outdoor unit, it’s time to make the necessary connections for refrigerant lines and electrical wiring. Here’s how:
- Refrigerant lines: Connect the refrigerant lines by carefully threading them through the designated holes in the wall and into the indoor unit. Ensure a proper seal by using high-quality insulation on the lines.
- Electrical wiring: Connect the electrical wires from the outdoor unit to the corresponding wires in the indoor unit. Make sure to follow the manufacturer’s instructions and adhere to local electrical codes.
- Testing: Before closing up the connections, test the mini split system to ensure that both the refrigerant lines and electrical wiring are functioning properly. Check for any leaks, unusual noises, or problems with the electrical supply.
By following these installation steps, you can easily install the outdoor unit of your mini split system and enjoy the benefits of efficient cooling or heating in your space. Remember to consult the manufacturer’s instructions for specific details and always prioritize safety throughout the installation process.
Connecting The Indoor And Outdoor Units
One crucial step in installing a mini split system is connecting the indoor and outdoor units. This step involves routing and connecting the refrigerant lines, securing and insulating the lines, and connecting the electrical wiring. By following these steps correctly, you can ensure that your mini split system functions efficiently and effectively.
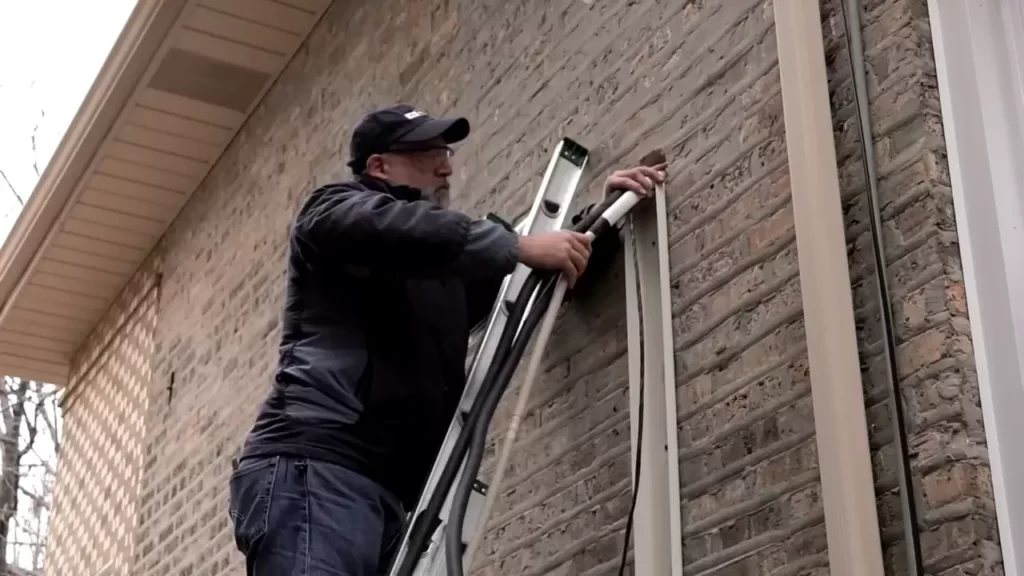
Routing and connecting the refrigerant lines
Firstly, you’ll need to carefully route the refrigerant lines from the outdoor unit to the indoor unit. These lines are responsible for transporting the refrigerant, which is essential for cooling or heating your space. To ensure optimal performance, it’s vital that the refrigerant lines are correctly connected. Here’s a breakdown of the process:
| Step | Description |
|---|---|
| 1 | Determine the best route for the lines, considering the shortest and most efficient path. |
| 2 | Drill a hole through the wall for the refrigerant lines to pass through. Make sure the hole is appropriately sized to prevent air leakage. |
| 3 | Connect the lines to the indoor unit’s refrigerant ports, ensuring a secure and leak-free connection. Use appropriate fittings and flares. |
| 4 | Properly insulate and secure the refrigerant lines to prevent energy loss and vibrations. |
Securing and insulating the lines
Securing and insulating the refrigerant lines is essential to maintain the efficiency and longevity of your mini split system. Here’s how you can accomplish this:
- Use mounting brackets or clamps to secure the refrigerant lines. This helps prevent excessive movement and vibrations.
- Insulate the lines using foam insulation tape or tubes. This insulation layer minimizes heat transfer and energy loss, improving the system’s efficiency.
- Inspect the connections and ensure there are no leaks. Apply duct tape or sealant if necessary to seal any gaps or openings.
Connecting the electrical wiring
Connecting the electrical wiring is a crucial part of the installation process. It’s important to exercise caution and follow local electrical codes. Here’s a step-by-step guide:
- Turn off the power supply to the unit before starting any electrical work.
- Connect the wiring from the outdoor unit to the indoor unit. Match the corresponding wires, ensuring a secure connection.
- If required, connect the wiring to the thermostat according to the manufacturer’s instructions.
- Double-check all electrical connections to ensure they are properly tightened and insulated.
- Turn on the power supply and test the mini split system to ensure it is operating correctly.
By following these steps, you can successfully connect the indoor and outdoor units of your mini split system, allowing it to deliver efficient heating and cooling to your space.
Testing And Troubleshooting
Once you have successfully installed your mini split system, it’s important to thoroughly test and troubleshoot the system to ensure it is functioning properly. This will help you identify any potential issues and make any necessary adjustments before using the system. In this section, we will guide you through checking for leaks or abnormal sounds, conducting a thorough system test, and troubleshooting common installation issues.
Checking for any leaks or abnormal sounds
One of the first things you should do after installing a mini split system is to check for any leaks or abnormal sounds. Leaks can lead to a loss of refrigerant and reduce the system’s efficiency. Abnormal sounds may indicate a mechanical issue that needs to be addressed. To check for leaks, follow these steps:
- Inspect the refrigerant lines and connections for any signs of oil or refrigerant leakage. Look for oil stains or wet spots around the connections.
- If you suspect a leak, you can use a soap solution to help identify it. Mix some dish soap with water and apply the solution to the connections. If you see bubbles forming, it indicates a leak.
- If you notice any leaks, you should tighten the connections or replace any faulty parts as necessary.
When it comes to abnormal sounds, listen for hissing or gurgling noises, which may indicate a refrigerant leak. Grinding or squealing noises may suggest a problem with the system’s motor or fan. If you hear any abnormal sounds, you should consult the user manual or contact a professional to properly diagnose and fix the issue.
Conducting a thorough system test
After checking for leaks and abnormal sounds, it’s time to conduct a thorough system test. This involves ensuring all components and functions of the mini split system are working correctly. Follow these steps to conduct the test:
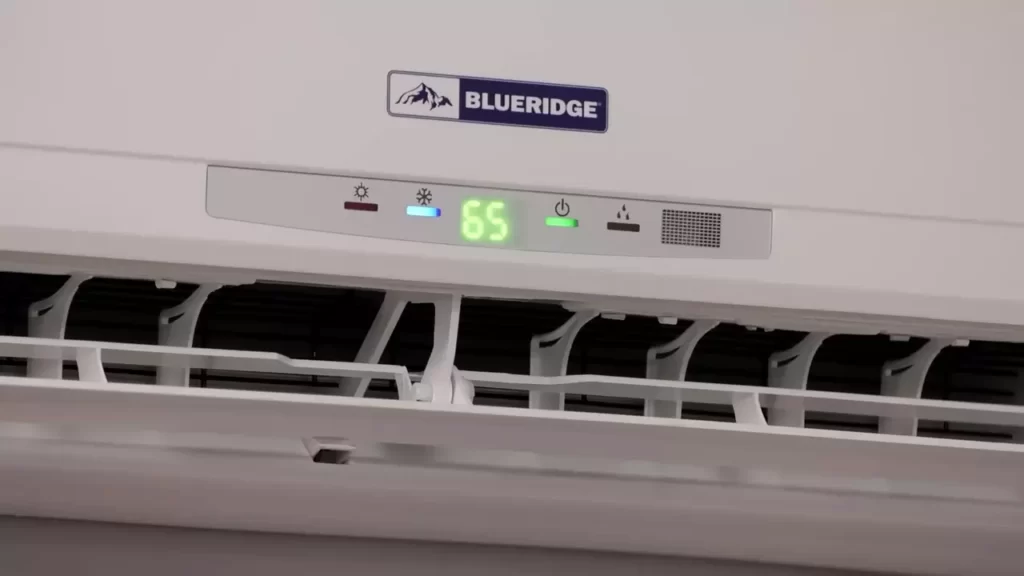
- Turn on the power to the unit and ensure the thermostat is set to the desired temperature.
- Wait a few minutes for the system to start up and begin cooling or heating.
- Check that the air is flowing properly from the indoor unit and that it reaches the desired temperature.
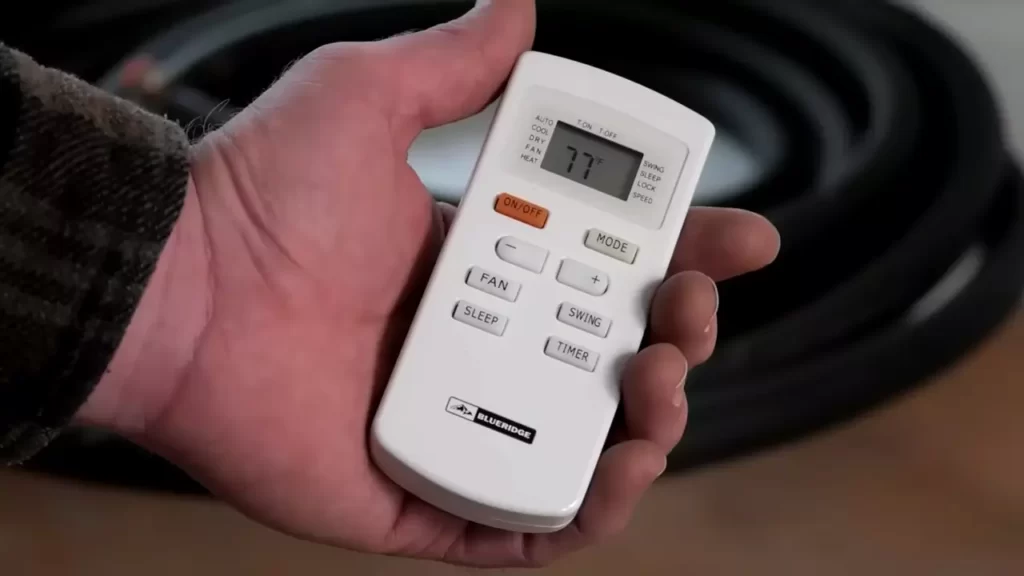
- Test the remote control to ensure it operates all the necessary functions, such as adjusting the temperature, fan speed, and mode.
- Make sure the outdoor unit is running smoothly and not making any unusual noises.
- If you notice any issues during the system test, refer to the user manual for troubleshooting steps or contact a professional for assistance.
Troubleshooting common installation issues
During the installation process, you may encounter some common issues that can be easily resolved. Here are a few troubleshooting tips:
| Issue | Possible Solution |
|---|---|
| No power to the unit | Check the power source and ensure it is properly connected. Also, check the circuit breaker to see if it has tripped. |
| Inadequate cooling or heating | Check if the air filters are clean and not clogged with dust or debris. Also, ensure that the thermostat is set correctly. |
| Uneven cooling or heating | If some areas of the room are not receiving proper airflow, check if the air vents are open and not blocked by furniture or other obstructions. |
| System not cycling properly | Ensure that the thermostat is set to the desired temperature and the system is not in a different mode, such as fan-only mode. |
Keep in mind that these troubleshooting tips are general suggestions, and it’s always a good idea to consult the user manual or seek the assistance of a professional if you encounter any issues that you are unsure how to resolve.
By thoroughly testing and troubleshooting your mini split system, you can ensure its efficiency and functionality for years to come. Make it a priority to regularly maintain and service your system to maximize its lifespan and performance.
Maintaining Your Mini Split System
Regularly cleaning and inspecting the unit
One of the key aspects of maintaining your mini split system is to regularly clean and inspect the unit. This helps to ensure that the system is running efficiently and effectively, keeping your space comfortable all year round. Dust, dirt, and debris can accumulate on the unit over time, both on the inside and outside. By cleaning the unit regularly, you can prevent these particles from clogging the filters and inhibiting the system’s performance.
To clean the unit, start by turning off the power supply for safety purposes. Remove the front panel of the indoor unit and carefully clean the air filters. These filters can easily accumulate dirt and dust, so cleaning them regularly is important. You can use a soft brush or a vacuum cleaner to remove any debris from the filters. Check the manufacturer’s instructions for specific cleaning recommendations.
Another important step in maintaining your mini split system is to inspect the unit for any signs of wear or damage. Look for loose connections, leaks, or any visible signs of malfunction. Pay attention to the outdoor unit as well, checking for any obstructions such as tree branches or leaves that may be blocking the airflow. Cleaning and inspecting the unit regularly not only promotes better performance but also helps to prolong the lifespan of your mini split system.
Routine filter replacement
In addition to regularly cleaning the air filters, it is crucial to replace them on a routine basis. Air filters play a vital role in maintaining good indoor air quality by trapping dust, pollen, and other particles. Over time, these filters become clogged and less effective in capturing airborne contaminants. This can lead to reduced airflow and strain on the system, causing it to work harder and consume more energy.
Refer to the manufacturer’s guidelines for the recommended filter replacement frequency. In general, it is best to replace the filters every three to six months, or more frequently if you have pets or if the air quality in your area is poor. Routine filter replacement helps to keep the system running smoothly, improves energy efficiency, and ensures that the air circulating in your space remains clean and healthy.
Scheduling professional maintenance as needed
While regular cleaning and filter replacement are essential for maintaining your mini split system, there are aspects that may require professional attention. It is recommended to schedule professional maintenance as needed to address any complex issues or specialized tasks.
Professional maintenance involves a comprehensive inspection of the system, including the electrical components, refrigerant levels, and overall performance. By hiring a qualified technician, you can ensure that any potential problems are identified and resolved promptly, preventing major breakdowns and costly repairs. Professional maintenance also helps to optimize the system’s efficiency, saving you money on energy bills in the long run.
In conclusion, maintaining your mini split system is crucial for its longevity and performance. Regularly cleaning and inspecting the unit, routine filter replacement, and scheduling professional maintenance as needed are key steps to ensure that your mini split system operates at its best. By following these maintenance practices, you can enjoy the comforts of an efficient and reliable cooling and heating system for years to come.
Frequently Asked Questions On How To Install A Mini Split System Yourself
Can I Install A Mini Split By Myself?
It is not recommended to install a mini split by yourself. Professional installation is crucial for proper functioning and to avoid any potential safety hazards.
How To Install Mini Split Step By Step?
To install a mini split, follow these steps: 1. Choose a suitable location for indoor and outdoor units. 2. Install the mounting bracket for the indoor unit on the wall. 3. Connect the indoor and outdoor units with refrigerant lines. 4.
Drill a hole in the wall for the lines and electrical wiring. 5. Finally, connect the electrical wiring and test the system for proper functioning.
Does A Mini Split Need Its Own Breaker?
Yes, a mini split needs its own breaker. This is because it requires a dedicated electrical circuit to operate effectively.
How Long Does It Take To Install A Diy Mini Split?
Installing a DIY mini split typically takes around 4-8 hours, depending on your experience and the complexity of the project.
Conclusion
Installing a mini split system on your own may seem daunting, but with the right knowledge and steps, it’s entirely manageable. From understanding the requirements to proper installation techniques, this guide has equipped you with the necessary information. By following these steps, you can save money and enjoy the benefits of a comfortable and efficient cooling system.
So, why wait? Roll up your sleeves and start installing your mini split system today!