To install a mantle, begin by positioning the mounting bracket on the wall. Attach the bracket securely using screws and then place the mantle on top, securing it to the bracket with bolts or screws.
Welcome to our guide on how to install a mantle! A mantle can be a beautiful addition to any fireplace, providing a focal point and a place to showcase decor. Installing a mantle is a straightforward process that can be completed with just a few tools and some basic DIY skills.
In this guide, we will walk you through the steps to install a mantle in your home. From positioning the mounting bracket to securing the mantle in place, we’ll cover everything you need to know to ensure a successful installation. So let’s get started and transform your fireplace with a stunning mantle!
Planning Your Mantle Installation
Determining the Best Location for Your Mantle
Before you begin the installation process, it is crucial to determine the best location for your mantle. This decision will greatly impact the overall aesthetics and functionality of your space. To choose the perfect spot, consider the following:
- Identify the focal point: Your mantle should be placed in a location that enhances the focal point of the room. This may be a fireplace, a large window, or even a piece of artwork. By positioning your mantle in alignment with the focal point, you create a harmonious and visually appealing space.
- Consider the layout: Take the room layout into account while selecting the installation location. Make sure the mantle does not obstruct any doorways or windows and allows for comfortable movement within the space.
- Evaluate the wall space: Examine the available wall space and identify an area that can accommodate the size and style of your desired mantle. Keep in mind the height and width of the mantle, ensuring it fits proportionally on the wall.
Choosing the Appropriate Size and Style for Your Mantle
The size and style of your mantle are essential in creating a cohesive and visually appealing design. To make the right choices, follow these guidelines:
- Consider the room dimensions: Assess the size of the room to determine the appropriate dimensions for your mantle. A small room might benefit from a sleek, compact mantle, while a larger space can accommodate a grander design.
- Match the existing decor: Choose a mantle style that complements the existing decor of your room. Whether your space follows a traditional, modern, or rustic theme, select a mantle that harmonizes with the overall aesthetic.
- Take ceiling height into account: The height of your ceiling can influence the style and proportions of your mantle. High ceilings can handle tall and elaborate designs, while low ceilings may require a more understated and compact option.
- Personalize with materials: Consider the materials used in the construction of your mantle. Wood mantles bring warmth and natural elegance, while stone or marble mantles exude a sense of luxury and sophistication. Choose the material that aligns with your personal taste and the style of your room.
Gathering the Necessary Tools and Materials
Before you dive into the installation process, gather all the essential tools and materials. Having everything ready ensures a smooth and efficient installation. Here are the items you’ll need:
| Tools | Materials |
|---|---|
| Measuring tape | Mantle kit or pre-cut mantlepieces |
| Level | Construction adhesive |
| Pencil | L-brackets or mounting hardware |
| Electric drill | Screws |
| Saw | Drywall anchors |
| Safety goggles | Painter’s tape |
| Protective gloves |
Once you have all the necessary tools and materials, you’ll be well-equipped to begin your mantle installation.
Preparing For Installation
Before you start installing a mantle, it is crucial to properly prepare the area and workspace. This will ensure a smooth and successful installation process. In this section, we will walk you through the essential steps to clear the area, measure and mark the correct placement for the mantle, and prepare the wall for installation.
Clearing the area and ensuring a clean workspace
Before you begin installing your mantle, it is essential to clear the area and ensure a clean and clutter-free workspace. These steps will not only help you avoid any accidents but also make the installation process easier and more efficient. Here’s what you need to do:
- Remove any furniture, decorations, or objects that may obstruct your workspace.
- Clear the area of any debris, dust, or other materials that may interfere with the installation.
- Ensure there is adequate lighting in the workspace to see clearly and avoid any mishaps.
- Wear appropriate safety gear, such as gloves and goggles, to protect yourself during the installation process.

Measuring and marking the correct placement for the mantle
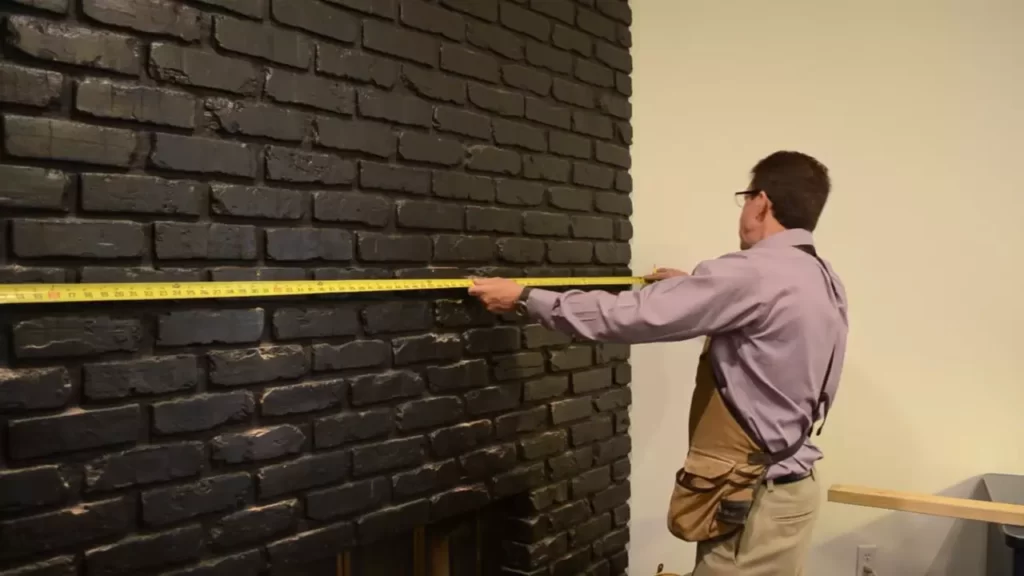
Accurate measurements and proper marking are crucial when installing a mantle to ensure it is centered and properly aligned. Follow these steps to measure and mark the correct placement:
- Measure the width of your fireplace or the area where you intend to install the mantle.
- Mark the center point of the fireplace or the desired placement for the mantle using a pencil or painter’s tape.
- Use a level to ensure the mark is straight and adjust if necessary.
- Measure and mark the desired height for the mantle, considering the overall aesthetics and practicality.
- Double-check your measurements and marks to ensure accuracy before proceeding to the next step.
Preparing the wall for installation
Before installing the mantle, it is essential to prepare the wall to provide a sturdy and secure foundation. Follow these steps to prepare the wall for installation:
- Inspect the wall for any damages, cracks, or uneven surfaces. If necessary, repair and smoothen the wall before proceeding.
- Locate the wall studs using a stud finder or by tapping the wall. Mark the stud locations to ensure you can anchor the mantle securely.
- Consider using a mounting board or cleats to provide additional support and stability for the mantle.
- Ensure you have the necessary tools and hardware to attach the mantle securely to the wall, such as brackets or screws.
By following these steps and properly preparing for the installation, you can ensure a successful and hassle-free installation of your mantle. It’s time to move on to the next step and learn how to install the mantle itself.
Installing The Mantle
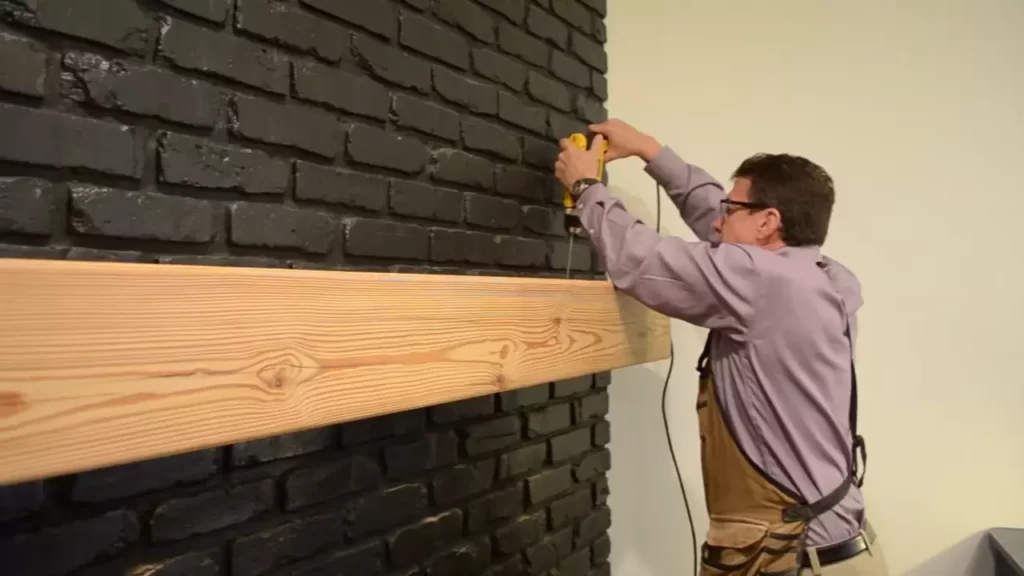
Attaching the mounting board to the wall
Before you can install your mantle, you’ll need to attach a mounting board to the wall. The mounting board provides a secure base for the mantle and ensures it stays in place. To attach the mounting board, follow these steps:
- Measure and mark the desired height for your mantle on the wall.
- Using a level, draw a straight line across the wall at the marked height. This will serve as a guide for attaching the mounting board.
- Position the mounting board against the wall, aligning it with the marked line.
- Using a drill, drive screws through the mounting board and into the wall studs. Make sure the screws are long enough to securely anchor the board to the wall.
- Check that the mounting board is level and firmly attached to the wall.
Securing the mantle to the mounting board
Once the mounting board is in place, you’re ready to securely attach your mantle. Follow these steps to ensure a stable installation:
- Place the mantle on top of the mounting board, aligning it with the wall.
- Using a drill, drive screws through the top of the mantle and into the mounting board. Make sure the screws are long enough to provide a secure attachment.
- Check that the mantle is level and properly secured to the mounting board.
- Give the mantle a gentle tug to ensure it is firmly in place.
Adding additional support for heavier mantles
If your mantle is on the heavier side, it’s important to provide extra support to prevent any sagging or potential damage. Follow these steps to add additional support:
- Identify the points on the mantle where you want to add support.
- Using a stud finder, locate the wall studs behind the mounting board.
- Measure and mark the stud locations on the mounting board.
- Install L-brackets or angle brackets at the marked stud locations, securing them to both the mounting board and the wall studs.
- Ensure the brackets are securely fastened and provide enough support for the weight of the mantle.
With the mounting board securely attached, the mantle properly fastened, and additional support added when necessary, your mantle installation is complete. Enjoy the enhanced beauty and functionality that a mantle can bring to your space!
Finishing Touches
Once you have successfully installed your mantle, it’s time to add those final details that will truly make it shine. The finishing touches not only enhance the overall look of your mantle but also help create a cohesive and inviting space. In this section, we will discuss filling any gaps or holes around the mantle, painting or staining the mantle to your desired finish, and styling and decorating the mantle.
Filling any gaps or holes around the mantle
Before you can begin painting or staining your mantle, it’s important to ensure a smooth and seamless surface. Check for any gaps or holes between the wall and the mantle that may need to be filled in. This will help create a polished look and prevent any dust or debris from accumulating in those spaces.
To fill any small gaps or cracks, you can use a quality wood filler that matches the color of your mantle. Apply the filler into the gaps using a putty knife, making sure to tightly pack it in for a seamless finish. Allow the filler to dry completely according to the manufacturer’s instructions before moving on to the next step.
Painting or staining the mantle to your desired finish
Once you have filled in any gaps or holes, it’s time to add the desired finish to your mantle. Whether you prefer a classic painted look or a natural stained appearance, choosing the right finish can enhance the overall aesthetics of your space.
If you opt for painting your mantle, make sure to choose a high-quality paint designed specifically for wood surfaces. Start by applying a primer to create a smooth base and improve the durability of your paint. Once the primer has dried, apply your chosen color using a brush or a roller, going with the wood grain for a professional finish. Apply multiple coats if necessary, allowing each coat to dry before applying the next.
Staining your mantle gives it a natural look that showcases the beauty of the wood grain. Begin by using a wood conditioner to prepare the surface for staining. Apply the conditioner evenly with a brush, following the manufacturer’s instructions. After the wood conditioner has dried, apply the stain using a brush or a rag, again following the wood grain. Allow the stain to penetrate the wood for the recommended amount of time before wiping off any excess.
Styling and decorating the mantle
Now that your mantle is beautifully finished, it’s time to put the spotlight on its decorative aspects. Styling and decorating your mantle can help create a focal point in your living space and reflect your personal style.
Some ideas for styling your mantle include:
- Balance: Place larger items in the center and gradually scale down the size on either side to create a visually pleasing balance.
- Layers: Add depth by layering objects, such as placing a mirror or artwork at the back and leaning smaller decorative items against it.
- Natural Elements: Incorporate natural elements like fresh flowers, plants, or greenery to bring life and vibrancy to your mantle.
- Atmospheric Lighting: Install ambient lighting fixtures like candle holders or string lights to create a cozy and inviting atmosphere.
- Seasonal Display: Change up your mantle’s decor with the seasons, incorporating seasonal colors, ornaments, or themed decorations.
Remember, the key to a well-styled mantle is to be creative and showcase items that hold meaning or represent your unique style. Experiment with different arrangements and don’t be afraid to switch things up from time to time to keep your mantle looking fresh and inspiring.
Frequently Asked Questions For How To Install A Mantle
How Are Fireplace Mantels Attached?
Fireplace mantels are typically attached using brackets, screws, or mantel straps. These attachments secure the mantel to the wall, providing stability and support. Brackets are mounted directly onto the wall and the mantel is placed on top, while screws are drilled through the mantel and into the wall studs.
Mantel straps wrap around the mantel and are secured to the wall for added reinforcement.
How Far Should A Mantle Stick Out From The Wall?
The ideal distance for a mantle to stick out from the wall is generally around 4 to 8 inches.
How Far Should A Mantle Be From The Hearth?
A mantle should be at least 12 inches away from the hearth for safety and heat protection.
How Is A Mantle Attached To A Stone Fireplace?
The mantle is attached to the stone fireplace using brackets or corbels.
Conclusion
Installing a mantle can instantly transform the look and feel of your living space. By following these step-by-step instructions, you can successfully install a mantle and add a touch of elegance to your fireplace. Remember to measure accurately, use the right tools, and secure the mantle properly.
With the proper guidance, you can create a stunning focal point that will enhance your home’s ambiance and charm. Get started on your mantle installation today and enjoy the cozy, inviting atmosphere it provides.