To install a humidifier, start by choosing a suitable location and ensuring all connections are secure and properly sealed. Fill the water tank, plug in the humidifier, and adjust the settings as desired.
Do you struggle with dry air in your home or office? Installing a humidifier can help alleviate dryness, improve air quality, and enhance your overall well-being. But how do you go about installing a humidifier? We will provide you with a step-by-step guide on how to install a humidifier quickly and efficiently.
From choosing the right location to setting up and adjusting the settings, we’ve got you covered. So, let’s dive into the process of installing a humidifier and start enjoying the benefits of optimal humidity levels in your living or working space.
Understanding The Benefits Of A Humidifier
Installing a humidifier in your home can have a variety of benefits that not only improve your overall comfort but also enhance your health. Whether you live in a dry climate or are looking to combat the effects of heating systems during the winter months, a humidifier can provide much-needed relief. In this section, we will explore the key benefits of using a humidifier in your living space.
Improving Air Quality
A humidifier plays a vital role in improving the air quality within your home. By adding moisture to the air, it can help alleviate symptoms of dryness, such as dry throat, dry eyes, and dry skin. The increased humidity levels create a more comfortable environment, making it easier to breathe and reducing the risk of respiratory issues.
Moreover, a humidifier can also help in managing allergy and asthma symptoms. Dry air can exacerbate these conditions and cause discomfort for those affected. By maintaining an optimal level of humidity, you can potentially reduce the frequency and severity of allergy and asthma attacks.
Relieving Dry Skin and Respiratory Conditions
Dry, itchy skin can be a common annoyance, especially during colder months when the air is typically drier. Humidifiers can provide relief by replenishing moisture into the air, thus ensuring your skin remains hydrated and supple. In addition to reducing dryness, a humidifier can also alleviate symptoms of respiratory conditions such as coughing, congestion, and sinusitis.
By keeping the respiratory system moist, a humidifier can help soothe irritated airways and prevent the discomfort often associated with colds, flu, and allergies. It can also aid in reducing the severity and duration of respiratory illnesses, allowing for a faster recovery.
Preventing Static Electricity
When indoors, especially during winter or in dry climates, you may have experienced unpleasant encounters with static electricity. Clothes clinging to your body or the occasional zap when you touch a doorknob can be quite bothersome. Static electricity is more prevalent in drier air, as the lack of moisture allows for an easier build-up of electrical charges.
A humidifier helps counteract this issue by adding moisture to the air. This reduces the static charge, making your environment more comfortable and preventing those unwanted shocks. Additionally, the presence of adequate humidity can safeguard sensitive equipment, such as electronics and musical instruments, from potential damage caused by static electricity.
Overall, incorporating a humidifier into your home can have numerous benefits, from improving air quality and relieving dry skin to preventing static electricity. With its ability to enhance comfort and promote better health, installing a humidifier is a worthwhile investment that can make a noticeable difference in your daily life.
Choosing The Right Humidifier For Your Space
Installing a humidifier in your home or office can provide numerous benefits, such as reducing dryness, improving respiratory health, and preventing damage to wooden furniture. However, with so many options available in the market, it’s crucial to choose the right humidifier for your specific space. Consider the following factors to ensure you make an informed decision.
Consider the Size of the Room
The size of the room is an important factor to consider when choosing a humidifier. A humidifier that is too small for the space will not be effective, while one that is too large may cause excessive humidity. To determine the appropriate size, measure the square footage of the room and check the product specifications of potential humidifiers. Be sure to account for any open-concept areas or multiple rooms that may share the same air.

Types of Humidifiers
There are various types of humidifiers available, each with its own unique features and benefits. Understanding the differences between them can help you choose the right one for your needs.
Evaporative Humidifiers
Evaporative humidifiers are a popular choice for many households. These humidifiers use a fan to blow air over a wick or a filter covered with water. As the air passes through the wet wick, moisture is added and then released into the room. Evaporative humidifiers are typically affordable and energy-efficient, making them suitable for larger spaces.
Ultrasonic Humidifiers
Ultrasonic humidifiers use ultrasonic vibrations to produce a fine mist that is expelled into the air. These humidifiers are known for being extremely quiet and are ideal for bedrooms or offices where noise can be disruptive. Additionally, ultrasonic humidifiers do not require filters, making them low-maintenance and cost-effective in the long run.
Warm Mist Humidifiers
Warm mist humidifiers, as the name suggests, emit warm mist into the room by heating the water before dispersing it. This type of humidifier is great for creating a cozy ambiance and generating soothing relief from congestion or cold symptoms. However, it’s important to note that warm mist humidifiers require regular cleaning and may consume more electricity compared to other types.
Factors to Consider When Choosing a Humidifier
Aside from the size of the room and the type of humidifier, there are a few additional factors to consider to ensure you make the right choice:
| Noise Level | Consider whether you need a silent operation, especially if you plan to use the humidifier in a bedroom or an office space. |
|---|---|
| Maintenance | Take into account the cleaning and maintenance requirements of the humidifier. Some models may require regular filter changes or manual cleaning. |
| Budget | Set a budget and compare prices of different humidifiers that meet your requirements. Remember to also consider long-term costs, such as replacement filters or accessories. |
By considering the size of the room, exploring the different types of humidifiers, and evaluating factors such as noise level, maintenance, and budget, you can choose the perfect humidifier that will meet the specific needs of your space. Don’t forget to read reviews and compare features before making your final decision. With the right humidifier in place, you can enjoy the benefits of improved air quality and a more comfortable environment in no time.
Preparing The Humidifier And Required Tools
Installing a humidifier in your home can do wonders for your indoor air quality and overall comfort. Whether you live in a dry climate or simply want to add moisture to your living space, a humidifier is a great solution. However, before you can start enjoying the benefits, you’ll need to prepare the humidifier and gather the necessary tools. In this article, we’ll guide you through this process step by step.
Gathering the Necessary Tools
Before you begin the installation process, it’s important to gather all the tools you’ll need. Having everything ready and easily accessible will make the installation smoother and more efficient. Here’s a list of tools you’ll likely need:
| Tools |
|---|
| Screwdriver set |
| Adjustable wrench |
| Utility knife |
| Tape measure |
| Level |
| Plumbing tape |
| Pliers |
| Bucket or basin |
| Electrical tester |
Reading the Humidifier Manual
Once you’ve gathered your tools, it’s crucial to familiarize yourself with the included humidifier manual. The manual will provide you with detailed instructions specific to your model. It may also contain important safety information and tips to ensure a successful installation. Make sure to read the manual thoroughly and understand all the steps before proceeding.
Checking for Any Pre-Installation Requirements
Before you begin the installation process, it’s essential to check for any pre-installation requirements. These requirements might include ensuring proper electrical wiring, having a sufficient water supply, or making sure the humidifier is compatible with your HVAC system. Consult the humidifier manual or contact the manufacturer if you are unsure about any prerequisites.
By gathering the necessary tools, reading the humidifier manual, and checking for any pre-installation requirements, you’ll be well-prepared to start installing your humidifier. Keep these steps in mind as you move forward with the installation process, and soon enough, you’ll be enjoying the improved air quality and comfort in your home.
Determining The Optimal Location For Your Humidifier
When it comes to installing a humidifier in your home, determining the optimal location is crucial for its effective performance. The right placement ensures that the humidity is evenly distributed across the living space, providing maximum comfort and health benefits. In this section, we will discuss a few key factors to consider when determining the placement of your humidifier.
Analyzing the Floor Plan and Traffic Flow
Analyzing the floor plan and traffic flow of your home is an essential step in determining the optimal location for your humidifier. Take some time to consider the layout of your house and how people move within it. It is important to place the humidifier in an area where the moisture can reach all the rooms effectively.
If you have an open floor plan, placing the humidifier in a central location can help distribute the moisture evenly throughout the entire space. On the other hand, if your home has multiple levels or separate areas with doors, you may need to consider using multiple humidifiers to adequately humidify each zone.
Considering the Possibility of Water Damage
Considering the possibility of water damage is another crucial aspect when determining the optimal location for your humidifier. Humidifiers work by adding moisture to the air, and if not properly placed, they can potentially cause water damage to nearby furniture, walls, or flooring.
To prevent water damage, it is recommended to place the humidifier on a water-resistant surface, such as tiled flooring, or use a drip tray or mat underneath it. Avoid placing the humidifier near electronics, wooden furniture, or sensitive objects that may be sensitive to moisture.
Prioritizing Accessibility and Aesthetics
Prioritizing accessibility and aesthetics is also important when selecting the optimal location for your humidifier. You want to ensure that the humidifier is easily accessible for refilling and maintenance. Consider placing it in a convenient spot where you can easily access the water reservoir and controls.
Additionally, take aesthetics into account. While the primary goal is functionality, it’s also essential to find a location that blends well with your home’s interior design. Opt for a spot that doesn’t disrupt the overall visual appeal of the room.
Installing Humidifier On A Furnace System
Installing a humidifier on your furnace system can greatly improve the air quality in your home, especially during the dry winter months. With the right tools and a little know-how, you can easily add a humidifier to your existing heating system. In this guide, we will walk you through the step-by-step process of installing a humidifier on a furnace system, ensuring that you have a comfortable and healthy indoor environment.
Shutting Off the Power Supply
The first step in installing a humidifier on a furnace system is to shut off the power supply to your HVAC system. This is an important safety measure to prevent any accidents or injuries during the installation process. Locate your circuit breaker panel and turn off the breaker that controls the power supply to your furnace.
Locating the Proper Attachment Point
Once the power supply is turned off, the next step is to locate the proper attachment point for the humidifier. This attachment point is typically found on the supply side of the furnace ductwork, near the return air duct. Check your humidifier’s installation instructions for the exact location and measurements.
Connecting the Humidifier to the Water Supply
Before attaching the humidifier to the furnace ductwork, you need to connect it to the water supply. This can be done by tapping into an existing water line, such as the one that supplies water to your sink or refrigerator. Shut off the water supply and carefully cut into the pipe using a pipe cutter. Attach a T-fitting to the cut section of the pipe and connect the water supply hose from the humidifier to the T-fitting.
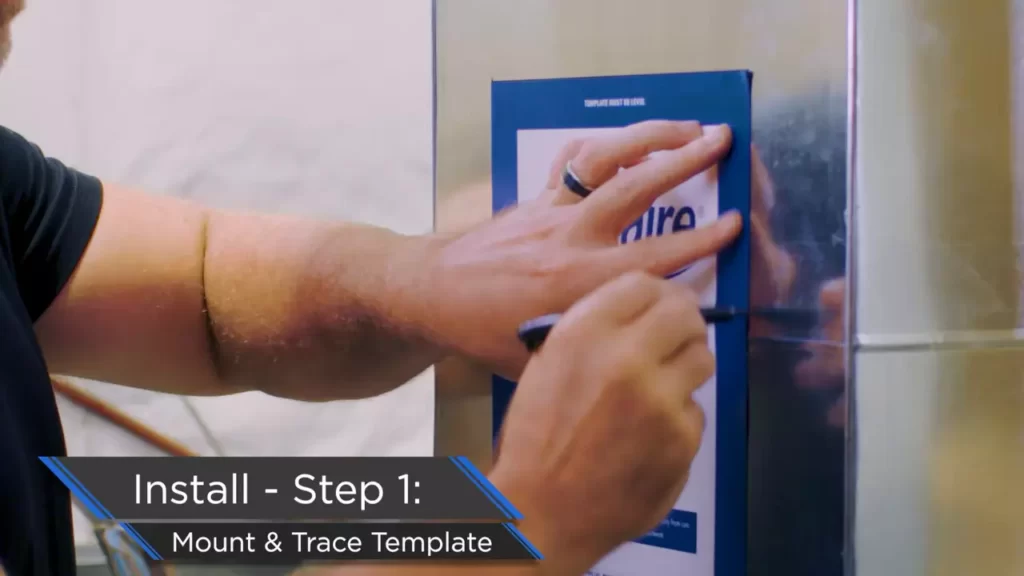
Attaching the Humidifier to the Furnace Ductwork
With the water supply connected, it’s time to attach the humidifier to the furnace ductwork. Use the mounting hardware provided with your humidifier to secure it to the ductwork. Make sure to follow the manufacturer’s instructions to ensure proper installation.
Testing the Humidifier’s Functionality
Once the humidifier is securely attached to the ductwork, it’s important to test its functionality before turning the power supply back on. Fill the humidifier’s water reservoir and turn on the water supply. Adjust the settings on the humidifier to your desired humidity level and check for any leaks or water flow issues.
Finally, turn on the power supply to your furnace system and verify that the humidifier is working properly. Monitor the humidity levels in your home and make any necessary adjustments to ensure a comfortable and healthy living environment.
By following these steps, you can successfully install a humidifier on your furnace system and enjoy the benefits of improved air quality throughout your home. Remember to always consult the manufacturer’s instructions and seek professional help if needed.
Installing Standalone Humidifier
Installing a standalone humidifier in your home can help to improve indoor air quality and provide relief from dryness. Whether you live in a dry climate or want to combat the effects of winter heating, a humidifier can be a valuable addition to your home. Follow these steps to properly install a standalone humidifier.
Preparing the Water Reservoir and Filter
The first step in installing a standalone humidifier is to prepare the water reservoir and filter. Start by removing the water reservoir from the humidifier unit. Fill the reservoir with clean, cool tap water or distilled water. Avoid using hot water as it can be damaging to the humidifier components. Next, insert the filter into the designated area in the humidifier. The filter plays a crucial role in trapping impurities and minerals from the water, ensuring that the mist released by the humidifier is clean and healthy. Refer to the manufacturer’s instructions for specific filter installation guidelines.
Placing the Humidifier on a Level Surface
Once the water reservoir and filter are prepared, find a suitable location for your standalone humidifier. It’s important to place the humidifier on a level surface to ensure proper operation. Uneven surfaces can potentially cause leaks or prevent the humidifier from functioning correctly. Avoid placing the humidifier on top of furniture or near electronics or heat sources. A sturdy table or the floor can be ideal options for optimum stability.
Connecting the Humidifier to the Power Supply
After positioning the humidifier on a level surface, it’s time to connect it to the power supply. Locate the power cord on your humidifier and plug it into a nearby electrical outlet. Ensure that the cord is not tangled or exposed to any hazards. Additionally, check that the power outlet is in good working condition. If there is a power switch or knob on your humidifier, turn it on. The humidifier will now start operating, and you should see mist coming out, indicating that it’s functioning correctly.

Adjusting the Humidity Levels
Once the humidifier is connected and running, it’s essential to adjust the humidity levels to create a comfortable environment. Different models of standalone humidifiers may have different controls for adjusting humidity levels. Refer to the user manual to understand the specific controls and settings of your humidifier. Generally, you will find options to increase or decrease the humidity levels as desired. Aim for a humidity level between 30% and 50% for ideal comfort and health benefits. Regularly monitor the humidity levels and adjust accordingly to maintain a balanced indoor environment.
Regular Cleaning And Maintenance
Regular cleaning and maintenance is essential for the proper functioning and longevity of your humidifier. Neglecting this aspect can result in the buildup of bacteria, mold, and mineral deposits, which can affect both the performance and air quality of the humidifier. In this section, we will discuss some important steps to keep your humidifier clean and well-maintained.
Cleaning the Water Reservoir
To ensure clean and healthy moisture output, the water reservoir of your humidifier should be cleaned regularly. This is particularly important if you use tap water, as it may contain minerals and impurities that can accumulate over time.
Here’s a simple step-by-step guide to clean the water reservoir:
- First, unplug the humidifier and remove the water reservoir from the base.
- Empty any remaining water from the reservoir.
- Dismantle any removable parts, such as the water tank cap and valve.
- Wash all removable parts with warm water and a mild detergent or white vinegar to remove any residue or buildup.
- Rinse thoroughly to ensure no traces of detergent or vinegar remain.
- Use a soft brush or cloth to clean the interior walls of the water reservoir, removing any scale or mineral deposits.
- Rinse the reservoir one final time before reassembling all parts.
Regular cleaning of the water reservoir will help maintain a fresh and clean environment inside your humidifier, ensuring optimal performance.
Replacing Filters and Pads
Filters and pads play a crucial role in capturing impurities and ensuring clean air output. Over time, these components can get clogged and lose their efficiency. It is therefore necessary to replace them periodically.
Here’s how to replace filters and pads in your humidifier:
- Check the manufacturer’s manual to understand the recommended frequency for filter and pad replacement.
- Unplug the humidifier and locate the filter or pad compartment.
- Remove the old filter or pad, following the instructions provided.
- Place the new filter or pad in the compartment, making sure it fits properly.
- Securely close the compartment and ensure it is tightly sealed.
Regular replacement of filters and pads will maintain the effectiveness of your humidifier, providing clean and healthy moisture.
Removing Scale and Mineral Build-up
Mineral build-up and scale can accumulate within your humidifier over time, affecting its performance and longevity. Regular removal of these deposits is necessary to prevent any possible damage and maintain optimal operation.
Here are some steps to remove scale and mineral build-up:
- Mix equal parts of water and white vinegar.
- Soak a clean cloth or sponge in the vinegar solution.
- Wipe the affected areas of the humidifier, focusing on parts with visible scale or mineral deposits.
- For stubborn deposits, you can use a toothbrush or soft brush to gently scrub the surfaces.
- Rinse the humidifier thoroughly with clean water to remove any traces of vinegar.
Regular removal of scale and mineral build-up will ensure optimal performance and extend the lifespan of your humidifier.
Troubleshooting Common Humidifier Issues
A humidifier is a valuable device that helps regulate the moisture levels in your home, ensuring a comfortable environment. However, like any mechanical appliance, it can encounter problems that require troubleshooting. By addressing these common issues promptly, you can keep your humidifier working optimally. Here are some troubleshooting tips for the most commonly encountered problems with humidifiers:
Insufficient Humidity Output
One of the most frustrating issues with a humidifier is when it fails to provide sufficient humidity output. If you notice that your home is still dry despite the humidifier’s operation, there are a few steps you can take to address this problem:
- Check the water level: Ensure that the water reservoir of your humidifier is filled to the appropriate level. Insufficient water can lead to reduced humidity output.
- Inspect the filter: A clogged or dirty filter can hinder the airflow and diminish the humidifier’s effectiveness. Remove the filter and rinse it with clean water. If it’s excessively dirty, consider replacing it.
- Location matters: The placement of your humidifier plays a significant role in its performance. Keep it away from heat sources or vents that can evaporate the moisture too quickly. Also, make sure it is positioned in an open area for better air circulation.
Leaks or Water Damage
It’s not uncommon to encounter leaks or water damage issues while using a humidifier. If you notice water pooling around your humidifier, follow these troubleshooting steps:
- Inspect the water tank: Check for cracks or damage on the water tank. A damaged tank can cause leaks. If you find any cracks, consider replacing the tank.
- Check the seals: The seals on your humidifier may wear out over time and cause leaks. Inspect the seals and ensure they are intact and properly fitted. Replace any damaged seals.
- Verify the filling process: Make sure that you are filling the water tank properly without overfilling it. Overfilling can result in leaks. Follow the manufacturer’s instructions for filling the tank correctly.
Unpleasant Odors
If your humidifier emits unpleasant odors, it can diminish the overall indoor air quality. Here are a few troubleshooting tips to tackle this issue:
- Clean the humidifier: Regular cleaning is crucial to prevent the buildup of mold, bacteria, or mineral deposits that can cause odors. Disassemble the parts and clean them thoroughly with water and mild soap. Rinse them well before reassembling.
- Use distilled water: Tap water often contains minerals that can create unpleasant smells when evaporated. Consider using distilled water instead, which is free from impurities.
Noisy Operation
A noisy humidifier can disrupt your peace and may indicate an underlying problem. Here’s what you can do to address this issue:
- Clean or replace the fan: A dirty or malfunctioning fan can cause excessive noise. Clean the fan blades using a soft brush and mild soap. If the fan is damaged, consider replacing it.
- Check for loose parts: Vibrations from loose or improperly fitted components can create noise. Secure all the connections and fasteners on your humidifier to eliminate any potential noise sources.
By troubleshooting these common humidifier issues, you can ensure optimal performance and enjoy the benefits of a well-functioning humidifier in your home. Remember to consult the manufacturer’s instructions or seek professional assistance if you encounter any complex problems or if your humidifier is still not working as expected.
Tips For Optimal Humidifier Performance
Installing a humidifier in your home can greatly improve indoor air quality and provide relief from dryness. However, to ensure that your humidifier performs at its best, there are a few essential tips to keep in mind. From using distilled or filtered water to regularly inspecting and cleaning the humidifier, taking these measures will help you maintain optimal performance and extend the lifespan of your device.
Using Distilled or Filtered Water
When operating a humidifier, the quality of the water used can significantly impact its performance and overall health benefits. Tap water often contains minerals and impurities that can lead to mineral buildup and white dust. To avoid these issues, it is recommended to use either distilled or filtered water.
Distilled water is the purest form of water as it is free from minerals and impurities. Using distilled water in your humidifier eliminates the risk of mineral buildup and white dust, helping you maintain cleaner air. Additionally, filtered water can also be used as an alternative. Using a water filter reduces the number of impurities present in tap water, ensuring a better-quality mist released by the humidifier.
Monitoring and Adjusting Humidity Levels
Another crucial aspect of optimizing humidifier performance is monitoring and adjusting the humidity levels. It is important to strike the right balance to ensure the air in your home doesn’t become too dry or too humid.
An ideal indoor humidity level ranges between 30% to 50%. To determine the humidity level in your home, you can use a hygrometer, a device specifically designed to measure humidity. It is recommended to place the hygrometer in the room where the humidifier is installed for accurate readings.
If the humidity level is too high, it can lead to excess moisture, which may result in mold growth and cause respiratory issues. On the other hand, if the humidity level is too low, it can cause dry skin, nasal congestion, and other discomforts.
Once you have determined the current humidity level, you can adjust the settings on your humidifier accordingly. Most humidifiers have adjustable mist output controls or humidity level settings that allow you to regulate the amount of moisture released into the air. Regularly monitoring and adjusting the humidity levels will help you maintain a comfortable and healthy environment in your home.
Regularly Inspecting and Cleaning the Humidifier
Maintaining a clean and well-functioning humidifier is essential for optimal performance. Over time, mineral deposits, mold, and bacteria can accumulate in the humidifier, compromising its effectiveness and potentially causing health issues.
To prevent these problems, it is important to regularly inspect and clean your humidifier. This involves disassembling the unit and thoroughly cleaning each component. Refer to the manufacturer’s instructions for specific cleaning procedures and safety precautions.
Here are some general steps to clean a typical humidifier:
- Unplug the unit and empty any remaining water.
- Disassemble the humidifier, removing the water tank, filter, and any other detachable parts.
- Follow the manufacturer’s instructions to clean each component with a mild detergent or vinegar solution.
- Rinse all parts thoroughly and allow them to dry completely before reassembling the humidifier.
- Regularly replace the filters as recommended by the manufacturer to ensure optimal performance.
By regularly inspecting and cleaning your humidifier, you can prevent mineral buildup, mold growth, and the release of harmful bacteria into the air. This will not only enhance the performance of your humidifier but also contribute to improved indoor air quality.
Frequently Asked Questions For How To Install A Humidifier
Can I Install the Humidifier Myself?
Yes, you can install a humidifier yourself. Just follow the instructions carefully and ensure you have the necessary tools.
How Hard Is It To Install A Humidifier In Your House?
Installing a humidifier in your house is not difficult. It can be done easily and quickly. Just follow the instructions provided with the humidifier, and you’ll have it up and running in no time. Enjoy the benefits of improved air quality and comfort in your home.
How Much Does It Cost To Install A Humidifier?
The cost of installing a humidifier varies, depending on factors such as the type of humidifier and the complexity of the installation process. On average, homeowners can expect to spend between $500 and $1,000 for a professional installation. However, it’s always best to get a quote from a licensed contractor to get an accurate estimate for your specific requirements.
Can You Add A Humidifier To An Existing Furnace?
Yes, you can add a humidifier to an existing furnace. It helps to add moisture to the air, improving indoor comfort levels and reducing dryness. This can be beneficial for your health, skin, and furniture. A professional technician can easily install a humidifier to your existing furnace system.
Conclusion
Installing a humidifier is a simple yet effective way to improve indoor air quality and enhance overall comfort in your home. By following the step-by-step process outlined in this guide, you can easily install a humidifier and enjoy its benefits.
Remember to choose the right type of humidifier, select the ideal location, and properly maintain it for optimal performance. With a properly installed humidifier, you can create a healthier and more comfortable atmosphere in your living space. Breathe easy and enjoy the benefits of a well-maintained humidifier.