Installing a home thermostat involves a simple process of disconnecting the old thermostat, mounting the new one, and connecting the wiring. We will guide you through the steps to successfully install a home thermostat, ensuring maximum comfort and energy efficiency in your home.
Factors To Consider When Choosing A Thermostat
When it comes to maintaining a comfortable and energy-efficient home, choosing the right thermostat is crucial. With so many options available in the market, it can be a bit overwhelming to make the right choice. To simplify the process for you, here are the key factors you need to consider when selecting a thermostat:
Compatibility with Your Heating and Cooling System
Before you make a decision, it’s important to ensure that the thermostat you choose is compatible with your existing heating and cooling system. Different heating and cooling systems have different requirements, so it’s important to check the specifications of the thermostat and compare them with your system.
Some thermostats might work only with specific types of systems, such as central heating, radiant heating, or heat pumps. Make sure to read the product descriptions and specifications carefully to determine compatibility.
Programmable vs Non-Programmable Thermostats
Another crucial factor to consider is whether you want a programmable or non-programmable thermostat. Programmable thermostats give you the flexibility to create a heating and cooling schedule based on your daily routine. This can help you save energy and money by automatically adjusting the temperature when you’re away from home or asleep.
On the other hand, non-programmable thermostats require manual adjustments throughout the day. Consider your lifestyle and preferences when making this decision. If you have a consistent schedule and prefer manual control, a non-programmable thermostat might be sufficient. However, if you want the convenience of automatic scheduling and energy savings, a programmable thermostat is the way to go.
Wi-Fi Enabled Thermostats for Smart Homes
If you’re looking to upgrade your home to a smart home, a Wi-Fi-enabled thermostat is an excellent choice. With a Wi-Fi-enabled thermostat, you can control the temperature of your home remotely from your smartphone or tablet. This feature is especially convenient when you’re out of town or want to adjust the temperature without leaving the comfort of your couch. Additionally, some Wi-Fi-enabled thermostats can even learn your preferred temperature settings and adjust accordingly, providing personalized comfort. Make sure to check if the thermostat is compatible with the smart home system you have or plan to install.
Energy Efficiency Ratings
Energy efficiency is a top priority for many homeowners, and choosing a thermostat with a high energy efficiency rating can help you save on your energy bills. Look for thermostats with an Energy Star rating, as they meet strict energy efficiency guidelines set by the U.S. Environmental Protection Agency. These thermostats use advanced technology to optimize energy usage and provide precise temperature control. By investing in an energy-efficient thermostat, you can contribute to a greener environment while enjoying the benefits of lower energy bills.
These are the key factors you need to consider when choosing a thermostat for your home. By taking into account the compatibility, programmability, smart home capabilities, and energy efficiency ratings, you can make an informed decision that will provide comfort, convenience, and energy savings in the long run.
Gathering The Necessary Tools And Equipment
Before you begin the installation process, it is essential to gather all the necessary tools and equipment. Having everything you need at your fingertips will make the installation smooth and hassle-free. In this section, we will discuss the tools and equipment you need and how each one plays a crucial role in the installation process.
Screwdriver
A screwdriver is a must-have tool when it comes to installing a home thermostat. It allows you to remove the faceplate of your old thermostat and attach the new one securely. Make sure to have both a flathead and a Phillips-head screwdriver, as different thermostats may require different types of screws.
Wire Strippers
Wire strippers are essential for this installation process as they help you remove the insulation from the wires. This step is necessary to connect the wires to the appropriate terminals on your new thermostat. Ensure you have wire strippers that are specifically designed for the gauge of wires you are working with.
Voltage Tester
A voltage tester is a crucial tool for your safety during the installation process. It helps you determine if there is any live electrical current present in the wires. This way, you can avoid any potential shocks or accidents. Remember, safety should always be a top priority.
Level
The level is a handy tool that ensures your thermostat is perfectly straight on the wall. Installing a thermostat at an angle can not only be visually unattractive but can also affect its functionality. Use a level to achieve a professional-looking installation.
Pencil
A simple tool like a pencil can make a big difference in the installation process. Before you start drilling any holes, mark the location of your new thermostat with a pencil. This way, you can ensure the thermostat is placed exactly where you want it to be.
By gathering these tools and equipment, you are now ready to proceed with the installation process. Having everything prepared will save you time and prevent any unnecessary delays.
Turning Off The Power To Your Hvac System
Before you begin installing your new home thermostat, it’s crucial to turn off the power to your HVAC system. This step is essential to ensure your safety and prevent any electrical mishaps during the installation process. In this section, we’ll guide you through the necessary steps to locate the circuit breaker, turn off the power, and verify that it’s off.
Locating the Circuit Breaker
The circuit breaker is a device that controls the electrical power in your home. It’s typically located in the basement, garage, or utility room. If you’re unsure about the exact location, here’s a simple way to find it:
- Start by checking these areas to locate a metal box with a door.
- Once you find the box, open the door to reveal a series of switches, also known as circuit breakers.
- Take note of the labels or markings on each breaker. Look for one specifically related to your HVAC system, such as “furnace” or “air conditioning.”
Keep in mind that the labels may vary depending on the wiring in your home. If you’re still unsure, consult the instruction manual or seek professional assistance.
Turning Off the Power
Now that you’ve located the circuit breaker and identified the correct switch, it’s time to turn off the power:
- Confirming that you’ve identified the correct breaker, gently push the switch to the “off” position.
- Most circuit breakers are designed to move downward when switched off. You may also hear a clicking sound or notice the position change.
- By switching the breaker off, you’re effectively cutting off the power supply to your HVAC system.
It’s essential to handle the circuit breaker with caution. Remember, electricity can be dangerous, and each step should be executed with care.
Verifying that the Power is Off
After turning off the circuit breaker, it’s crucial to double-check that the power to your HVAC system is indeed off. Here’s how you can verify:
- Go to your thermostat and attempt to adjust the temperature. If the thermostat doesn’t respond or display any changes, it indicates that the power is off.
- Alternatively, you can try turning on your heating or cooling system. If it fails to activate, the power is successfully off.
- To be absolutely certain, you may also use a voltage tester to check for any electrical activity. This handheld device helps detect the presence or absence of electricity in a circuit.
Once you’ve completed these steps and verified that the power is off, it’s safe to proceed with the installation of your new home thermostat. Remember, safety should always be your top priority when working with electricity.
Removing The Thermostat Cover
Before you can install a new thermostat in your home, you’ll need to remove the cover of your old thermostat. This is an essential step in the process, as it will give you access to the wires and components that need to be disconnected. Follow these steps to successfully remove the thermostat cover:
Unscrewing the Cover
First, locate the screws that secure the thermostat cover to the wall. They are usually found at the top and bottom of the cover, though this may vary depending on the model. Using a screwdriver that fits the screws, turn it counterclockwise to loosen and remove the screws. Keep the screws in a safe place, as you will need them later to install the new thermostat.
Gently Removing the Cover
Once the screws are removed, you can gently remove the thermostat cover from the wall. It’s essential to be cautious during this step to prevent damaging the wires or other components. Start by grasping the cover firmly, but not too tightly, and gently pull it away from the wall. Take your time and move slowly to ensure a smooth removal. If the cover feels stuck, double-check to ensure all screws have been removed.
If the cover is still not coming off, try wiggling it slightly while pulling it away from the wall. Be careful not to exert too much pressure, as this can damage the thermostat or the wall. If the cover continues to resist removal, refer to the manufacturer’s instructions or consult a professional to avoid any potential damage.
Removing the thermostat cover is a crucial step in the installation process. Take your time and follow the steps carefully to avoid any mishaps or damage. Once the cover is successfully removed, you can proceed with disconnecting the wires and installing your new thermostat.
Disconnecting The Wires
Now that you have taken a picture of your current thermostat’s wiring configuration for reference and labeled the wires, it’s time to move on to disconnecting the wires. This step is crucial as it ensures a smooth installation process and prevents any damage to the wires or the new thermostat.
Taking a Picture of the Wiring Configuration for Reference
To begin, it’s a good idea to take a picture of the wiring configuration of your current thermostat. This will serve as a handy reference later on when you are connecting the wires to your new thermostat. By having a visual representation of the original wiring, you can confidently match the wires to their corresponding terminals, ensuring a correct installation.
Labeling the Wires
Next, you’ll want to label each wire according to its corresponding terminal. This step prevents confusion and makes it easier to reconnect the wires correctly later on. You can use small, adhesive labels or simply write directly on the wires with a marker or pen. Make sure your labeling is clear and easy to read.
Loosening the Terminal Screws
Now that you have documented and labeled the wires, it’s time to loosen the terminal screws. These screws are what secure the wires to the thermostat’s terminals. By loosening them, you’ll be able to easily remove the wires without causing any damage. Be careful not to loosen the screws too much, as they need to remain in place to secure the new wires.
Removing the Wires
With the terminal screws loosened, you can now remove the wires from the thermostat. Take each wire one at a time and gently pull it out from its corresponding terminal. Be mindful of any connectors or clips that may be holding the wires in place. Apply steady, even pressure to avoid bending or breaking the wires.
Once you have successfully disconnected all the wires, you can proceed with installing your new thermostat. Remember to keep your picture and label references close by for easy installation.
Mounting The Thermostat Base
Mounting the thermostat base is an important step in the process of installing a home thermostat. This is the component that holds the thermostat in place and connects it to your HVAC system. Properly mounting the thermostat base is crucial for ensuring accurate temperature readings and efficient operation.
Choosing a Suitable Location
Before you begin the mounting process, it’s essential to choose a suitable location for your thermostat base. Here are some factors to consider:
- Place the thermostat base on an interior wall for more accurate temperature readings. Exterior walls may experience more temperature fluctuations.
- Avoid mounting the thermostat base near direct sunlight, as this can affect temperature readings and lead to incorrect energy consumption calculations.
- Select a location away from drafts or vents. Proximity to air vents or drafty areas can interfere with the thermostat’s ability to accurately sense room temperature.
- Ensure the thermostat base is easily accessible for wiring and future maintenance.
Marking the Mounting Holes
Once you have identified a suitable location for your thermostat base, the next step is to mark the mounting holes. Follow these steps:
- Hold the thermostat base against the wall in the desired location.
- Using a pencil or marker, make small dots through the mounting holes on the base to mark their positions on the wall.
- Double-check the levelness of the base before making permanent marks.
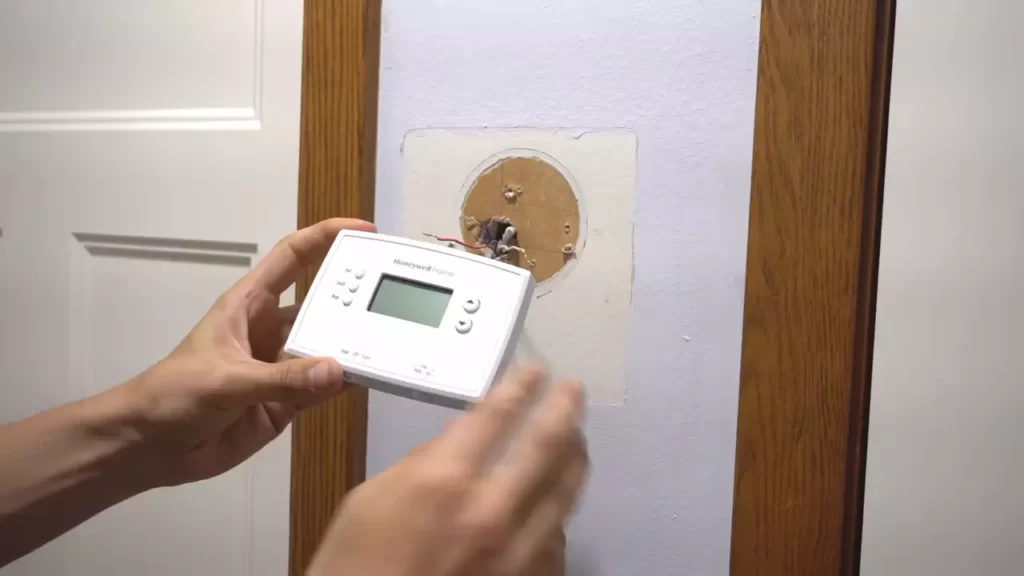
Attaching the Thermostat Base
After marking the mounting holes, it’s time to attach the thermostat base to the wall:
- Drill pilot holes into the marked positions on the wall. Ensure the drill bit matches the size required for your mounting screws.
- Insert wall anchors into the pilot holes to provide extra stability for the screws.
- Align the thermostat base with the wall anchors and mount it using the appropriate screws. Make sure the base is securely fastened and level.
- Double-check the levelness of the base and make any necessary adjustments.
Congratulations! You have successfully mounted the thermostat base. The next step is to wire the thermostat and attach the thermostat cover, which we will cover in the following sections.
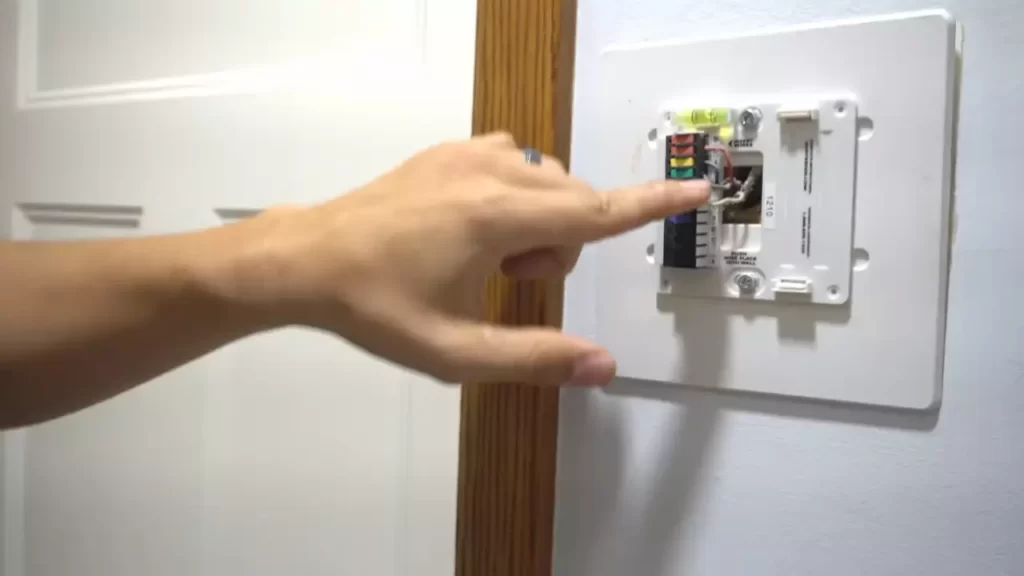
Wiring The New Thermostat
Installing a new thermostat in your home can help you regulate the temperature more efficiently and potentially save on energy costs. One crucial step in the installation process is wiring the new thermostat correctly. This ensures that your heating and cooling system functions properly. In this section, we will guide you through the necessary steps to wire your new thermostat correctly.
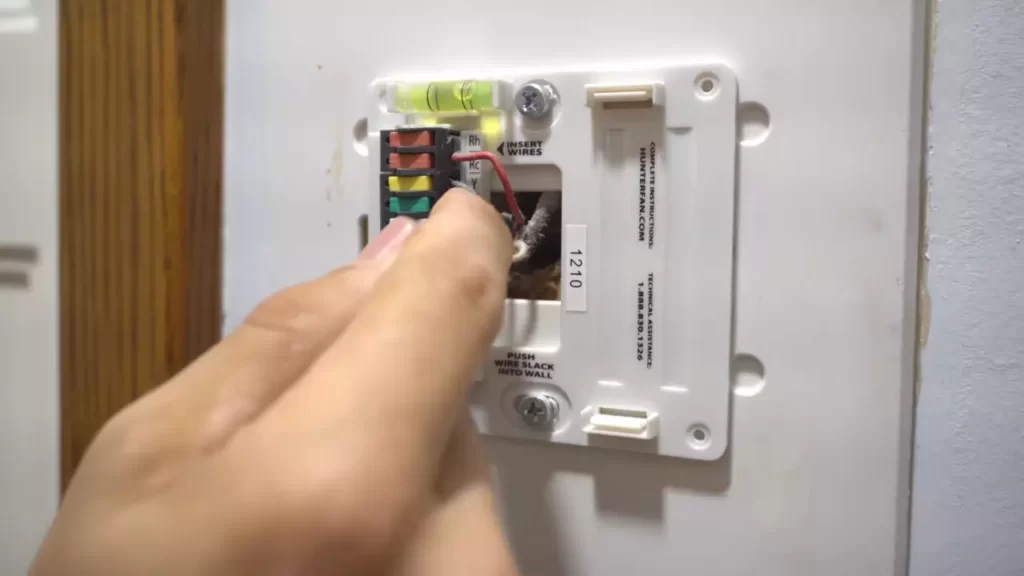
Identifying the Correct Terminal Labels
Before you start wiring your new thermostat, it is essential to identify the correct terminal labels. Different thermostats may have different labeling systems, but common labels include R (power), C (common), W (heat), Y (cool), and G (fan). These labels determine which wire should be connected to each terminal. Refer to the instruction manual provided by the thermostat manufacturer to confirm the correct terminal labels for your model.
Matching and Connecting the Wires
Once you have identified the terminal labels, the next step is to match and connect the wires. Start by turning off the power to your heating and cooling system at the main circuit breaker. Afterward, remove the old thermostat from the wall to expose the existing wires.
Inspect each wire and its corresponding terminal label. Carefully disconnect the wires from the old thermostat, ensuring you remember which wire was connected to which terminal. Take note of the wire colors to make the rewiring process easier.
Using the provided wiring diagram or the labeling on the new thermostat, match each wire to its respective terminal. For example, connect the wire labeled R to the R terminal on the new thermostat. Repeat this process for each wire until all connections are secure.
Tightening the Terminal Screws
After successfully matching and connecting the wires, the final step is to tighten the terminal screws. Using a screwdriver, ensure that each terminal screw is tight enough to firmly hold the wire in place. Be careful not to overtighten the screws, as this can damage the wires.
Once all the terminal screws are tightened, double-check each connection to ensure they are secure and properly seated. Loose connections can cause your thermostat and HVAC system to malfunction.
By following these steps, you can wire your new thermostat with confidence. Remember to always refer to the manufacturer’s instructions and consult a professional if you encounter any difficulties or uncertainties during the installation process.
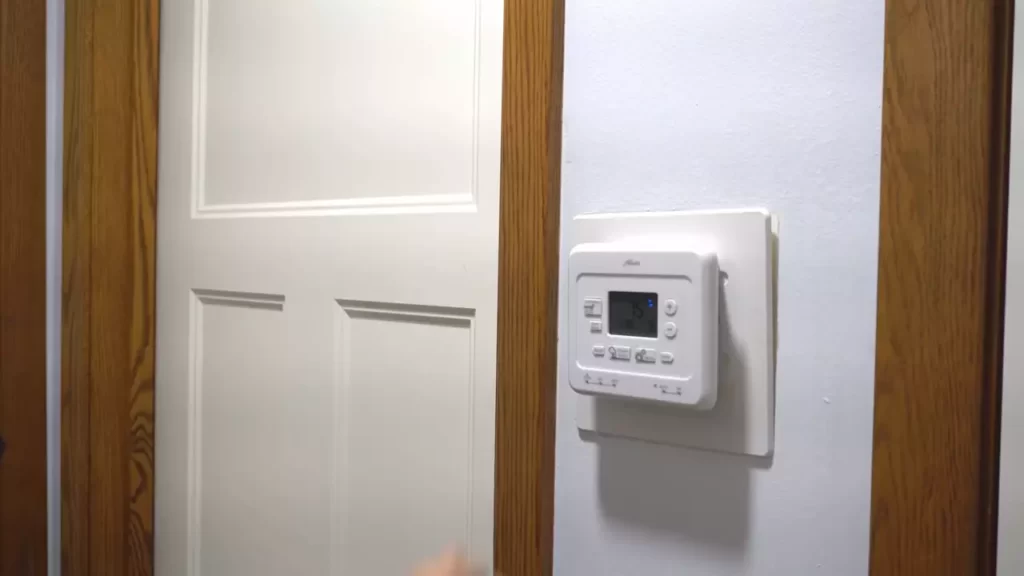
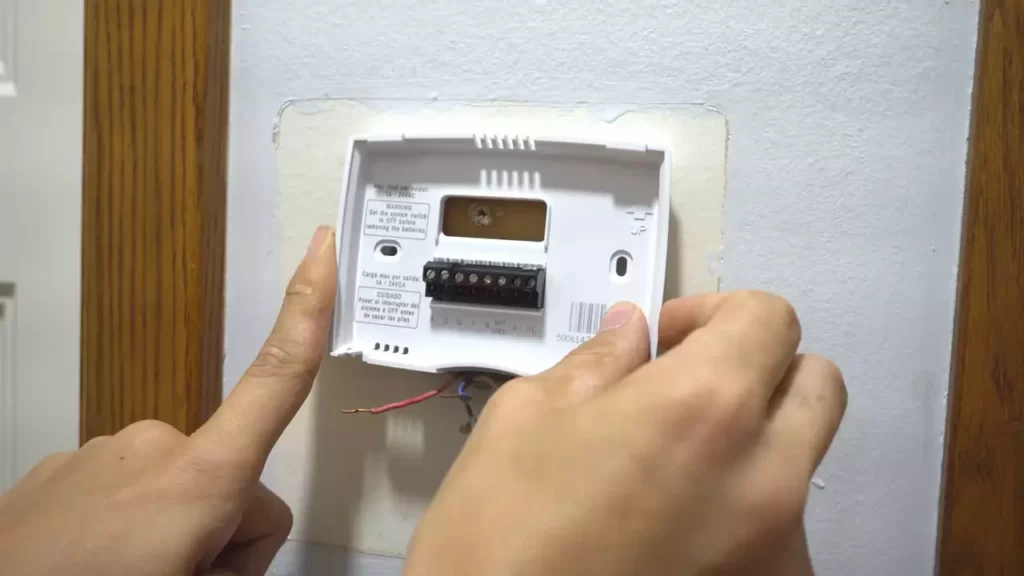
Attaching The Thermostat Faceplate
Attaching the thermostat faceplate is the final step in the installation process and is crucial for ensuring proper functioning of your home thermostat. The faceplate serves as the interface between you and your thermostat, allowing you to control the temperature settings and other features. Follow these steps to securely attach the faceplate to the thermostat base.
Snapping the Faceplate onto the Base
To begin, locate the faceplate and the base of your thermostat. Place the faceplate on top of the base, ensuring that the alignment pins on the faceplate are inserted into the corresponding holes on the base. Press down firmly to align the clips on the sides of the faceplate with the slots on the base. When in the correct position, you will hear a satisfying “click” sound, indicating that the faceplate is securely attached.
Ensuring a Secure Fit
Once the faceplate is snapped onto the base, it is important to check for a secure fit. Gently tug on the faceplate to ensure it is firmly attached and does not move or come loose. A loose faceplate can lead to inaccurate temperature readings and improper functioning of your thermostat.
If the faceplate feels loose or does not seem to fit properly, it may be due to misalignment or improper installation. Remove the faceplate and repeat the snapping process, ensuring that the alignment pins and clips are properly inserted into their respective slots. Make sure the faceplate is aligned evenly and parallel to the base before firmly pressing down to attach it.
It is also important to note that some thermostats may have additional locking mechanisms to further secure the faceplate. Refer to the manufacturer’s instructions to determine if any additional steps are required to ensure a secure fit.
In conclusion, attaching the thermostat faceplate is a straightforward process that requires proper alignment and firm attachment. By following these steps and double-checking the secure fit, you can ensure that your thermostat functions accurately and effectively, providing you with optimal control over your home’s temperature.
Restoring Power To The HVAC System
After successfully installing a new home thermostat, the next step is to restore power to the HVAC (heating, ventilation, and air conditioning) system. This crucial step ensures that your thermostat can communicate with the HVAC system and regulate the temperature in your home effectively. In this section, we will guide you through the process of turning on the circuit breaker and verifying that the power is restored, ensuring a seamless operation of your new thermostat. Let’s get started!
Turning On the Circuit Breaker
The first step in restoring power to your HVAC system is to locate the circuit breaker panel in your home. Typically, the panel is situated in the basement or utility room. Once you’ve found the panel, follow these steps to turn on the circuit breaker:
- Identify the circuit breaker that controls the HVAC system. It is usually labeled as “HVAC,” “Furnace,” or “Air Handler.”
- Check if the circuit breaker is in the “Off” position. If it is, flip the switch to the “On” position.
- Give the circuit breaker a moment to reset. You may hear a click as it restores power to the HVAC system.
Verifying that the Power is Restored
Now that you’ve turned on the circuit breaker, it’s time to verify that the power is successfully restored to the HVAC system. Here’s how you can do it:
- Go back to your thermostat and make sure it is set to the “Off” position.
- Slowly increase the temperature on the thermostat by a few degrees.
- Listen closely for the sound of the HVAC system turning on, which indicates that the power is restored.
- Observe the vents in your home to check if the airflow has resumed. You should feel warm or cool air coming out of the vents depending on your desired temperature setting.
If you have followed these steps and the HVAC system does not turn on or there is no airflow from the vents, it may indicate an issue with the installation or compatibility of the thermostat. In such cases, it is advisable to consult a professional HVAC technician to ensure proper functionality.
Restoring power to the HVAC system is a vital step in installing a new home thermostat. By following the steps outlined above, you can ensure that your new thermostat communicates effectively with the HVAC system, allowing you to control and maintain a comfortable temperature in your home.
Testing The Thermostat Functionality
Setting the Temperature
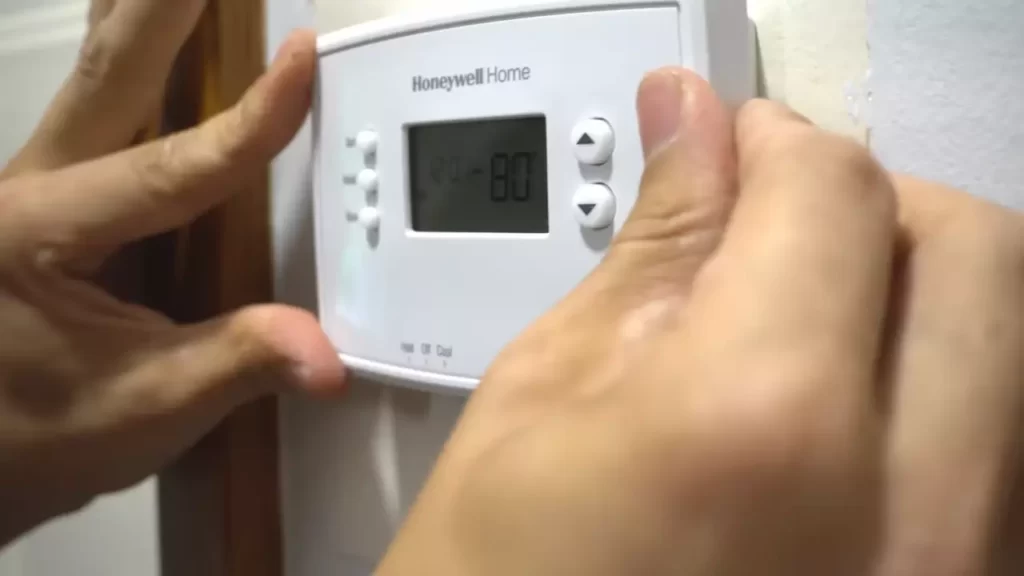
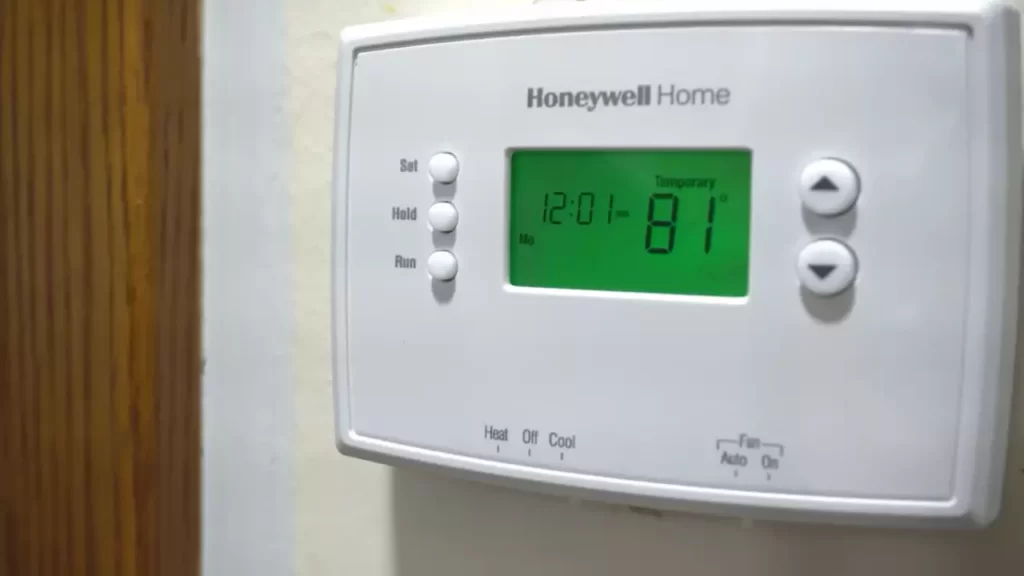
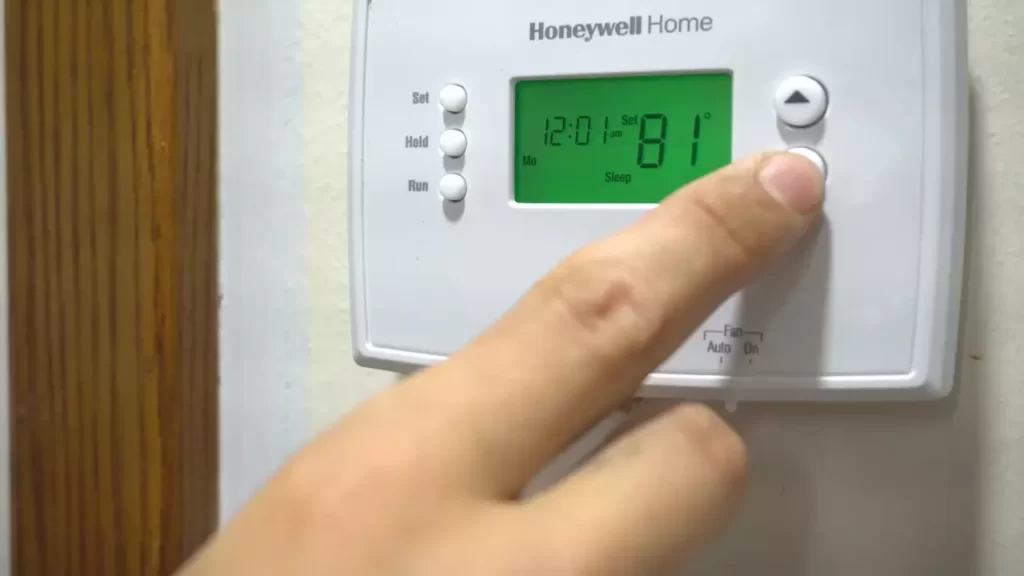
To test the functionality of your home thermostat, you’ll first need to set the temperature to a desired level. This will allow you to check if the thermostat is able to adjust the temperature in your home accordingly. Follow these steps to set the temperature on your thermostat:
- Locate the temperature control buttons on your thermostat. These buttons are typically labeled with “+” and “-” symbols.
- Press the “+” button to increase the temperature or the “-” button to decrease the temperature. You can refer to the temperature scale on your thermostat display to determine the desired temperature.
- Once you have set the temperature, wait for a few minutes to allow the thermostat to register the change. You can also refer to the display on your thermostat to confirm that the temperature you selected has been set.
Checking the HVAC System’s Response
After setting the temperature on your thermostat, it’s important to check if the HVAC system responds accordingly. Follow these steps to ensure that your HVAC system is functioning properly:
- Turn on your HVAC system by adjusting the mode setting on your thermostat to “Heat” or “Cool,” depending on the current weather conditions.
- Wait for a few minutes to allow the system to start working. You should be able to hear the sound of the system running.
- Check the vents in your home to see if there is hot or cold air being released. In the winter, you should feel warm air coming out of the vents, while in the summer, you should feel cool air.
- If you notice that the HVAC system is not responding as expected, there may be an issue with the thermostat or the HVAC system itself. In this case, it’s recommended to contact a professional HVAC technician to diagnose and repair the problem.
Make sure to perform these tests after installing a new thermostat or if you suspect that your current thermostat is not functioning properly. By testing the thermostat functionality, you can ensure that your home’s temperature is accurately regulated, providing comfort and energy efficiency.
Remember, in case of any doubts or concerns, consult the user manual provided by the thermostat manufacturer or seek assistance from a professional.
Programming The Thermostat
Setting the Temperature Schedule
Setting a temperature schedule is an essential part of programming your home thermostat. With a pre-programmed schedule, you can ensure optimal comfort while also saving energy and reducing utility bills. Here’s how you can set your temperature schedule:
- Begin by accessing the thermostat’s menu on the device or through the accompanying mobile app, if available.
- Locate the “Schedule” or “Program” option and select it.
- Choose the days of the week you want to program. This typically includes weekdays and weekends, but you may have the flexibility to customize it further.
- For each day, specify the desired temperatures for different periods, such as morning, daytime, evening, and nighttime. Consider your personal preferences, occupancy patterns, and energy-saving opportunities when setting these temperatures.
- Save the schedule once you are satisfied with your programming.
By setting a temperature schedule, you can automate your heating and cooling system, allowing it to adjust to your desired comfort levels at different times of the day without your constant intervention.
Adjusting Additional Settings
In addition to setting the temperature schedule, your home thermostat may have a range of additional settings that you can customize to suit your needs. Some of these settings may include:
- Fan settings: You can choose whether the fan should run continuously or only when the heating or cooling system is actively running.
- Heat and cool settings: Depending on your climate, you may want to adjust the temperature differentials between heating and cooling modes to optimize efficiency and comfort.
- System preferences: If your thermostat controls multiple zones or has advanced features, you may have options to configure settings such as humidity control, ventilation, or integration with other smart home devices.
Take some time to explore the additional settings menu on your thermostat and make adjustments as needed. However, be cautious when changing settings that you are not familiar with, as improper adjustments may affect the performance of your HVAC system.
Using Smart Features (if applicable)
If your home thermostat has smart features, you can unlock even more convenience and energy savings. These features typically require initial setup and may require compatibility with other smart devices or access to a dedicated mobile app. Here are some examples of smart features you may find:
- Remote control: Use your smartphone or tablet to adjust the thermostat from anywhere, providing flexibility and control even when you’re not at home.
- Learning capabilities: Some smart thermostats have the ability to learn your schedule and preferences over time, automatically adjusting the temperature to maximize comfort and efficiency.
- Voice control: Integration with virtual assistants like Amazon Alexa or Google Assistant allows you to control the thermostat using voice commands, providing a hands-free experience.
- Energy usage insights: Smart thermostats often provide valuable information about your energy consumption, helping you make informed decisions to reduce energy waste and save money.
When using smart features, ensure that you follow the manufacturer’s instructions for setup and properly integrate the thermostat with your home’s Wi-Fi network to enjoy the full benefits of these advanced capabilities.
The thermostat Not Powering On
Checking the Power Source
If your thermostat is not powering on, the first thing you should check is the power source. Without a steady power supply, the thermostat won’t be able to function properly. Start by confirming if the thermostat is connected to an electrical outlet or if it’s hardwired. If it’s connected to an outlet, ensure that the outlet is working by plugging in another device.
If the outlet is not the issue, it’s time to check your circuit breaker. Head over to the electrical panel and locate the circuit breaker that controls the thermostat. Look for any switches that may have tripped. If you see one that is in the off position, switch it back on. This should restore power to the thermostat.
Verifying the Wiring Connections
If the power source is not the problem, the next step is to verify the wiring connections of your thermostat. Faulty wiring can prevent the thermostat from powering on. To do this, you’ll need to locate the control panel of your HVAC system.
Before proceeding, make sure to turn off the power supply to the HVAC system to avoid any electrical hazards. This can usually be done by flipping the circuit breaker switch associated with the system or turning off the power switch nearby. Once the power is off, carefully remove the cover of the control panel.
Inside the control panel, you’ll find a series of wires connected to different terminals. Take a close look at each wire and ensure it is securely fastened to its corresponding terminal. Over time, wires can become loose or disconnected, causing power issues. If you notice any loose wires, gently tighten them with a screwdriver.
Once you have checked and secured all the wiring connections, you can safely put the control panel cover back on. Turn the power supply back on and check if your thermostat is now powering on properly.
Remember, if you’re unsure or uncomfortable working with electrical components, it’s always best to consult a professional HVAC technician. They have the knowledge and expertise to diagnose and fix complex thermostat issues.
HVAC System Not Turning On
If your HVAC system is not turning on, it can be frustrating, especially when you need cool air in the scorching summer or warmth during the chilly winter. But don’t worry! There are a few troubleshooting steps you can take to determine the cause and potentially fix the issue yourself. In this section, we will discuss three common areas to investigate when your HVAC system fails to turn on: verifying the thermostat settings, checking for loose wires or connections, and testing the HVAC system’s power.
Verifying the Thermostat Settings
The first step in troubleshooting your HVAC system not turning on is to verify the thermostat settings. Incorrect settings or a malfunctioning thermostat can prevent your system from operating correctly. Here’s how you can check:
- Ensure that the thermostat is set to the appropriate mode, such as cooling or heating, depending on the season.
- Double-check the temperature setting to make sure it is set to a desired and accurate level.
- Verify that the fan is set to either “auto” or “on” mode, depending on your preference.
If you have a programmable thermostat, it’s essential to review and adjust any programmed schedules that may be interfering with the system’s operation.
Checking for Loose Wires or Connections
Loose wires or connections can disrupt the power supply to your HVAC system, causing it not to turn on. To check for loose wires or connections, follow these steps:
- Turn off the power supply to your system by switching off the circuit breaker associated with the HVAC unit.
- Using a screwdriver, carefully remove the thermostat cover to access the wiring.
- Inspect each wire and connection for any signs of looseness, corrosion, or damage.
- If you find any loose or damaged wires, tighten or replace them accordingly.
Remember to always exercise caution and turn off the power supply before working with electrical components.
Testing the HVAC System’s Power
If the thermostat settings and wiring appear to be in order, the next step is to test the power supply to your HVAC system. Here’s how:
- Head to your electrical panel and locate the circuit breaker connected to the HVAC unit.
- Check if the breaker is in the “on” position. If it’s tripped, reset it by flipping it to the “off” position and then back to the “on” position.
- Once the breaker is reset, head back to your HVAC system and verify if it starts running.
If the system still fails to turn on even after verifying the thermostat settings, checking for loose wires or connections, and testing the power supply, it may be time to call a professional HVAC technician for further inspection and repair.
Regularly Cleaning The Thermostat
Removing Dust and Debris
Regularly cleaning your home thermostat is essential to ensure its optimal performance and accuracy. Over time, dust and debris can accumulate on the thermostat, which can interfere with its sensors and affect its functionality. By taking the time to remove any dust and debris from your thermostat, you can maintain its effectiveness and prolong its lifespan.
To begin, gently remove the faceplate of your thermostat, exposing the inner components. Carefully inspect the thermostat for any visible dust or debris. Take note of any areas where dirt seems to have accumulated the most.
Using a soft microfiber cloth or a small brush, gently wipe away the dust and debris from the thermostat’s surface. Be careful not to apply excessive pressure, as this could damage the internal components. Pay special attention to areas in and around the buttons, as these tend to collect the most dirt. Consider using a can of compressed air to blow away any stubborn debris that may be trapped in hard-to-reach areas.
Cleaning the Display Screen
The display screen of your home thermostat is where all the information and settings are displayed. Over time, this screen can accumulate smudges, fingerprints, and dust, making it difficult to read and navigate. Regularly cleaning the display screen is essential for clear visibility and ease of use.
To clean the display screen, start by turning off the thermostat. Using a soft, lint-free cloth, gently wipe the screen in a circular motion. Avoid using any harsh cleaning agents or abrasive materials, which could scratch or damage the screen. If the screen is particularly dirty, you can dampen the cloth with a small amount of water or a mild cleaning solution made specifically for electronics. Be sure to thoroughly dry the screen afterward with a clean, dry cloth.
Additionally, consider investing in a screen protector for your thermostat. These thin, transparent films can help prevent smudges and fingerprints from accumulating on the display. They are also easy to clean and replace when needed.
By regularly cleaning your home thermostat, you can ensure its longevity and accuracy. Make it a part of your routine home maintenance to keep your thermostat in top shape, promoting energy efficiency and comfortable indoor temperatures.
Calibrating The Thermostat
Calibrating the thermostat is an essential step to ensure accurate temperature readings in your home. By properly adjusting the temperature settings, you can have complete control over your comfort levels and energy usage. In this section, we will explore two important aspects of calibrating the thermostat: adjusting temperature readings if necessary and selecting the right location.
Adjusting Temperature Readings if Necessary
If you find that your thermostat is displaying inaccurate temperature readings, don’t worry! Many thermostats allow you to adjust the temperature readings manually. Follow these steps to ensure accurate readings:
- Identify the temperature discrepancy: Place an accurate thermometer near your thermostat and note any differences in the readings. This will help you determine how much adjustment is needed.
- Access the calibration settings: Refer to your thermostat’s user manual to find out how to access the calibration settings. Most thermostats have a specific menu or button for calibration.
- Adjust the temperature: Use the calibration settings to make the necessary adjustments. If your thermostat is reading higher than the actual temperature, decrease the offset value. Similarly, if it is reading lower, increase the offset value.
- Test and re-adjust if needed: After making the initial adjustment, wait for a few hours and compare the readings again. If necessary, repeat the process until you achieve accurate temperature readings.
By following these steps, you can fine-tune your thermostat to provide accurate temperature readings, ensuring your home remains comfortable at all times.
Selecting the Right Location
To get the most accurate readings, it’s crucial to install your thermostat in the right location. Consider the following factors when determining the placement:
- Avoid direct sunlight: Direct sunlight can cause false temperature readings. Install the thermostat away from windows and other sources of direct sunlight to ensure accurate measurements.
- Avoid drafts and vents: Placing the thermostat near drafts or vents can lead to inconsistent readings. Keep it away from areas with excessive airflow to prevent inaccurate temperature measurements.
- Place it at the right height: Install the thermostat at an appropriate height, typically at eye level. This allows for easy access and ensures accurate readings in the most commonly occupied areas.
- Consider the central location: Installing the thermostat in a central location within your home helps it better sense the overall temperature, giving you more accurate control over your HVAC system.
By considering these factors, you can select the optimal location for your thermostat, avoiding any issues and ensuring accurate temperature measurements throughout your home.
Energy Saving Tips
Utilizing Programmable Settings
One of the most effective ways to save energy with your home thermostat is to utilize its programmable settings. Programmable thermostats allow you to set different temperature levels for various times of the day, ensuring that you’re not wasting energy when you don’t need it. By programming your thermostat to lower the temperature when you’re away from home or during the night when you’re sleeping, you can significantly reduce your energy consumption.
Here’s how you can make the most out of your thermostat’s programmable settings:
- Create a schedule: It’s important to have a consistent schedule that aligns with your daily routines. Determine when you leave for work, when you return, and when you go to sleep, and program your thermostat accordingly.
- Avoid temperature extremes: It’s unnecessary and inefficient to set your thermostat to extreme temperatures. Instead, choose a moderate temperature that keeps you comfortable without wastefully using energy.
- Consider setbacks: If you’re away from home for prolonged periods, such as a vacation, set your thermostat to reduce energy consumption. This can be done by using the “vacation mode” or simply adjusting your regular schedule accordingly.
Setting Temperature According to Occupancy
An additional way to save energy with your thermostat is to set the temperature according to occupancy. If there are specific times when certain areas of your home are unused, you can adjust the thermostat settings accordingly. Here are a few tips to help you effectively manage temperature levels:
- Zoning: If possible, consider dividing your home into different zones. This allows you to heat or cool specific areas separately, focusing on occupied spaces and effectively reducing energy consumption in unused areas.
- Temperature adjustment: When adjusting the temperature according to occupancy, keep in mind that even a single degree difference can have a significant impact on energy savings. By lowering the temperature slightly in unoccupied areas, you can save energy without sacrificing comfort.
- Smart thermostat integration: Some thermostats can be synced with motion sensors or connected to your smartphone, allowing them to adjust the temperature based on occupancy. This feature ensures that energy isn’t wasted in unoccupied areas.
By utilizing programmable settings and setting the temperature according to occupancy, you can maximize your energy savings with your home thermostat. Remember to regularly review and adjust your settings to maintain efficiency and comfort in your home.
Frequently Asked Questions On How To Install A Home Thermostat
Can I Install A Home Thermostat Myself?
Yes, you can install a home thermostat yourself. Just follow the manufacturer’s instructions carefully and ensure you have the necessary tools and knowledge. Consider turning off power to the thermostat before starting and consult a professional if you’re unsure.
Do You Need An Electrician To Install A Thermostat?
No, it’s not necessary to hire an electrician to install a thermostat. The installation process is typically straightforward and can be done by any homeowner with basic electrical knowledge. Just make sure to follow the manufacturer’s instructions and turn off the power before starting.
How Do I Install A New Thermostat In My House?
To install a new thermostat in your house, start by turning off the power to the HVAC system. Remove the old thermostat and connect the wires to the new one according to the manufacturer’s instructions. Mount the new thermostat on the wall and restore the power.
Set up the thermostat settings to your preferences. Done!
What Color Wire Goes Where On A Thermostat?
The color of the wire on a thermostat depends on the specific wiring system. It’s important to consult the user manual or contact a professional to ensure proper installation and accurate connection of the wires.
Conclusion
Installing a home thermostat may seem overwhelming, but with these step-by-step instructions, you can do it yourself successfully. By considering factors such as placement, compatibility, and wiring, you’ll be able to upgrade your home’s heating and cooling system efficiently. Remember to turn off the power and consult the manufacturer’s guidelines for your specific thermostat model.
With a little patience and attention to detail, you’ll enjoy the benefits of a properly installed thermostat, enhancing your home’s comfort and energy efficiency. Start saving on your utility bills today!