To install a gas stove, follow the manufacturer’s instructions carefully and ensure the gas supply is turned off before attempting installation. A gas stove can be a great addition to your kitchen, providing efficient and precise cooking capabilities.
However, installing a gas stove requires proper knowledge and attention to safety protocols. In this guide, we will walk you through the step-by-step process of installing a gas stove in your home. By following these instructions and taking necessary precautions, you can ensure a seamless installation experience and enjoy the benefits of cooking with gas.
Let’s get started with the installation process to make your kitchen more functional and convenient.
Gathering The Necessary Tools And Materials
Before you can start installing a gas stove, it’s essential to gather all the necessary tools and materials. This will ensure that the installation process goes smoothly and efficiently. In this section, we will discuss the safety equipment, gas stove, pipe sealant, wrenches, and pipe cutter that you will need.
Safety Equipment
Safety should always be your top priority when working with gas appliances. Make sure you have the following safety equipment on hand before you begin:
- Protective gloves to safeguard your hands
- Safety glasses to protect your eyes from potential hazards
- A fire extinguisher within reach in case of emergencies
Gas Stove
The gas stove itself is, of course, a key component of the installation process. Ensure that you have the gas stove unit, including its attached gas regulator and control knobs, ready to be installed. Check that the gas stove is compatible with your home’s gas supply and meets the necessary safety standards.
Pipe Sealant
One of the essential materials you will need is pipe sealant or pipe thread compound. This substance helps create a secure seal between threaded connections, preventing gas leaks. Look for a high-quality pipe sealant specifically designed for gas lines. It’s crucial to use the right type to ensure a proper and safe installation.
Wrenches
To tighten and loosen various connections during the installation, you will need wrenches. Adjustable wrenches are commonly used for gas stove installations as they offer versatility. Make sure you have a couple of properly sized wrenches on hand to ensure a secure and leak-free installation.
Pipe Cutter
A pipe cutter is an essential tool if you need to adjust or resize the gas line that connects to your gas stove. This handy tool allows you to make precise cuts on the pipe, ensuring a proper fit. Choose a pipe cutter that is suitable for the type and size of the gas line you are working with.
By gathering these necessary tools and materials, you’ll be well-prepared to proceed with the installation of your gas stove. Remember to double-check the compatibility of the gas stove with your home’s gas supply and follow all safety guidelines to ensure a successful and safe installation.
Preparing For Installation
Before installing a gas stove, it’s crucial to properly prepare the space and ensure compatibility with the gas supply. By following these steps, you’ll be well-prepared for a successful installation.
Assessing the Space
Prior to installation, it’s important to assess the space where the gas stove will be placed. Take measurements of the area to ensure there is enough room for the stove, leaving sufficient clearance on all sides for safety. Consider factors such as proximity to windows, cabinets, and other appliances to prevent any potential hazards or damage.
Checking Gas Supply Compatibility
Another vital step is to check the compatibility of the gas supply in your home with the gas stove you plan to install. This involves verifying that the gas line has the correct pressure rating and that it’s the appropriate size for the stove. Review the manufacturer’s specifications and consult with a professional if needed to ensure the gas supply meets the necessary requirements for a safe and efficient installation.
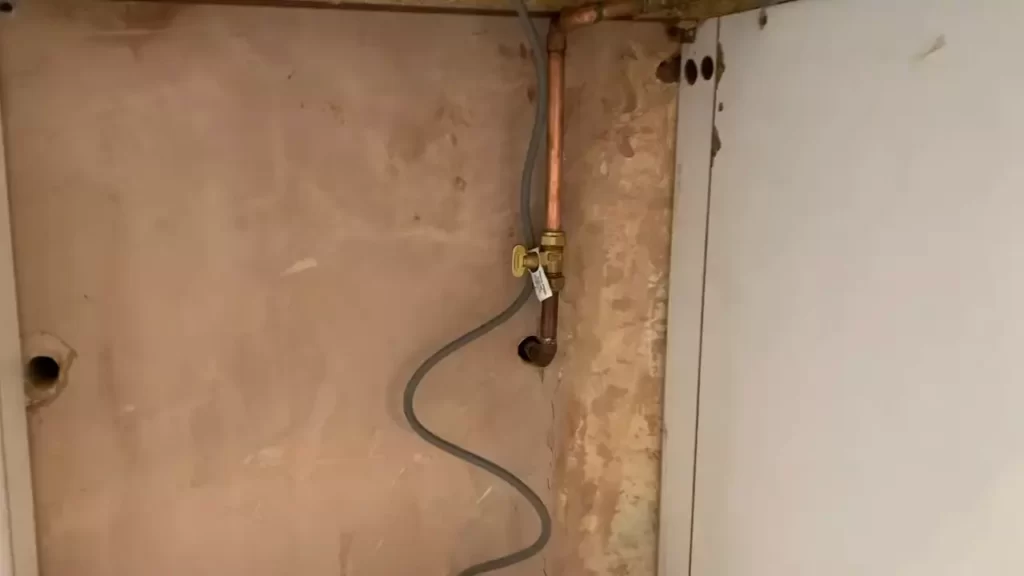
Turning Off the Gas Supply
Before starting the installation process, it’s crucial to turn off the gas supply. Locate the gas shut-off valve, usually situated near the gas meter or the appliance, and close it by turning it clockwise. This will prevent any potential leaks or accidents during the installation. Remember, safety should always be the top priority.
By following these steps and adequately preparing for the installation, you’re setting a solid foundation for successfully installing your gas stove. With careful attention to detail and adherence to safety precautions, you’ll soon be enjoying the convenience and comfort it brings to your kitchen.
Installing The Gas Stove
Installing a gas stove is a simple and straightforward process that can be completed by anyone with a basic understanding of plumbing and carpentry. In this section, we will go through the step-by-step process of installing a gas stove, ensuring that you have all the necessary information to complete the installation safely and efficiently. From removing the old stove to securing the new one, we will cover every aspect of the process. Let’s dive in and learn how to install a gas stove!
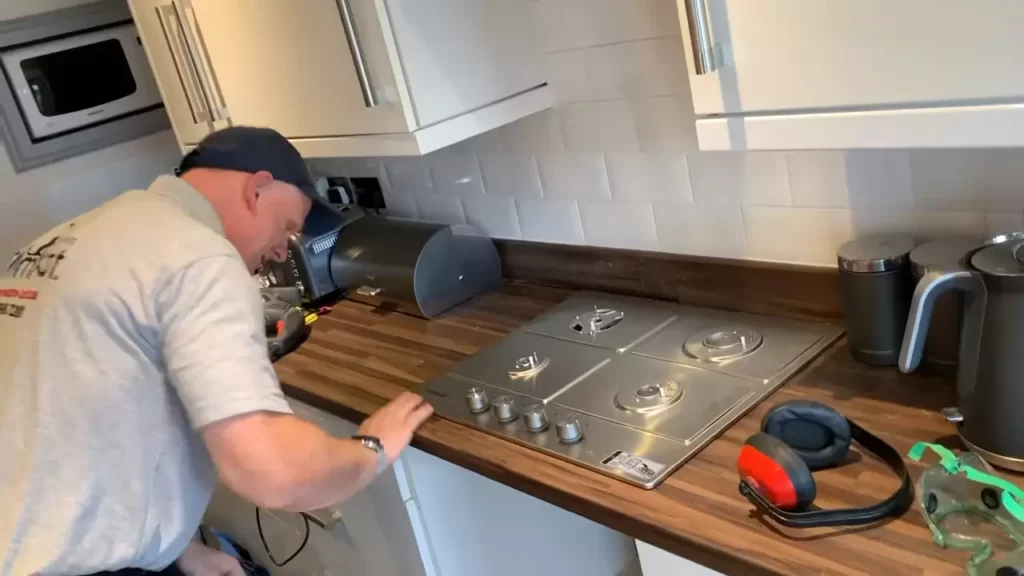
Removing the Old Stove
Before you can install a new gas stove, it is essential to remove the old one. Start by turning off the gas supply to the stove at the main valve. Once the gas is turned off, disconnect the gas line from the stove using an adjustable wrench. Make sure to have a bucket or towel handy to catch any residual gas that may escape during the disconnection. Once the gas line is disconnected, carefully slide the old stove away from the wall, ensuring not to damage the flooring or any nearby surfaces. Dispose of the old stove according to your local regulations.
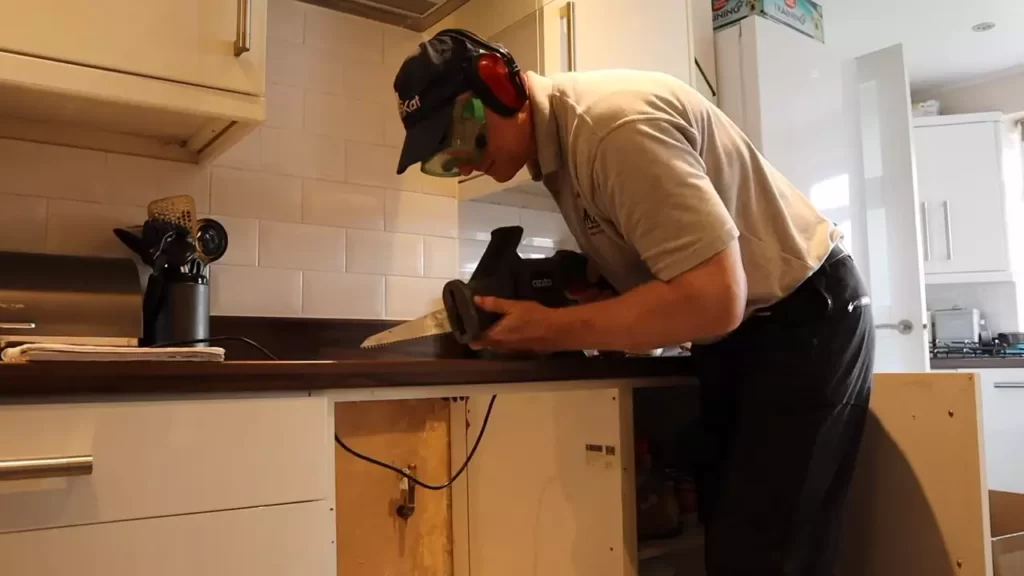
Measuring and Cutting the Gas Line
Now that the old stove is removed, it’s time to measure and cut the gas line to fit the new stove. Start by measuring the distance between the gas line connection on the wall and the connection on the new stove. Use a pipe cutter to cut the gas line to the desired length, ensuring a clean and straight cut. Remove any burrs or rough edges from the cut end of the gas line using a file or sandpaper. It’s important to measure and cut the gas line accurately to prevent any leaks or issues in the future.
Attaching the Pipe to the Stove
With the gas line cut to size, it’s time to attach it to the new stove. Begin by applying Teflon tape to the threads of the gas line connection on the stove. This tape helps create a tight seal and prevent any gas leaks. Once the tape is applied, carefully screw the gas line into the connection on the stove using an adjustable wrench. Make sure the connection is tight but avoid over-tightening, as it can damage the threads. Double-check that the connection is secure before proceeding to the next step.
Securing the Stove to the Floor or Wall
To ensure the stability and safety of your gas stove, it’s important to secure it to the floor or wall. Most gas stoves come with brackets or straps for this purpose. Refer to the manufacturer’s instructions to determine the specific requirements for securing your stove. Use screws or anchors to secure the brackets or straps to the floor or wall as indicated. Make sure the stove is level and securely fastened, preventing any movement during use. This step is crucial for preventing accidents and maintaining the longevity of your gas stove.
Connecting The Gas Supply
Installing a gas stove may seem like a daunting task, but with the right knowledge and precautions, it can be done safely and efficiently. One crucial step in this process is connecting the gas supply. In this article, we will walk you through the steps involved in connecting your gas stove to the gas supply, ensuring a secure and leak-free connection.
Applying Pipe Sealant
Before making any connection, it’s important to apply pipe sealant to the threaded end of the gas line. Pipe sealant, also known as pipe dope or thread sealant, helps create a tight and secure seal between the gas line and the stove’s gas connector. This prevents any gas leakage, ensuring your safety.
When applying pipe sealant, it’s crucial to follow the manufacturer’s instructions for the specific product you are using. Generally, you will need to:
- Clean the threaded end of the gas line with a rag to remove any dirt, debris, or old sealant.
- Apply a thin layer of pipe sealant to the threaded end of the gas line, spreading it evenly.
- Ensure the sealant is applied only to the threaded area and not to the smooth portion of the gas line.
By properly applying pipe sealant, you create a reliable seal that prevents potential gas leaks.
Making the Connection
Once the pipe sealant has been applied, it’s time to connect the gas line to the stove’s gas connector. To do this, follow these steps:
- Position the stove near the gas line and ensure there is enough clearance around it for proper installation.
- Take the nut end of the flexible gas connector and attach it to the gas line, making sure it is fully threaded onto the gas line.
- Using an adjustable wrench or a suitable tool, tighten the connection by turning it clockwise until it is snug. Avoid over-tightening, as it can cause damage to the gas line.
By securely connecting the gas line to the stove’s gas connector, you ensure a reliable and safe gas supply for your stove.
Testing for Leaks
After the connection has been made, it is crucial to test for any potential gas leaks. This step is essential for your safety and the proper functioning of your gas stove. To test for leaks:
- Apply a mixture of water and dish soap to the connection, covering it entirely.
- Observe closely for any bubbles forming on the surface of the connection.
- If you notice any bubbles, it indicates a gas leak. In this case, turn off the gas supply immediately and recheck the connection for proper sealing. If the issue persists, consult a professional.
- If no bubbles appear, it indicates a secure connection, and you can proceed with confidence.
By testing for leaks, you can ensure the safety and efficiency of your gas stove installation.
Connecting the gas supply when installing a gas stove is a critical step that requires attention to detail and adherence to safety guidelines. By following the steps outlined in this article, you can connect your gas stove with confidence, knowing that you have taken the necessary precautions to prevent gas leaks and ensure your safety.
Finalizing The Installation
Now that you have successfully installed your gas stove, it’s time to complete the final steps to ensure everything is in working order. This section will guide you through reassembling and testing the stove, cleaning up the work area, and reviewing important safety precautions.
Reassembling and Testing the Stove
Once you have connected the gas line and secured the stove in place, it’s time to reassemble the various components of the stove. Follow these steps to complete the reassembly process:
- Reattach the burner grates and burner caps to their respective positions on the stove.
- If your stove has removable control knobs, slide them back onto the control shafts.
- Align the oven racks and slide them back into place.
- Securely close the stove’s oven door.
Once you have reassembled the stove, it’s important to conduct a thorough test to ensure proper functionality. Follow these steps to test your gas stove:
- Double-check that all gas valves are in the “off” position.
- Turn on the main gas supply valve.
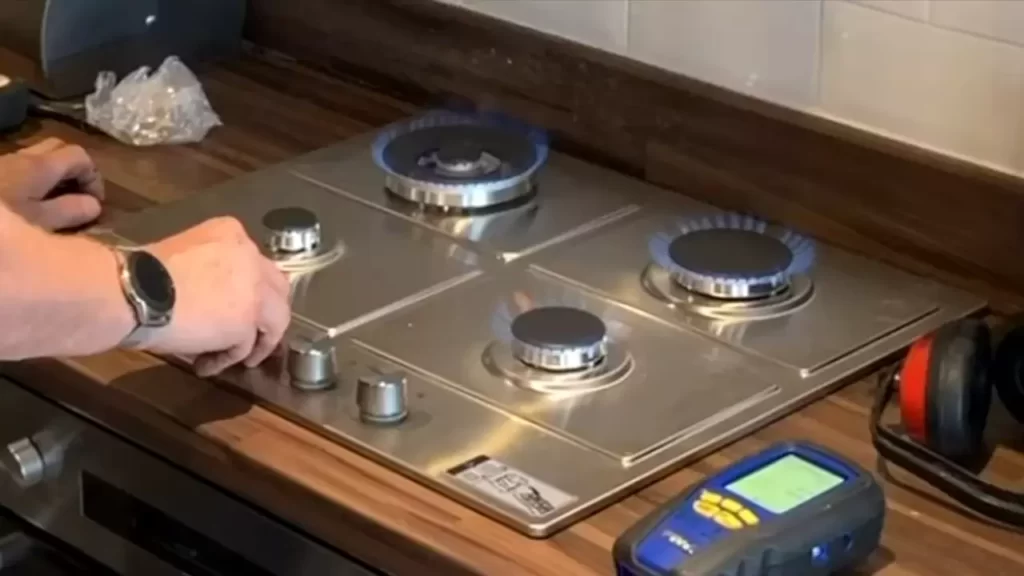
- Light one burner at a time and confirm that the flame is steady and blue.
- Check the oven’s temperature control by setting it to a desired temperature and ensuring the oven reaches and maintains that temperature.
- Test any additional features, such as timers or self-cleaning functions, to ensure they are working correctly.
Cleaning Up the Work Area
After completing the installation and testing, it’s essential to tidy up your work area to ensure safety and cleanliness. Here are some cleaning guidelines to follow:
- Remove any remaining debris or packaging materials from the stove installation.
- Use a damp cloth to wipe down the stove’s exterior, as well as the surrounding countertop and floor.
- Please remember to avoid using any abrasive cleaners that could damage the stove’s surface.
By taking the time to clean up after installation, you can ensure a clean and organized cooking space for your future culinary endeavors.
Reviewing Safety Precautions
Safety should always be a top priority when it comes to gas stove installations. Before you start using your new stove, take a moment to review the following safety precautions:
- Keep flammable objects, such as curtains or paper, at a safe distance from the stove.
- Install a carbon monoxide detector in your kitchen or nearby area.
- Regularly check the gas connections for any potential leaks.
- Be mindful of any unusual odors or sounds coming from the stove, as these could indicate a problem.
- If you ever smell gas or suspect a leak, immediately turn off the gas supply and contact a professional technician.
By adhering to these safety precautions, you can enjoy the convenience of your gas stove while maintaining a secure and well-protected environment in your kitchen.
Frequently Asked Questions On How To Install A Gas Stove
Can You Install A Gas Stove Yourself?
It is not advisable to install a gas stove yourself. It involves dealing with gas lines and connections, which should be done by a professional to ensure safety and compliance. Hiring a licensed gas technician is recommended to ensure proper installation and avoid potential hazards.
What Do You Need To Install A Gas Stove?
To install a gas stove, you will need a gas line connection, a flexible gas hose, a gas shutoff valve, and compatible gas fittings. A licensed professional should handle the installation to ensure safety and proper functionality. Always follow local building codes and manufacturer instructions.
Do You Have To Vent A Gas Stove?
Yes, it is necessary to vent a gas stove. Venting a gas stove helps to safely remove carbon monoxide and other harmful gases produced during the combustion process. Proper ventilation is essential for avoiding health issues and ensuring good indoor air quality.
What Kind Of Outlet Does A Gas Stove Need?
A gas stove needs a specific type of outlet called a gas line.
Conclusion
Installing a gas stove may seem like a daunting task, but with the right steps, it can be a straightforward process. By following the guidelines of this blog post, you can successfully install a gas stove in your home. Remember to prioritize safety and consult a professional if needed.
With the right tools and knowledge, you can enjoy the benefits of cooking with gas in no time. Happy cooking!