To install a gas regulator, first, turn off the gas supply, then remove the old regulator and attach the new one according to the manufacturer’s instructions. Welcome to our guide on how to install a gas regulator.
Gas regulators are essential for controlling the flow and pressure of gas in your home or business. Whether you’re replacing an old regulator or installing one for the first time, this step-by-step guide will help you ensure a safe and proper installation.
We’ll walk you through the necessary precautions, tools you’ll need, and easy-to-follow instructions to get your gas regulator up and running efficiently. So let’s dive in and learn how to install a gas regulator in just a few simple steps.
Preparing For The Installation Process
Inspecting And Preparing The Gas Regulator
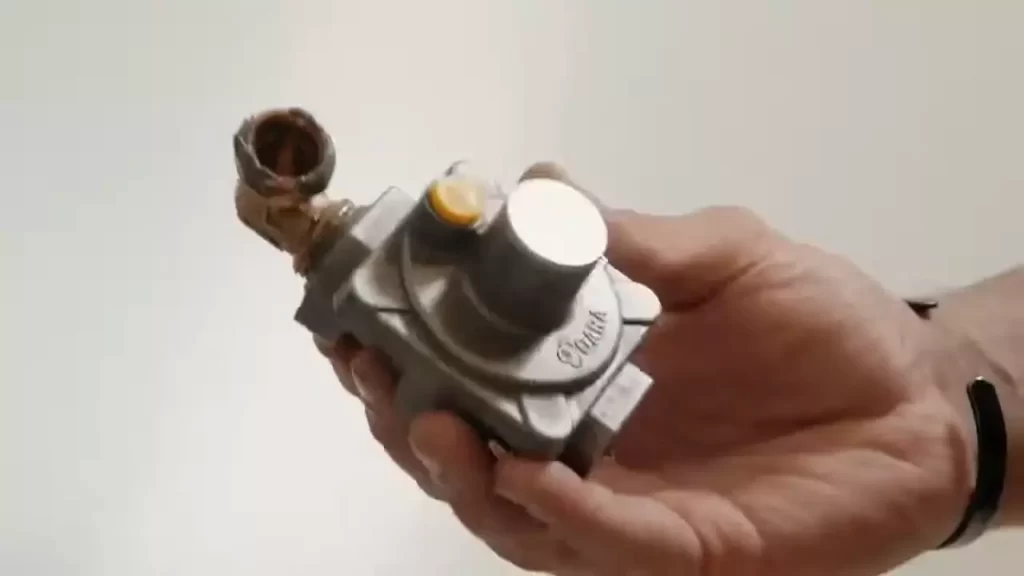
Before installing a gas regulator, it is crucial to inspect and prepare it properly to ensure its safe and efficient operation. This step is essential to avoid any potential hazards and to ensure that the regulator functions optimally. In this section, we will guide you through the process of checking the regulator for any damage or wear, cleaning and preparing it for installation, as well as understanding the different parts of the regulator.
Checking the regulator for any damage or wear
It is important to carefully examine the regulator for any signs of damage or wear before proceeding with the installation. This will help you identify any potential issues that might affect the performance of the regulator or compromise its safety. Here are a few steps to follow:
- Inspect the exterior casing of the regulator. Look for any cracks, dents, or corrosion. If you notice any damage, it is advisable to replace the regulator.
- Check the regulator connections for any signs of leaks. Use a mixture of soap and water to create a solution and apply it to the connections. If you see bubbles forming, it indicates a leak, and the regulator should not be used.
- Examine the pressure gauge to ensure it is functioning properly. Make sure the needle is not stuck and that it provides accurate readings. If the gauge is faulty, it should be replaced.
- Inspect the diaphragm and spring mechanism of the regulator for any signs of wear or deterioration. These components are crucial for the proper functioning of the regulator, so any damage should be addressed immediately.
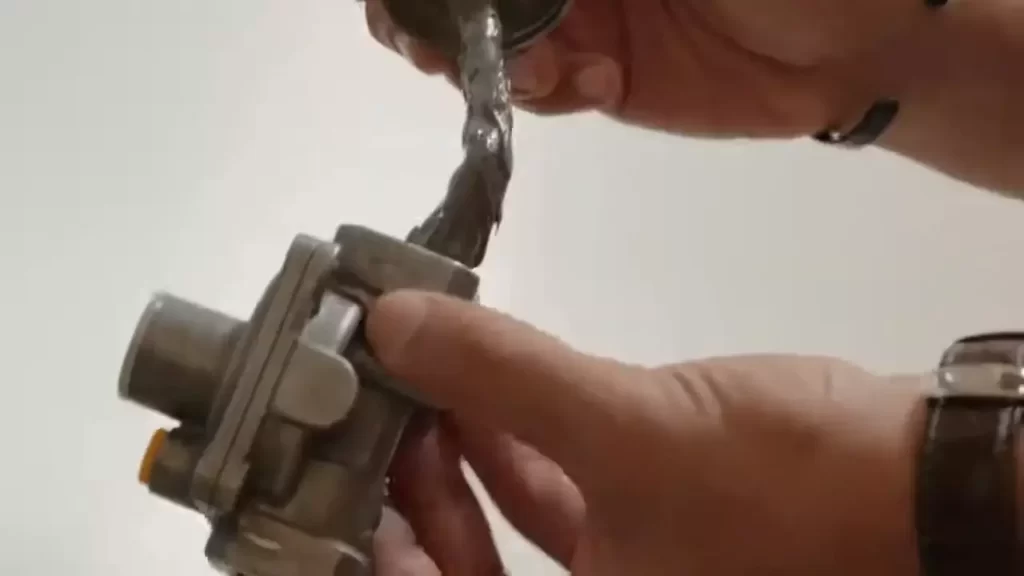
Cleaning and preparing the regulator for installation
Once you have inspected the regulator and ensured that it is in good condition, the next step is to clean and prepare it for installation. Proper cleaning and preparation help remove any dirt, debris, or contaminants that may affect the performance of the regulator. Follow these steps:
- Disconnect the regulator from any gas source or cylinder.
- Clean the exterior of the regulator using a mild detergent and a soft cloth. Avoid using abrasive cleaners or brushes, as they can damage the regulator’s surface.
- Inspect the interior of the regulator by removing the cover or cap. If you notice any dirt or debris, carefully clean it using compressed air or a soft brush.
- Check the filter or screen inside the regulator and clean it if necessary. This component prevents dirt and debris from entering the regulator and should be kept clean for optimal performance.
Understanding the different parts of the regulator
Before proceeding with the installation, it is important to have a basic understanding of the different parts of the regulator. This knowledge will help you correctly assemble and connect the regulator during the installation process. Here are the key parts of a typical gas regulator:
| Part | Description |
|---|---|
| Body | The main housing of the regulator that contains the internal components. |
| Diaphragm | A flexible membrane that moves in response to changes in pressure, controlling the flow of gas. |
| Spring | Provides the necessary force to keep the diaphragm in the proper position, maintaining the desired pressure level. |
| Pressure Gauge | Displays the pressure of the gas being regulated, helping you monitor and adjust it as needed. |
| Inlet and Outlet Connections | Allow the regulator to be connected to the gas source and the downstream appliance or system. |
By understanding the function and role of each part, you will be better equipped to install the regulator correctly and ensure its proper operation.
Now that you have inspected and prepared the gas regulator, as well as familiarize yourself with its various parts, you are ready to proceed with the installation process. In the next section of this guide, we will guide you through the steps of installing the regulator and connecting it to the gas supply.
Removing The Old Gas Regulator
In order to install a new gas regulator, the first step is to remove the old one. This process involves a few important steps to ensure a smooth and safe transition. Proactively following these steps will ensure a seamless installation of the new regulator.
Turning off any appliances connected to the regulator
The very first step in removing the old gas regulator is to turn off all appliances that are connected to it. This is crucial to avoid any leakage of gas during the removal process. By turning off the appliances, you minimize the risk of gas-related accidents and guarantee the safety of yourself and others.
Disconnecting the gas supply line from the old regulator
Once you have turned off the appliances, the next step is to disconnect the gas supply line from the old regulator. This line is connected to the regulator by a fitting or a nut. To disconnect it, you will need to use an appropriate wrench or tool. Carefully remove the fitting or nut by turning it counterclockwise. Make sure to handle the line and the old regulator with care to prevent any damage or gas leakage.
Removing the old regulator from its mounting location
After disconnecting the gas supply line, it’s time to remove the old regulator from its mounting location. The regulator is usually secured to a wall or a bracket. Locate the screws or bolts that are holding it in place and, using a suitable tool, remove them one by one. Once all the screws or bolts are removed, gently pull the old regulator away from its mounting location. Be cautious while doing this to avoid any damage to the gas supply line or any surrounding components.
By following these steps diligently, you will successfully remove the old gas regulator and be ready to proceed with the installation of the new one. Remember to always prioritize safety and take necessary precautions throughout the process.
Installing The New Gas Regulator
Installing a new gas regulator is an essential step in ensuring the safe and efficient operation of your gas appliance. In this guide, we will walk you through the process of installing a gas regulator. Before proceeding with the installation, make sure you have selected the appropriate location for installation, attached the new regulator to the mounting bracket, and connected the gas supply line to the new regulator. Let’s dive into each step in detail.
Selecting the appropriate location for installation
When it comes to installing a gas regulator, selecting the appropriate location is crucial for the proper functioning and safety of your gas appliance. Here are a few things to consider:
- Choose a well-ventilated area that allows for the free flow of air.
- Avoid installing the regulator near any sources of heat, flames, or sparks.
- Ensure that the location is easily accessible for maintenance and inspection purposes.
Take your time to find the perfect spot, as this will ensure the longevity and reliability of your gas appliance.
Attaching the new regulator to the mounting bracket
Once you have identified the ideal location for your new gas regulator, it’s time to attach it to the mounting bracket. Follow these steps:
- Securely mount the bracket on a stable surface using appropriate screws or fasteners.
- Align the regulator with the bracket and insert it into place.
- Tighten the screws or fasteners to ensure a firm connection.
- Double-check the attachment to make sure the regulator is securely fixed to the mounting bracket.
Attaching the regulator to the mounting bracket properly is essential for stability and avoiding any potential leaks or accidents.
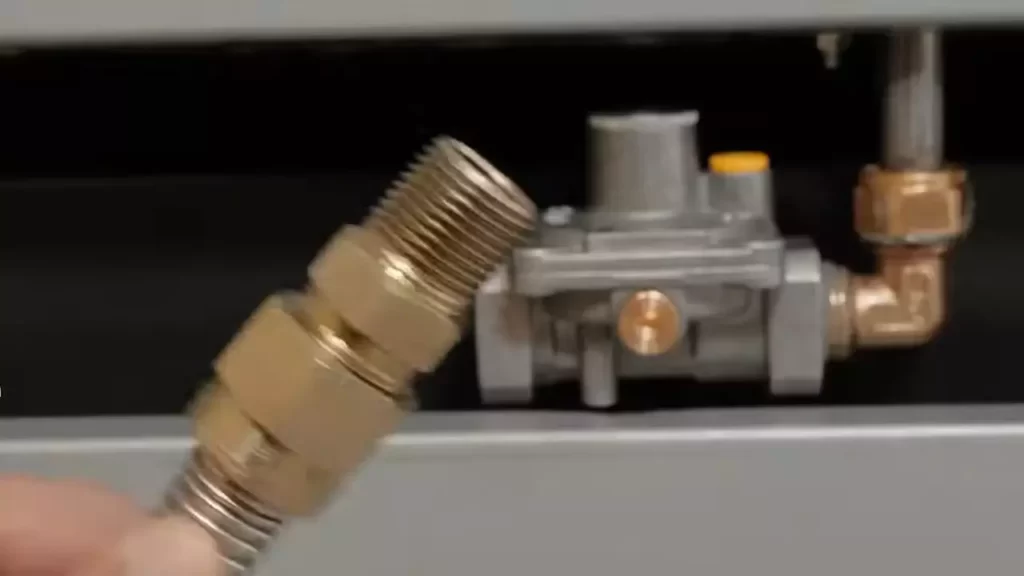
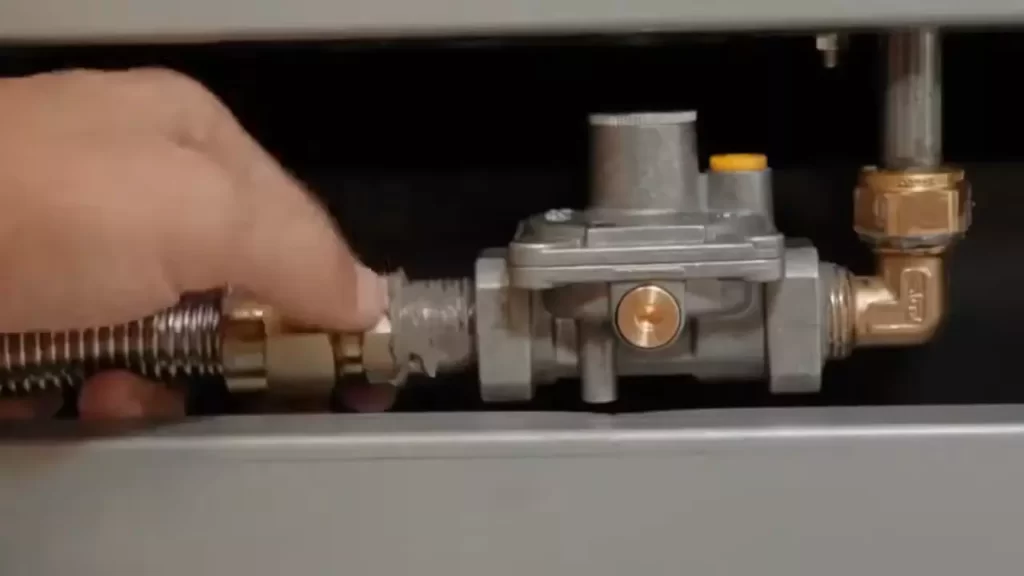
Connecting the gas supply line to the new regulator
With the regulator securely attached to the mounting bracket, the final step is to connect the gas supply line. Follow these guidelines:
- Inspect the gas supply line for any damage or wear. If necessary, replace it before proceeding.
- Ensure that the threads on the regulator and gas supply line match and are clean.
- Apply some pipe thread sealant to the threads to prevent gas leaks.
- Carefully screw the gas supply line onto the regulator, making sure not to overtighten.
- Use a wrench to provide a final snug and secure connection.
Connecting the gas supply line to the new regulator requires attention to detail to prevent any potential gas leaks, ensuring the safety of your gas appliance.
By following these step-by-step instructions for installing a new gas regulator, you can ensure the safe and efficient operation of your gas appliance. Remember to always prioritize safety and consult a professional if you are unsure about any aspect of the installation process. Now you can enjoy peace of mind while using your gas appliance!
Testing And Adjusting The Gas Regulator
Conducting a leak test to ensure proper installation
One crucial step in installing a gas regulator is to conduct a leak test. This test is essential for ensuring that the regulator has been properly installed and there are no gas leaks that could pose a safety hazard. Follow these steps to conduct a leak test:
- Prepare a mixture of soap and water. This will be used to check for leaking gas.
- Apply the soapy water mixture to all the connection points of the gas regulator. This includes the inlet, outlet, and any other fittings.
- Observe the connection points closely and look for any bubbles forming. If you notice bubbles, it indicates a leak in that area.
- If there are no bubbles and everything appears to be secure, the installation is leak-free. However, if you spot any bubbles, carefully tighten the connections until the bubbles disappear.
Adjusting the pressure settings on the regulator
After conducting the leak test and ensuring a secure installation, it’s important to adjust the pressure settings on your gas regulator. This step is necessary to ensure that the regulator is functioning correctly and providing the desired amount of gas to your appliances. Follow these steps to adjust the pressure settings:
- Locate the pressure adjustment screw on your gas regulator. It is typically labeled or indicated with an arrow.
- Using a suitable tool, such as a screwdriver, turn the pressure adjustment screw clockwise to increase the pressure or counterclockwise to decrease it.
- Make small adjustments at a time and monitor the pressure gauge to achieve the desired pressure.
- Once you have reached the desired pressure, tighten the locknut to secure the pressure adjustment and prevent unintentional changes.
Testing the functionality of the new regulator
Testing the functionality of the newly installed gas regulator is crucial to ensure that it is working properly and providing a steady flow of gas to your appliances. Follow these steps to test the functionality:
- Ensure all gas-consuming appliances are turned off.
- Open the gas valve slowly to allow gas to flow into the system.
- Check the pressure gauge on the regulator. It should display the desired pressure, as per the manufacturer’s specifications.
- Turn on each gas-consuming appliance one at a time and observe their operation.
- Check for any irregularities, such as weak flames or sputtering, which could indicate a problem with the regulator.
- If everything appears to be functioning correctly, your new gas regulator is ready for use.
Troubleshooting Common Issues
While installing a gas regulator may seem like a straightforward task, it is not uncommon to run into some issues along the way. Knowing how to troubleshoot these issues can save you time, and money, and ensure the safety of your gas appliances. Here are some common problems you may encounter and how to address them:
Identifying and addressing gas leaks
Gas leaks can pose a serious safety hazard, so it’s important to be able to identify and address them promptly. If you suspect a gas leak, follow these steps:
- Step 1: Ensure everyone’s safety by evacuating the area immediately.
- Step 2: Avoid using any open flames or electrical devices that could ignite the gas.
- Step 3: Open windows and doors to ventilate the space.
- Step 4: Once outside, using a gas detector or soapy water, check for any signs of a gas leak. Look for bubbles or a strong odor.
- Step 5: If you detect a leak, contact your gas provider or a licensed gasfitter to address the issue.
Troubleshooting low or high gas pressure problems
Another common issue that can arise when installing a gas regulator is low or high gas pressure. Here’s how to troubleshoot both scenarios:
Low Gas Pressure
If you are experiencing low gas pressure, follow these steps to troubleshoot:
- Step 1: Check all valves to ensure they are fully open.
- Step 2: Inspect the gas regulator for any blockages or debris. Clean or replace if necessary.
- Step 3: Verify that the regulator is properly installed and not damaged in any way.
- Step 4: If the problem persists, contact a professional to assess and diagnose the issue.
High Gas Pressure
In the event of high gas pressure, take the following steps to troubleshoot:
- Step 1: Check all valves to ensure they are not over-tightened.
- Step 2: Inspect the gas regulator for any signs of malfunction, such as excessive gas flow.
- Step 3: Verify that the regulator is properly adjusted to the correct pressure setting.
- Step 4: If the problem persists, contact a professional to assess and diagnose the issue.
Seeking professional help if needed
While troubleshooting common issues can often be resolved on your own, there are situations where it’s necessary to seek professional help. If you are unfamiliar with gas systems, or if the problem persists despite your best efforts, it’s important to contact a licensed gasfitter or technician who can properly diagnose and resolve the issue.
Maintaining And Caring For The Gas Regulator
The gas regulator is an essential component of your gas system that helps control and regulate the flow of gas to your appliances. To ensure optimal performance and safety, it is important to regularly inspect, clean, and lubricate the regulator. Additionally, knowing when to replace the regulator is crucial to prevent any potential gas leaks or malfunctions. In this section, we will discuss the key steps to maintaining and caring for your gas regulator.
Regularly inspecting the regulator for damage or wear
Inspecting your gas regulator on a regular basis is crucial to identify any signs of damage or wear. Regular inspections can help you catch any potential issues early on and prevent safety risks. When inspecting the regulator, look out for:
- Cracks or splits in the regulator body
- Damaged or corroded fittings
- Leaking gas
- Worn-out or faulty pressure gauges
If you notice any of these issues, it is important to take immediate action. This may involve repairing or replacing the regulator or contacting a professional for assistance. Regular inspections will help ensure that your gas regulator is functioning properly and keeping your gas system safe.
Cleaning and lubricating the regulator as needed
Cleaning and lubricating the gas regulator is another important step in its maintenance. Over time, dust, dirt, and debris may accumulate on the regulator, affecting its performance. Here’s how you can clean and lubricate your gas regulator:
- Start by turning off the gas supply to the regulator.
- Use a clean cloth or brush to remove any visible dirt or debris from the regulator body and fittings.
- For stubborn residue, you can use a mild soap and water solution to gently clean the affected areas.
- Once cleaned, dry the regulator thoroughly to prevent any water from entering the gas system.
- Next, lubricate the moving parts of the regulator using a silicone-based lubricant.
- Apply the lubricant sparingly to avoid excess build-up.
- Finally, turn on the gas supply and check for any leaks or abnormalities in the regulator’s operation. If you notice any issues, contact a professional for assistance.
Regular cleaning and lubrication will help keep your gas regulator in good working condition and prolong its lifespan.
Replacing the regulator when necessary
Despite regular maintenance, there may come a time when your gas regulator needs to be replaced. When replacing the regulator, it is important to follow these steps:
- Turn off the gas supply to the regulator.
- Disconnect the regulator from the gas line by unscrewing the fittings.
- Inspect the new regulator to ensure it is compatible with your gas system and has the appropriate pressure rating.
- Securely attach the new regulator to the gas line, ensuring the fittings are tightened properly.
- Turn on the gas supply and check for any leaks. Use a solution of soapy water to detect any escaping gas. If you notice bubbles forming, there may be a leak, and you should immediately turn off the gas and seek professional help.
Regularly inspecting, cleaning, and lubricating your gas regulator, as well as knowing when to replace it, is essential for maintaining a safe and efficient gas system. By following these steps, you can ensure that your gas regulator functions optimally, giving you peace of mind.
Frequently Asked Questions On How To Install A Gas Regulator
How Should A Gas Regulator Be Installed?
To install a gas regulator, follow these steps: First, turn off the gas supply. Second, remove the old regulator if applicable. Third, connect the new regulator by screwing it onto the gas line. Fourth, turn on the gas supply and check for leaks using a soapy water solution.
Finally, make sure the regulator is securely in place.
Where Do You Put A Gas Regulator?
A gas regulator should be properly installed adjacent to the gas appliance, typically near the gas meter or tank. It helps control the pressure of the gas supply going into the appliance, ensuring safe and efficient operation.
How Should A Propane Regulator Be Installed?
To install a propane regulator, follow these steps: 1. Shut off the propane supply. 2. Remove the existing regulator (if any). 3. Ensure the regulator matches the required pressure rating for your equipment. 4. Connect the regulator to the propane tank or supply line.
5. Test for leaks using a soap and water solution.
Which Way Should A Gas Regulator Face?
A gas regulator should face outward from the gas cylinder, with the gas flow arrow pointing in the direction of gas flow. It ensures the proper regulation of gas pressure for safe and efficient usage.
Conclusion
Installing a gas regulator is a crucial step in ensuring the safe and efficient operation of your gas appliances. By following the step-by-step guide provided in this blog post, you can confidently install a gas regulator on your own. Remember to prioritize safety and follow all relevant codes and regulations.
Regularly inspect and maintain your gas regulator to prolong its lifespan. With these tips in mind, you can enjoy an uninterrupted gas supply and peace of mind in your home or business.