To install a gas line for a stove, turn off the gas supply, attach the new gas line, and secure all fittings with a wrench. Additionally, check for any leaks by applying a soapy water solution to the connections and observing for bubbles.
When installing a gas line for a stove, it is crucial to follow proper procedures to ensure safety and efficiency. Before beginning the installation process, be sure to turn off the gas supply to your home. Next, use a wrench to securely attach the new gas line to the existing gas line fitting.
Make sure to tighten all fittings to prevent any leaks. Finally, inspect the connections for potential leaks by applying a soapy water solution and checking for the presence of bubbles. By following these steps, you can successfully install a new gas line for your stove.
Understanding The Basics Of Gas Line Installation
Importance of Proper Gas Line Installation
When it comes to installing a gas line for your stove, understanding the basics is crucial. A properly installed gas line ensures a safe and efficient supply of gas to your stove, allowing you to cook your meals with ease. It is important to remember that gas, though a convenient fuel source, can also be dangerous if not handled properly. In this section, we will discuss the importance of proper gas line installation, safety precautions to consider, and the necessary tools and materials needed for a successful installation.
Safety Precautions
Before you proceed with installing a gas line for your stove, it is vital to prioritize safety. Gas leaks can pose a serious threat to your household, risking fire accidents and even more severe consequences. By taking proper safety precautions, you can minimize these risks and ensure a secure installation process:
- Inspect the work area thoroughly, checking for any signs of gas leaks or damage to existing gas lines.
- Turn off the main gas supply valve to prevent gas flow during the installation process.
- Wear protective gear such as gloves and safety goggles to protect yourself from potential hazards.
- Make sure the area is well-ventilated to avoid the accumulation of gas fumes.
- Avoid using open flames or any potential sources of ignition near the installation site.
- Take your time and follow the installation steps carefully, referring to manufacturer instructions and local regulations.
Tools and Materials Needed
Before you begin the gas line installation process, gather all the necessary tools and materials to ensure a smooth and efficient installation. Here are some essential items you will need:
| Tools | Materials |
|---|---|
| Measuring tape | Gas pipe |
| Pipe wrench | Sealant tape or compound |
| Pipe cutter | Fittings (such as elbows and tees) |
| Gas pressure gauge | Gas line shut-off valve |
| Flux and brush | Gas leak detection solution |
| Torch | Fasteners (screws, brackets, etc.) |
| Leak detection tool | Pipe hangers or straps |
By equipping yourself with the necessary tools and materials, you can ensure a hassle-free installation process and avoid last-minute trips to the hardware store.
Remember, when it comes to gas line installation, safety should always be the top priority. Following proper safety measures and adhering to local regulations will help you create a secure and functional gas line for your stove.
Planning And Preparation
Planning and preparation are crucial steps when it comes to installing a gas line for your stove. Before you begin the installation process, it is important to carefully assess the location and requirements, obtain any necessary permits and approvals, and measure and mark the gas line path. By following these steps, you can ensure a safe and efficient installation of your gas line.
Assessing the Location and Requirements
The first step in planning for your gas line installation is to assess the location and requirements of your stove. This involves determining where your stove will be placed in your kitchen and taking into consideration the proximity to existing gas lines or outlets. It is important to ensure that there is enough space for the gas line and that it meets the necessary safety regulations.
You should also consider the type of gas that will be used for your stove. In most cases, natural gas is a common choice, but in some areas, liquefied petroleum gas (LPG) may be the preferred option. Make sure to consult with a professional to determine the type of gas that is suitable for your needs.
Obtaining Necessary Permits and Approvals
Before beginning any gas line installation, it is important to obtain the necessary permits and approvals from the appropriate authorities. This ensures that your installation meets the required safety standards and regulations. Failure to obtain the necessary permits and approvals can result in fines and penalties, so it is crucial to complete this step before proceeding.
To obtain permits and approvals, you will need to contact your local building department or gas utility company. They will provide you with the necessary application forms and guidelines. It is important to provide accurate information and follow the instructions provided to ensure a smooth and hassle-free approval process.
During the approval process, an inspector may visit your property to assess the proposed gas line installation. They will verify that the installation is up to code and conforms to the safety regulations. Once the necessary permits and approvals are obtained, you can proceed with the installation process.
Measuring and Marking the Gas Line Path
The next step in the planning and preparation process is to measure and mark the gas line path. This involves mapping out the route that the gas line will take from the existing gas supply to the location of your stove. Accurate measurements are crucial to ensure that the gas line fits properly and that there are no obstacles or obstructions along the way.
Start by identifying the location of the existing gas supply and the intended location of your stove. Measure the distance between these two points, taking into account any bends or corners that may be required. Use a tape measure or other suitable measuring tool to get precise measurements.
Once you have determined the measurements, mark the gas line path using a suitable marker or tape. This will serve as a guide during the installation process and help ensure that the gas line is installed accurately.
By following these planning and preparation steps, you can set yourself up for a successful gas line installation. Remember to always consult with a professional and adhere to the necessary safety regulations and guidelines for a safe and efficient installation.
Gathering The Required Supplies
Before you start installing a gas line for your stove, it’s important to gather all the necessary supplies. This ensures a smooth and efficient installation process without any delays. In this section, we will discuss the essential components, the right pipes and fittings, and additional equipment and tools needed for the gas line installation.
Essential components for the gas line installation
When it comes to installing a gas line for your stove, there are a few essential components that you’ll need to have on hand. These include:
- Gas shut-off valve: This valve is a crucial safety feature that allows you to turn off the gas supply in case of emergencies or when the stove is not in use.
- Flexible gas connector: A flexible gas connector is a must-have for connecting the gas supply to the stove. It allows for easy maneuverability and flexibility during installation.
- Pipe sealant: To ensure a secure and leak-free connection, it’s important to use pipe sealant specifically designed for gas lines. This will help prevent any potential gas leaks.
Selecting the right pipes and fittings
Selecting the right pipes and fittings is crucial for a safe and efficient gas line installation. Here’s what you need to keep in mind:
- Pipe material: When it comes to gas lines, it’s important to use pipes that are approved for gas applications. Common options include steel pipes, copper pipes, and CSST (Corrugated Stainless Steel Tubing).
- Pipe size: The size of the pipe depends on the BTU (British Thermal Unit) rating of your stove. It’s important to consult local codes and guidelines to determine the appropriate pipe size for your specific installation.
- Fittings: Fittings are used to join pipes together and ensure a secure connection. Make sure to use fittings that are compatible with the chosen pipe material.
Identifying additional equipment and tools
In addition to the essential components and pipes, there are a few additional equipment and tools that you might need during the gas line installation. These include:
- Pipe cutter: A pipe cutter is a handy tool for cutting pipes to the desired length. It ensures clean and precise cuts, making the installation process much simpler.
- Wrenches: Having a set of adjustable wrenches will help you tighten and secure fittings and connections.
- Leak detection solution: To ensure the integrity of the gas line, it’s important to have a leak detection solution on hand. This solution helps identify any potential gas leaks by producing bubbles when applied to connections.
By gathering all the required supplies beforehand, you can ensure a smooth and successful gas line installation for your stove. Remember to always follow safety guidelines and consult professionals if needed. Now that you have the necessary components, let’s move on to the next step: planning the installation process!
Shutting Off And Disconnecting The Gas Supply
When it comes to installing a gas line for your stove, it’s crucial to start by shutting off and disconnecting the gas supply. This step is important for both safety and ease of installation. In this guide, we’ll walk you through the process, ensuring you have the necessary information to complete it successfully.
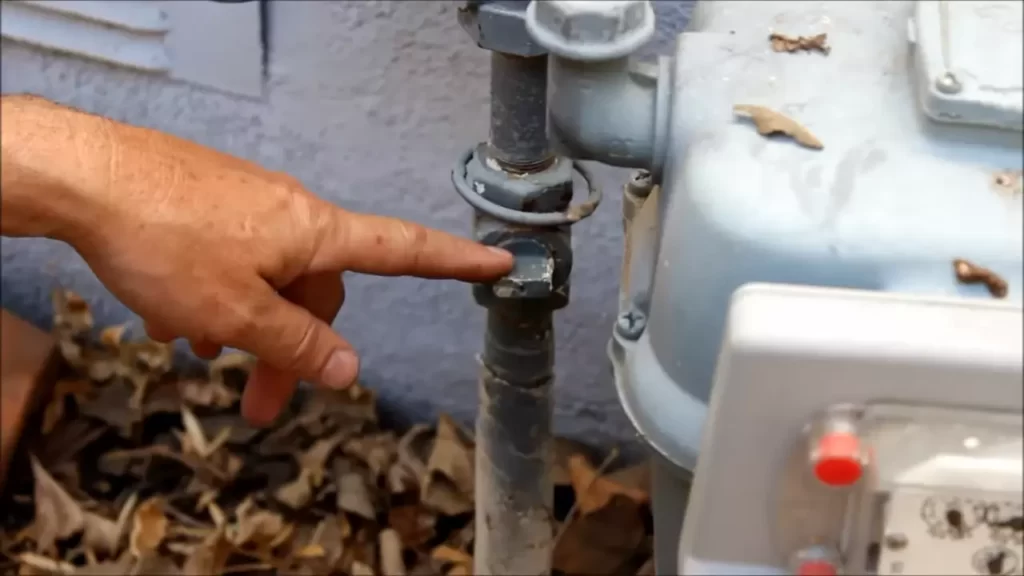
Locating and turning off the main gas supply
The first step in shutting off and disconnecting the gas supply is to locate the main gas valve. This valve is usually situated near your gas meter or inside a utility room. To ensure safety, follow these steps:
- Locate the main gas valve by referring to your home’s gas line schematics or consulting a professional if needed.
- Once located, turn the main gas valve counter-clockwise to shut off the gas supply to your home. Ensure the valve is fully closed.
- For added precaution, confirm that the gas supply has been shut off by checking that your stove’s burners no longer ignite.
Disconnecting the existing gas line from the stove
After successfully shutting off the main gas supply, it’s time to disconnect the existing gas line from your stove. Follow these steps to execute the task smoothly:
- Ensure you have protective gloves, safety glasses, and a wrench or adjustable pliers.
- Carefully inspect the gas line and locate the shut-off valve, which is often located behind the stove or in the wall.
- With your wrench or adjustable pliers, turn the shut-off valve clockwise to close it and stop the gas flow.
- Now, use the same tool to loosen the connection between the gas line and the stove. Rotate it counterclockwise until the connection is loose enough to disconnect by hand.
- Gently detach the gas line from the stove, ensuring any excess gas is securely contained and does not leak into the room.
Ensuring proper ventilation
During the process of shutting off and disconnecting the gas supply, it’s crucial to ensure proper ventilation in your kitchen to safeguard against potential gas leaks. Follow these tips to maintain a safe environment:
- Open windows and doors to allow fresh air to circulate.
- Utilize a fan to increase airflow in the area.
- Consider using a carbon monoxide detector to monitor any leaks.
- Keep ignition sources, such as flames or sparks, away from the gas line and stove during the entire process.
By adhering to these steps, you can safely shut off and disconnect the gas supply while ensuring proper ventilation during the installation of a new gas line for your stove.
Making The Connections
Choosing appropriate connectors for the gas line
When it comes to installing a gas line for your stove, one of the crucial steps is making the right connections. Whether you are a seasoned DIY enthusiast or a beginner, choosing appropriate connectors is essential for a safe and efficient gas line installation. Let’s explore the different types of connectors available and how to select the right one for your needs.
Understanding different types of connectors
There are several types of connectors available for gas lines, each with its own advantages and applications. Understanding these different types can help you make an informed decision for your stove installation. Here are the most common types of connectors:
- Flexible stainless steel connectors: These connectors consist of a stainless steel tubing wrapped with a protective outer layer. They are highly flexible, making them ideal for applications requiring movement or bending. Additionally, they are resistant to corrosion and can withstand high-pressure conditions.
- Coated or uncoated brass connectors: Brass connectors offer excellent durability and are suitable for both indoor and outdoor use. The coating provides additional protection against corrosion. They come in various lengths and sizes, offering flexibility for your specific installation needs.
- CSST (Corrugated Stainless Steel Tubing): CSST is a flexible tubing with a corrugated design and a yellow protective jacket. They are easy to install, lightweight, and can be bent around corners. CSST connectors provide reliable performance and are commonly used in residential gas line installations.
Attaching the connectors to the gas line and stove
Now that you have chosen the appropriate connector for your gas line, it’s time to attach them to both the gas line and your stove. Here’s how to do it:
- Turn off the gas supply to the area where you will be installing the stove. Safety should always be a top priority.
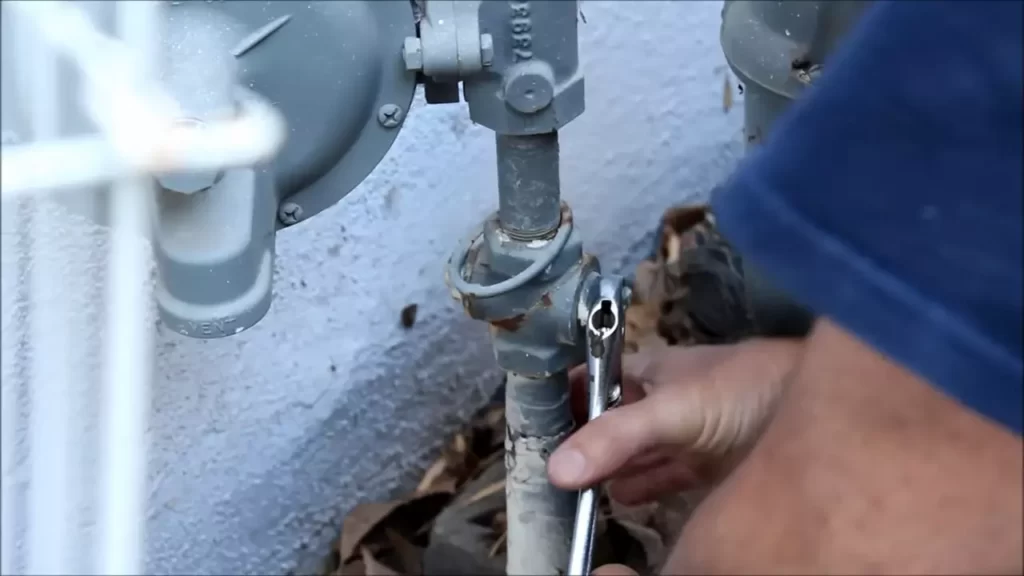
- Using a pipe wrench, connect one end of the connector to the gas line. Ensure that the connection is tight and secure.
- Next, connect the other end of the connector to the gas inlet on your stove. Again, make sure the connection is tight and properly aligned.
- Check the connections for any leaks by applying a mixture of soapy water to the joints and looking for bubbles. If you notice any bubbles forming, it indicates a leak, and you should tighten the connections further or seek professional assistance if needed.
- Once all the connections are secure and leak-free, you can turn on the gas supply and follow the manufacturer’s instructions to ignite and test your stove.
By carefully choosing the right connectors and ensuring proper attachment, you can have peace of mind knowing that your gas line installation is safe and reliable. Remember to always follow safety guidelines and consult a professional if you are unsure about any step of the installation process.
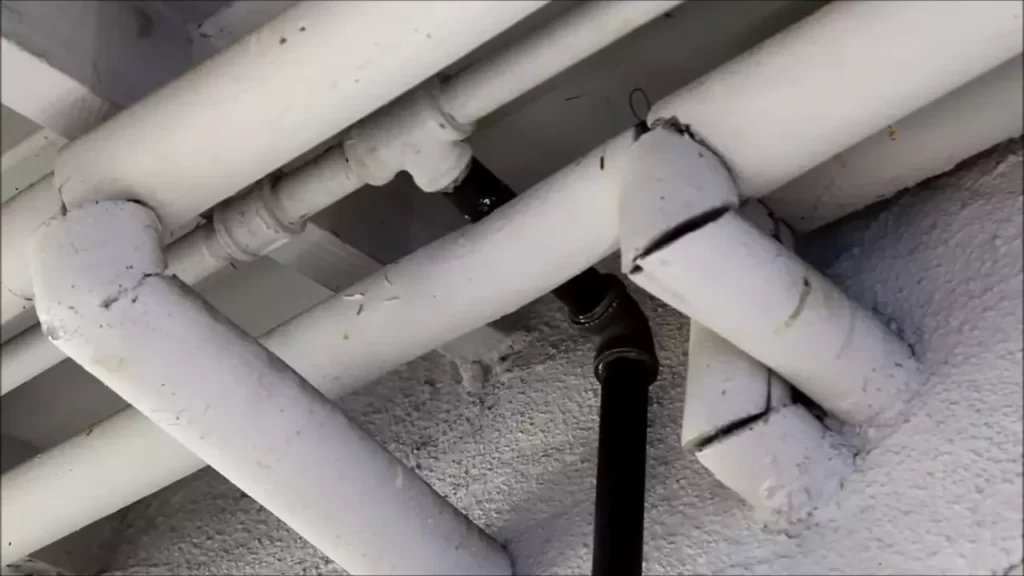
Installing The Gas Line
When it comes to installing a gas line for a stove, it is crucial to follow the correct procedures to ensure safety and efficiency. In this section, we will guide you through the process, step by step, starting with determining the optimal route for the gas line.
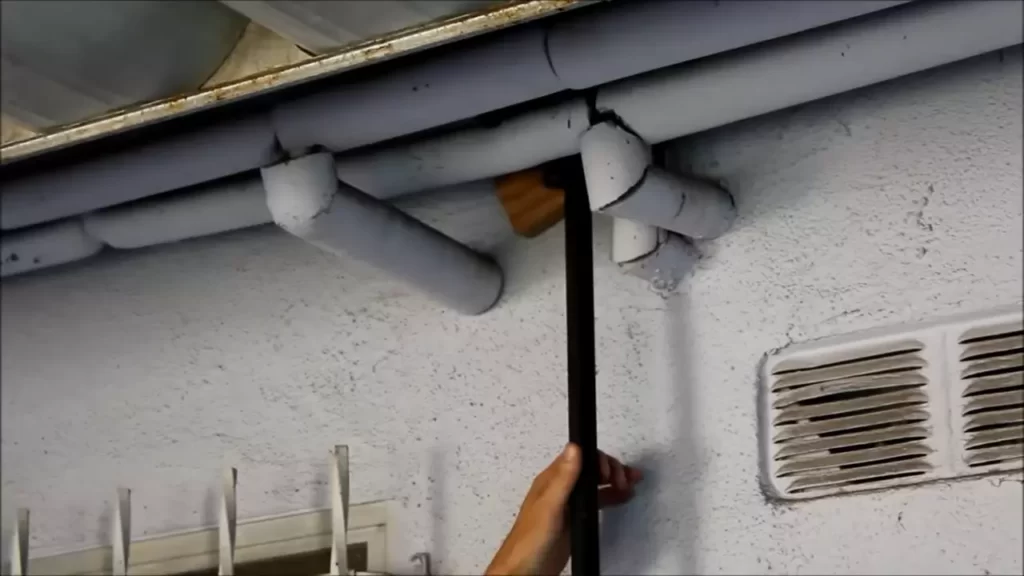
Determining the optimal route for the gas line
The first step in installing a gas line for your stove is finding the optimal route. Proper planning is crucial to ensure the gas line reaches your stove without any obstructions or safety hazards.
Here are a few key points to consider when determining the optimal route for the gas line:
- Check local building codes and regulations: Before proceeding with the installation, it is important to check local building codes and regulations regarding the installation of gas lines. This will help ensure that you comply with all safety requirements.
- Identify the shortest and straightest path: In order to minimize bends and potential obstructions, it is best to identify the shortest and straightest path from the main gas supply to the stove. This will help maintain the pressure and optimize the efficiency of the gas line.
- Avoid obstacles: Take note of any obstacles such as walls, floors, or electrical wiring that might be in the way. It is important to plan your route in a way that avoids any potential hazards.
By taking these factors into consideration, you can determine the optimal route for your gas line, ensuring a smooth and efficient installation process.
Cutting and preparing the pipes
Once you have determined the optimal route for the gas line, the next step is to cut and prepare the pipes. This requires careful measurements and precise cutting to ensure a proper fit.
Here are the steps involved in cutting and preparing the pipes:
- Measure and mark the pipes: Using a tape measure, carefully measure the length of pipe needed to connect the gas line to the main supply and the stove. Mark the pipes with a pencil at the appropriate length.
- Cut the pipes: Use a pipe cutter to cut the pipes at the marked locations. Make sure to cut the pipes straight and clean, avoiding any rough edges that could cause leaks or damage.
- Prepare the ends of the pipes: After cutting, use a deburring tool to remove any burrs or rough edges from the cut ends of the pipes. This will ensure a smooth and secure connection.
By carefully cutting and preparing the pipes, you can ensure a proper fit and secure connection for your gas line.
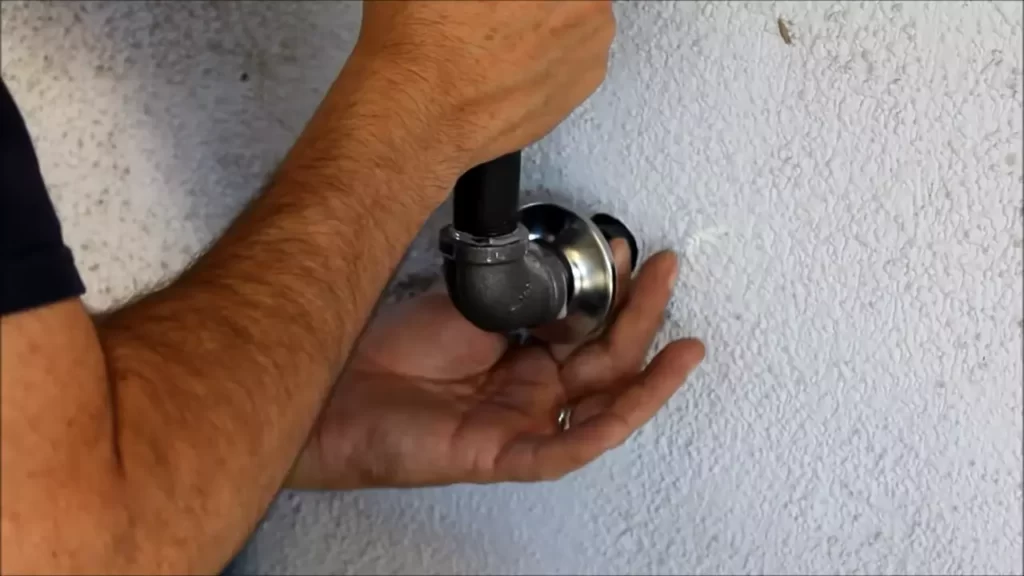
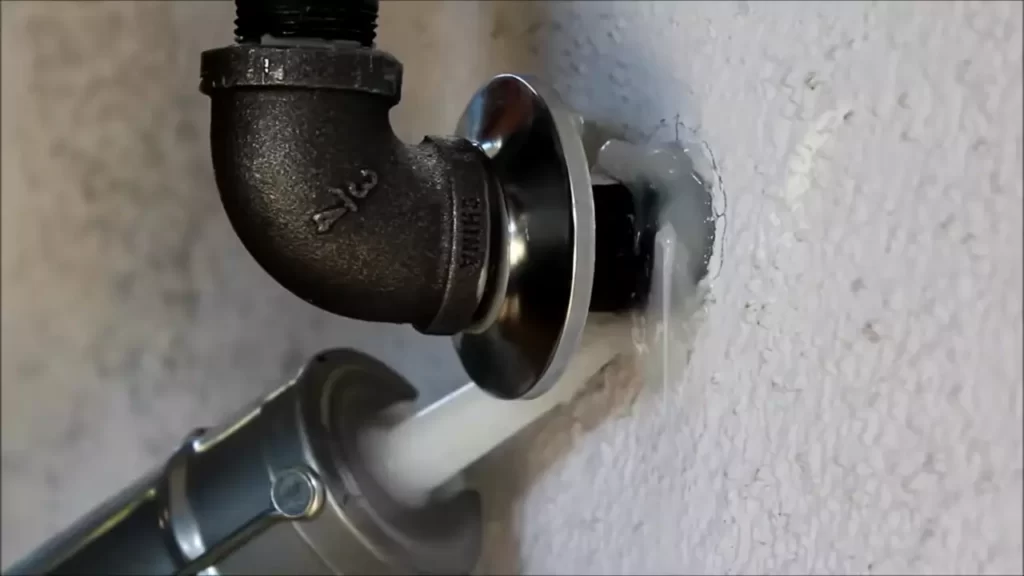
Connecting the gas line to the main supply
After cutting and preparing the pipes, the final step in installing the gas line is connecting it to the main supply. This is a critical step that requires attention to detail and adherence to safety guidelines.
Here is the process for connecting the gas line to the main supply:
- Secure the fittings: Start by securing the appropriate fittings to the ends of the pipes. Use thread sealant or gas-rated Teflon tape to ensure a tight and leak-free connection.
- Attach the pipes to the main supply: Carefully attach one end of the pipe to the main gas supply, ensuring it is securely fastened. Use a wrench to tighten the connection, but be cautious not to overtighten and risk damaging the fittings.
- Connect the gas line to the stove: Attach the other end of the pipe to the gas inlet on your stove. Again, use a wrench to tighten the connection, making sure it is secure but not overly tightened.
- Check for leaks: Once the connections are made, it is crucial to check for gas leaks. Apply a solution of soapy water to the fittings and connections, and observe if any bubbles form. If bubbles appear, there is a leak that needs to be addressed immediately.
By following these steps and performing a thorough leak check, you can connect the gas line to the main supply safely and securely.
In conclusion, installing a gas line for a stove requires careful planning, precise cutting, and secure connections. By determining the optimal route for the gas line, cutting and preparing the pipes accurately, and connecting the gas line to the main supply properly, you can ensure a safe and efficient installation process.
Sealing And Testing The Gas Line
Applying sealant and securing the connections
Once you have successfully installed the gas line for your stove, the next step is to ensure that all the connections are properly sealed and secured. This is crucial for the safe and efficient operation of your gas stove.
To apply sealant to the connections, you will need a high-quality gas-rated sealant. Before applying the sealant, make sure that all the connections are clean and free from any debris or residue. Apply the sealant to the male threads of the gas fittings, ensuring that you cover the threads completely. Next, carefully attach the fittings to the gas line, making sure that they are tightly secured. You can use a wrench to tighten the connections, but be careful not to overtighten, as this can damage the fittings.
Conducting pressure tests for leaks
Once the connections are properly sealed and secured, it is important to conduct a pressure test to check for any leaks in the gas line. This test will help you identify any potential issues before you start using your stove. To perform the pressure test, you will need a gas pressure gauge and a test cap.
First, close the shut-off valve on the gas line to prevent the flow of gas into the line. Properly attach the test cap to the open end of the gas line and then attach the pressure gauge to the test cap. Slowly open the shut-off valve and allow the gas pressure to build up in the line. Monitor the pressure gauge and ensure that it stays consistent. If the pressure drops, it indicates that there is a leak in the gas line. In this case, you will need to detect and fix the leak before proceeding.
Detecting and fixing any leaks before use
If you detect any leaks during the pressure test, it is essential to locate and fix them before using your gas stove. Start by applying a mixture of soap and water to the gas connections, including the fittings and the gas line. Watch for any bubbles forming, as they indicate a gas leak.
If you spot any bubbles, immediately turn off the shut-off valve and tighten the connection further. Reapply the soap and water mixture to confirm that the leak has been fixed. If the leak persists, you may need to replace the faulty fitting or seek professional assistance to ensure the gas line is safe to use.
Remember, safety is paramount when it comes to gas installations, so never ignore the signs of a potential leak. By properly sealing, testing, and fixing any leaks in the gas line, you can ensure the safe and efficient operation of your stove for years to come.
Checking For Proper Functionality
Verifying gas supply to the stove
Before using your newly installed gas line for your stove, it is crucial to verify the gas supply to ensure the proper functionality of the stove. Here are the steps to follow:
- Turn off the stove and make sure all burners are in the off position.
- Locate the gas shut-off valve, usually found behind the stove or in the basement near the gas meter.
- Check if the gas shut-off valve is in the “on” position. It should be parallel to the pipe for the gas to flow.
- If the valve is closed, turn it on by turning it parallel to the pipe.
- Inspect the flexible gas hose for any leaks or cracks. If there are any issues, replace the hose immediately.
- Once you have ensured that the gas supply is on and there are no visible leaks in the hose, you can move on to testing the burner ignition and flame quality.
Testing burner ignition and flame quality
After verifying the gas supply, it is time to test the burner ignition and flame quality. Follow these steps to ensure everything is working correctly:
- Turn one of the burners on by turning the corresponding knob counterclockwise.
- Observe the burner closely for any signs of delayed ignition or a weak flame.
- If the burner fails to ignite, turn off the gas supply immediately and recheck the installation to identify any potential issues.
- When the burner ignites, check the flame quality. The flame should be blue and steady. A yellow or flickering flame indicates a problem that needs to be addressed.
- Repeat the process with the remaining burners to ensure consistent ignition and flame quality throughout.
- If at any point you notice issues with ignition or flame quality, it is advisable to contact a professional for assistance.
Ensuring continued safe operation
Once you have confirmed proper gas supply and burner functionality, it is crucial to ensure continued safe operation. Here are some key points to remember:
- Regularly inspect the gas line, shut-off valves, and flexible hose for any signs of wear or damage.
- Keep the area around the stove clear of any flammable materials to prevent accidents.
- Avoid using excessive force when turning the gas shut-off valve on and off.
- If you smell gas or suspect a leak, immediately shut off the gas supply and contact your gas utility provider for assistance.
- Consider scheduling regular maintenance checks with a licensed professional to ensure the safe and efficient operation of your gas line and stove.
By following these steps and adhering to safety guidelines, you can enjoy a properly functioning gas line for your stove and have peace of mind knowing that you are maintaining a safe cooking environment.
Maintenance And Troubleshooting Tips
Maintaining and troubleshooting your gas line for your stove is crucial to ensure its safe and efficient operation. Regular inspection and servicing, along with prompt identification and troubleshooting of common issues, are essential in keeping your gas line functioning optimally. Here are some important tips to help you maintain and troubleshoot your gas line for your stove.
Regular Inspection and Servicing Recommendations
Regular inspection and servicing of your gas line not only prevent potential issues but also extend the lifespan of your stove. Here are some recommendations to consider:
- Inspect your gas line at least once a year to check for any visible damage, leaks, or loose connections. Look for any signs of wear and tear, such as cracks or corrosion.
- Ensure all gas line components, including valves and fittings, are in good condition and tightly secured.
- Clean the burner and grates regularly to avoid clogging and maintain proper gas flow.
- Check the gas pressure regularly to ensure it falls within the recommended range. High or low pressure can affect the stove’s performance.
- Consider having a professional technician service your gas line every few years to perform a more thorough inspection and maintenance.
Identifying Common Issues and Troubleshooting Techniques
Despite regular maintenance, issues with your gas line may still arise. Here are some common problems you may encounter and troubleshooting techniques to resolve them:
| Issue | Troubleshooting Technique |
|---|---|
| Weak or no flame | Check for clogged burner holes and clean them with a needle or pin. Make sure the gas supply valve is fully open and the regulator is set correctly. |
| Gas smell | If you detect a gas smell, immediately turn off the gas supply and open windows to ventilate the area. Check for gas leaks by applying a soapy water solution to the gas line connections and look for bubbles. If bubbles appear, there is a leak, and you should contact a professional technician for repairs. |
| Pilot light won’t stay lit | Check the pilot light assembly for any obstructions or dirt. Clean the assembly or replace faulty components if necessary. Also, ensure that the gas supply valve to the pilot light is fully open. |
Contacting Professional Help When Needed
While some troubleshooting can be done on your own, certain issues require the expertise of a professional. If you encounter any of the following situations, it is advisable to seek professional help:
- Persistent gas leaks
- Malfunctioning gas valves or regulators
- Unusual flame patterns or colors
- Repeated problems with the pilot light
- Any other significant issues that you are unsure how to address
Remember, safety should always be your top priority when dealing with gas appliances. If in doubt, it’s better to seek professional assistance rather than attempting to fix the issue yourself.
Frequently Asked Questions For How To Install A Gas Line For Stove
How Hard Is It To Run A Gas Line For A Stove?
Running a gas line for a stove may be challenging. Due to safety concerns, it’s best to hire a professional. They’ll evaluate your home’s gas line capacity, ensure proper installation, and meet local building codes. Trusting experts ensures a safe and efficient gas line installation.
Can I Hook Up A Gas Stove Myself?
No, it is not recommended to hook up a gas stove yourself. It is a task that should be handled by a licensed professional for safety reasons.
What Size Gas Line Is Needed For A Stove?
A gas line of at least 1/2 inch diameter is typically needed for a stove.
How Do You Install A Gas Stove Connector?
To install a gas stove connector, follow these steps:
1. Turn off the gas supply valve.
2. Attach the connector to the gas line using a wrench.
3. Connect the other end to the stove’s gas inlet.
4. Use a wrench to secure the connections.
5. Turn on the gas supply valve and check for any leaks using soapy water.
Conclusion
Installing a gas line for your stove can seem like a daunting task, but with the right knowledge and precautions, it can be done safely and efficiently. Remember to always consult a professional if you are unsure or uncomfortable with any step of the process.
By following the steps outlined in this blog post, you can ensure that your gas line installation is successful and provides you with a reliable fuel source for your stove. Happy cooking!