To install a gas hot water heater, follow these steps: turn off the gas, drain the old heater, disconnect the gas line and water lines, remove the old heater, install the new heater, connect the gas line and water lines, test for leaks, and finally, turn on the gas and water supply. Installing a gas hot water heater requires a series of steps, and it’s crucial to follow them carefully to ensure a successful installation.
In this guide, we will provide you with a concise and accurate overview of how to install a gas hot water heater. From turning off the gas to testing for leaks, we will cover each important step to help you confidently complete the installation.
By following these instructions, you can enjoy the benefits of a reliable and efficient gas hot water heater in your home. So let’s dive into the process and get started on installing your new gas hot water heater.
Choosing The Right Gas Hot Water Heater For Your Needs
Factors to consider when selecting a gas hot water heater
When it comes to choosing a gas hot water heater for your home, there are several important factors to consider. These factors will ensure that you select a water heater that not only meets your household’s needs but also provides you with energy efficiency and savings in the long run. Let’s take a closer look at the key considerations.
Sizing the water heater correctly for your household’s needs
One of the first and most crucial steps in selecting a gas hot water heater is sizing it correctly for your household’s needs. Purchasing a water heater that is too small may result in insufficient hot water, while buying one that is too large can lead to unnecessary energy consumption and higher utility bills. To determine the appropriate size, consider the estimated daily hot water usage in your household. This can be calculated based on the number of occupants and their typical hot water activities, such as showering, laundry, and dishwashing.
Here’s a handy table to help you estimate the appropriate water heater size for your household:
| Number of Occupants | Size (in gallons) |
|---|---|
| 1-2 | 30-40 |
| 2-3 | 40-50 |
| 3-4 | 50-60 |
| 5 or more | 60 or larger |
Energy efficiency ratings and their importance
Energy efficiency is another crucial factor to consider when selecting a gas hot water heater. By choosing an energy-efficient model, you can save on your energy bills and reduce your carbon footprint. Look for water heaters with a high Energy Factor (EF) rating, as this indicates how efficiently the unit converts energy into hot water. The higher the EF rating, the more energy-efficient the water heater.
Additionally, pay attention to the Uniform Energy Factor (UEF) rating, which considers the energy consumed during standby mode. This rating provides a holistic view of the water heater’s overall energy efficiency. Aim for a UEF rating of 0.64 or higher for optimal energy savings.
In conclusion, when choosing a gas hot water heater for your home, consider factors such as proper sizing for your household’s needs and energy efficiency ratings. Taking these factors into account will ensure that you select a water heater that provides ample hot water while also saving you money and reducing your environmental impact.
Preparing For Installation
Before installing a gas hot water heater, it’s important to prepare yourself and your space for the task. This involves gathering the necessary tools and materials, checking local building codes and permits, as well as clearing the installation area and ensuring proper ventilation. By taking these steps, you can ensure a smooth and successful installation process. Let’s delve into each aspect in more detail:
Gathering the necessary tools and materials
Before starting the installation, make sure you have all the tools and materials required. This will prevent any delays or last-minute trips to the hardware store. Here’s a list of essential items you’ll need:
| Tools | Materials |
|---|---|
|
|
Checking local building codes and permits
Before proceeding with the installation, it’s crucial to familiarize yourself with the local building codes and obtain any necessary permits. These regulations are in place to ensure the safety and compliance of your gas hot water heater installation. To avoid any legal issues or complications, check with your local municipality or building department for specific requirements.
Clearing the installation area and ensuring proper ventilation
Prior to installing the gas hot water heater, clear the designated area of any obstacles or debris that could impede the installation process. Ensure that there is adequate space for both the unit and future maintenance access. Additionally, proper ventilation is of utmost importance to prevent the buildup of dangerous gases. Install the vent pipe and termination kit according to the manufacturer’s instructions, ensuring it complies with safety standards and is positioned away from windows, doors, and air intakes.
By preparing for the installation in advance, you set yourself up for a successful and efficient process. Gathering the necessary tools and materials, checking local building codes and permits, as well as clearing the installation area and ensuring proper ventilation are key steps to consider. Once you’ve completed these preparatory tasks, you’ll be ready to move on to the next step of installing your gas hot water heater.
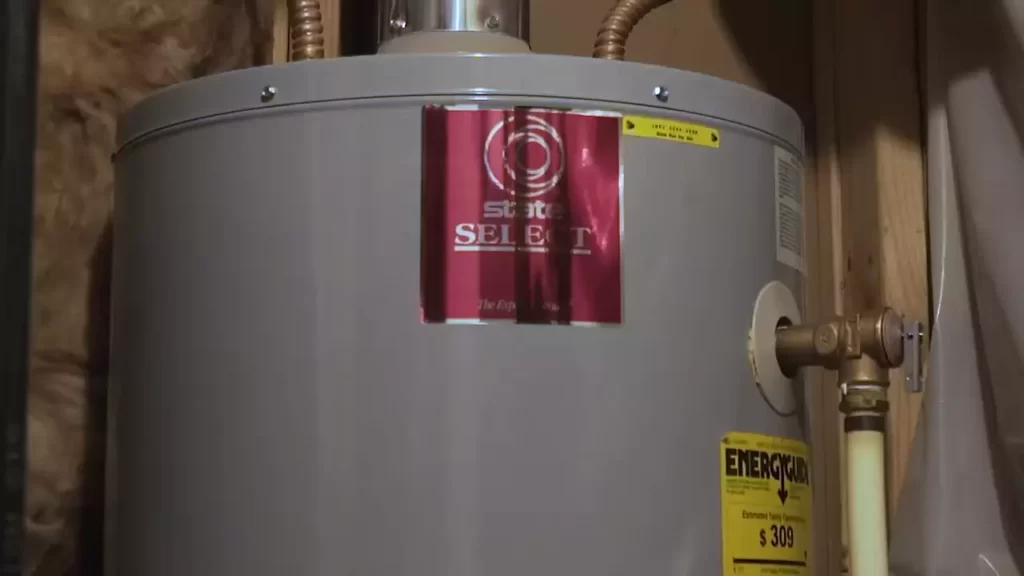
Removing The Old Water Heater
Removing an old gas hot water heater is a necessary step when installing a new one. This process involves shutting off the gas supply and water valves, draining the old water heater, and disconnecting and removing the unit. Let’s explore each step in detail.
Shutting off the gas supply and water valves
Before you begin removing the old water heater, ensure that the gas supply and water valves are shut off. This step is crucial to prevent any potential leaks or accidents. Follow these simple steps to shut off the valves:
- Locate the gas supply valve connected to the water heater. It is typically a lever or handle positioned on the gas line.
- Turn the gas supply valve perpendicular to the gas line to shut off the gas flow.
- Next, locate the water supply valve usually located above the heater, and turn it clockwise to shut off the water flow.
Draining the old water heater
After shutting off the gas and water valves, the next step is to drain the old water heater to empty it completely. Follow the below steps to drain the water heater:
- Connect a garden hose to the drain valve located near the bottom of the unit. Make sure the other end of the hose is positioned near a floor drain or outside.
- Open the drain valve by turning it counterclockwise. This will allow the water to start flowing out through the hose.
- Once the water stops flowing, close the drain valve and disconnect the hose.
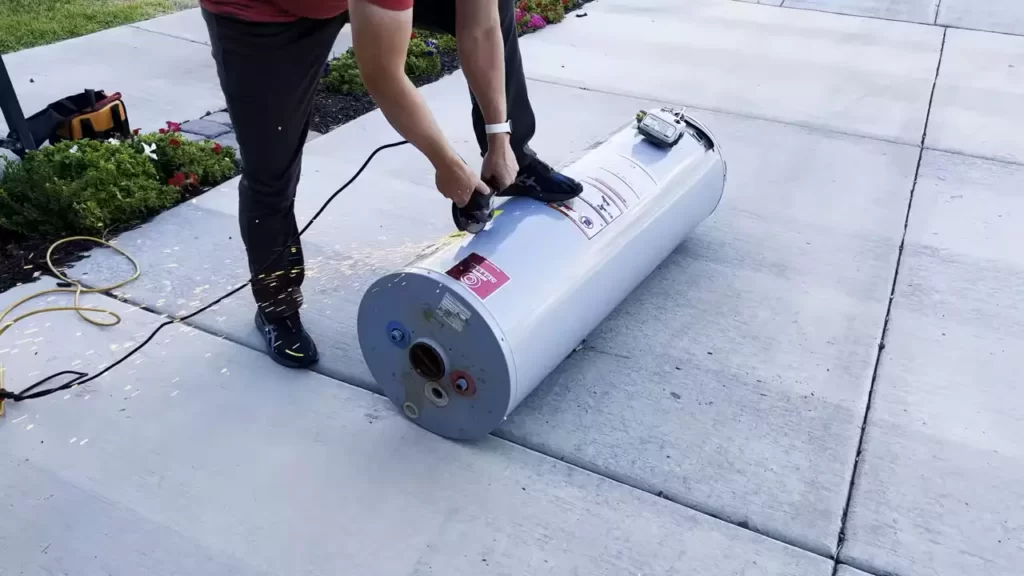
Disconnecting and removing the old water heater
After draining the water heater, it’s time to disconnect and remove the unit from its current location. The following steps will guide you through the process:
- Turn off the power supply to the water heater by either flipping the breaker switch in your electrical panel or disconnecting the power cord.
- Loosen the gas connection fitting with a wrench, carefully disconnecting the gas line from the water heater. Remember, if you smell gas during this process, leave the area immediately and contact a professional.
- Using a pipe wrench or adjustable pliers, carefully disconnect the water pipes from the heater by turning them counterclockwise.
- With the connections now removed, enlist the help of a friend to gently lift and remove the old water heater from its position.
By following these steps to remove the old water heater, you will be well-prepared to move on to the next phase of installing your new gas hot water heater.
Installing The New Water Heater
Installing a new gas hot water heater is an important home improvement project that can provide you with a reliable and efficient source of hot water. In this section, we will discuss the installation process, focusing on the subheading: Installing the New Water Heater. Let’s dive in and discover how to position the new water heater, connect the gas supply line, attach the water supply lines, and vent the exhaust gases properly.
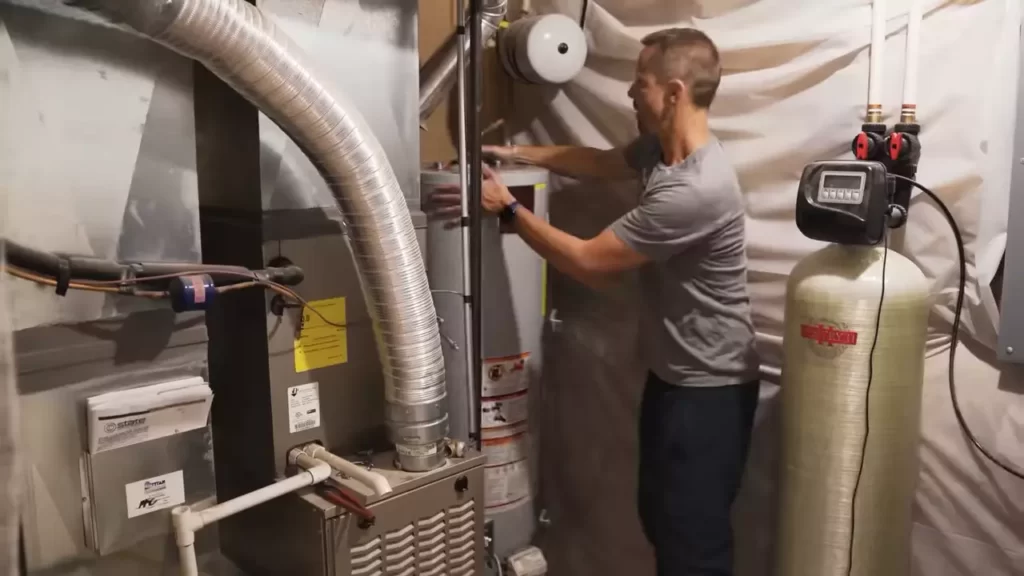
Positioning the new water heater
Before we begin the installation process, it is crucial to position the new water heater correctly. Follow these steps:
- Ensure the location is easily accessible for future maintenance and repairs.
- Place the water heater on a stable surface, such as a concrete pad or metal stand.
- Leave ample space around the heater for proper ventilation and clearance.
- Check local codes and manufacturer guidelines for specific clearance requirements.
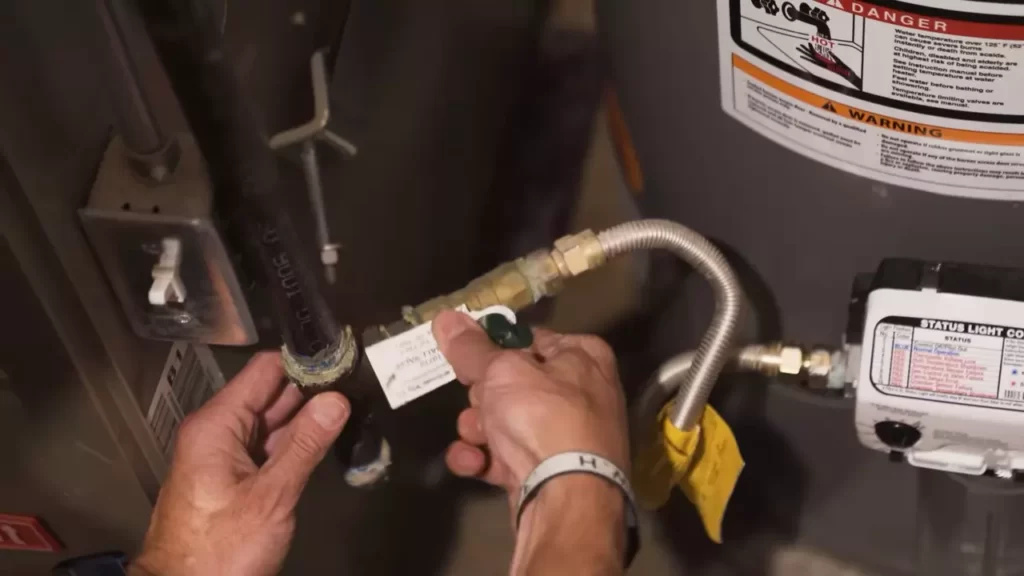
Connecting the gas supply line
Now that the water heater is correctly positioned, it’s time to connect the gas supply line. Follow these steps:
- Turn off the main gas supply valve.
- Wrap the threaded end of the gas pipe with Teflon tape to ensure a tight seal.
- Connect the gas supply line to the gas valve on the heater, tightening it with a wrench.
- Turn on the main gas supply valve and check for any gas leaks using a soapy water solution.
Attaching the water supply lines
With the gas supply connected, it’s time to attach the water supply lines. Follow these steps:
- Shut off the water supply to the house.
- Attach a dielectric union to the cold water inlet of the water heater, ensuring a watertight seal.
- Connect the cold water supply line to the dielectric union and tighten using a wrench.
- Repeat the process for the hot water outlet side of the heater.
Venting the exhaust gases properly
Proper venting of exhaust gases is crucial for the safe operation of your gas water heater. Follow these steps:
- Refer to the manufacturer’s instructions for the specific type of venting required.
- Install a vent pipe that meets local codes and is suitable for the heater’s BTU rating.
- Ensure the vent pipe is securely connected to the heater’s exhaust outlet and properly supported.
- Provide adequate clearance to combustible materials as per local codes.
- Inspect the venting system regularly for any signs of damage or blockage.
By following these steps to position the new water heater, connect the gas supply line, attach the water supply lines, and vent the exhaust gases properly, you can ensure a successful installation. Remember to consult local codes and manufacturer guidelines for any specific requirements during the installation process.
Testing And Safety Checks
After successfully installing a gas hot water heater, it’s crucial to perform thorough testing and safety checks before use. These steps will help ensure proper functioning, minimize the risk of accidents, and provide peace of mind for you and your family.
Checking for Gas Leaks After Installation
Before filling the water heater and turning on the gas supply, it’s essential to inspect for any possible gas leaks. This step ensures the safety of your household and prevents potential hazards.
To check for gas leaks:
- Apply a mixture of soapy water to the gas supply connections, including pipe joints, gas valve, and any threaded connections.
- Turn on the gas supply and observe closely for the formation of bubbles.
- If you notice bubbles forming, it indicates a gas leak.
- If a gas leak is detected, immediately turn off the gas supply, tighten the affected connection, and retest for leaks.
Remember, it’s crucial to address any gas leaks before proceeding to the next steps.
Filling and Testing the Water Heater
Once you have ensured there are no gas leaks present, it’s time to fill and test the water heater. This process enables you to confirm that the unit is functioning correctly and there are no issues with water flow or pressure.
Follow these steps to fill and test your gas hot water heater:
- Close the drain valve located near the bottom of the water heater.
- Open a hot water faucet in one of the sinks to allow air to escape from the system.
- Slowly open the cold water supply valve to start filling the tank.
- Continue filling until water flows steadily from the previously opened hot water faucet.
- Close the faucet once a steady flow is achieved.
- Once the tank is filled, turn on the gas supply to the water heater.
- Activate the pilot light according to the manufacturer’s instructions.
- Set the thermostat to the desired temperature.
By following these steps, you have successfully filled and tested your gas hot water heater, ensuring it’s ready to provide you with a reliable and efficient supply of hot water.
Adjusting the Temperature and Pressure Relief Valve
After filling and testing the water heater, it is vital to adjust the temperature and check the pressure relief valve. These steps contribute to the safe and optimal operation of your gas hot water heater.
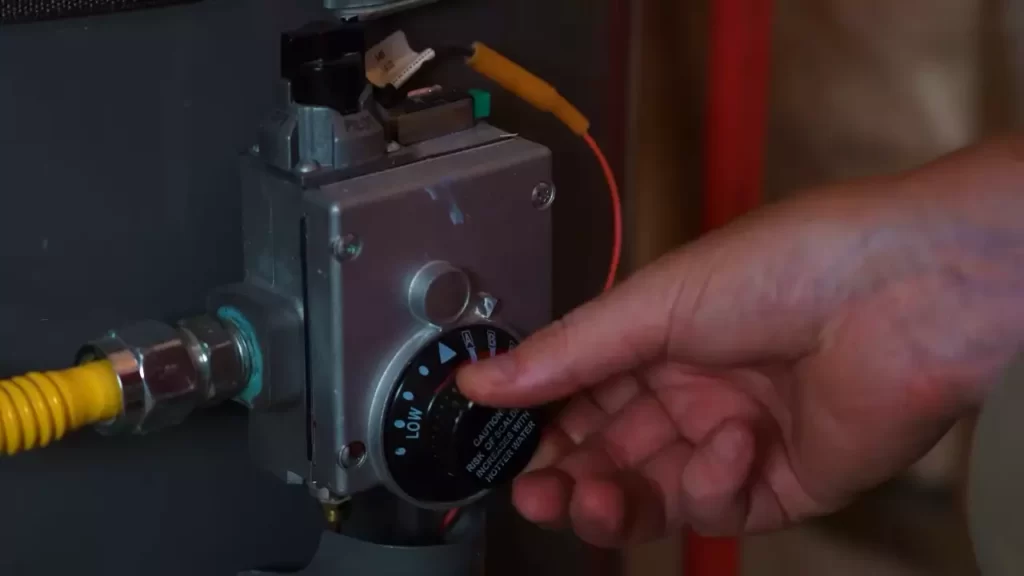
To adjust the temperature:
- Locate the temperature adjustment dial on the water heater. It is typically located on the front or side.
- Turn the dial clockwise to increase the temperature or counterclockwise to decrease it.
- Take caution not to set the temperature too high to prevent scalding accidents.
To check the pressure relief valve:
- Locate the pressure relief valve on the side or top of the water heater.
- Place a bucket or container beneath the valve to catch any water that may be released during testing.
- Flip the valve’s lever briefly to release some water and check if it flows freely.
- If the water does not flow or flows intermittently, it may require replacement. Consult the manufacturer’s instructions or seek professional assistance to address this issue.
By adjusting the temperature and testing the pressure relief valve, you ensure the safety and efficiency of your gas hot water heater.
With these testing and safety checks completed, your gas hot water heater is now ready to provide you with a reliable and consistent supply of hot water, ensuring comfort and convenience for your household.
Maintaining A Gas Hot Water Heater
Maintaining a gas hot water heater is essential to ensure its optimal performance and longevity. Regular maintenance tasks, troubleshooting common issues, and knowing when to call a professional are all important aspects of keeping your gas hot water heater running smoothly. By following these guidelines, you can avoid costly repairs and enjoy a consistent supply of hot water for your household.
Regular maintenance tasks to ensure optimal performance
Performing regular maintenance tasks on your gas hot water heater is crucial to maintain its efficiency and performance. Here are some key tasks that every homeowner should undertake:
- Inspect the pressure relief valve: Regularly checking the pressure relief valve helps prevent excessive pressure build-up inside the tank, which can lead to potential leaks or even an explosion. Make sure the valve is not malfunctioning or leaking.
- Flush the tank: Sediment buildup over time can affect the performance and efficiency of your gas hot water heater. Flushing the tank every six months helps remove sediment and prolongs the lifespan of your unit. Refer to the manufacturer’s instructions for the correct flushing procedure.
- Check the anode rod: The anode rod protects the tank from corrosion. Inspect the anode rod annually, and if it appears heavily corroded or deteriorated, consider replacing it. Anode rods are inexpensive and readily available at hardware stores.
- Inspect the venting system: Ensure that the venting system is clear of any debris or obstructions. Proper venting prevents the buildup of dangerous carbon monoxide gas in your home.
- Test the pressure and temperature relief valve: Every six months, test the pressure and temperature relief valve to ensure it is functioning correctly. Lift the valve lever, and if water flows freely, it is working correctly.
Troubleshooting common issues and when to call a professional
Despite regular maintenance, issues may still arise with your gas hot water heater. In some cases, you may need to troubleshoot the problem yourself, while in others, it is best to call a professional. Here are some common issues and when to seek professional assistance:
| Issue | Troubleshooting Steps | When to Call a Professional |
|---|---|---|
| No hot water |
|
If none of the troubleshooting steps solve the issue. |
| Leaking water |
|
Immediately call a professional plumber to assess and repair the leak. |
| Strange noises |
|
If the noises persist after flushing the tank and checking the burner. |
Remember, gas hot water heaters involve working with natural gas and can pose safety hazards. If you ever feel unsure or uncomfortable handling any maintenance or troubleshooting tasks yourself, it is always best to call a professional plumber or gas technician. Their expertise ensures the safety of your home and the proper functioning of your gas hot water heater.
Frequently Asked Questions For How To Install A Gas Hot Water Heater
Is It Safe To Install A Gas Water Heater Yourself?
Installing a gas water heater yourself is not safe. It requires technical expertise to ensure proper installation, gas line connections, and venting. Incorrect installation can lead to gas leaks, fire hazards, or carbon monoxide poisoning. It’s best to hire a licensed professional for safe installation.
Can You Install A Water Heater Yourself?
Yes, you can install a water heater yourself. However, it is important to have proper knowledge and experience to ensure safety and efficiency. If you are unsure, it is recommended to hire a professional plumber to install the water heater for you.
How Do You Install A Gas Hot Water Heater?
To install a gas hot water heater, follow these steps:
1. Turn off the electricity and gas supply.
2. Drain the old water heater.
3. Disconnect and remove the old unit.
4. Position the new heater and connect gas and water lines.
5. Fill the tank, check for leaks, and relight the pilot.
Why Does It Cost So Much To Install A Gas Water Heater?
The cost of installing a gas water heater is high due to several factors like the cost of the unit, additional materials required, labor costs, permits, and potential modifications to existing gas lines or venting systems.
Conclusion
To summarize, installing a gas hot water heater is a relatively simple process that can save you money in the long run. By following the steps outlined in this guide, you can ensure a safe and efficient installation. Remember to always consult the manufacturer’s instructions and local building codes.
With a little planning and preparation, you’ll have hot water flowing in no time. So, don’t hesitate to tackle this DIY project and enjoy the benefits of a gas hot water heater.