To install a gas fire pit, start by selecting a suitable location and ensure proper ventilation. Then, connect the gas supply line and secure the fire pit in place.
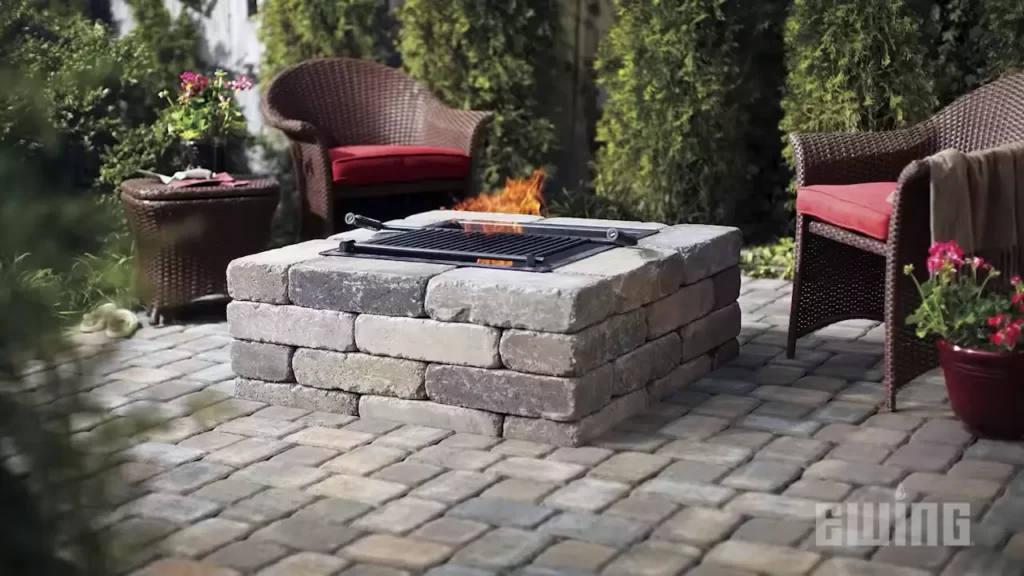
Fire pits are a great addition to any outdoor space, allowing you to create a cozy and inviting atmosphere for gatherings or quiet nights under the stars. If you’re considering installing a gas fire pit, it’s important to do it correctly to ensure safety and functionality.
We’ll guide you through the step-by-step process of installing a gas fire pit. From selecting the perfect spot to connecting the gas supply line and securing the fire pit, we’ll cover all the essential details. So, let’s get started and create a warm and inviting outdoor space with a gas fire pit installation.
Choosing The Right Location
One of the most important steps in installing a gas fire pit is choosing the right location for it. The location you choose will not only affect the overall aesthetic of your outdoor space but also ensure the safety and functionality of the fire pit. In this section, we will discuss the factors to consider when selecting a location for your gas fire pit and how to adhere to safety regulations.
Factors to consider when selecting a location for your gas fire pit
When choosing a location for your gas fire pit, there are several key factors to keep in mind. These factors will help you determine the ideal placement for your fire pit and create a comfortable and inviting space for you and your guests to enjoy.
Ensuring proper clearance for safety regulations
Safety should always be a top priority when installing a gas fire pit. It is crucial to adhere to the safety regulations provided by the manufacturer and your local authorities. One important safety consideration is ensuring proper clearance around the fire pit.
Taking into account wind direction and proximity to flammable materials
To create a safe environment for your gas fire pit, it is important to take into account the wind direction and the proximity to flammable materials. Placing the fire pit downwind from your seating area will help ensure that the smoke doesn’t blow directly towards you and your guests. Additionally, you should avoid placing the fire pit near flammable materials such as trees, overhanging branches, or combustible structures. This will minimize the risk of accidental fires and create a safer living space.
Here is a summary of the factors to consider:
| Factor | Consideration |
| 1. Clearance | Follow the safety regulations for clearance around the fire pit. |
| 2. Wind Direction | Place the fire pit downwind from seating areas to avoid smoke blowing towards you. |
| 3. Proximity to Flammable Materials | Avoid placing the fire pit near trees, overhanging branches, or combustible structures. |
By considering these factors and adhering to safety regulations, you can ensure that your gas fire pit is installed in the most suitable and safe location for your outdoor space.

Credit: starfiredirect.com
Gathering The Necessary Materials And Tools
A list of essential materials and tools needed for the installation process:
Gathering the necessary materials and tools is the first step towards installing a gas fire pit in your backyard. It’s important to have all the required items on hand to ensure a smooth and efficient installation process. Here’s a list of essential materials and tools that you will need:
- Gas fire pit kit, including a burner, control panel, and ignition system
- Gas supply line and fittings
- Flexible gas hose
- Fire pit enclosure or tabletop
- Fire glass or lava rocks for decoration
- Level
- Tape measure
- Shovel
- Nut driver or adjustable wrench
- Teflon tape
Shopping Tips for purchasing the best quality equipment:
When shopping for the necessary equipment to install your gas fire pit, it’s important to consider quality to ensure the longevity and safety of your fire pit. Here are some shopping tips to help you purchase the best quality equipment:
- Do thorough research and read reviews about different brands and models of gas fire pit kits.
- Look for fire pit kits that are made from durable materials, such as stainless steel, to withstand outdoor elements.
- Check the warranty offered by the manufacturer to ensure you are covered in case of any defects or malfunctions.
- Consider purchasing additional accessories, such as a weather-resistant cover, to protect your fire pit when not in use.
- Compare prices and shop around to find the best deal without compromising on quality.
Understanding the different types of gas fire pits available:
Gas fire pits come in various types and styles, each offering unique features and design options. Understanding the different types will help you choose the one that best suits your needs. Here are the main types of gas fire pits available:
| Fire Pit Type | Description |
|---|---|
| Portable | This type of fire pit is lightweight and can be moved around easily. It is ideal for those who want the flexibility to change its location. |
| Built-in | A built-in gas fire pit is permanently installed in your outdoor space. It offers a seamless and integrated appearance. |
| Tabletop | Tabletop fire pits are compact and designed to be placed on an existing table. They are perfect for smaller outdoor spaces or for those who prefer a portable option. |
| Fire Pit Table | A fire pit table combines the functionality of a fire pit with a tabletop surface. It can serve as a centerpiece in your outdoor seating area. |
By understanding the different types of gas fire pits available, you can make an informed decision and choose the one that aligns with your preferences and outdoor space.
Preparing The Site
Before you can enjoy the cozy warmth and ambiance of a gas fire pit in your outdoor space, it is crucial to properly prepare the site. This involves clearing the area of any obstacles, leveling the ground, and creating a solid base to ensure stability and safety.
Clearing the Area and Removing Any Obstacles
The first step in preparing the site for your gas fire pit is to clear the area of any obstacles that could potentially interfere with its installation or pose a safety hazard. These obstacles could include rocks, tree roots, vegetation, or any other debris.
To clear the area effectively, follow these steps:
- Remove any rocks or stones that may be on the site.
- Trim or remove any vegetation that is in the way.
- Ensure there are no underground utilities or cables that could be damaged during the installation process.
Leveling the Ground and Ensuring Stability of the Fire Pit
Once the area is cleared, it’s important to level the ground to provide a stable foundation for your gas fire pit. Uneven ground can cause the fire pit to tilt or wobble, which can be dangerous and affect its performance.
To level the ground and ensure stability, consider the following steps:
- Use a shovel or a rake to remove any bumps or uneven patches in the area.
- Compact the soil by tamping it down with a hand tamper or a plate compactor.
- Check the levelness of the ground using a leveling tool or a simple DIY method like placing a long board or a level across the area.
- Make any necessary adjustments by adding or removing soil until the ground is adequately leveled.
Creating a Solid Base Using Pavers or Concrete
Now that the ground is leveled, it’s time to create a solid base for your gas fire pit. A solid base ensures the fire pit is secure and prevents it from sinking into the ground over time.
There are two main options for creating a solid base: using pavers or concrete. Both options have their advantages, so choose the one that suits your preferences and needs.
If you decide to use pavers, follow these steps:
- Outline the shape of the fire pit using rope or a garden hose.
- Dig a shallow trench along the outline, ensuring it is deep enough to accommodate the pavers.
- Place a layer of gravel or sand in the trench to provide a stable base.
- Install the pavers, ensuring they are level and tightly fitted together.
If you prefer using concrete, follow these steps:
- Build a formwork using wooden boards to define the shape of the fire pit.
- Excavate the area inside the formwork to the desired depth.
- Compact the soil inside the formwork to provide a stable base.
- Mix and pour the concrete into the formwork, ensuring it is evenly spread and leveled.
Allow the pavers or concrete to cure according to the manufacturer’s instructions before proceeding with the installation of your gas fire pit.
By following these steps to prepare the site, you can create a safe and stable foundation for your gas fire pit. Once the site is prepared, you’ll be ready to move on to the next steps of the installation process, bringing you one step closer to enjoying cozy evenings around your new fire pit.
Installing The Gas Line
One essential step in installing a gas fire pit is connecting the gas line. This ensures a steady supply of gas to power your fire pit and ensures safe and efficient operation. In this section, we will guide you through determining the proper gas line size for your fire pit, connecting the gas line to the fire pit and the main gas supply, and conducting a pressure test to ensure there are no leaks.
Determining the proper gas line size for your fire pit
Before connecting the gas line, it’s crucial to determine the correct gas line size for your fire pit. This ensures that there is enough gas flow to support the flame and prevent any issues during operation.
The size of the gas line depends on several factors, including the maximum BTU (British Thermal Unit) rating of your fire pit and the distance from the gas source to the fire pit. To determine the proper size, refer to the manufacturer’s guidelines or consult with a professional.
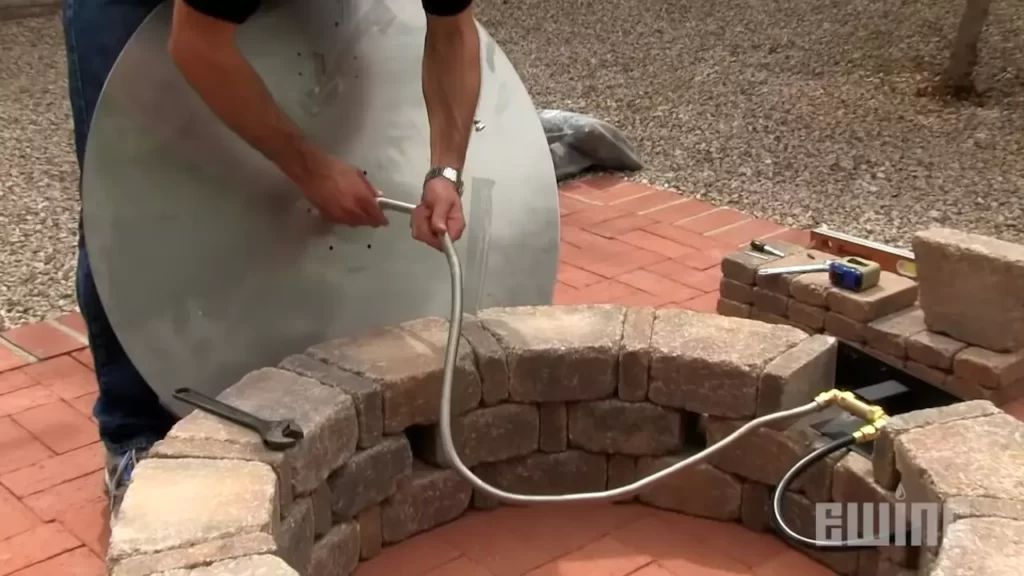
Connecting the gas line to the fire pit and the main gas supply
Once you have determined the appropriate gas line size, it’s time to connect the gas line to both the fire pit and the main gas supply. It’s essential to follow the manufacturer’s instructions for a secure and leak-proof connection.
Here’s a step-by-step guide to connecting the gas line:
- Shut off the gas supply: Before starting the connection process, ensure that the main gas supply is turned off.
- Attach the gas line to the fire pit: Use a wrench to attach one end of the gas line to the gas inlet on the fire pit. Make sure to tighten the connection securely.
- Connect the gas line to the main gas supply: Connect the other end of the gas line to the main gas supply using a gas connector. Again, ensure that the connection is tight and secure.
- Check for leaks: Apply a mixture of soapy water to the connections. If bubbles form, there is a leak. Tighten the connections further or seek professional assistance if needed.
- Turn on the gas supply: Once all the connections are secure and leak-free, open the main gas supply to allow gas flow to the fire pit.
Conducting a pressure test to ensure there are no leaks
After connecting the gas line, it’s critical to conduct a pressure test to ensure there are no leaks. This test helps identify any potential issues and ensures the safety of your gas fire pit.
Here’s how you can conduct a pressure test:
- Close all valves: Ensure that all valves on the fire pit and gas line are closed.
- Apply pressure: Use a pressure gauge to apply pressure to the gas line. The recommended pressure for a pressure test is typically around 10-15 psi.
- Monitor the pressure: Leave the pressure for a designated period, usually around 10-15 minutes, and monitor the pressure gauge for any significant drops.
- Check for leaks: Apply a mixture of soapy water to the connections once again. If bubbles appear, it indicates a leak, and you should address it before proceeding.
- Release pressure and recheck: Finally, release the pressure from the gas line and ensure that all connections are tight and leak-free.
By following these steps and conducting a pressure test, you can ensure a safe and efficient gas line installation for your fire pit.
Setting Up The Ignition System
One of the key components of installing a gas fire pit is setting up the ignition system. This system is responsible for supplying the spark or flame that ignites the gas and creates a beautiful fire. There are two main types of ignition systems to choose from: manual and electronic. In this section, we will explore the differences between these two options and guide you on how to install the ignition system correctly.
Choosing between manual and electronic ignition systems
When it comes to choosing an ignition system for your gas fire pit, you have two options: manual and electronic. Each has its own set of pros and cons, so it’s essential to understand them before making a decision.
| Manual Ignition System | Electronic Ignition System |
|---|---|
| Requires a manual spark to ignite the gas. | Automatically generates spark or flame using electronic components. |
| Simpler and less expensive. | More advanced and pricey. |
| Dependable in various weather conditions. | May require additional protection during harsh weather. |
| Allows for manual control of the ignition process. | Provides convenient and automatic ignition. |
Once you’ve evaluated the advantages and disadvantages of each system, you can make an informed decision based on your preferences, budget, and the level of convenience you desire.
Installing the ignition system according to manufacturer instructions
Now that you’ve chosen the type of ignition system that suits your needs, it’s time to install it properly. It’s crucial to follow the manufacturer’s instructions to ensure a safe and effective installation. Here is a step-by-step guide:
- Start by gathering all the necessary tools and equipment mentioned in the manufacturer’s instructions.
- Select a suitable location for the ignition system, keeping in mind clearance requirements and safety measures.
- Attach the ignition system to the gas supply line, making sure to use the appropriate fittings and connectors.
- Mount any required brackets or supports securely to ensure the stability of the ignition system.
- Connect the ignition system to a reliable power source, following the electrical connections specified by the manufacturer.
- Double-check all the connections, ensuring they are tight and leak-free.
- Verify that the ignition system is correctly aligned with the gas burner or pilot assembly.
- Readjust any necessary settings or configurations according to the manufacturer’s instructions.
Testing the ignition system for functionality
After installing the ignition system, it’s crucial to test its functionality before enjoying your gas fire pit. Follow these steps to ensure everything is working correctly:
- Turn on the gas supply and make sure the valve is fully open.
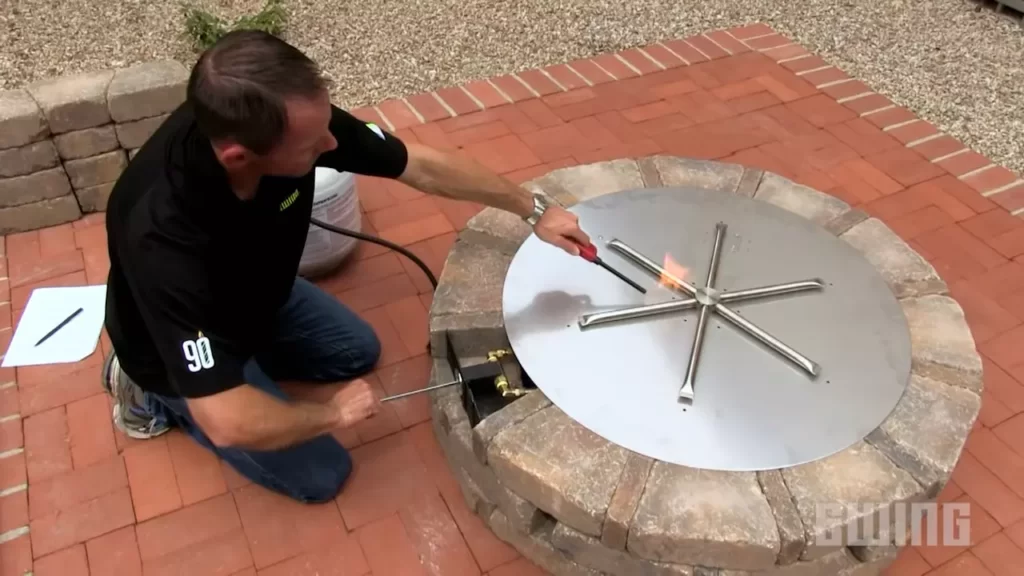
- Activate the ignition system according to the manufacturer’s instructions.
- Observe if the system generates a spark or flame, indicating that the ignition process is functioning properly.
- Check for any gas leaks around the connections using a soapy water solution.
- If there are no leaks and the ignition system works as intended, you’re ready to proceed with enjoying your gas fire pit. Otherwise, double-check all the connections and consult the manufacturer’s troubleshooting guide if necessary.
By following these steps and adhering to the manufacturer’s instructions, you can confidently set up the ignition system for your gas fire pit and ensure that it functions reliably and safely.
Assembling And Installing The Fire Pit
Installing a gas fire pit is a wonderful addition to any outdoor space, providing warmth and ambiance for those cozy evenings with family and friends. While it may seem like a complex project, with the right guidance, you can assemble and install your fire pit with ease. In this guide, we will walk you through the essential steps of assembling and installing your gas fire pit, ensuring it is secure, stable, and properly ventilated.
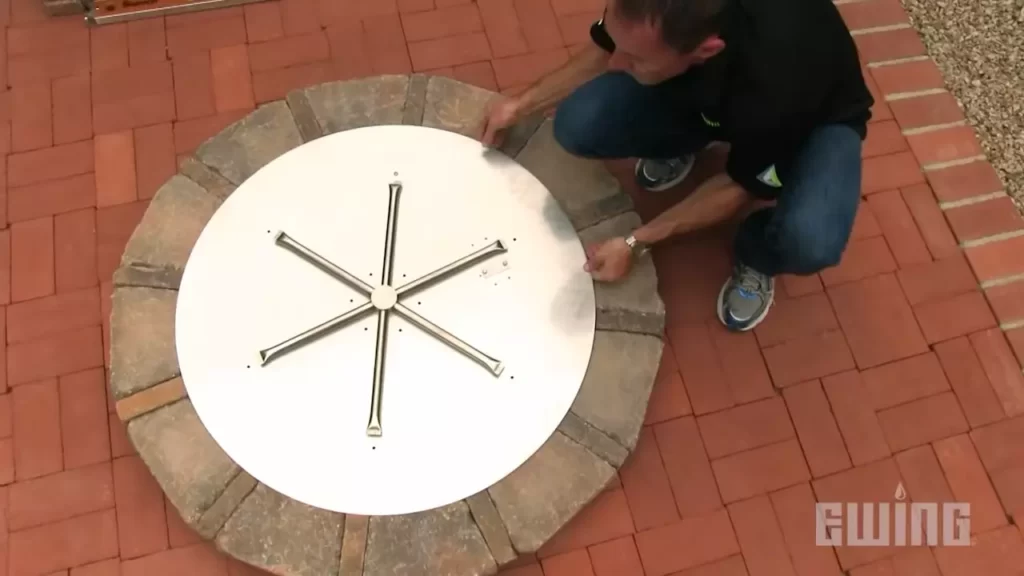
Putting together the various components of the fire pit
Once you have selected your gas fire pit kit, the first step is to carefully unpack and organize all the components. Ensure you have all the necessary components by referring to the instruction manual provided by the manufacturer. Take a moment to familiarize yourself with the various parts, including the burner, control valve, igniter, and valve key.
Next, using a wrench or pliers, connect the gas supply line to the gas valve on the burner. Make sure to tighten the connection securely to prevent any leaks. If necessary, use Teflon tape to ensure a tight seal. Take care not to overtighten, as it may damage the threads.
Then, attach the igniter assembly to the side of the burner, following the manufacturer’s instructions. This will typically involve securing it with screws or bolts provided. Make sure the igniter assembly is positioned correctly so that it ignites the gas effectively.
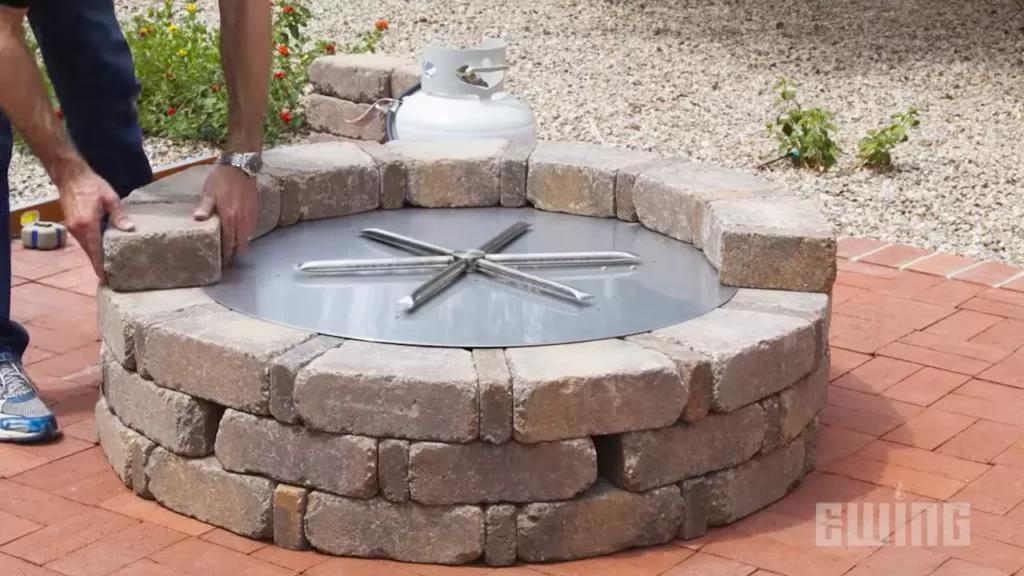
Securing the fire pit to the base and ensuring stability
Before securing the fire pit to the base, choose a suitable location for your fire pit. Ensure there is enough clearance from any combustible materials, such as trees, shrubs, or buildings. It is recommended to have at least 10 feet of clearance around the fire pit.
If your fire pit comes with a base, carefully place it in the desired location. Ensure the base is level by using a level tool. If needed, adjust the base by adding or removing soil or using leveling blocks.
Once the base is level, position the fire pit on top of the base. Ensure it is centered and aligned properly. Depending on the design of your fire pit, you may need to secure it to the base using screws, brackets, or other fastening methods provided by the manufacturer. This will help ensure stability and prevent any accidental tipping.
Checking for proper ventilation and clearance
Proper ventilation is crucial when installing a gas fire pit to ensure the safe operation of the burner. Check the manufacturer’s guidelines for ventilation requirements specific to your fire pit model.
Make sure there is enough clearance between the fire pit and any nearby structures, such as walls or overhead structures. This will help prevent heat damage and reduce the risk of fire.
Additionally, ensure there is adequate clearance above the fire pit to allow for proper air circulation. This will help prevent the buildup of carbon monoxide and ensure the flames burn efficiently.
By following these steps, you can confidently assemble and install your gas fire pit, creating a beautiful and functional addition to your outdoor living space. Remember to always refer to the manufacturer’s instructions for your specific fire pit model to ensure proper installation and safe operation.
Installing Fire Pit Media And Accessories
Once you have successfully installed your gas fire pit, it’s time to add the finishing touches that will transform it into a cozy and inviting outdoor gathering spot. In this section, we will discuss how to select the appropriate fire pit media, add decorative elements and accessories, as well as arrange seating and other outdoor furniture around the fire pit.
Selecting the appropriate fire pit media, such as lava rocks or glass beads
Choosing the right fire pit media is crucial for both the aesthetics and functionality of your gas fire pit. Two popular options are lava rocks and glass beads, each with its own unique qualities:
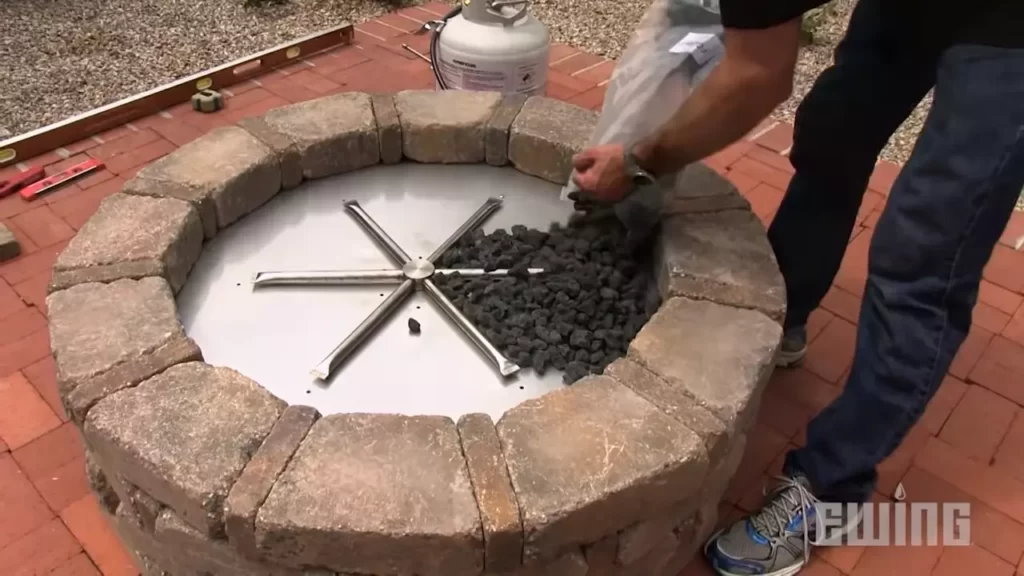
- Lava rocks: These natural volcanic stones are a classic choice for fire pit media. They retain and radiate heat effectively, providing a more authentic and rustic look. Lava rocks also help with air circulation, promoting better combustion. Simply spread the rocks evenly across the burner plate or the fire pit bowl, ensuring they cover the burner completely.
- Glass beads: If you prefer a modern and sleek look, glass beads are the way to go. They come in various colors and sizes, allowing you to customize your fire pit’s appearance. Glass beads are also known for their reflective properties, creating a stunning visual effect when the flames dance upon them. To install, pour the beads carefully over the burner or fill the fire pit bowl, ensuring they cover the burner evenly.
Adding decorative elements and accessories to enhance the appearance
In addition to fire pit media, incorporating decorative elements and accessories can elevate the overall look and feel of your outdoor fire pit area. Here are a few ideas to consider:
- Fire pit cover: A fire pit cover not only protects your investment from the elements but also provides a sleek and organized appearance when not in use. Look for a cover that is weather-resistant and fits securely over your fire pit.
- Fire pit screens: These metal mesh screens serve two essential purposes. They enhance safety by preventing sparks or embers from escaping the fire pit, and they add a charming touch to the ambiance as they reflect the flickering flames. Make sure to choose a screen that matches the dimensions of your fire pit and can be easily removed and cleaned.
- Fire pit seating: Comfortable seating is essential for creating a cozy and inviting atmosphere around your fire pit. Arrange outdoor chairs, benches, or even cozy outdoor sofas in a manner that encourages conversation and relaxation. Consider materials that are weather-resistant and choose cushions or pillows that complement the overall color scheme of your outdoor space.
Arranging seating and other outdoor furniture around the fire pit
Strategic placement of seating and other outdoor furniture around the fire pit ensures optimal enjoyment and comfort for you and your guests. Here are a few tips:
- Proximity: Place seating within a safe distance from the fire pit, ensuring that there is enough space for people to move comfortably. Maintain proper clearance from any combustible materials and keep in mind the direction of the prevailing wind to avoid smoke blowing directly into the seating area.
- Grouping: Arrange seating in a way that encourages conversation and interaction. Consider creating a circular or semicircular seating arrangement, allowing everyone to face one another and easily engage in conversation.
- Lighting: Enhance the ambiance and visibility around the fire pit by incorporating outdoor lighting. Hanging string lights, lanterns, or solar-powered pathway lights can create a warm and inviting atmosphere in the surrounding area.
By carefully selecting fire pit media, adding decorative elements and accessories, and arranging seating and other outdoor furniture, you can create a stunning and functional outdoor space that will be the envy of your friends and neighbors. Now, it’s time to sit back, relax, and enjoy the warmth and beauty of your gas fire pit.
Safety Measures And Maintenance
When it comes to setting up a gas fire pit, safety should be the top priority. By implementing the right safety measures and following proper maintenance practices, you can enjoy the warmth and beauty of your fire pit without any worries. In this section, we will discuss the key steps you need to take to ensure that your gas fire pit remains a safe and enjoyable addition to your outdoor space.
Implementing safety measures to prevent accidents and injuries
To prevent accidents and injuries, it is crucial to follow these safety measures:
- Choose a safe location: Select an open and well-ventilated area, away from flammable objects such as trees, plants, and structures. Ensure that there is sufficient clearance on all sides of the fire pit.
- Install a fire pit on a stable surface: Place the fire pit on a level and non-combustible surface like concrete or brick. This will prevent any tipping or shifting during use.
- Keep a fire extinguisher nearby: It’s always better to be prepared. Have a fire extinguisher handy in case of any emergencies. Make sure everyone in your household knows how to use it.
- Use a gas shut-off valve: Install a gas shut-off valve within easy reach of the fire pit. This will allow you to quickly cut off the gas supply in case of any leaks or emergencies.
- Follow manufacturer instructions: Read and follow the instructions provided by the manufacturer for safe installation and operation of the fire pit. This includes guidelines for proper connection to the gas source and regular maintenance.
Regular cleaning and maintenance tips to keep the fire pit in good condition
To keep your gas fire pit in optimal condition, follow these cleaning and maintenance tips:
- Remove debris: Regularly remove leaves, twigs, and any other debris from the fire pit. This will prevent blockages and ensure proper ventilation.
- Clean the burner: Clean the burner and control valve assembly using a soft brush or cloth. Remove any dirt or buildup that may affect the flame quality.
- Inspect for gas leaks: Periodically inspect the gas connections for leaks. Apply a solution of soapy water to the connections and look for bubbles. If you spot any leaks, turn off the gas supply and contact a professional for repairs.
- Check ignition system: Test the ignition system regularly to ensure it is working properly. If you notice any issues with the ignition, contact a professional for assistance.
- Protect the fire pit: Use a cover or protective shield when the fire pit is not in use to shield it from harsh weather conditions and extend its lifespan.
Troubleshooting common issues and contacting professionals if needed
Despite taking all the necessary precautions, you may encounter some common issues with your gas fire pit. Here are a few troubleshooting tips:
- Low flame or no flame: Check the gas supply and ensure the shut-off valve is fully open. Clean the burner and check for any blockages that may be affecting the flame.
- Strange odor: If you detect a gas odor, turn off the gas supply immediately and contact a professional to inspect for leaks.
- Malfunctioning ignition: If the ignition system fails to ignite the fire, check the battery or connection for any issues. If the problem persists, it’s best to seek professional help.
Remember, if you encounter any issues that you are unsure how to handle, do not hesitate to contact a professional. They have the expertise to diagnose and resolve any problems, ensuring the safety and longevity of your gas fire pit.
Frequently Asked Questions On How To Install A Gas Fire Pit
What Do You Put In The Bottom Of A Gas Fire Pit?
The bottom of a gas fire pit is usually filled with fire glass, lava rocks, or a combination of both. These materials not only enhance the appearance of the fire pit but also help to distribute the heat evenly.
Do You Need A Vent For A Gas Fire Pit?
Yes, a vent is needed for a gas fire pit. The vent allows for proper air circulation and eliminates the buildup of harmful gases such as carbon monoxide. Make sure to follow the manufacturer’s guidelines for venting requirements.
How Far Away From A House Does A Gas Fire Pit Need To Be?
A gas fire pit should be at least 10 feet away from a house for safety reasons.
How Do You Hook Up A Natural Gas Fire Pit?
To hook up a natural gas fire pit, first, ensure you have a natural gas supply line available. Next, connect the gas line to the fire pit using a flexible gas hose and a shutoff valve. Check for leaks with a soap and water solution.
If there are no leaks, light the fire pit according to the manufacturer’s instructions.
Conclusion
To conclude, installing a gas fire pit may seem like a daunting task, but with the right tools and knowledge, it can be done effortlessly. By following the step-by-step instructions outlined in this guide, you’ll be able to enjoy the warmth and ambiance of a gas fire pit in no time.
Remember to prioritize safety precautions, seek professional assistance if needed, and enjoy the cozy evenings by your new fire pit. Happy fire pit installation!