To install a garbage disposal where there was none, first, gather necessary tools and obtain a suitable disposal unit. Then, shut off the power, disconnect the sink drain, and mount the disposal.
Finally, connect the drain pipes and power supply, test for leaks, and secure any loose connections. Introducing a garbage disposal to your kitchen can greatly enhance your waste management system. Whether you want to upgrade from an old unit or install one where there was none previously, the process can be surprisingly simple.
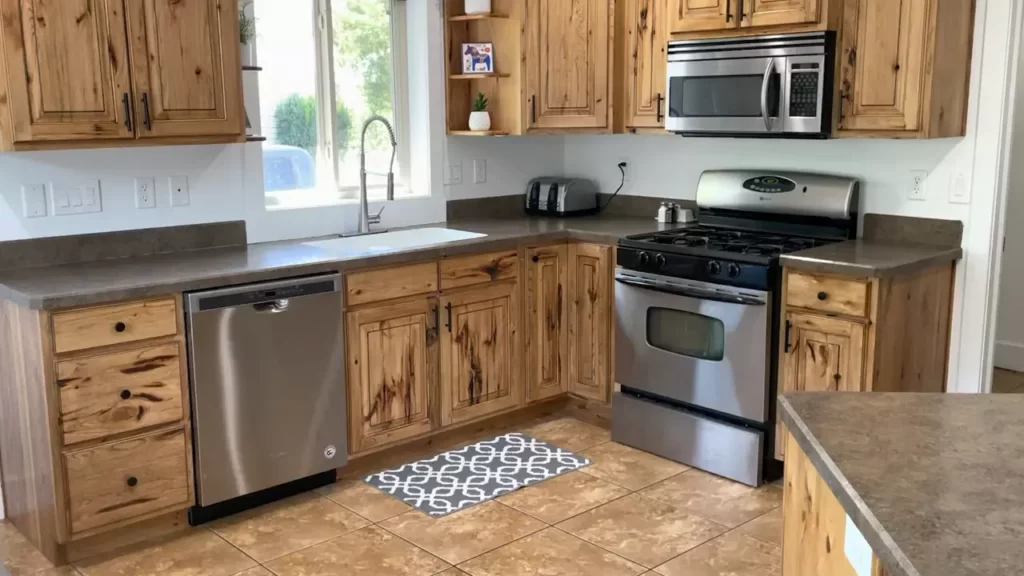
With a few basic tools and a new garbage disposal unit, you’ll be well on your way to a more efficient kitchen. This article will guide you through the step-by-step process of installing a garbage disposal where there was none, ensuring proper functionality and avoiding any potential pitfalls along the way. So let’s dive in and get started on your journey to a cleaner, more convenient kitchen setup.
The Benefits Of Installing A Garbage Disposal
Reducing Food Waste in Your Kitchen
One of the major benefits of installing a garbage disposal in your kitchen is the ability to effectively reduce food waste. With a garbage disposal unit, you can easily dispose of food scraps and leftovers right in your sink, preventing them from ending up in the trash bin and ultimately in a landfill. Food waste that is left to decompose in landfills contributes to greenhouse gas emissions and takes up valuable space.
By utilizing garbage disposal, you can significantly reduce your environmental impact and contribute to a more sustainable lifestyle.
Improving Hygiene and Reducing Odors
Another advantage of installing a garbage disposal is the improvement in hygiene and reduction of unpleasant odors in your kitchen. When food waste is left in the trash bin, it can quickly become a breeding ground for bacteria and emit strong odors, especially in hot weather. However, with a garbage disposal, food waste is quickly ground up and flushed away, eliminating the presence of rotting food and the associated smells. This not only contributes to a cleaner and more pleasant kitchen environment, but it also helps in maintaining better overall hygiene.
Planning And Preparation
Before installing a garbage disposal in your kitchen where there was none, it is important to properly plan and prepare for the installation process. This will ensure that you have all the necessary tools and materials, as well as a thorough understanding of your kitchen’s plumbing system. By following these steps, you can make the installation process go smoothly and efficiently.
Assessing Your Kitchen’s Plumbing
The first step in planning for a garbage disposal installation is to assess the plumbing in your kitchen. This involves understanding how the waste pipes are configured and determining if there is an existing drain that can be used for the garbage disposal. It is crucial to have a solid understanding of your kitchen’s plumbing layout to avoid any complications during the installation process.
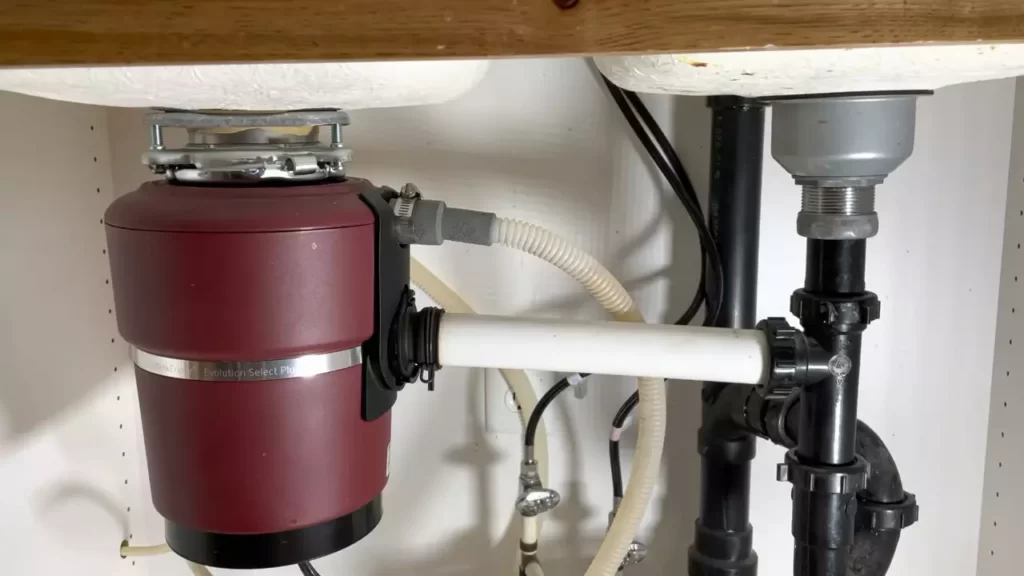
To assess your kitchen’s plumbing, start by locating the main drain line. This is usually found underneath the sink and connects to the larger plumbing system in your home. Take note of any existing connections or branches that may complicate the installation process. You may also want to check the local building codes to ensure that installing a garbage disposal is permitted in your area.
Gathering the Necessary Tools and Materials
Once you have assessed your kitchen’s plumbing, it is time to gather all the necessary tools and materials for the installation. Having the right equipment on hand will help you complete the installation smoothly and efficiently. Here is a list of the tools and materials you will need:
| Tools | Materials |
|---|---|
| – Screwdriver | – Garbage disposal unit |
| – Adjustable wrench | – Mounting hardware |
| – Plunger | – Drain connector |
| – Hacksaw | – Plumbers putty |
| – Electrical tape | – PVC cement |
Make sure you have all the tools and materials listed above before starting the installation. This will save you time and frustration during the process. Additionally, it is important to read the manufacturer’s instructions that come with the garbage disposal unit to ensure you have all the necessary parts for a successful installation.
By properly planning and preparing for the installation of a garbage disposal in your kitchen where there was none, you can ensure a smooth and efficient process. Assessing your kitchen’s plumbing layout and gathering the necessary tools and materials will set you up for success. In the next section, we will walk you through the steps for installing the garbage disposal.
Step-By-Step Guide To Installing A Garbage Disposal
Are you tired of dealing with kitchen waste that clogs up your sink and emits unpleasant odors? Installing a garbage disposal can be a game-changer, as it allows you to efficiently and hygienically dispose of food scraps without the worry of blockages or unpleasant smells. In this step-by-step guide, we’ll walk you through the process of installing a garbage disposal where there was previously none. By following these simple steps, you’ll have a fully functioning garbage disposal in no time!
Shutting Off the Power and Water Supply
Before you begin the installation process, it’s crucial to ensure your safety by shutting off the power and water supply to the sink area. Start by locating the circuit breaker for your kitchen and switching off the power. Then, turn off the water supply by closing the shut-off valve underneath the sink. This will prevent any accidents and make the installation process much safer.
Removing the Existing Sink Drain and Piping
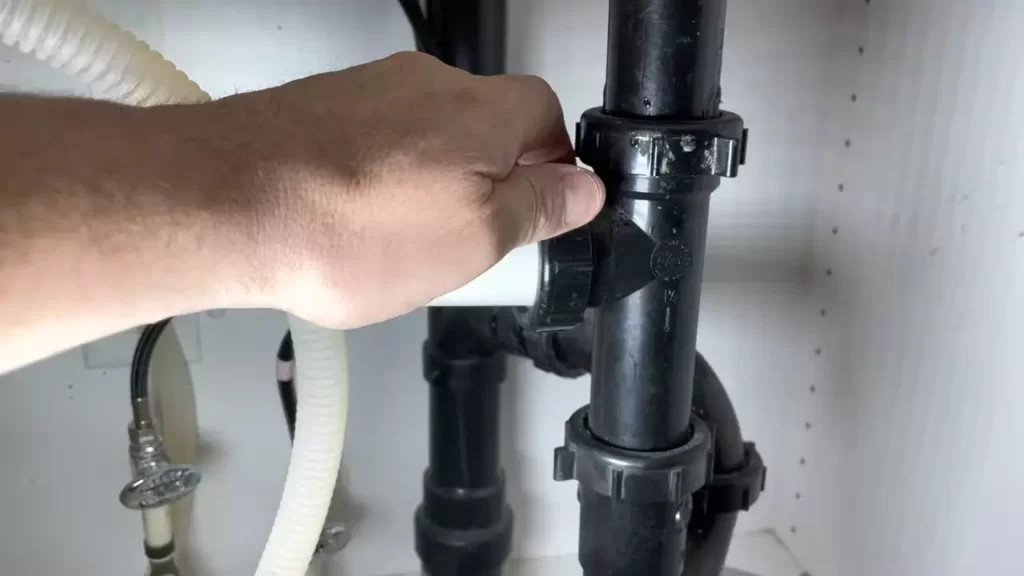
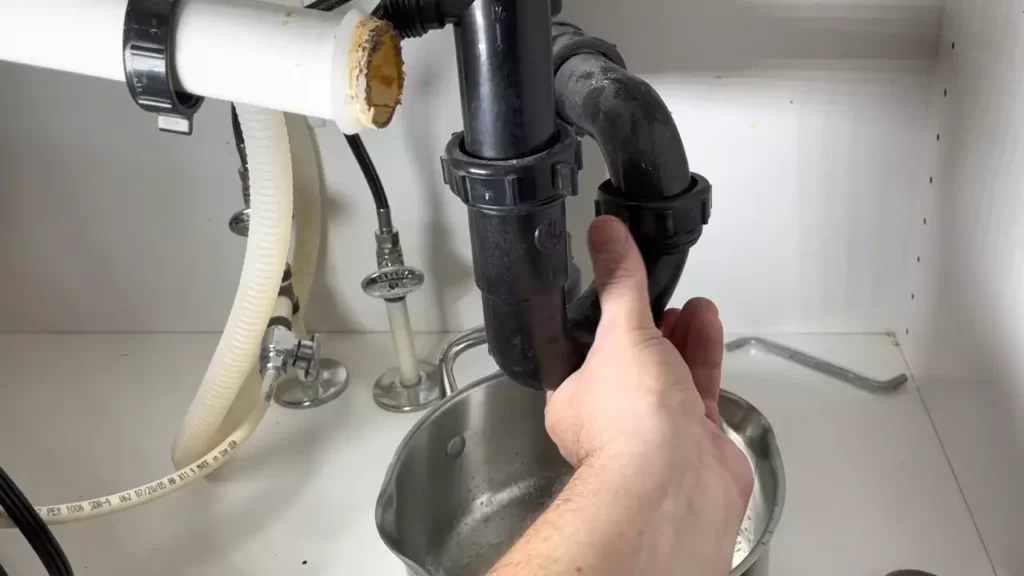
The next step is to remove the existing sink drain and piping. Begin by loosening the slip nut that connects the P-trap to the sink strainer. Once the slip nut is loosened, remove the P-trap and set it aside. Next, use a pipe wrench to loosen the locknut that holds the sink strainer in place. Once the locknut is removed, you can easily detach the sink strainer from the sink. It’s important to clean the area thoroughly after removing the old drain to ensure a proper and secure installation of the new garbage disposal.
Installing the Mounting Hardware
Now it’s time to install the mounting hardware for your new garbage disposal. Start by placing the fiber gasket onto the sink flange, ensuring it sits securely. Then, attach the mounting ring and tighten it using the mounting screws. Make sure the mounting ring is centered over the drain opening to ensure proper alignment for the garbage disposal unit.
Attaching the Garbage Disposal Unit to the Mounting Ring
With the mounting hardware in place, it’s time to attach the garbage disposal unit to the mounting ring. Begin by aligning the disposal unit with the mounting ring and twisting it clockwise until it locks into place. Once properly aligned, use the mounting ring’s screws to secure the disposal unit tightly. Double-check that the disposal unit is firmly attached to the mounting ring before proceeding.
Connecting the Drain Pipe and Securing the Disposal Unit
Now you’ll connect the drain pipe to the garbage disposal and secure the disposal unit. Start by attaching the drain pipe to the disposal’s outlet tube using a slip joint nut and washer. Make sure the connection is tight to prevent any leaks. Then, connect the other end of the drain pipe to the P-trap and tighten the slip nut. Finally, use a screwdriver to secure the disposal unit to the mounting ring, ensuring it is stable and in the correct position.
Testing and Ensuring Proper Functioning
Before considering the installation complete, it’s essential to test the garbage disposal to ensure proper functioning. Turn on the water supply, then switch on the power to the disposal at the circuit breaker. Run water into the sink and turn on the disposal. Listen for any unusual sounds or vibrations while it is running. If everything sounds and works as expected, congratulations! You have successfully installed a garbage disposal.
Installing a garbage disposal where there was none may seem like a daunting task, but by following this step-by-step guide, you can accomplish it with ease. Not only will you enjoy the convenience of a garbage disposal, but you’ll also contribute to a cleaner and more efficient kitchen. So, say goodbye to food waste woes and hello to a hassle-free kitchen cleanup!
Tips For A Successful Installation
When it comes to installing a garbage disposal where there was none before, there are a few key tips to keep in mind to ensure a successful installation. Choosing the right size and power capacity for your garbage disposal, properly aligning and tightening connections, and troubleshooting common installation issues are all crucial steps in the process. In this article, we will dive into each of these topics in detail to help you complete your garbage disposal installation seamlessly.
Choosing the Right Size and Power Capacity
Choosing the correct size and power capacity for your garbage disposal is essential for its efficient operation. Garbage disposals typically come in sizes ranging from 1/3 horsepower to 1 horsepower. The size you select will depend on the amount of food waste generated in your household and your personal preferences.
If you have a smaller household or generate less food waste, a 1/3 or 1/2 horsepower disposal may be sufficient. However, if you have a larger family or frequently dispose of tougher food scraps, you might want to consider a more powerful 3/4 or 1 horsepower disposal. Remember, higher horsepower disposal will be able to handle more challenging food waste, but it may also come at a higher price.
It is also important to consider the physical dimensions of the disposal when choosing the right size. Make sure the disposal will fit smoothly under your sink without any clearance issues. Taking measurements beforehand and comparing them with the product specifications will help you select the perfect size for your space.
Properly Aligning and Tightening Connections
Proper alignment and tightening of connections is crucial for the optimal performance of your garbage disposal. Before starting the installation process, make sure to gather all the necessary tools and materials, including a screwdriver, pliers, and plumber’s putty.
To begin, attach the mounting ring to the sink flange and tighten it securely using the provided screws. Next, connect the discharge tube to the disposal unit and align it with the plumbing trap. Use a wrench or pliers to tighten the connection, ensuring it is leak-proof.
Additionally, it is essential to secure the garbage disposal tightly to the mounting ring to prevent any movement or vibrations during operation. Follow the manufacturer’s instructions carefully when attaching the disposal to the mounting ring, and double-check that all screws are tightened properly.
Troubleshooting Common Installation Issues
During the installation process, you may encounter common issues that can be easily resolved with a few troubleshooting techniques. One common problem is a leak around the connection points. To fix this, ensure that the connections are tightly secured and sealed with plumber’s putty or rubber gaskets.
If the garbage disposal does not turn on or makes unusual noises when switched on, check the power connections and make sure they are securely attached. If the disposal is still not functioning correctly, refer to the troubleshooting guide provided by the manufacturer, as these issues could potentially require professional assistance.
Another common installation issue is a jammed disposal. If the disposal gets clogged or stuck, avoid using harsh chemicals to clear the jam, as they may damage the unit. Instead, locate the reset button on the disposal and press it to reset the motor. If the problem persists, use a disposal wrench or an Allen wrench to rotate the impellers manually and free any obstructions.
In conclusion, proper installation of a garbage disposal involves choosing the right size and power capacity, properly aligning and tightening connections, and troubleshooting common issues. By following these tips and guidelines, you will be well on your way to successfully installing a garbage disposal where there was none before, making food waste disposal a breeze in your kitchen.
Safety Precautions And Maintenance
When installing a new garbage disposal, it’s crucial to prioritize safety precautions and regular maintenance to ensure its proper functioning and longevity. By handling the disposal unit safely and regularly cleaning and maintaining it, you can prevent accidents, extend its lifespan, and keep your kitchen environment clean and odor-free.
Handling the Disposal Unit Safely
Proper handling of the garbage disposal unit is essential to avoid injuries and damage. Follow these safety precautions:
- Wear protective gloves:
- Never reach into the disposal unit with bare hands:
- Do not use your fingers to push down food waste:
- Always keep the power off when working on the disposal unit:
Whenever you work with the garbage disposal unit, make sure to wear sturdy gloves. This will protect your hands from sharp edges and potential debris.
Even when the unit is turned off, avoid sticking your hands inside. Use tongs or pliers if you need to retrieve dropped objects, ensuring the unit remains unplugged.
If there is a clog or jam, avoid using your fingers or any other objects to push down the food waste. Instead, use a wooden spoon or a disposal jam wrench to rotate the impellers and release the obstruction.
Before performing any maintenance tasks like cleaning or unclogging the garbage disposal, switch off the power at the circuit breaker or unplug the unit.
Regularly Cleaning and Maintaining the Garbage Disposal
Maintaining your garbage disposal unit not only ensures its optimal performance but also helps eliminate unpleasant odors. Follow these cleaning and maintenance tips:
- Clean your garbage disposal regularly:
- Use citrus peels for deodorizing:
- Avoid grinding hard or fibrous materials:
- Regularly check for leaks:
- Schedule professional maintenance:
Remove any food residue and buildup by pouring a mixture of equal parts white vinegar and water into the disposal. Let it sit for a few minutes, then turn on the unit and run cold water for about 30 seconds.
To combat unwanted smells, throw a few citrus peels like lemons, limes, or oranges into the disposal. Run cold water and turn on the unit to grind them up, leaving your kitchen smelling fresh.
To prevent damage to the blades, avoid putting hard items like bones or fibrous materials into the disposal. They can dull or jam the blades, leading to costly repairs or replacements.
Inspect the connections and pipes under the sink for any signs of leaks. If you notice any water drips, tighten the connections or contact a professional plumber for assistance.
To enhance the longevity of your garbage disposal unit, consider scheduling regular professional maintenance. A qualified technician can inspect the unit, clean the internal components, and identify any potential issues before they escalate.
By adhering to these safety precautions and implementing regular maintenance practices, you can maintain a safe and efficient garbage disposal system in your kitchen. Not only will this save you from unnecessary expenses but it will also provide you with a hassle-free experience while disposing of your food waste.
Avoiding Common Mistakes
When installing a garbage disposal where there was none, it’s important to be aware of the common mistakes that people often make. By avoiding these errors, you can ensure a successful installation and enjoy the benefits of a functioning disposal unit. This section will highlight three common mistakes to steer clear of during the installation process: not disconnecting power before installation, overloading the disposal unit, and using improper cleaning agents.
Not Disconnecting Power Before Installation
Before you begin the installation of your new garbage disposal, it is crucial to disconnect the power supply. This step is often overlooked, but it is vital for your safety. Failing to disconnect the power can result in electrical shock or other serious injuries. To avoid this mistake, follow these simple steps:
- Locate the circuit breaker that controls the power to your kitchen.
- Switch off the circuit breaker to cut off the electricity.
- Verify that the power is indeed off by testing the disposal unit, ensuring it doesn’t turn on.
By taking these cautionary measures, you can proceed with the installation process confidently and without risking any harm.
Overloading the Disposal Unit
One of the most common mistakes made with garbage disposals is overloading the unit. It is important to remember that disposals are designed to handle specific amounts of food waste at a time. Overloading the disposal can cause it to jam or malfunction. To ensure the proper functioning and longevity of your disposal, follow these guidelines:
- Feed small amounts of food waste into the disposal at a time.
- Avoid disposing of large bones, fruit pits, or other hard items that could damage the unit.
- Never force excessive amounts of waste into the disposal, as this can lead to blockages or damage to the motor.
By adhering to these guidelines, you can prevent common issues such as clogs and motor burnout, allowing your disposal to work efficiently.
Using Improper Cleaning Agents
Another mistake to avoid when installing a garbage disposal is using improper cleaning agents. While it’s important to keep the disposal unit clean and odor-free, certain cleaning products can cause damage to the unit and the environment. Here are a few tips for proper disposal cleaning:
- Avoid using harsh chemicals or drain cleaners, as they can corrode the disposal’s components.
- Instead, use mild cleaning agents such as dish soap and warm water to clean the disposal thoroughly.
- You can also freshen the disposal by grinding baking soda and citrus peels.
By using the right cleaning agents, you can maintain your disposal’s functionality and extend its lifespan.
Frequently Asked Questions Of How To Install A Garbage Disposal Where There Was None
Can You Put A Garbage Disposal In A Sink That doesn’t have One?
Yes, you can add a garbage disposal to a sink that doesn’t have one. A professional plumber can easily install a garbage disposal unit in your sink to make your kitchen more convenient and efficient.
Can A Garbage Disposal Be Added To Any Sink?
Yes, a garbage disposal can be added to any sink.
Is It Easy To Add A Garbage Disposal?
Adding a garbage disposal is relatively easy. It involves installing the unit under the kitchen sink and connecting it to the plumbing. With proper tools and basic DIY skills, you can do it yourself.
What Do You Do If You Don’t Have A Garbage Disposal?
Without a garbage disposal, you can still manage waste efficiently. Use a compost bin for organic waste, scrape leftovers into the trash, and avoid pouring grease down the drain. It’s also wise to install a sink strainer to catch food particles.
Conclusion
Installing a garbage disposal might seem like a daunting task, but with these step-by-step instructions, you’ll be able to do it even if there wasn’t one before. By following the necessary plumbing, electrical, and installation processes, you can ensure a smooth and successful installation.
Remember to always prioritize safety and consult a professional if needed. So go ahead and transform your kitchen with the convenience and functionality of a garbage disposal. Happy DIY-ing!