To install a garbage disposal in a sink without one, you will need to follow these steps carefully. First, turn off the power to the sink to avoid any electrical mishaps.
Then, disconnect the drain pipes and remove any existing plumbing connections. Next, mount the garbage disposal unit beneath the sink, ensuring it is securely in place. After that, connect the unit to the sink drain, using a combination of wrenches and adhesive.
Finally, restore the power to the sink and test the garbage disposal for proper functioning.
Understanding The Benefits Of A Garbage Disposal
Installing a garbage disposal in your sink can revolutionize the way you manage food waste in your kitchen. Not only does it provide a convenient and efficient method for disposing of food scraps, but it also offers several key benefits that are worth considering. By understanding these benefits, you may find yourself eager to install a garbage disposal in your sink without one.
Reducing Food Waste and Minimizing Landfill Contribution
One of the primary advantages of a garbage disposal is its ability to reduce food waste and minimize the contribution to landfills. Instead of throwing leftover food into the garbage bin where it ends up in landfills and contributes to environmental problems, a garbage disposal allows you to grind up food scraps and flush them down the drain.
This not only reduces the amount of organic waste that goes to landfills but also helps to decrease the production of harmful methane gas that is released as the waste breaks down in an oxygen-free environment. By diverting food waste from landfills, you can contribute to a greener and more sustainable environment.
Preventing Clogs and Odors in the Sink
Another significant benefit of a garbage disposal is its ability to prevent clogs and odors in the sink. When food scraps are disposed of in the regular trash or left in the sink, they can accumulate and cause blockages in the plumbing pipes over time. This often leads to unpleasant clogs and foul odors that can be difficult to eliminate.
However, with a garbage disposal, food scraps are ground into fine particles that can flow easily through the plumbing system. This helps to prevent clogs and keeps your sink smelling fresh. By installing a garbage disposal, you can say goodbye to the hassle of dealing with clogged drains and unpleasant odors.
Increasing Convenience in the Kitchen
In addition to reducing waste and preventing clogs, a garbage disposal also offers the benefit of increased convenience in the kitchen. Instead of having to scrape plates and collect food scraps in a separate bin, you can simply rinse them down the drain with the help of a garbage disposal.
This saves time and effort, making your kitchen routines more streamlined and efficient. With a garbage disposal, you won’t have to worry about emptying smelly food waste bins or dealing with messy scraps. It’s a convenient solution that can simplify your food waste management process.
Overall, a garbage disposal provides several benefits that make it a worthwhile addition to your kitchen. From reducing food waste and minimizing landfill contribution to preventing clogs and odors in the sink, and increasing convenience, it’s clear that installing a garbage disposal in a sink without one can greatly improve your overall kitchen experience.
Assessing Sink Compatibility
Before installing a garbage disposal in a sink that doesn’t already have one, it’s crucial to first assess the sink’s compatibility. This involves considering the type of sink you have, determining its suitability for a garbage disposal, checking for necessary plumbing connections, and taking note of any potential limitations or challenges that may impact the installation process.
Determining the Type of Sink and Its Suitability for a Garbage Disposal
The first step in assessing sink compatibility is understanding the type of sink you have and whether it can accommodate a garbage disposal. Different sink materials, such as stainless steel, porcelain, or composite, may have varying levels of compatibility. While most sinks can handle a garbage disposal, it’s important to verify that yours is designed to support the weight, vibration, and torque generated by the unit.
Here’s a quick overview of some common sink types and their suitability for a garbage disposal:
| Sink Type | Suitability for Garbage Disposal |
|---|---|
| Stainless Steel | Generally suitable for garbage disposal installation. |
| Porcelain | May require additional support due to the fragility of the material. |
| Composite | Often compatible with garbage disposals, but it’s essential to check the manufacturer’s guidelines. |
Note: Always consult the manufacturer’s instructions for your specific sink to ensure proper compatibility.
Checking for Necessary Plumbing Connections
Once you’ve determined the sink’s suitability for a garbage disposal, the next step is to check for necessary plumbing connections. A properly installed garbage disposal requires both a drainpipe connection and an electrical connection.
Here’s what you need to ensure:
- Drainpipe Connection: Look under the sink and determine whether there is an existing drainpipe connection available. This connection is crucial for the proper functioning of the garbage disposal. If there isn’t one, you may need to consult a professional plumber to make the necessary modifications.
- Electrical Connection: Garbage disposals require a dedicated electrical circuit. Check if there is an electrical outlet nearby that can provide power to the unit. If not, you might need to hire an electrician to install a new outlet.
Considering Any Potential Limitations or Challenges
Lastly, it’s essential to consider any potential limitations or challenges that may affect the installation of a garbage disposal in your sink. These can include space constraints, existing plumbing configurations, or the complexity of the installation process.
Here are some common limitations and challenges to be aware of:
- Insufficient Space: Ensure that there is enough space under the sink to accommodate the garbage disposal unit without causing interference with other plumbing components.
- Complex Plumbing Configurations: In some cases, the existing plumbing may be complex or incompatible with a garbage disposal. This may require professional assistance to assess and make the necessary adjustments.
- Personal Skill and Comfort Level: Installing a garbage disposal can be a DIY project, but it’s important to assess your own skill and comfort level. If you’re unsure about handling electrical or plumbing tasks, it’s best to consult professionals to avoid potential damage or injury.
By thoroughly assessing your sink’s compatibility, checking for necessary connections, and considering any limitations or challenges, you can effectively prepare for the installation of a garbage disposal in a sink without one. This ensures that the process goes smoothly and helps prevent any potential issues down the line.
Tools And Materials Needed
Before you begin the installation process for your new garbage disposal in a sink without one, it is important to gather all the necessary tools and materials. Having everything at hand will make the process smoother and faster. Here is a list of essential tools and an overview of the required materials:
List of essential tools for installation
- Adjustable wrench
- Plumber’s putty
- Plunger
- Screwdriver
- Hammer
- Hacksaw
- Tape measure
- Wire stripper
- Bucket
Overview of required materials
As for the required materials, make sure you have the following items:
- Garbage disposal unit
- Electrical wire connectors
- Dishwasher connector kit (if applicable)
- Plumbing tape
- Plumbing fittings (if necessary)
Gathering the necessary equipment might require a trip to your local home improvement store. However, before you head out, it’s a good idea to take accurate measurements of your sink, ensuring the new disposal unit will fit seamlessly. Additionally, consult your sink’s manufacturer’s manual or a plumbing professional to determine if any specific tools or materials are needed for your particular sink model.
Preparing The Sink For Installation
Clearing the Sink and Removing Any Existing Debris
Before installing a garbage disposal in a sink that does not have one, it is important to clear the sink and remove any existing debris. This will ensure a clean and smooth installation process. Follow the steps below to get started:
- Remove all dishes, utensils, and other items from the sink.
- Use a strainer or your hands to remove any food particles or debris that may be present in the sink.
- Clear any clogs or blockages in the drain using a plunger or a drain snake.
- Thoroughly clean the sink using a mild dish soap and warm water, making sure to remove any grease or residue.
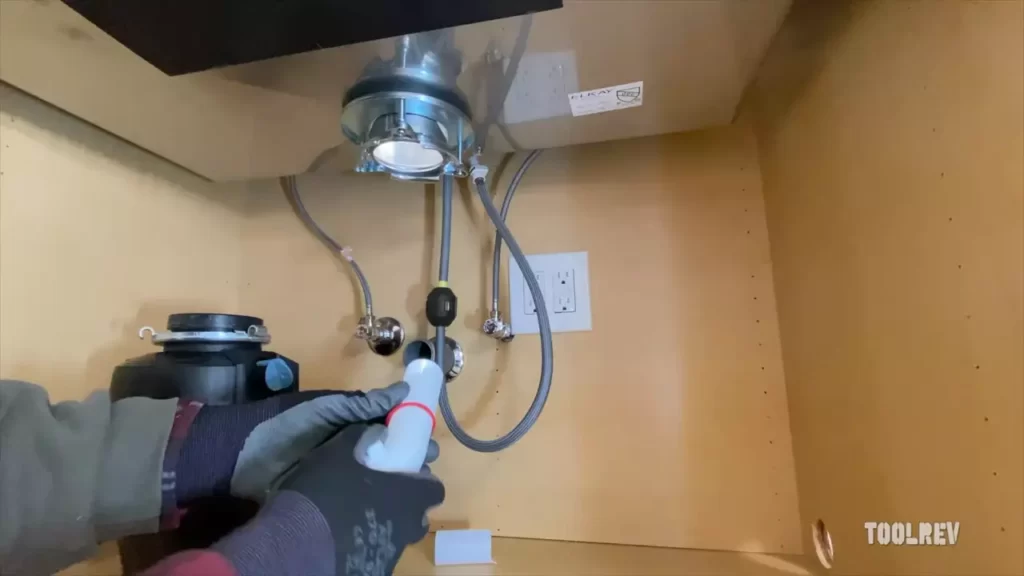
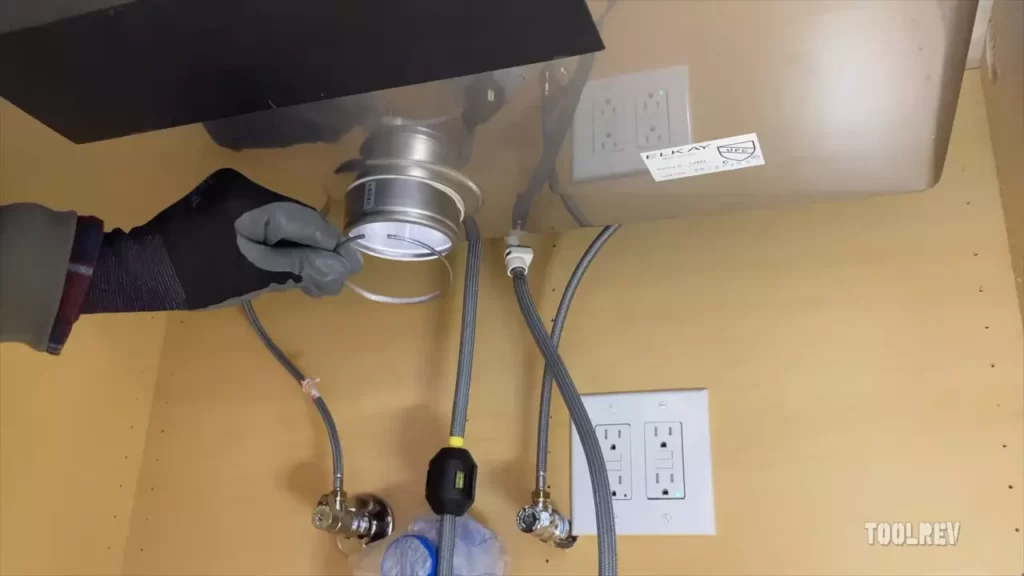
Preparing the Sink Flange Area for Installation
After clearing the sink, the next step is to prepare the sink flange area for installation. Follow these simple instructions:
- Inspect the sink flange area to ensure that it is clean and free from any debris.
- If there is an existing sink flange, remove it by unscrewing the mounting bolts. Make sure to disconnect any plumbing connections as well.
- Apply a thin bead of plumber’s putty around the sink flange area. This will help create a watertight seal when the garbage disposal is installed.
- Insert the new sink flange into the sink opening and press it firmly into place.
- Secure the sink flange by tightening the mounting bolts, ensuring that it is centered and level.
Ensuring the Electrical Connection is Ready (if applicable)
If your garbage disposal requires an electrical connection, it is important to ensure that it is ready before installation. Follow these steps:
- Turn off the power to the area where the garbage disposal will be installed. This can be done by switching off the circuit breaker in your electrical panel.
- Inspect the electrical wiring to ensure that it is in good condition. If there are any signs of wear or damage, contact a qualified electrician for repair.
- If there is no existing electrical connection, you may need to install a new one. This should be done by a licensed electrician to ensure safety and compliance with electrical codes.
- If there is an existing electrical connection, make sure it is compatible with the garbage disposal and can handle the required voltage and amperage.
- If necessary, install a strain relief connector to secure the electrical cable to the garbage disposal.
- Once the electrical connection is ready, carefully follow the manufacturer’s instructions to connect the electrical wires to the garbage disposal.
By following these steps to prepare the sink for installation, you will ensure a smooth and successful garbage disposal installation. Remember to always consult the manufacturer’s instructions for your specific model and seek professional help if needed.
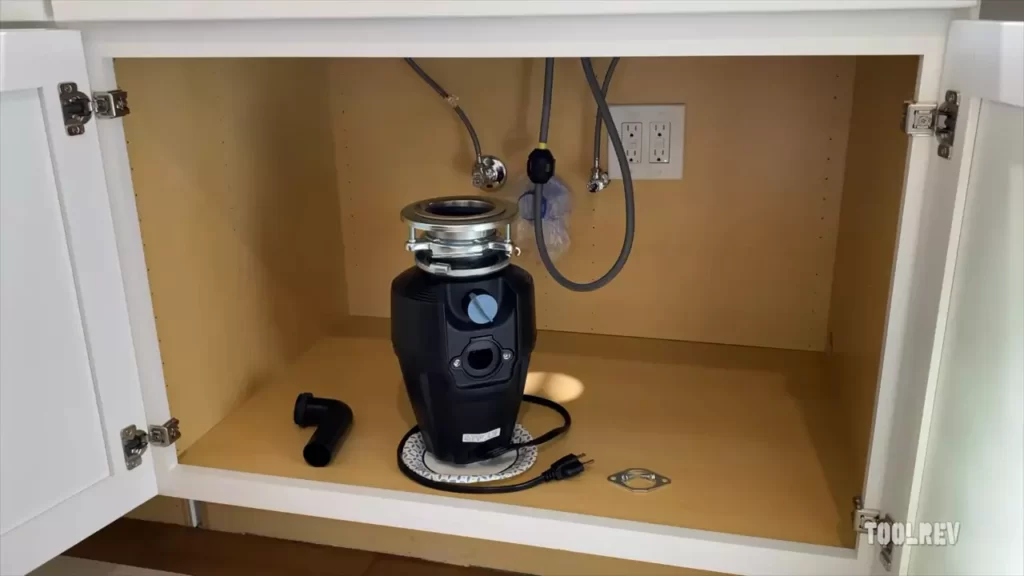
Installing The Mounting Hardware
When it comes to installing a garbage disposal in a sink without one, one of the crucial steps is installing the mounting hardware. This hardware not only provides a stable platform for the garbage disposal unit but also ensures proper alignment for optimal functioning. In this section, we will guide you through the process of attaching the mounting bracket to the sink flange, aligning and securing the mounting ring, and checking for stability and proper alignment.
Attaching the mounting bracket to the sink flange
Before you begin, make sure to gather all the necessary tools and materials such as a screwdriver, pliers, screws, and the mounting bracket that usually comes with your garbage disposal unit.
- Start by placing the mounting bracket on the sink flange, and positioning it in a way that aligns with the mounting holes on the sink.
- Use a screwdriver or a suitable tool to tighten the screws, securing the mounting bracket to the sink flange. Make sure to tighten them firmly to ensure a stable installation.
Aligning and securing the mounting ring
Next, you’ll need to align and secure the mounting ring to the mounting bracket. Follow these steps:
- Place the mounting ring on top of the mounting bracket, ensuring that it fits snugly.
- Use a screwdriver or pliers to tighten the screws on the mounting ring, securing it to the mounting bracket. Make sure to tighten them evenly to maintain stability.
Checking for stability and proper alignment
Once you have attached the mounting bracket and secured the mounting ring, it’s essential to check for stability and proper alignment. This step will ensure that your garbage disposal functions efficiently and without any issues. Here’s how to do it:
- Give the garbage disposal unit a gentle shake to check if it feels stable and securely attached to the mounting hardware.
- Inspect the alignment of the unit with the sink opening. It should be centered and level to ensure proper operation.
- If you notice any instability or misalignment, readjust the mounting bracket and ring as needed.
By following these steps to install the mounting hardware properly, you are well on your way to successfully installing a garbage disposal in a sink without one. In the next section, we will guide you through the remaining installation steps to complete the process seamlessly.
Connecting The Disposal Unit
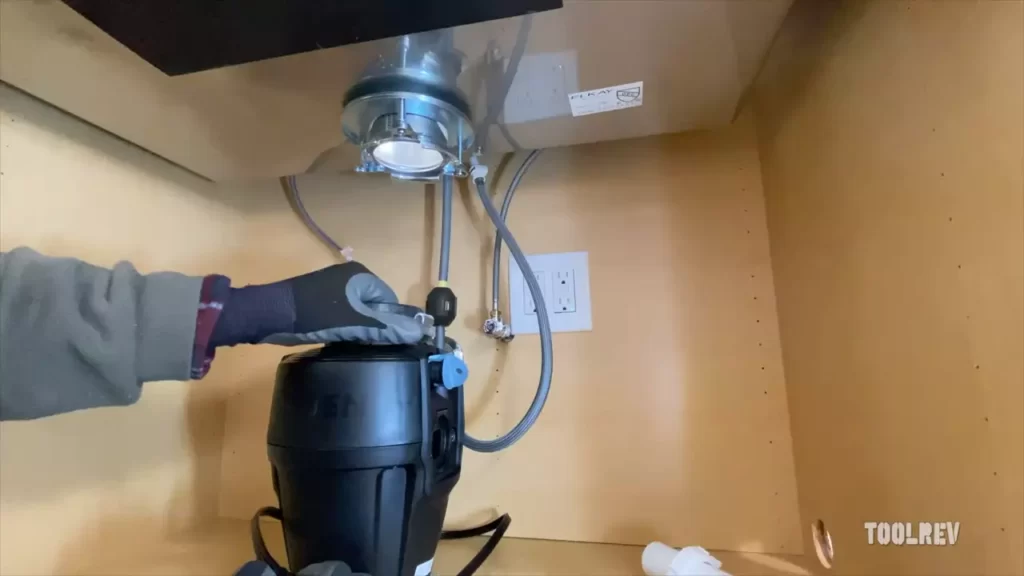
Attaching the disposal unit to the mounting ring:
Once you have prepared the sink and inserted the mounting ring, it’s time to connect the disposal unit. Start by locating the mounting tabs on the disposal unit. These tabs are designed to align with the ridges on the mounting ring.
To attach the disposal unit, align the tabs with the ridges on the mounting ring. Once aligned, rotate the disposal unit clockwise until it locks into place. You should hear a clicking sound, indicating a secure connection.
Securing the disposal unit in place:
With the disposal unit attached to the mounting ring, the next step is to ensure it is securely fastened. Locate the mounting ring screws that came with your disposal unit. These screws will be used to secure the disposal unit to the mounting ring.
Using a screwdriver, tighten each screw clockwise until they are snug. Be careful not to overtighten, as this could damage the mounting ring or disposal unit. The disposal unit should now be firmly attached to the mounting ring, allowing it to function properly.
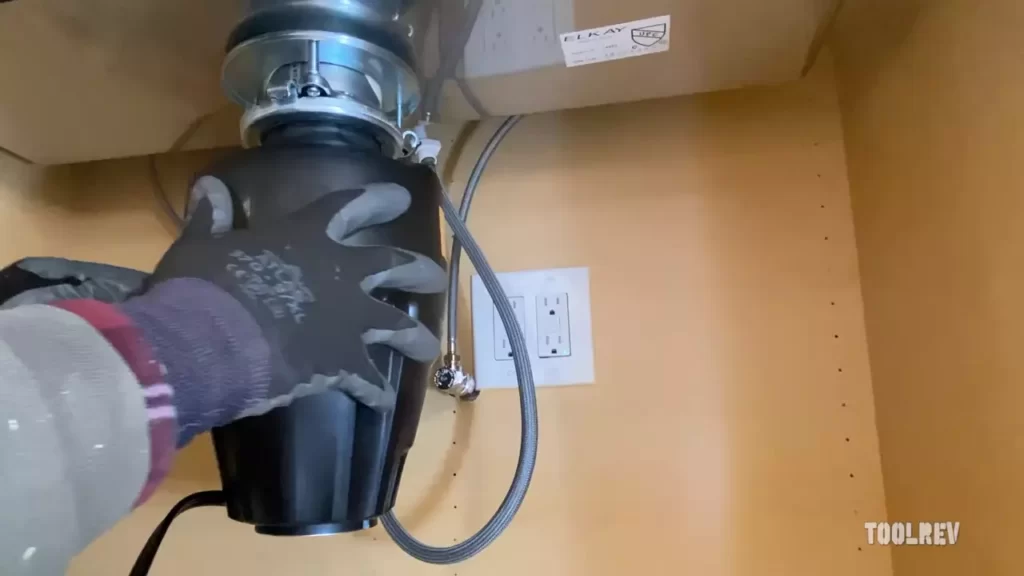
Confirming proper alignment and stability:
After securing the disposal unit, it’s essential to check that it is properly aligned and stable. Take a moment to visually inspect the disposal unit. Ensure that it is level with the sink and sits flush against the mounting ring.
If the disposal unit appears misaligned, gently adjust the position until it is level. Once you are satisfied with the alignment, give the disposal unit a light push to confirm its stability. It should not wobble or move excessively.
By following these steps, you have successfully connected your disposal unit to the sink without one. This installation process ensures proper alignment, stability, and functionality of the garbage disposal, providing you with a convenient and efficient waste management solution for your kitchen.
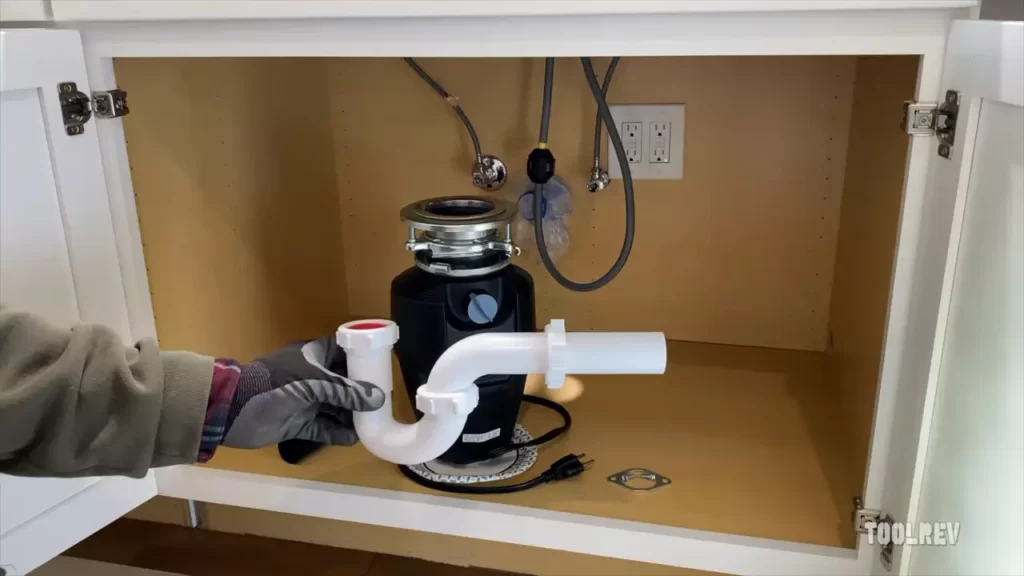
Plumbing Connections
Connecting the discharge pipe to the disposal unit
Once you have successfully installed a garbage disposal in your sink, the next step is to connect the discharge pipe to the disposal unit. This connection ensures that the waste from the disposal is properly directed into the plumbing system.
To connect the discharge pipe, follow these steps:
- Remove the knockout plug: Before connecting the discharge pipe, make sure to remove the knockout plug from the disposal unit. This plug is located on the side of the disposal and needs to be knocked out to create an opening for the discharge pipe. Use a hammer and a screwdriver to carefully remove the knockout plug.
- Attach the discharge pipe: Once the knockout plug is removed, attach the discharge pipe to the opening. Most disposals come with a rubber gasket that needs to be placed between the pipe and the disposal unit to ensure a watertight connection. Use a wrench to tighten the connection, but be cautious not to overtighten it, as it may cause damage to the unit.
- Secure the connection with a clamp: After attaching the discharge pipe, secure the connection with a clamp. The clamp should be placed around the pipe and tightened to prevent any leaks. A tight and secure connection is essential for the proper functioning of the garbage disposal.
Attaching the P-trap and drainpipe assembly
Once the discharge pipe is connected, the next step is to attach the P-trap and drainpipe assembly. The P-trap and drainpipe assembly helps to create a barrier between the sink and the disposal unit, preventing any backflow of wastewater.
Follow these steps to attach the P-trap and drainpipe assembly:
- Position the P-trap: Start by positioning the P-trap under the sink. The P-trap is shaped like a “P” and is responsible for trapping debris and preventing foul odors from entering your kitchen. Make sure the outlet of the P-trap faces the disposal unit.
- Connect the drainpipe: Once the P-trap is in place, connect the drainpipe to the other end of the P-trap. The drainpipe should be positioned in a way that allows water to flow freely into the disposal unit. Use a wrench to tighten the connections.
- Check for proper alignment: After attaching the P-trap and drainpipe assembly, check for proper alignment. Ensure that the pipes are straight and not kinked, as this can lead to clogs and drainage issues. Adjust the connections if necessary.
Checking for leaks and ensuring proper drainage
After connecting the discharge pipe and attaching the P-trap and drainpipe assembly, it’s crucial to check for any leaks and ensure proper drainage. Leaks can cause damage to your cabinets and surrounding areas, while improper drainage can lead to clogs and backups.
Follow these steps to check for leaks and ensure proper drainage:
- Turn on the water: Turn on the water and let it run for a few minutes. Observe the connections and look for any signs of leakage. If you notice any leaks, tighten the connections or replace any faulty components.
- Test the disposal: Once you’ve checked for leaks, test the disposal by running water and grinding some food waste. Watch how the water drains and make sure it flows smoothly down the pipes. If there are any drainage issues, double-check the connections and ensure there are no clogs.
- Use a flashlight: To thoroughly inspect the connections and pipes, use a flashlight to illuminate hard-to-see areas. Look for any signs of leakage, loose connections, or blockages. Address any issues immediately to prevent further problems down the line.
By following these steps, you can successfully connect the discharge pipe, attach the P-trap and drainpipe assembly, and ensure proper drainage in your sink without a garbage disposal. Remember to take your time and double-check each connection to prevent any future issues. Enjoy the convenience of a garbage disposal while maintaining a well-functioning plumbing system!
Testing And Troubleshooting
When it comes to installing a garbage disposal in a sink without one, testing and troubleshooting is a crucial step to ensure its proper functionality. Testing the garbage disposal can help identify any issues or defects, while troubleshooting common problems can save you from potential headaches down the road. This section will guide you through the process of checking the functionality, troubleshooting common issues, and provide tips for proper maintenance and care.
Checking the functionality of the garbage disposal
Before you start troubleshooting, it’s important to ensure that the garbage disposal is functioning correctly. Here are a few steps to check its functionality:
- Turn on the cold water faucet and let it run.
- Ensure the electrical circuit that the garbage disposal is connected to is properly functioning. You can do this by testing other appliances connected to the same circuit.
- Remove any objects or debris from the sink that may obstruct the disposal.
- Turn on the garbage disposal by flipping the switch or pressing the button.
- Listen for any unusual noises or vibrations. A properly functioning garbage disposal should operate smoothly and quietly.
- Allow the garbage disposal to run for a few minutes to ensure there are no leaks.
Troubleshooting common issues and solutions
Even with proper installation, garbage disposals can encounter issues. Here are some common problems and their potential solutions:
- If the garbage disposal doesn’t turn on, check if it’s properly plugged into an electrical outlet. Additionally, ensure that the circuit breaker hasn’t tripped.
- If you hear a humming noise but the disposal isn’t working, it could be jammed. Insert an Allen wrench into the bottom of the disposal and turn it back and forth to free any obstructions.
- If the garbage disposal is leaking, it may indicate a loose or damaged connection. Tighten the connections or replace any faulty parts, such as the rubber gasket or seals.
- For unpleasant odors, grind ice cubes and citrus peels in the disposal to freshen it up. You can also pour a mixture of vinegar and baking soda into the disposal and rinse it with hot water.
- If the garbage disposal is still not functioning correctly after troubleshooting, it’s best to consult a professional plumber to diagnose and fix the issue.
Tips for proper maintenance and care
Maintaining and caring for your garbage disposal can extend its lifespan and prevent common issues. Here are a few tips to keep in mind:
- Avoid putting non-food items, such as plastic, metal, or glass, into the disposal as they can damage the blades or motor.
- Never pour grease or oil down the disposal, as they can solidify and clog the drain.
- Regularly clean the disposal by running cold water and dish soap while it’s running. This helps remove any buildup or residue.
- Use the garbage disposal regularly to prevent rust or corrosion.
- Avoid overloading the disposal with large quantities of food waste. Gradually feed the waste into the disposal to allow it to break down properly.
- If you encounter any issues, address them promptly to prevent further damage and the need for costly repairs.
Finalizing The Installation
Once you have successfully installed the garbage disposal in your sink without one, there are a few essential steps to take to finalize the installation process. By following the guidelines below, you can ensure that your newly installed garbage disposal is fully functional and ready to safely and efficiently handle your kitchen waste.
Cleaning up the workspace and disposing of any waste materials
After completing the installation, it’s crucial to clean up the workspace and properly dispose of any waste materials that may have accumulated during the process. This ensures that your kitchen remains tidy and free from any leftover debris. Follow these steps to clean up effectively:
- Remove any tools, equipment, or leftover packaging from the area.
- Wipe down the sink and surrounding countertop with a mild cleaning agent to remove any dust or residue.
- Dispose of all waste materials, such as old pipes or damaged parts, in accordance with your local regulations. Consider recycling any recyclable materials to minimize your environmental impact.
- Double-check that the workspace is clean and free from any potential hazards before proceeding with testing the garbage disposal.
Reviewing safety precautions and recommendations
Before turning on your newly installed garbage disposal, it’s crucial to review the safety precautions and recommendations to prevent any accidents or damage. Here are a few important points to consider:
- Ensure that the power switch for the garbage disposal is in the “off” position before plugging it into the electrical outlet.
- Use caution when operating the garbage disposal and avoid placing your hands or any foreign objects down the drain.
- Regularly clean and maintain the garbage disposal to keep it in optimal condition. This includes running cold water while using the disposal and periodically grinding small ice cubes to help sharpen the blades.
- If you encounter any issues or unusual noises during operation, immediately turn off the disposal and consult the manufacturer’s instructions or a professional plumber for assistance.
Enjoying the benefits of a fully functional garbage disposal
With the installation completed and the necessary precautions in place, it’s time to reap the benefits of having a fully functional garbage disposal. Enjoy these advantages:
- Efficiently dispose of food waste, reducing the amount of garbage in your regular trash.
- Prevent unpleasant odors and potential pest problems by eliminating food scraps from your kitchen.
- Enhance the cleanliness and hygiene of your kitchen area by keeping it free from rotting food waste.
- Contribute to a more sustainable environment by diverting organic waste from landfills.
By following these final steps and guidelines, you can confidently use and maintain your newly installed garbage disposal, knowing that it is operating safely and effectively. Remember, proper care and occasional maintenance will help prolong the lifespan of your garbage disposal and ensure it remains a valuable addition to your kitchen for years to come.
Frequently Asked Questions Of How To Install A Garbage Disposal In A Sink Without One
Can You Put A Garbage Disposal In A Sink That doesn’t have One?
Yes, you can install a garbage disposal in a sink that doesn’t already have one. It can be done by hiring a professional plumber or following a DIY guide. Installing a garbage disposal helps to efficiently dispose of kitchen waste and keep your sink clean.
Can A Garbage Disposal Be Added To Any Sink?
Yes, a garbage disposal can be added to any sink.
What To Do If Your Sink Doesn’t Have A Garbage Disposal?
If your sink doesn’t have a garbage disposal, you can take a few simple steps to keep it clean and prevent clogs. First, make sure to scrape food scraps into the trash before washing dishes. Use a sink strainer to catch any remaining debris.
Regularly clean the sink and drain with a mixture of hot water and vinegar. Finally, avoid pouring grease or oil down the drain to prevent buildup.
How Do You Hook Up A Garbage Disposal To A Single Sink?
To hook up a garbage disposal to a single sink, start by turning off the power and water supply. Remove the drainpipe and install the mounting assembly. Connect the disposal unit to the mounting ring using a plumber’s putty. Attach the drain flange and reinstall the drainpipe.
Secure the electrical connections and turn on the water and power.
Conclusion
To sum up, installing a garbage disposal in a sink without one is a feasible DIY project with the right tools and guidance. By following the step-by-step instructions outlined in this blog post, you can successfully add this convenient appliance to your kitchen.
Remember to prioritize safety, consult the manufacturer’s instructions, and take your time to ensure a proper and secure installation. With a garbage disposal in place, you’ll enjoy a cleaner and more efficient kitchen experience.