To install an electric stove, turn off the power supply, carefully align the stove with the designated area, plug it into the electrical outlet, and secure it in place with any provided hardware. Installing an electric stove is a straightforward process that can be completed with basic tools and following safety precautions.
By following these steps, you can ensure a successful installation of your electric stove in your desired location.
Understanding The Basics
Installing an electric stove in your kitchen can be a great way to upgrade your cooking experience. Whether you’re replacing an old stove or installing a brand new one, understanding the basics of installation is essential to ensure safety and efficiency. In this guide, we’ll walk you through the necessary steps to install an electric stove, starting with the benefits of choosing an electric stove over other options.
Benefits of Electric Stoves
Electric stoves offer several advantages that make them a popular choice among homeowners. Understanding these benefits can help you make an informed decision about whether an electric stove is the right choice for your kitchen. Some of the key benefits include:
- Consistent and even heat distribution for precise cooking
- Quick heating and responsive temperature control
- Easy cleaning and maintenance compared to gas stoves
- Safe operation with no open flame or gas leakage concerns
- Compatibility with a wide range of cookware
Considering these benefits, it’s no wonder why many people prefer electric stoves in their kitchens. However, before you proceed with the installation, there are a few things to consider.
Things to Consider Before Installation
Before installing your electric stove, take the following factors into account:
- Available space in your kitchen: Ensure that you have enough clearance and ventilation for the stove, following the manufacturer’s guidelines.
- Power supply: Check if your kitchen has the necessary electric infrastructure to support an electric stove, such as sufficient amperage and an appropriate circuit breaker.
- Weight capacity: Ensure that the countertop or cabinet is capable of supporting the weight of the stove.
- Local building codes: Familiarize yourself with any specific regulations or permits required for stove installation in your area.
By considering these factors, you can ensure a smooth and successful installation process. Once you’ve evaluated these aspects, it’s time to assess the electrical requirements for your electric stove.
Assessing Electrical Requirements
Installing an electric stove involves working with electricity, so safety should be your top priority. Make sure you follow these guidelines:
- Turn off the power supply: Locate the circuit breaker that controls the kitchen’s electrical supply, and turn it off before starting any electrical work.
- Determine the power requirements: Refer to the stove manufacturer’s instructions to determine the voltage and amperage requirements for your specific model.
- Inspect existing wiring: Check the condition of the existing wiring, outlets, and any electrical connections to ensure they meet the necessary standards.
- Hire a professional if needed: If you’re unsure about handling electrical work, it’s recommended to hire a licensed electrician to ensure a safe installation.
Once you’ve assessed the electrical requirements and made sure everything is in order, it’s time to gather the necessary tools for the installation.
Gathering the Necessary Tools
Before you begin installing your electric stove, make sure you have the following tools on hand:
| Screwdriver | Wire stripper |
| Adjustable wrench | Electrical tape |
| Level | Measuring tape |
| Drill | Wire connectors |
Having these tools ready will help you complete the installation efficiently and effectively.
Now that we’ve covered the basics, it’s time to dive into the detailed steps involved in installing an electric stove. Stay tuned for the next section of this guide!

Ensuring Safety
When it comes to installing an electric stove, safety should always be your top priority. This involves taking the necessary precautions to protect yourself and your home from potential hazards. In this section, we will discuss the steps you can take to ensure a safe installation of your electric stove.
Turning Off the Power
Before you begin any work on your electric stove, it’s crucial to turn off the power supply. This will help prevent electric shock and avoid any accidental electrical fires. Follow these steps to turn off the power:
- Locate the main electrical panel in your home.
- Identify the circuit breaker that controls the power to the stove.
- Flip the switch to the “off” position.
- Double-check that the power is indeed off by testing the stove’s controls and ensuring that they don’t turn on.
Protecting the Work Area
Creating a safe work environment is essential during the installation process. Follow these guidelines to protect the work area:
- Clear any debris or clutter around the stove area to prevent accidents.
- Cover nearby surfaces and flooring with drop cloths or plastic sheets to prevent any damage during the installation.
- Ensure there is adequate lighting in the work area to avoid any mistakes or mishaps during the installation.
Using Personal Protective Equipment
Wearing personal protective equipment (PPE) offers an extra layer of protection during the installation. Here are some PPE items you should consider:
| PPE | Reason |
|---|---|
| Gloves | To protect your hands from sharp edges and potential electrical hazards. |
| Safety goggles | To shield your eyes from debris and prevent any eye injuries. |
| Dust mask | To protect yourself from inhaling any harmful particles or dust. |
By following these safety measures, you can ensure a secure installation of your electric stove. Remember, safety should never be compromised when working with electricity. By taking the necessary precautions, you can enjoy your new stove with peace of mind.
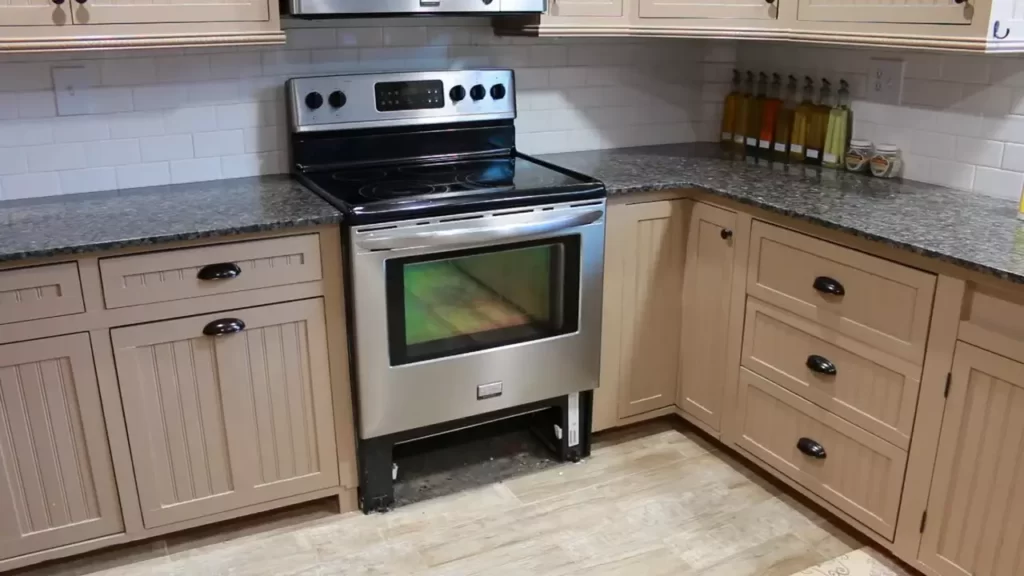
Preparing The Electric Stove Space
One of the first steps in installing an electric stove is to prepare the space where it will be placed. Proper preparation ensures that the stove fits snugly and operates efficiently. In this section, we will discuss key aspects of preparing the electric stove space, including measuring and marking the area, clearing the space, and checking for proper ventilation.
Measuring and Marking the Area
Before installing an electric stove, it is crucial to accurately measure and mark the area where it will be placed. This ensures that the stove will fit properly and align with any existing countertops or cabinets. To measure the space, follow these steps:
- Use a measuring tape to determine the width, depth, and height of the designated area.
- Mark these measurements on the floor or wall using a carpenter’s pencil or masking tape.
- Double-check the measurements to ensure accuracy before proceeding.
By accurately measuring and marking the area, you can ensure a seamless installation of your electric stove.
Clearing the Space
Once you have measured and marked the area, the next step is to clear the space to accommodate the electric stove. Clearing the space involves removing any obstructions or hindrances that may interfere with the installation process. Follow these guidelines to clear the space effectively:
- Remove any furniture, appliances, or objects that are currently occupying the area.
- Clean the area thoroughly to remove dust, debris, and any other dirt that may affect the installation.
- If necessary, make any adjustments to the surrounding countertops or cabinets to create a level surface for the electric stove.
By clearing the space, you ensure that the installation process is smooth and unobstructed, allowing for the proper placement of the electric stove.
Checking for Proper Ventilation
Proper ventilation is essential for the safe and efficient operation of your electric stove. Without adequate ventilation, heat and fumes can build up, leading to potential hazards. To ensure proper ventilation, follow these steps:
- Check if there is an existing vent or range hood in the area. If not, you may need to install one or consult a professional for guidance.
- Ensure that the vent or range hood is clean and free of any obstructions.
- If necessary, install a vent fan or ensure that the existing vent fan is in good working condition.
Proper ventilation promotes airflow, reduces the risk of heat buildup, and enhances the overall safety and performance of your electric stove.
Now that you have prepared the electric stove space by measuring and marking the area, clearing the space, and checking for proper ventilation, you are ready to move on to the next steps of the installation process.
Positioning The Stove
Aligning with Existing Wiring
Before positioning your electric stove, it’s crucial to ensure that it aligns perfectly with the existing wiring. This not only guarantees a seamless installation but also ensures the stove operates safely and efficiently. Here’s a step-by-step guide on aligning your stove with the existing wiring:
- Start by turning off the main power supply to avoid any electrical mishaps during the installation process. Safety should always come first!
- Inspect the area behind the stove to locate the electrical outlet. Ensure the outlet matches the voltage requirements specified in the stove’s user manual.
- If the outlet doesn’t match the voltage requirements, hire a professional electrician to make the necessary adjustments.
- Once you have confirmed that the outlet aligns with the stove’s voltage requirements, position the stove close to the outlet.
- Next, attach the stove’s power cord to the electrical outlet securely. Double-check to ensure all connections are tight and properly fastened.
- Lastly, restore the main power supply and test the stove to verify that it’s working correctly.
By aligning your electric stove with the existing wiring, you can rest assured that it will function smoothly and safely in your kitchen.
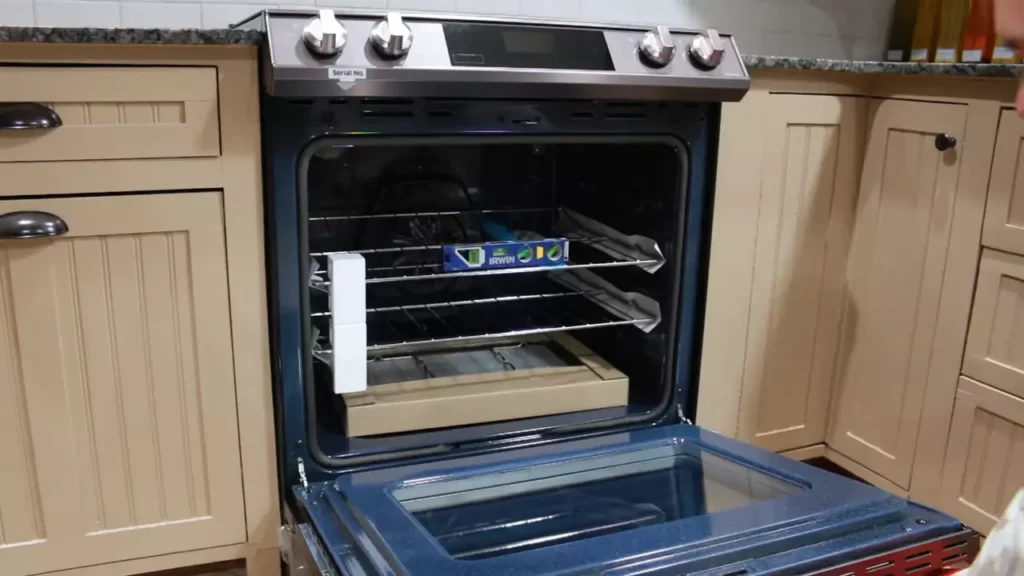
Adjusting for Level
When installing an electric stove, it’s essential to ensure that it is level to prevent any issues with functionality or cooking performance. Here’s how you can adjust your stove for level:
- Use a level tool to determine if the stove is even. Place the level on top of the stove and check for any imbalances.
- If the stove is not level, gently slide it out of its position.
- Adjust the leveling legs located at the bottom of the stove. Turn them clockwise or counterclockwise to level the stove. Ensure the legs are of equal height to maintain stability.
- Place the level on top of the stove again to confirm that it is now level.
- Once the stove is level, carefully slide it back into position, ensuring it fits snugly against the wall or the designated space.
By taking the time to adjust your electric stove for level, you’ll have a smooth and efficient cooking experience, while also prolonging the lifespan of your appliance.
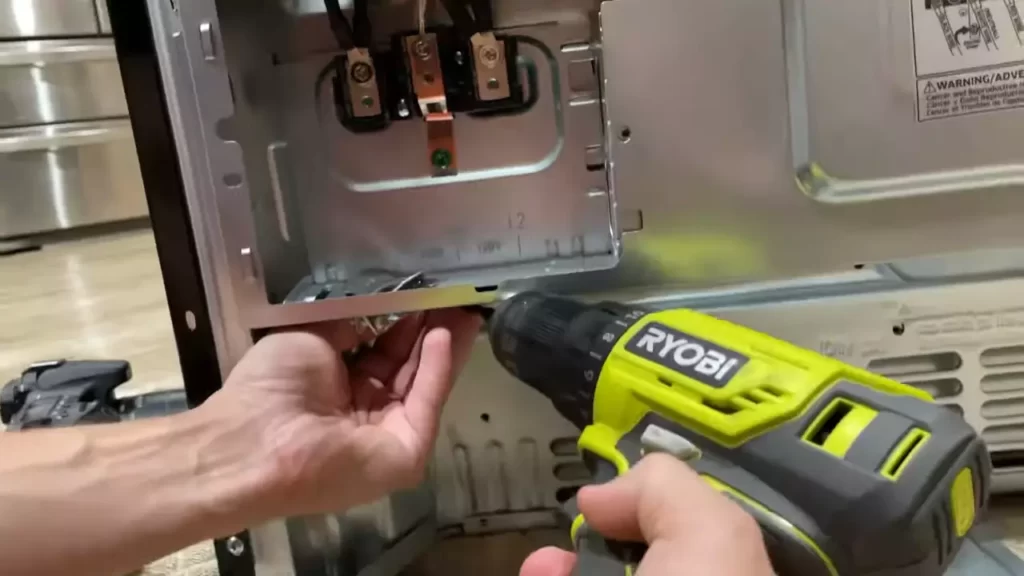
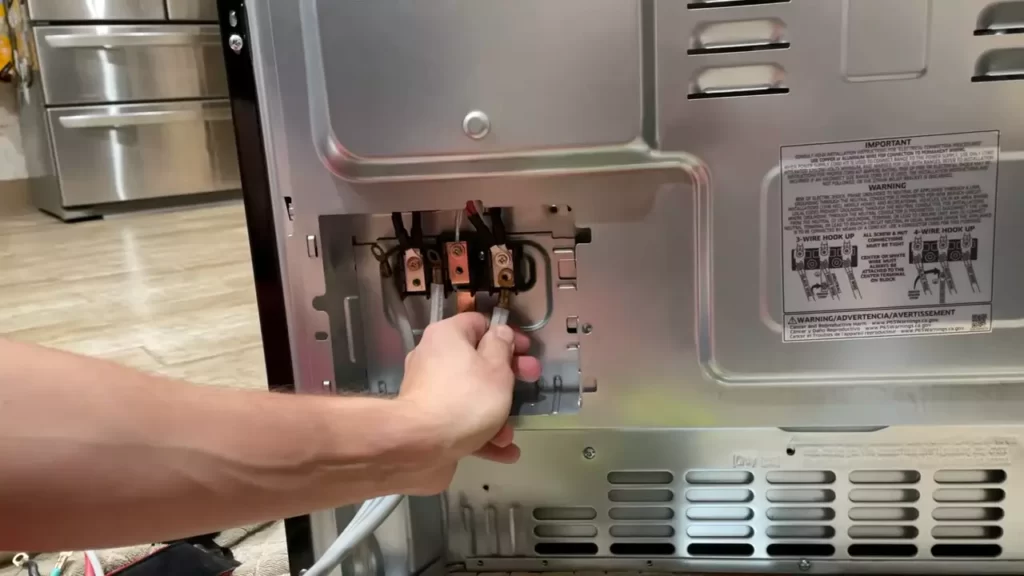
Connecting The Electrical Wiring
Connecting the electrical wiring for your electric stove is a crucial step to ensure it operates safely and efficiently. This process involves matching the correct wire sizes, stripping and connecting wires, securing the connections, and testing the electrical connection. Follow the steps below to complete this task effectively:
Matching the Correct Wire Sizes
When connecting the electrical wiring for your electric stove, it is essential to match the correct wire sizes. Using the wrong wire size can result in poor performance, overheating, or electrical hazards. Refer to the instruction manual provided by the manufacturer to determine the appropriate wire gauge for your specific model.
Stripping and Connecting Wires
After identifying the correct wire sizes, the next step is to strip and connect the wires. Use wire strippers to carefully remove about 3/4 inch of insulation from the ends of the wires. Once the wires are stripped, you can connect them to the corresponding terminals on the stove, following the color or number coding specified by the manufacturer.
Pro tip: Before connecting the wires, ensure that the power to the stove is switched off at the circuit breaker to avoid any electrical shocks.
Securing the Connections
To ensure the connections are secure and stable, it is crucial to properly tighten the terminals. Use a screwdriver or pliers to firmly tighten the screws on the terminals, ensuring there is no movement or looseness. A secure connection is important for efficient electrical flow and to prevent any potential hazards.
Testing the Electrical Connection
Once the connections are securely fastened, it is crucial to test the electrical connection to ensure it is working correctly. Switch on the power at the circuit breaker and turn on the stove. Check if all the burners and oven functions are operational. It is recommended to periodically check the electrical connection to ensure there are no loose or damaged wires.
Important Note: If you are unsure about any aspect of connecting the electrical wiring for your electric stove, it is always best to seek assistance from a qualified electrician to guarantee a safe and effective installation.
Securing The Stove
Securing the stove properly is crucial to ensure its safety and stability in your kitchen. By adhering to the following steps, you can securely install an electric stove in no time.
Securing the Stove to the Floor
Beginning with securing the stove to the floor, this step is essential to prevent accidental tipping or movement. Follow the instructions below to accomplish this:
- Make sure the floor around the stove area is clean and free from any debris or obstacles.
- Locate the pre-drilled holes on the bottom of the stove, typically found near the corners.
- If necessary, use a screwdriver or a drill with the appropriate bit to remove the coverings or plugs from these holes.
- Position the stove in place, aligning the holes on the stove with the pre-existing holes or marks on the floor.
- Insert screws or bolts through the stove’s holes and into the floor, ensuring a tight fit. Fasteners with washers may be needed to provide additional stability.
- Tighten the screws or bolts securely, but be cautious not to overtighten and damage the stove or the floor.
Ensuring Stability
After securing the stove to the floor, it’s important to ensure its overall stability. Take the following steps into consideration:
- Use a level to determine if the stove is horizontally aligned. If necessary, adjust the stove’s position or use shims to achieve balance.
- Ensure there are no gaps between the stove and the surrounding countertop or cabinets. Use silicone caulk or heat-resistant adhesive to fill any gaps, guaranteeing a secure fit.
- Carefully test the stove for any wobbling or movement. If instability is detected, double-check the screws or bolts attaching the stove to the floor and tighten as necessary.
- Refer to the stove manufacturer’s instructions for any additional steps or recommendations specific to your model.
By following these guidelines, not only will you ensure the safety of the stove, but also enjoy a stable and secure cooking environment in your kitchen.
Conducting Safety Checks
Before you begin installing your electric stove, it’s crucial to conduct safety checks to ensure the well-being of both yourself and your home. These checks will help you identify potential hazards and address any electrical issues that may arise during the installation process. Here are two important safety checks to perform before proceeding with the installation:
Verifying Power Connection
The first step in conducting a safety check is to verify the power connection. This involves checking if the power supply matches the requirements of your electric stove. Ensure that the electrical outlet is compatible with the stove’s voltage and amperage specifications. In addition, double-check that the power source has an appropriate ground connection to prevent any electrical shocks or damage.
If you are uncertain about the power connection, it is recommended to consult a licensed electrician to assess and make any necessary adjustments. Remember, ensuring the correct power connection is essential for the safe and efficient operation of your electric stove.
Checking for Proper Functionality
Once you have confirmed the power connection, the next step is to check for proper functionality of your electric stove. This involves inspecting various components to ensure they are in good working condition and that there are no loose connections or damaged parts. Here’s a checklist to help you conduct this safety check:
| Component | Check |
|---|---|
| Power cord | Inspect for any signs of fraying or exposed wires. |
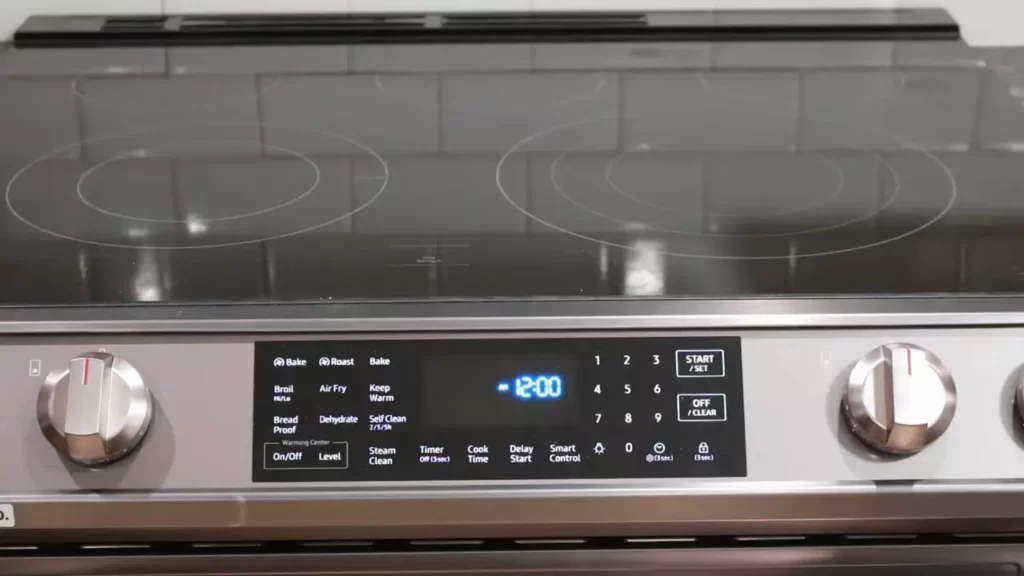
| Control panel | Make sure all buttons and knobs are functioning properly and not sticky or loose. |
| Heating elements | Ensure that all burners and the oven’s heating element heat up as expected. |
| Timer | Test the timer function to ensure it works accurately. |
If you notice any issues during this inspection, it’s advisable to contact the manufacturer for assistance or have a professional technician inspect and repair the stove. Remember, a thorough check for proper functionality will not only guarantee your safety but also contribute to the longevity of your appliance.
By conducting these safety checks, you can proceed with the installation of your electric stove confidently. It’s crucial to prioritize safety and address any electrical concerns before moving forward. Once you have completed these necessary checks, you can proceed with the installation steps knowing that you have taken all precautions to ensure a safe and successful process.
Troubleshooting Common Issues
Installing an electric stove can be a convenient and efficient way to upgrade your kitchen. However, like any other appliance, an electric stove can encounter certain issues that may disrupt its smooth operation. In this section, we will explore some of the most common problems that you may encounter when installing an electric stove and provide you with practical solutions to address them.
Identifying and Fixing Wiring Problems
One of the primary concerns when installing an electric stove is the wiring. Faulty or incorrectly installed wiring can lead to a range of issues, including power outages, heating problems, or even electrical hazards. It is crucial to identify and fix any wiring problems promptly.
To identify wiring problems, follow these steps:
- Turn off the power supply to the stove by switching off the circuit breaker or removing the fuse.
- Check the power cord for any visible signs of damage or wear. If you notice any frayed wires or exposed conductors, it is essential to replace the cord immediately.
- Inspect the connections between the power cord and the stove terminal block. Ensure that the connections are secure and tight.
- If you suspect an internal wiring issue, it is advisable to seek the assistance of a professional electrician to avoid any potential hazards.
Adjusting Temperature Controls
Another common issue that you may encounter when installing an electric stove is difficulty in achieving the desired temperature settings. This can result in uneven cooking or overcooked meals. Adjusting the temperature controls can help resolve this problem.
Follow these steps to adjust the temperature controls:
- Refer to the manufacturer’s instructions to locate the temperature control knobs or buttons.
- Ensure that the stove is turned on and preheated to the desired temperature.
- Gradually increase or decrease the temperature setting to achieve the desired cooking temperature.
- Use an oven thermometer to verify the accuracy of the temperature. If necessary, recalibrate the temperature controls according to the manufacturer’s instructions.
Addressing Power Supply Issues
A malfunctioning power supply can disrupt the operation of your electric stove. If your stove fails to turn on or loses power intermittently, it is essential to address any power supply issues promptly.
Consider the following steps to address power supply issues:
- Check the power outlet to ensure it is functioning correctly. Plug in another device to verify if it is receiving power.
- Inspect the power cord for any kinks, bends, or frayed wires. If any damage is evident, replace the cord immediately.
- If the stove is hardwired, inspect the connections in the junction box. Make sure the wires are securely connected and not loose.
- If all else fails, consult a qualified electrician to assess and troubleshoot any power supply issues.
By identifying and addressing these common issues when installing an electric stove, you can ensure a safe and efficient cooking experience. Remember to consult the manufacturer’s instructions and seek professional assistance whenever necessary to prevent any accidents or electrical hazards.
Cleaning And Maintaining The Electric Stove
Keeping your electric stove clean and well-maintained not only ensures its longevity but also contributes to a safe and efficient cooking experience. Regular cleaning and maintenance will help prevent any build-up of grease, dirt, or debris that can affect the stove’s performance. In this section, we will discuss two important aspects of cleaning and maintaining an electric stove: wiping down the exterior and cleaning the burners and oven.
Wiping Down the Exterior
To start, make sure the electric stove is turned off and unplugged before cleaning. Begin by removing any loose debris or crumbs from the surface using a soft cloth or brush. Then, dampen a cloth with mild soap and water and wipe down the exterior, paying extra attention to any stubborn stains or spills. If there are any grease splatters, you may need to use a gentle kitchen cleaner or a mixture of water and vinegar to remove them completely. Remember to dry the stove thoroughly to prevent any moisture damage.
Additionally, if your electric stove has control knobs or a control panel, take a moment to clean them using a cloth slightly dampened with a mild soap solution. Avoid using excessive water or harsh chemicals as they may damage the controls. Once cleaned, dry the knobs or control panel completely before using the stove again.
Cleaning the Burners and Oven
Over time, burners and oven racks tend to accumulate grease, food residue, and baked-on spills, making them less efficient and potentially causing bad odors or smoke during cooking. Cleaning these components regularly is essential for optimal stove performance. Here’s how you can clean the burners and oven:
- Remove the burners by gently lifting them away from the stove. Place them in a sink filled with warm water and dish soap.
- Using a soft brush or sponge, gently scrub away any built-up grime. For stubborn stains, you can create a paste by combining baking soda and water, apply it to the affected area, and let it sit for a few minutes before scrubbing.
- Rinse the burners thoroughly with water and allow them to air dry before reattaching them to the stove.
- For the oven, start by removing the oven racks and soaking them in warm, soapy water. Scrub them using a non-abrasive sponge or brush, paying close attention to any tough stains or residue.
- For the inside of the oven, use a specialized oven cleaner or a mixture of baking soda and water to create a paste. Apply the paste to the oven walls and allow it to sit for a while to loosen any baked-on stains. Then, scrub the oven walls using a sponge or brush.
- Rinse the oven racks and wipe down the oven walls with a damp cloth to remove any remaining residue or cleaning solution.
- Once everything is clean and dry, reassemble the burners and oven racks, and your electric stove will be ready to use.
Regular cleaning and maintenance of your electric stove will not only keep it looking pristine but also help it operate efficiently and extend its lifespan. By following these simple cleaning steps, you can enjoy a clean and well-maintained electric stove for many years to come.
Safety Tips For Using An Electric Stove
Ensuring the safe use of an electric stove is of paramount importance to prevent accidents, fires, and injuries in your kitchen. By following proper usage guidelines, safeguarding against fire hazards, and performing regular maintenance and inspection, you can use your electric stove efficiently and safely. In this section, we will outline these vital safety tips in detail.
Proper Usage Guidelines
Adhering to proper usage guidelines is key to safely utilizing an electric stove. By following these simple yet essential tips, you can minimize the risks associated with cooking and ensure a hazard-free cooking experience:
- Always read and follow the manufacturer’s instructions and guidelines for operating your specific electric stove model.
- Ensure that the power supply to the stove is turned off before plugging it in or unplugging it.
- Never leave the stove unattended while it is in use.
- Avoid placing flammable items such as oven mitts, paper towels, or plastic utensils near the stove, as they could inadvertently catch fire.
- When using the stove, always use appropriate cookware with flat bottoms and lids that fit properly to minimize the risk of spills and splatters.
Preventing Fire Hazards
Prevention is the key to avoiding fire hazards while using an electric stove. By implementing these preventive measures, you can significantly reduce the likelihood of a fire:
- Regularly clean the stove’s heating elements and drip pans to prevent the buildup of grease and food debris, which can ignite and cause a fire.
- Ensure that the stove’s ventilation system is functioning properly to prevent overheating and potential ignition of surrounding materials.
- Never use the stove to heat your home or to dry flammable items, as this can lead to fires.
- Keep a fire extinguisher in a readily accessible location in your kitchen, and ensure that you know how to operate it.
- Install a smoke detector near your kitchen to alert you in case of a fire and regularly test its functionality.
Regular Maintenance and Inspection
Maintaining and inspecting your electric stove regularly is crucial to identify any potential safety hazards in advance. Follow these maintenance and inspection guidelines:
| 1. | Clean the stove regularly, including the control panel, oven, and coil burners, to prevent the accumulation of dirt and grease. |
| 2. | Check the power cord and plug for any signs of damage, such as fraying or exposed wires, and replace them if necessary. |
| 3. | Inspect the heating elements for any visible damage or signs of malfunction, such as uneven heating or sparking, and replace faulty elements promptly. |
| 4. | Regularly test the stove’s temperature control and safety features, such as the thermostat and auto-shutoff, to ensure they are functioning correctly. |
By following these safety tips for using an electric stove, you can protect yourself, your family, and your property from potential hazards, while enjoying the convenience and efficiency of cooking with electricity. Incorporate these guidelines into your routine and make safety a priority in your kitchen.
Frequently Asked Questions Of How To Install An Electric Stove
Can I Install An Electric Stove Myself?
No, it is not recommended to install an electric stove yourself. Hiring a professional is necessary to ensure safety and proper installation.
Can You Just Plug In An Electric Stove?
No, you cannot simply plug in an electric stove. It requires a dedicated electrical circuit and professional installation to ensure safety and proper functioning. Consult a licensed electrician for the correct setup.
Do You Need Special Wiring For An Electric Stove?
No, special wiring is not needed for an electric stove. It can run on standard household wiring.
Do Electric Stoves Need 220 Wiring?
Yes, electric stoves require 220 wiring because they need a higher voltage to operate efficiently.
Conclusion
Installing an electric stove may seem like a daunting task, but with the right steps and precautions, it can be easily accomplished. By following this guide, you can complete the installation process smoothly and efficiently. Remember to always prioritize safety and consult the stove’s manual for any specific instructions.
With a little patience and attention to detail, you’ll be enjoying your new electric stove in no time.