To install a center mount drawer slide, first, measure and mark the centerline of the drawer and cabinet. Then, align the slide with the center marks and fasten it securely using screws.
Welcome to our complete guide on how to install a center mount drawer slide. Whether you’re a DIY enthusiast or a professional carpenter, understanding the steps to properly install a center mount drawer slide is essential for smooth and effective drawer operation.
We will walk you through the process of installing a center mount drawer slide, providing you with detailed instructions and tips to ensure a successful installation. So, let’s get started and learn how to install a center mount drawer slide effortlessly.
Understanding The Basics
If you’re looking to achieve smooth and effortless drawer operation, installing a center mount drawer slide is the way to go. In this guide, we’ll walk you through the basics of center mount drawer slides, the benefits they offer, and the tools and materials you’ll need for a successful installation.
What is a center mount drawer slide?
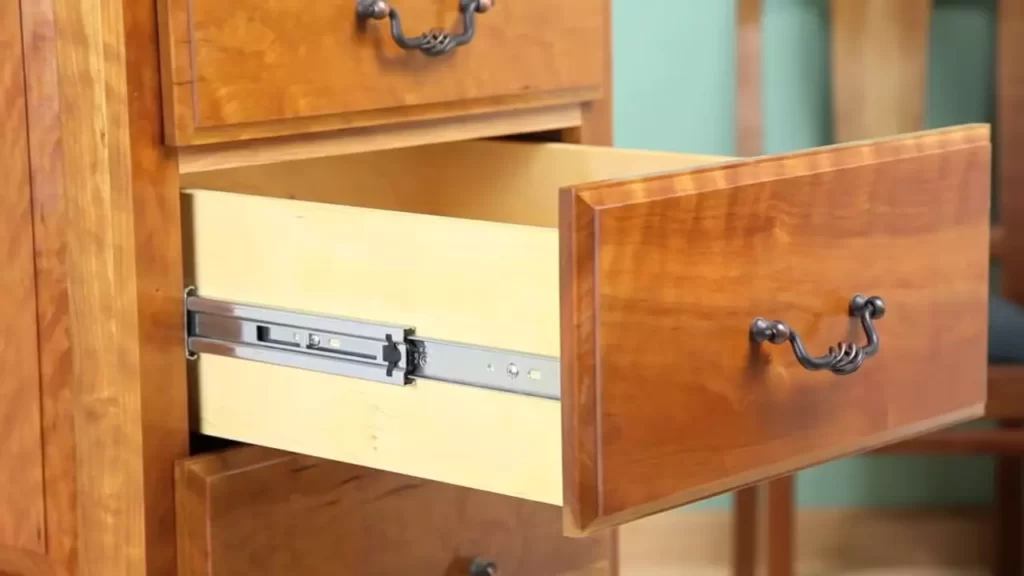
A center mount drawer slide is a type of drawer slide that is mounted on the center of the drawer’s bottom edge. Unlike side-mount or under-mount slides, which are attached to the sides or bottom corners of the drawer, a center mount slide provides support and stability in the center of the drawer. This design allows for a smooth and quiet drawer operation while also ensuring that the drawer remains aligned and balanced.
Benefits of using a center mount drawer slide
Using a center mount drawer slide has several benefits:
- Smooth operation: Center mount slides are known for their smooth and quiet drawer operation. With the weight of the drawer evenly distributed along the center line, you can expect effortless opening and closing.
- Improved weight capacity: Center mount slides can typically handle heavier loads compared to side-mount slides. This makes them ideal for applications where you need to store heavy items in the drawer.
- Easy installation: Installing a center mount drawer slide is relatively straightforward, making it a suitable choice for DIY enthusiasts. With a few basic tools and materials, you can easily complete the installation process.
- Clean aesthetic: Center mount slides are hidden from view when the drawer is closed, giving your furniture a clean and seamless appearance.
Tools and materials needed for installation
Before you start installing a center mount drawer slide, ensure you have the following tools and materials:
| Tools | Materials |
|---|---|
|
|
With these tools and materials at your disposal, you’ll be well-prepared to install a center mount drawer slide and enjoy the convenience it brings to your drawers.
Preparing The Drawer And Cabinet
Before you can install a center mount drawer slide, it’s essential to properly prepare both the drawer and the cabinet. This ensures that the installation will go smoothly and the drawer will operate correctly.
Removing the old drawer slide (if applicable)
If you are replacing an existing drawer slide, you’ll need to start by removing the old one. This may involve unscrewing the slides from the drawer and the cabinet, or releasing any clips or mechanisms that hold them in place. Make sure to remove any screws or hardware associated with the old slides, as you will not be reusing them for the new installation.
Measuring and marking the center line on the drawer
Once the old drawer slide has been removed, you can start preparing the drawer for the new center mount slide. Begin by measuring and marking the center line on the drawer. This will ensure that the slide is positioned correctly for smooth operation. To find the center line, measure the width of the drawer and divide it in half. Make a small mark at this midpoint using a pencil or marking tool.
Measuring and marking the center line on the cabinet
Next, it’s time to measure and mark the center line on the cabinet. This step is crucial as it determines the exact placement of the drawer slide. To find the center line on the cabinet, measure the width of the opening where the drawer will be installed. Again, divide this measurement in half and make a mark at the midpoint. This mark will serve as a guide for attaching the slide to the cabinet.

Installing The Center Mount Drawer Slide
Installing a center mount drawer slide is a crucial step in ensuring smooth operation and functionality of your drawers. Whether you are assembling new furniture or upgrading your existing cabinets, this guide will walk you through the process of attaching the center mount slide to both the drawer and the cabinet, as well as how to adjust it for optimal performance.
Attaching the center mount slide to the drawer
Before diving into the installation process, it’s essential to gather all the necessary tools and materials. You will typically need a power drill, a screwdriver, screws, and of course, the center mount drawer slide.
- Start by locating the center of the drawer’s front panel. Properly aligning the slide is crucial for optimal function, so take your time with this step.
- Once you have determined the center, place the slide on the drawer’s interior side, ensuring it aligns with the center mark. Use a pencil or a marker to mark the screw hole positions.
- Now it’s time to attach the slide. Using your power drill or screwdriver, carefully secure the slide in place, making sure all the screws are tight and firmly holding the slide to the drawer.
Attaching the center mount slide to the cabinet
With the drawer slide securely attached to the drawer, it’s time to move on to the cabinet installation. Here’s how to do it:
- First, place the drawer in the cabinet, aligning it with the opening. This step is essential to ensure accuracy during the installation process.
- Next, take the other half of the center mount slide and position it against the cabinet’s side, aligning it with the corresponding slide on the drawer. Again, marking the screw hole positions with a pencil or a marker will help you achieve accuracy.
- Ready to attach the slide to the cabinet? Use your power drill or screwdriver to secure it firmly in place, double-checking that all screws are tightened properly. The slide should be parallel to the one attached to the drawer, allowing for smooth movement.
Adjusting the slide for smooth operation
Once you have successfully attached the center mount slide to both the drawer and the cabinet, it’s time to ensure smooth operation. Here’s how:
- Test the drawer by sliding it in and out. If you notice any friction or difficulty in movement, you may need to make some adjustments.
- If the drawer is tight or seems to rub against the cabinet, you can loosen the screws slightly and reposition the slide until the movement becomes smoother.
- On the other hand, if the drawer appears loose or wobbly, tighten the screws to secure the slide more firmly in place.
By making these adjustments, you can achieve the perfect balance between smooth sliding and secure positioning for your center mount drawer slide.
Remember to always refer to the manufacturer’s instructions for specific guidance, as different drawer slides may have unique installation requirements. With proper installation and adjustment, your drawers will open and close effortlessly, enhancing the overall functionality of your cabinets.
Testing And Troubleshooting
Before finalizing the installation of a center mount drawer slide, it is crucial to perform a series of tests to ensure smooth gliding and troubleshoot any common installation issues that may arise. By conducting these tests and implementing proper maintenance and care, you can ensure the longevity and functionality of your drawer slide. In this section, we will guide you through the testing process, offer troubleshooting tips, and provide advice for proper maintenance.
Testing the slide for smooth gliding
Testing the smoothness of the gliding action is vital to make sure your center mount drawer slide is working properly. Here’s how you can test it:
- Open and close the drawer several times to observe if it moves smoothly along the slide. Pay attention to any signs of sticking, jumping, or misalignment.
- If you notice any roughness or resistance during the sliding motion, inspect the slide mechanism for any obstructions, debris, or misalignment.
- Apply a silicone-based lubricant, specifically designed for drawer slides, to ensure optimal gliding performance. Avoid using oil-based lubricants as they can attract dust and dirt, leading to potential issues.
- Repeat the opening and closing process to verify that the lubrication has improved the smoothness of the gliding action.
Troubleshooting common installation issues
It’s common to encounter some installation issues while installing a center mount drawer slide. Here are a few troubleshooting tips to overcome these challenges:
- Drawer misalignment: If the drawer seems misaligned or does not close properly, check if the slide is level and positioned correctly. Adjust the position and ensure that the drawer is parallel to the cabinet.
- Drawer sticking: When the drawer sticks during the sliding motion, inspect the slide for any debris or obstructions. Remove any foreign objects that may hinder the smooth operation of the slide.
- Insufficient slide length: If the slide is too short for the drawer, the extension won’t be sufficient. Consider replacing the slide with a longer one that suits your drawer’s dimensions.
- Loose slide attachment: If the slide seems loose or unstable, check the attachment screws. Tighten them to ensure a secure fit, but be cautious not to overtighten and risk damaging the slide or cabinet.
Tips for proper maintenance and care
Maintaining and caring for your center mount drawer slide will maximize its lifespan and functionality. Here are some tips:
- Regular cleaning: Periodically clean the slides and remove any accumulated dirt or dust. This helps prevent debris from hindering the smooth gliding motion.
- Proper load distribution: Distribute weight evenly across the drawer to prevent excessive strain on the slide system.
- Avoid excessive force: Don’t slam or forcefully close the drawer, as this can damage the slide mechanism. Close it gently to ensure smooth and consistent operation.
- Inspect screws and connections: Check the screws and connections periodically to ensure they are secure and tight. Loose screws can impact the stability and functionality of the drawer slide.
By performing tests for smooth gliding, troubleshooting common installation issues, and following proper maintenance and care tips, you can ensure the optimal performance and longevity of your center mount drawer slide.

Additional Considerations
When it comes to installing a center mount drawer slide, there are a few additional considerations you should keep in mind. These considerations include weight capacity and load requirements, as well as choosing the right size and type of slide. You may also be interested in upgrading your existing drawer slides to a center mount system. Let’s dive into each of these considerations in more detail.
Weight Capacity and Load Requirements
One important factor to consider when installing a center mount drawer slide is the weight capacity and load requirements of your drawer. You need to ensure that the slide you choose can support the weight of your drawer and its contents without any issues. This will prevent any potential damage or sagging over time.
To determine the weight capacity of a drawer slide, refer to the manufacturer’s specifications. This information is usually available on the packaging or the manufacturer’s website. Make sure to choose a slide that has a weight capacity that matches or exceeds the weight of your drawer and its contents.
If you’re unsure about the weight of your drawer, you can measure it using a bathroom scale. Simply remove the drawer from the cabinet, place it on the scale, and record the weight. This will help you make an informed decision when selecting a center mount drawer slide.
Choosing the Right Size and Type of Slide
Choosing the right size and type of slide is crucial for a successful center mount drawer slide installation. Measure the length and width of your drawer to determine the appropriate size of the slide. Look for slides that match these measurements to ensure a precise fit.
Additionally, consider the type of slide that is best suited for your drawer. There are various types available, including ball-bearing slides, roller slides, and undermount slides. Each type has its own unique features and benefits, so it’s important to choose one that meets your specific needs and preferences.
Keep in mind that undermount slides are typically used for face-frame cabinets, while ball-bearing and roller slides are suitable for both face-frame and frameless cabinets. Consider the construction of your cabinet and the type of movement you desire for your drawer when making your selection.
Upgrading Existing Drawer Slides to Center Mount
If you already have drawer slides installed in your cabinet and want to upgrade to a center mount system, it’s essential to ensure compatibility. Measure the existing slides to determine their length and compare it to the length required for a center mount slide.
If the existing slides are shorter than the required length, you may need to remove them and fill in any holes before installing the center mount slide. On the other hand, if the existing slides are longer, you may need to trim them to fit properly.
Additionally, consider the weight capacity and load requirements of the new center mount slide when upgrading. Make sure the new slide can support the weight of your drawer and its contents without any issues.
By following these additional considerations, you can ensure a successful center mount drawer slide installation that meets your requirements and provides smooth and reliable functionality for your drawers.
Frequently Asked Questions On How To Install A Center Mount Drawer Slide
What Are Centre Mount Drawer Slides?
Centre mount drawer slides are a type of hardware that allows drawers to smoothly slide in and out from the center of a cabinet. These slides provide stability and even weight distribution, making them ideal for high-quality furniture. They are commonly used in kitchen cabinets, bathroom vanities, and other storage units.
How Do You Measure For Center Mount Drawer Slides?
To measure for center mount drawer slides, start by measuring the depth of your cabinet. Then, measure the width of the drawer opening. Finally, subtract the depth of the cabinet from the width of the drawer opening and divide the result by two.
This will give you the measurement for the center mount drawer slides.
Can You Use Two Center Mount Drawer Slides On One Drawer?
Yes, you can use two center mount drawer slides on one drawer. This allows for balanced support and smooth opening and closing of the drawer. It is important to ensure proper installation and alignment for optimal functionality.
Does It Matter Where You Mount Drawer Slides?
Where you mount drawer slides does matter. Proper placement ensures smooth operation, prevents damage, and allows for easy access to the contents of the drawer. Correct alignment is crucial for drawers to function properly and maintain stability. Therefore, it is important to follow installation instructions provided by the manufacturer for optimal performance.
Conclusion
To sum up, installing a center mount drawer slide is a straightforward process that can greatly enhance the functionality and convenience of your drawers. By following the step-by-step instructions provided in this blog post, you’ll be able to effectively and efficiently install these slides.
Remember to carefully measure, align, and secure the slides to ensure optimal performance. With this new knowledge, you can confidently tackle your next DIY project. Happy sliding!