To install a capacitor on an AC unit, follow these steps: Turn off the power to the unit, locate the old capacitor, discharge its electrical charge, remove the wires connecting to it, install the new capacitor in the same position, and reconnect the wires. If you own an AC unit and notice irregularities in its performance, a faulty capacitor might be the culprit.
The capacitor is a vital component that stores and releases electrical energy to help power the motor. Over time, it can wear out and need replacement. Fortunately, installing a new capacitor is a relatively straightforward process that you can do yourself with the right tools and precautions.
This article will guide you through the steps required to install a capacitor on your AC unit, ensuring it continues to cool your space efficiently and effectively.
Why Install A Capacitor On An AC Unit?
If you want your AC unit to run smoothly and efficiently, installing a capacitor is a crucial step. A capacitor plays a vital role in the proper functioning of your AC unit by providing an electrical charge to start the motor and keep it running.
Factors necessitating the installation of a capacitor
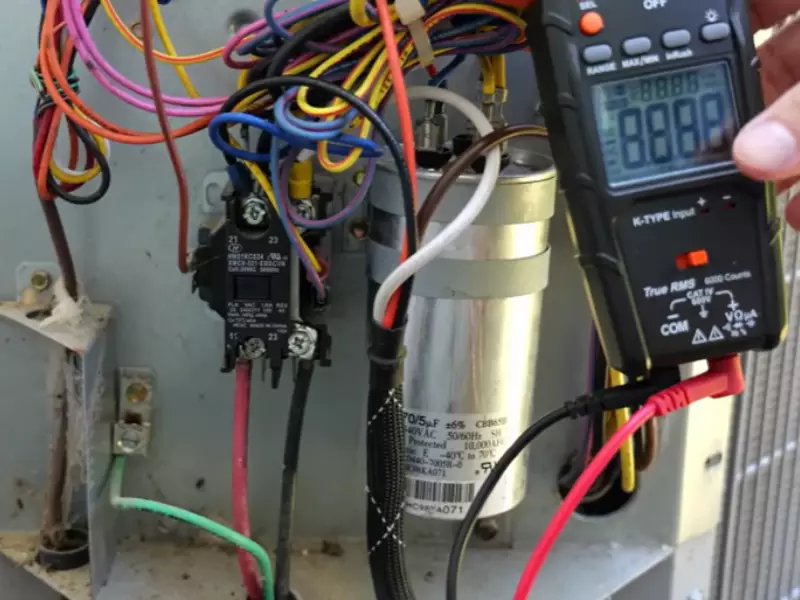
There are several factors that necessitate the installation of a capacitor on an AC unit:
- Aging Components: Over time, the various components of your AC unit, including the capacitor, can start to deteriorate and lose their effectiveness. Installing a new capacitor can help restore the unit’s performance and avoid any potential breakdowns.
- Power Surges: Power surges can occur due to lightning strikes or issues with the electrical grid. These surges can damage the capacitor, rendering it ineffective. By installing a new capacitor, you can ensure that your AC unit is protected against power surges, maintaining its efficiency.
- Frequent Start/Stop Cycles: If your AC unit frequently starts and stops, it can put a strain on the capacitor, leading to wear and tear. Installing a new capacitor can help improve the unit’s overall performance and prevent any potential damage caused by frequent start/stop cycles.
- Poor Cooling: If you notice that your AC unit is not cooling your space as effectively as before, it could be due to a faulty capacitor. A capacitor that is nearing the end of its lifespan may not provide enough electrical charge to start the motor, resulting in decreased cooling capacity. Installing a new capacitor can help restore the cooling efficiency of your AC unit.
By understanding the factors that necessitate the installation of a capacitor and taking necessary action, you can ensure that your AC unit operates at its best, providing optimal cooling and energy efficiency.
Understanding Capacitors For AC Units
In order to properly install a capacitor on an AC unit, it is essential to have a thorough understanding of how capacitors function and their role in the overall operation of the unit. Capacitors are vital components in AC units, responsible for storing and supplying electrical energy to various parts of the system.
Capacitor Basics
Before delving into the installation process, let’s begin by understanding some basic concepts about capacitors. Simply put, a capacitor is an electronic component that has the ability to store and release electrical energy. It consists of two conductive plates separated by an insulating material known as the dielectric. When a voltage is applied, an electric field is created between the plates, storing energy in the electric field.
Capacitors are commonly denoted by their capacitance value, which is measured in farads (F). However, in the context of AC units, capacitance values range from microfarads (μF) to picofarads (pF). It is crucial to use the appropriate capacitor, as the wrong capacitance value may result in improper functioning or even damage to the AC unit.
Role of Capacitors in AC Units
Now that we have a basic understanding of capacitors, let’s explore their role in AC units. Capacitors serve two main purposes in these systems: starting and running.
Starting Capacitors: AC units require a significant amount of power to start up. Starting capacitors provide the initial surge of energy needed to power the compressor and get the unit up and running. Once the motor reaches its operating speed, the starting capacitor is no longer utilized.
Running Capacitors: Running capacitors are continuously used to maintain the operation of the motor. They provide a steady supply of electrical energy to keep the compressor and fan motors running smoothly. Running capacitors help improve the efficiency, performance, and longevity of the AC unit.
Without properly functioning capacitors, the AC unit may struggle to start, experience frequent breakdowns, or fail to cool adequately. Therefore, when installing a capacitor, it is crucial to ensure that it is compatible with the specific AC unit and correctly wired according to the manufacturer’s guidelines.
Tools And Materials Needed For Installing A Capacitor On An AC Unit
When it comes to installing a capacitor on an AC unit, having the right tools and materials is essential. This ensures a smooth and successful installation process. In this section, we will discuss the tools and materials that you will need for this task.
List of essential tools
Before you begin the installation process, make sure you have the following tools on hand:
- Insulated screwdriver
- Wire strippers
- Needle-nose pliers
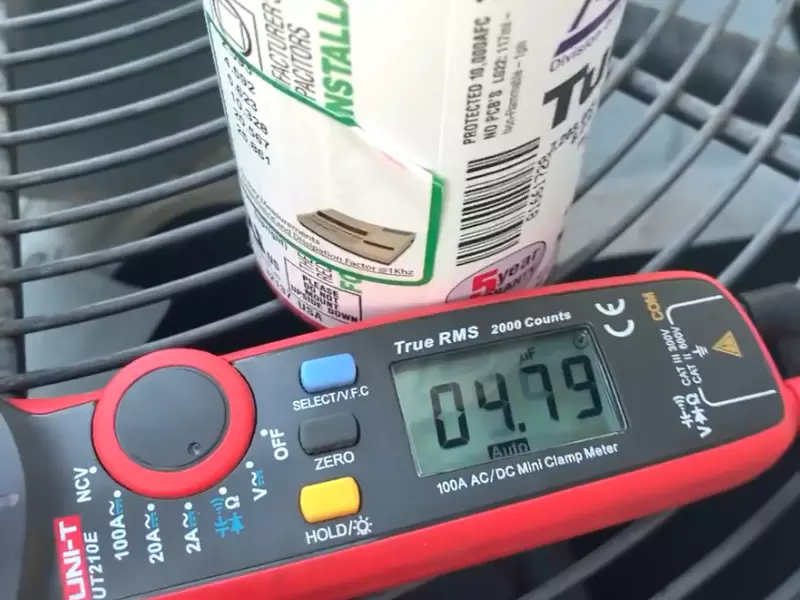
- Multimeter
- Adjustable wrench
- Flashlight
- Safety glasses
- Gloves
These tools will help you handle the electrical components safely and efficiently during the installation.
Necessary materials for installation
In addition to the tools listed above, you will also need the following materials for installing a capacitor on an AC unit:
- Replacement capacitor: Make sure you choose a capacitor that matches the specifications of your AC unit. Refer to the manufacturer’s guidelines or consult a professional if you’re unsure.
- Electrical tape: This will be used to secure and insulate the electrical connections.
- Zip ties: Zip ties will help you organize and secure the wiring during the installation process.
It’s important to ensure that you have the correct replacement capacitor and the necessary materials before you start the installation. This will help you avoid any delays or complications during the process.
By having the right tools and materials ready, you can confidently proceed with the installation of a capacitor on your AC unit. Remember to always follow the manufacturer’s guidelines and take appropriate safety precautions throughout the process.
Step-By-Step Guide To Installing A Capacitor On An Ac Unit
Step-by-Step Guide to Installing a Capacitor on an AC Unit
Installing a capacitor on an AC unit is an essential part of maintaining its functionality and ensuring efficient cooling. The capacitor acts as a power storage device that helps start the compressor and fan motors. If you’re experiencing issues with your AC unit, a faulty capacitor could be the culprit. In this step-by-step guide, we’ll walk you through the process of installing a capacitor on your AC unit, ensuring a smoother and more comfortable cooling experience.
Safety Precautions Before Starting Installation
Before you begin the installation process, it’s crucial to prioritize your safety. Electricity is involved in AC units, and any mishap can lead to severe injuries. So, make sure to follow these safety precautions:
- Turn off the power: Locate the main circuit breaker panel and switch off the power supply to your AC unit. This step will protect you from potential electrical hazards.
- Wear protective gear: Put on safety goggles and gloves to shield yourself from any accidental sparks or electrical shocks.
- Ensure proper grounding: Verify that your AC unit is properly grounded to prevent electrical malfunctions.
Installation Steps
Now that you’ve taken the necessary safety precautions, let’s dive into the installation process step by step:
- Identify the capacitor: Locate the existing capacitor on your AC unit. The capacitor is a small cylindrical or rectangular component with wires attached to it.
- Document wiring connections: Take a photo or draw a diagram of the existing wiring connections. This step will help you during the reconnection process.
- Discharge the capacitor: To ensure your safety, it’s important to discharge the existing capacitor. Use an insulated screwdriver to touch the terminals of the capacitor, safely releasing any stored electrical charge.
- Remove the old capacitor: Once discharged, carefully remove the wires attached to the old capacitor. Remember the exact location of each wire.
- Install the new capacitor: Take your new capacitor and attach the wires to their corresponding terminals, referring to the photo or diagram you documented earlier.
- Secure the capacitor: Use zip ties or clamps to secure the new capacitor in its designated spot. Make sure it is tightly fastened and won’t move during operation.
- Test the AC unit: Turn on the power supply to your AC unit and test its functionality. Listen for any unusual sounds and check if the unit cools the air properly.
Following these step-by-step instructions will help you install a capacitor on your AC unit without any hassle. It’s crucial to prioritize safety throughout the installation process. If you encounter any difficulties or feel unsure about certain steps, it’s best to seek professional assistance.
Step 1: Disconnecting Power To The Ac Unit
Before starting any installation or repair work on your AC unit, it is crucial to disconnect the power supply to ensure your safety. Taking this precautionary step will help prevent any potential electrical accidents during the process. In this section, we will go over the necessary steps to disconnect the power supply for your AC unit.
Turning off the power supply
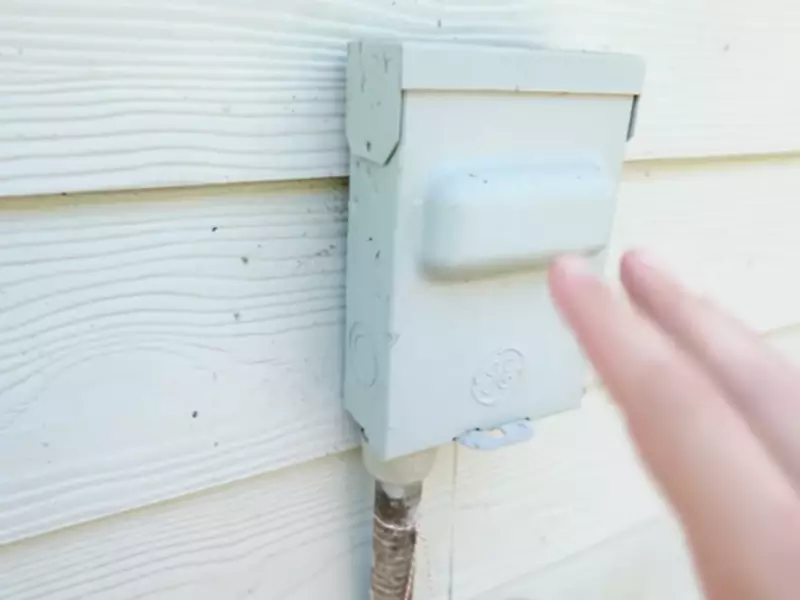
To begin, locate the main electrical panel in your home. This panel is typically found in the basement, utility room, or garage. Once you have located the panel, carefully remove the cover.
Inside the panel, you will find a series of circuit breakers or fuses. Look for the breaker that corresponds to your AC unit. Typically, it will be labeled with either “AC” or “air conditioner” for easy identification. If you are unsure, refer to the user manual or consult a professional.
Next, flip the switch or pull the lever on the breaker that corresponds to your AC unit to the “off” position. This will cut off the power supply to the unit, ensuring that it is safely disconnected.
Ensuring safety during disconnecting
While turning off the power supply is an important step, it is equally important to take additional safety measures when disconnecting your AC unit. Here are some essential precautions to follow:
- Wear protective gear: Before starting any electrical work, ensure you are wearing appropriate protective gear such as gloves and safety glasses. This will help protect you from any potential electrical hazards.
- Double-check the power: Prior to disconnecting any wires, use a non-contact voltage tester to confirm that the power supply is indeed off. This device will detect the presence of electricity without making direct contact.
- Follow instructions: Always refer to the manufacturer’s instructions and guidelines while disconnecting the AC unit. These instructions will outline specific steps and precautions unique to your model, ensuring a safe process.
- Label and document: As you disconnect the wires, it is important to label and document each wire’s location and connection points. This will make reinstallation much easier and prevent any confusion later on.
- Secure loose wires: Throughout the disconnection process, be mindful of any loose wires. Use cable ties or electrical tape to secure them to the AC unit or nearby surfaces, reducing the risk of accidental contact.
By following these safety guidelines, you can ensure a secure disconnection of the power supply to your AC unit. Once you have completed these steps, you can proceed with the installation of the capacitor confidently.
Step 2: Locating The Capacitor
Now that you have gathered all the necessary tools, it’s time to locate the capacitor in your AC unit. Identifying the capacitor is crucial in the installation process.
Identifying the capacitor in the AC unit
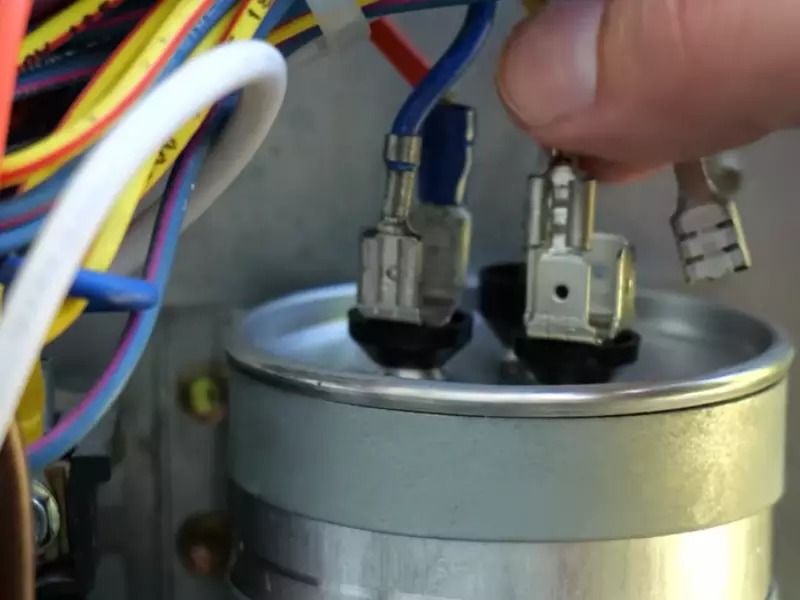
First, let’s understand what a capacitor looks like. It is a cylindrical device with two or three metal terminals protruding from one end, resembling a small battery. Most capacitors are metal or plastic-covered and can be found near the fan or compressor in your AC unit.
To locate the capacitor, take the following steps:
- Ensure that your AC unit is powered off. Safety should always be your top priority!
- Remove the access panel or cover of the condensing unit. This panel is typically located on the outside of your AC unit.
- Using a flashlight, carefully inspect the interior components of the unit. Look for the metallic cylinder with terminals sticking out.
Once you have found the capacitor, it’s time to understand its position and connections.
Understanding the capacitor’s position and connections
The capacitor is strategically positioned near the fan or compressor to store electrical energy. It plays a crucial role in starting and running the motor of your AC unit.
Take note of the following key points:
- Examine the terminals on the capacitor. Typically, there are two terminals labeled “C” and “FAN” or “HERM.” These labels indicate the different connections for common, fan, and hermetic wires, respectively.
- Identify the wire connections to the capacitor. The common wire, usually colored brown, connects to the terminal labeled “C.” The fan wire, often colored purple, goes to the terminal labeled “FAN,” while the hermetic wire, typically yellow, connects to the terminal labeled “HERM.”
- Make sure each connection is secure by gently wiggling the wires. Loose or damaged connections can lead to malfunctions or even equipment failure.
Understanding the position and connections of the capacitor is crucial before moving on to the next steps in the installation process. A thorough inspection ensures a successful and safe installation.
Step 3: Discharging The Capacitor
Safety Measures for Discharging the Capacitor
Discharging the capacitor is a crucial step in the process of installing a capacitor on an AC unit. However, it is important to follow certain safety measures to avoid any accidents or electrical shocks. Here are some safety precautions to keep in mind:
- Before starting the process, make sure to turn off the power supply to the AC unit. This can be done by switching off the circuit breaker or unplugging the unit.
- Ensure that you are wearing proper protective gear, such as insulated gloves and safety goggles, to protect yourself from any electrical hazards.
- Take note of the location of the capacitor within the AC unit. It is typically located near the compressor and has two terminals labeled “C” and “HERM”.
- Be cautious of any stored electrical charge in the capacitor as it can still discharge even when the power is turned off. Therefore, it is important to discharge the capacitor before proceeding with any further steps.
Methods for Discharging the Stored Energy
Discharging the stored energy in the capacitor is essential to ensure your safety when working with the AC unit. Here are a few methods to discharge the capacitor safely:
| Method | Description |
|---|---|
| Using a Discharge Tool | A discharge tool, such as an insulated screwdriver with a rubber handle, can be used to bridge the terminals of the capacitor. Gently touch the metal end of the tool to both terminals to allow the energy to dissipate. This should be done carefully and with minimal contact. |
| Shorting the Terminals | Another method involves using a specific tool, like a resistor-equipped jumper wire, to directly short the terminals of the capacitor. This allows the stored energy to safely discharge. However, it is crucial to ensure that you are using the correct wire and following proper guidelines to avoid any accidents. |
| Waiting for Discharge | If you prefer not to use any tools, you can simply wait for the capacitor to discharge naturally. This method may take a longer time, and it is important to be patient and not rush the process. |
By following these safety measures and using the appropriate methods to discharge the capacitor, you can ensure a safe and successful installation process. Once the capacitor is discharged and the stored energy is dissipated, you can proceed to the next step in installing the capacitor on your AC unit.
Step 4: Removing The Old Capacitor
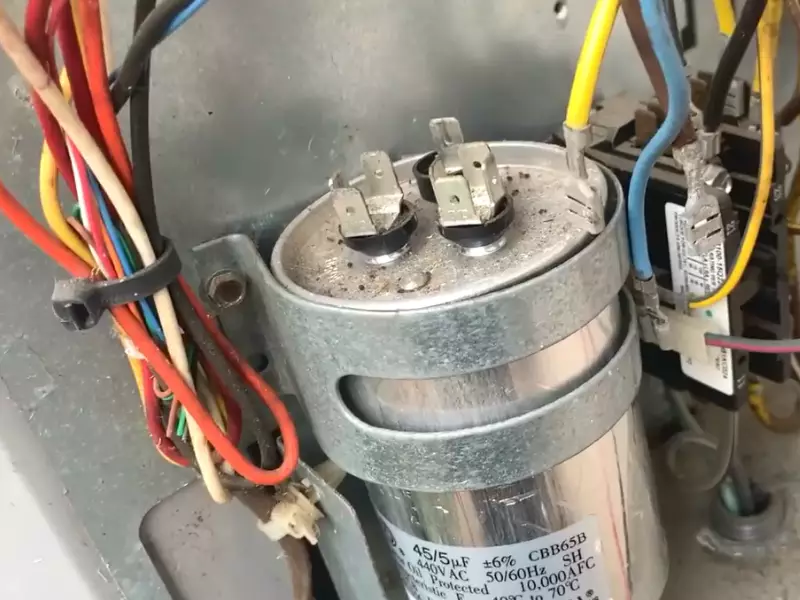
Now that you have gathered the necessary tools and safety gear, it’s time to remove the old capacitor from your AC unit. Proper removal technique for the old capacitor is essential to prevent any damage to yourself or the surrounding components.
Proper Removal Technique for the Old Capacitor
Follow these steps to remove the old capacitor from your AC unit:
- Turn off the power: Before beginning any work on your AC unit, make sure to turn off the power. This will ensure your safety throughout the removal process.
- Identify the old capacitor: Locate the old capacitor within your AC unit. It is typically a small cylindrical component often covered in a metal casing.
- Discharge the capacitor: Capacitors store electrical energy even after the power is turned off. To discharge the capacitor, use an insulated screwdriver. With one hand holding the insulated handle, use the metal end to bridge the two terminals on the old capacitor. This will safely discharge any residual electrical energy.
- Disconnect the wires: After discharging the capacitor, you can proceed to disconnect the wires. Take note of the wire colors and their corresponding terminals to ensure correct reconnection later on. If necessary, take a picture for reference.
- Remove the mounting bracket: Use a wrench or screwdriver (depending on your AC unit’s design) to loosen and remove the mounting bracket holding the old capacitor in place. Set the mounting bracket aside for later use.
- Take out the old capacitor: With the mounting bracket removed, carefully pull out the old capacitor from its housing. Ensure that you handle it properly to avoid any damage or injury.
Preventing Damage While Removing
While removing the old capacitor, it’s crucial to take preventive measures to avoid any damage:
- Handle with care: Capacitors are delicate components, so make sure to handle them with care. Avoid dropping or mishandling the old capacitor to prevent damage.
- Avoid touching exposed terminals: Capacitors can retain an electrical charge, so avoid touching any exposed terminals to prevent electric shocks.
- Store the old capacitor safely: Once removed, store the old capacitor in a safe location away from children or pets. Dispose of it properly according to local regulations.
- Keep the area clean: During the removal process, it’s important to keep the surrounding area clean and free from dirt or debris. This will prevent any particles from interfering with the installation of the new capacitor.
By following these proper removal techniques and taking preventive measures, you can safely remove the old capacitor from your AC unit without causing any damage. With this step completed, you’re now ready to move on to the next step of installing the new capacitor.
Step 5: Installing The New Capacitor
Now that you have successfully removed the old capacitor from your AC unit, it’s time to install the new one. This step is crucial as the proper positioning and connection of the new capacitor will determine the effectiveness and longevity of your air conditioning system. Follow the instructions below to ensure a successful installation.
Proper Positioning and Connection of the New Capacitor
First, make sure you have the correct replacement capacitor for your AC unit. Refer to the manufacturer’s specifications or consult a professional if you are unsure. Once you have the right capacitor, follow these steps for proper positioning and connection:
- Locate the capacitor terminals. Each terminal will be labeled with a specific designation – “C” for common, “FAN” for the fan motor, and “HERM” for the compressor motor.
- Position the new capacitor in the same orientation as the old one, making sure the terminals are facing the right way.
- Connect the wires from the air conditioning unit to the corresponding terminals on the new capacitor. Refer to the labeling on the capacitor to ensure the correct connection. A common mistake is reversing the connections, which can damage the capacitor and the unit.
- Secure the connections by tightening the terminal screws. Ensure they are snug but not over-tightened to avoid damaging the capacitor.
- Inspect the connections to make sure they are secure and properly seated. Loose or improper connections can lead to a malfunctioning AC unit or even electrical hazards.
Double-Checking the Connections
After you have completed the installation process, it is essential to double-check the connections to ensure everything is in order. This will help prevent any potential issues or malfunctions down the line. Take the time to:
- Verify that each wire is connected to the correct terminal on the new capacitor. Again, refer to the labeling on the capacitor for guidance.
- Inspect the connections for any signs of damage, such as frayed or exposed wires. If you notice any issues, replace the wires or consult a professional to ensure safe and proper operation.
By following these steps and double-checking the connections, you can ensure that your new capacitor is installed correctly and ready to help keep your AC unit running smoothly. Remember, if you are unsure about any step during the installation process, it is always best to seek professional assistance to avoid any potential hazards or damage.
Step 6: Testing The Installed Capacitor
Introduction
Welcome to Step 6 of our guide on how to install a capacitor on an AC unit. In the previous steps, we have covered everything from gathering the necessary tools to safely removing the old capacitor and installing the new one. Now that the new capacitor is securely in place, it is time to test its installation to ensure proper functionality and performance. This step is crucial as it helps verify the successful installation and allows you to check if your AC unit is working optimally. Let’s dive into the details of testing the installed capacitor.
Verification of successful installation
After completing the installation of the new capacitor, it is essential to verify its successful installation. This step ensures that the capacitor is properly connected and secured in its designated place. To verify the successful installation, follow these steps:
- Double-check the connections: Pay close attention to the wiring connections and ensure that each wire is attached firmly to its respective terminal. Any loose connections can lead to performance issues or potential electrical hazards.
- Inspect for any damages: Carefully examine the capacitor and its surrounding components for any signs of physical damage such as cracks, leaks, or burnt marks. If you notice any abnormalities, it may indicate installation errors or other underlying issues that need to be addressed.
- Confirm proper orientation: Check if the new capacitor is oriented correctly, aligning with the markings or labels provided by the manufacturer. Installing the capacitor in the wrong direction can affect its performance and potentially damage the AC unit.
By following these steps, you can ensure that the new capacitor has been installed successfully and is ready for testing.
Testing the AC unit’s performance and functionality
To determine if the newly installed capacitor is functioning as intended, you need to test the performance and functionality of your AC unit. Here are some crucial tests to conduct:
1. Power on the AC unit
Switch on the AC unit and observe if it starts up smoothly without any unusual sounds or vibrations. Listen for any clicking or humming noises, which may indicate a problem with the capacitor or other components.
2. Measure voltage levels
Using a multimeter, measure the voltage levels across the terminals of the capacitor. Compare the readings with the manufacturer’s specifications to ensure they fall within the acceptable range. Any significant deviations could suggest a faulty capacitor or improper installation.
3. Check for proper cooling
Feel the air coming out of the AC unit’s vents and check if it is cool and refreshing. Inadequate cooling might indicate that the capacitor is not functioning correctly, potentially leading to reduced efficiency and increased energy consumption.
4. Assess compressor functionality
Observe if the AC unit’s compressor is engaging and cycling properly. The compressor should start and stop seamlessly, maintaining a consistent temperature as desired. An irregular compressor operation could signify capacitor issues or other underlying problems.
By performing these tests, you can assess the performance and functionality of your AC unit, ensuring that the newly installed capacitor is working effectively.
Remember, proper testing is crucial to identify any potential installation errors or capacitor malfunctions. If you encounter any issues during the testing process, it is recommended to consult a professional technician or refer to the manufacturer’s guidelines for troubleshooting.
Common Mistakes To Avoid When Installing A Capacitor On An AC Unit
Mistakes that can lead to malfunction or damage:
When it comes to installing a capacitor on an AC unit, there are a few common mistakes that many individuals make. These errors can not only lead to a malfunctioning or damaged unit but also result in costly repairs. To ensure that your capacitor installation goes smoothly, it’s important to be aware of these mistakes and take the necessary precautions.
Tips for avoiding these common installation errors:
1. Incorrect wiring connections: One of the most common mistakes during capacitor installation is incorrectly wiring the connections. Improper connections can cause the capacitor to fail or even damage other components of the AC unit. Always double-check the manufacturer’s instructions and ensure that you follow the correct wiring diagram provided.
2. Inadequate sizing: Another mistake to avoid is using a capacitor that is not properly sized for your AC unit. Capacitors come in different sizes and ratings, and using an undersized or oversized capacitor can lead to poor performance and premature failure. Refer to the AC unit’s specifications or consult with a professional to determine the correct capacitor size for your specific unit.
3. Failure to discharge the capacitor: Before starting the installation process, it is crucial to discharge the capacitor to avoid any potential electrical shock. Failure to do so can put you at risk of being electrocuted. To discharge the capacitor safely, use an insulated screwdriver and short the terminals together, allowing any stored charge to dissipate.
4. Ignoring safety precautions: When working with electrical components, safety should always be a priority. Avoid shortcuts and always follow proper safety procedures. This includes wearing protective gloves and goggles, turning off the power supply, and ensuring proper grounding to prevent any accidents.
5. Skipping a professional inspection: While it is possible to install a capacitor on an AC unit by yourself, it is always a good idea to have a professional inspect your work. A skilled technician can double-check the installation, ensure everything is functioning properly, and identify any potential issues that may have been overlooked.
By being aware of these common installation mistakes and following the proper steps, you can avoid any unnecessary damage or malfunction to your AC unit. Taking the time to install the capacitor correctly will not only save you from future headaches but also help prolong the life of your AC unit. Remember, it’s always better to seek professional help if you’re unsure of the installation process or face any difficulties.
Frequently Asked Questions On How To Install A Capacitor On An Ac Unit
Can I Replace the AC capacitor Myself?
Yes, you can replace the AC capacitor yourself as long as you follow safety precautions and have the necessary knowledge.
Can You Hook Up An AC Capacitor Wrong?
Yes, it is possible to connect an AC capacitor incorrectly.
What Wires Go Where on the AC Capacitor?
The wires on the AC capacitor are color-coded. The brown wire goes to the capacitor’s fan motor, while the yellow wire goes to the compressor. The white wire is connected to the common terminal, and the purple and gray wires connect to the herm terminal.
Can An Ac Unit Run Without A Capacitor?
Yes, an AC unit cannot run without a capacitor as the capacitor provides the energy needed to start the compressor. It helps the motor to run smoothly and efficiently. Without a capacitor, the AC unit will not be able to function properly.
Conclusion
Installing a capacitor on an AC unit is a crucial step in maintaining its efficient performance. By following the steps outlined in this guide, you can ensure that your unit operates smoothly and lasts longer. Remember to prioritize safety and consult a professional if you are uncertain about any aspect of the installation process.
With the proper understanding and care, you can enjoy a comfortable and cool environment in your home or workplace.
