To install a 6 mil vapor barrier on concrete, first clean the surface thoroughly. Then, lay the barrier flat, overlapping the seams by at least 6 inches and securing it with tape or adhesive.
Understanding The Importance Of A Vapor Barrier
The installation of a vapor barrier is a crucial step when it comes to protecting your concrete surfaces. Understanding the importance of a vapor barrier can help you ensure the long-term durability and functionality of your concrete. In this article, we will explain what a vapor barrier is and discuss the benefits of installing one on concrete surfaces.
Explanation of What a Vapor Barrier Is
A vapor barrier, also known as a moisture barrier, is a protective layer that is installed to prevent moisture infiltration through concrete surfaces. It is typically made from a polyethylene material that is resistant to water vapor transmission. The primary purpose of a vapor barrier is to block the passage of moisture from the ground or surrounding areas into the concrete, aiding in the overall moisture management of the structure.
Discussing the Benefits of Installing a Vapor Barrier on Concrete
Installing a vapor barrier on concrete surfaces offers several key benefits, which are essential for maintaining the structural integrity of the concrete and the overall environment. Here are some important advantages of installing a vapor barrier:
- Moisture Control: One of the primary benefits of a vapor barrier is that it helps control moisture. Moisture infiltration can lead to several issues such as mold growth, deterioration of the concrete, and damage to any materials placed on top of it. By preventing moisture from seeping into the concrete, a vapor barrier helps maintain a dry and healthy environment.
- Prevents Floor and Wall Damage: Moisture can cause significant damage to concrete floors and walls over time. With the installation of a vapor barrier, you can prevent the expansion and contraction of concrete due to moisture absorption, reducing the likelihood of cracks, buckling, or crumbling.
- Improved Insulation: Another advantage of a vapor barrier is that it enhances insulation. By blocking moisture transfer, the vapor barrier helps maintain a stable temperature within the concrete structure. This is particularly important in areas where temperature fluctuations are common, as it can minimize energy loss and lower utility costs.
- Protection of Interior Finishes: The installation of a vapor barrier also protects interior finishes such as flooring, carpeting, or hardwood. Moisture can seep through the concrete and damage these finishes, which can be costly to repair or replace. A vapor barrier acts as a protective shield, preventing moisture damage and preserving the integrity of these interior finishes.
By understanding the importance of a vapor barrier and its benefits, you can make informed decisions on how to protect your concrete surfaces effectively. Installing a 6 mil vapor barrier is a prudent investment that can help prevent potential issues related to moisture infiltration. Whether you are working on a residential or commercial project, incorporating a vapor barrier into your concrete installation will contribute to its long-term durability and performance.
Preparing The Concrete Surface
Before installing a 6 Mil Vapor Barrier on concrete, it is crucial to properly prepare the surface. This step is essential to ensure optimal performance and maximize the effectiveness of the vapor barrier. The preparation process involves cleaning the concrete surface and ensuring it is dry before installation. Let’s dive into each of these steps in detail.
Cleaning the Concrete Surface
The first step in preparing the concrete surface is to clean it thoroughly. This is important as any dirt, debris, or contaminants on the surface can compromise the adhesion of the vapor barrier. Follow these steps to clean the concrete surface:
- Remove any loose dirt or debris by sweeping the surface with a broom.
- Use a pressure washer or hose with a high-pressure nozzle to remove stubborn dirt, stains, or oil spills.
- If there are any grease or oil stains, apply a concrete cleaner or degreaser and scrub the area with a stiff brush.
- Rinse the surface thoroughly with clean water to remove any residue from the cleaning products.
By cleaning the concrete surface diligently, you can ensure that there are no obstructions or contaminants that might compromise the adhesion of the vapor barrier.
Ensuring the Surface is Dry before Installation
Once the concrete surface is clean, the next step is to ensure that it is completely dry before installing the 6 Mil Vapor Barrier. Moisture trapped under the barrier can lead to mold, mildew, and other issues. Follow these steps to ensure the surface is dry:
- Leave the cleaned surface to air dry for at least 24 to 48 hours, depending on the weather conditions. Make sure there is adequate airflow and ventilation in the area to facilitate drying.
- Use a moisture meter to check the moisture content of the concrete. Ensure that the reading is below the recommended threshold for the specific vapor barrier being installed.
- If the concrete surface is not dry enough, use fans or dehumidifiers to facilitate the drying process. It is crucial to have a dry surface before proceeding with the vapor barrier installation.
By ensuring that the concrete surface is dry, you can prevent any moisture-related issues in the future and ensure the proper functioning of the vapor barrier.
Choosing The Right Vapor Barrier Material
Installing a 6 mil vapor barrier on concrete is an essential step in preventing moisture and water vapor from seeping into your home. However, choosing the right vapor barrier material can be a daunting task, as there are various options available in the market. To help you make an informed decision, let’s take a closer look at the different types of vapor barrier materials and the factors to consider when selecting a 6 mil vapor barrier.
Overview of Different Types of Vapor Barrier Materials
There are several types of vapor barrier materials to choose from, each with its own set of benefits and drawbacks. Here is a brief overview of some common options:
| Vapor Barrier Material | Features |
|---|---|
| Polyethylene Sheets | These are affordable and commonly used vapor barriers. They come in various thicknesses, with 6 mil being a popular choice for concrete installations. |
| Rubber Membranes | These offer excellent resistance to moisture and are more durable compared to polyethylene sheets. However, they can be more expensive. |
| Bituminous Coatings | These are applied as a liquid and form a seamless protective layer. They are ideal for areas with high moisture levels but can be slightly more complicated to install. |
| Vapor Retardant Paints | These paints contain additives that help reduce the passage of water vapor. They are suitable for smaller areas with low moisture concerns but may require regular maintenance. |
Factors to Consider When Selecting a 6 Mil Vapor Barrier
- Moisture Resistance: The primary purpose of a vapor barrier is to prevent moisture from passing through. Ensure the material you choose has a high moisture resistance rating to effectively protect your home.
- Durability: Consider the durability of the vapor barrier material, especially if you anticipate heavy foot traffic or potential damage during the construction process.
- Cost: Compare the prices of different vapor barrier materials, taking into account your budget and the size of the area you need to cover.
- Installation: Some vapor barrier materials may require professional installation, while others can be easily installed by homeowners. Consider your skill level and the complexity of the installation process.
- Environmental Impact: If eco-friendliness is important to you, look for vapor barrier materials that are made from recycled or sustainable materials.
By considering these factors and understanding the different types of vapor barrier materials available, you can choose the right 6 mil vapor barrier that best suits your needs and provides reliable protection against moisture and water vapor.
Installing The Vapor Barrier
Installing a 6 mil vapor barrier on concrete is a crucial step in preventing moisture and condensation from seeping through and causing damage. Proper installation of the vapor barrier ensures a dry and stable environment, which is essential for preserving the integrity of your building. In this section, we will guide you through the process of installing the vapor barrier, including measuring and cutting the sheets, securing it to the concrete surface, and sealing the edges and seams for maximum effectiveness.

Measuring and Cutting the Vapor Barrier Sheets
Before you begin installing the vapor barrier, it is important to accurately measure and cut the sheets to fit the dimensions of your concrete surface. This ensures effective coverage and minimizes waste. Follow these steps to measure and cut the vapor barrier sheets:
- Measure the length and width of the concrete surface using a tape measure.
- Add a few extra inches to each measurement to allow for overlapping and proper coverage.
- Transfer the measurements onto the vapor barrier sheets using a permanent marker.
- Use a utility knife or scissors to carefully cut along the marked lines, ensuring straight and clean cuts.
Securing the Vapor Barrier to the Concrete Surface
Once you have accurately cut the vapor barrier sheets, it’s time to secure them to the concrete surface. Properly securing the vapor barrier ensures it stays in place and provides an effective barrier against moisture. Follow these steps to secure the vapor barrier:
- Clean the concrete surface thoroughly, removing any dirt, debris, or moisture.
- Unroll the vapor barrier sheets onto the concrete surface, aligning them with the edges.
- Secure the vapor barrier using a heavy-duty construction adhesive or double-sided tape, applying it in a continuous bead along the edges and seams of the sheets.
- Press down firmly on the sheets to ensure they adhere to the concrete surface securely.
Sealing the Edges and Seams of the Vapor Barrier
Sealing the edges and seams of the vapor barrier is a critical step in ensuring its effectiveness. This helps prevent any gaps or openings where moisture could potentially penetrate. Follow these steps to properly seal the edges and seams of the vapor barrier:
- Inspect the edges and seams of the vapor barrier for any gaps or openings.
- If necessary, use a high-quality sealant specifically designed for vapor barriers.
- Apply the sealant along the edges and seams, ensuring full coverage and a tight seal.
- Smooth out the sealant using a putty knife or your finger, creating a uniform and watertight seal.
- Allow the sealant to dry completely before proceeding with any further construction or flooring installations.
Following these steps for measuring, cutting, securing, and sealing the vapor barrier will help ensure a proper installation, providing optimal protection against moisture and condensation. Remember to take your time and pay attention to detail throughout the process for the best results.
Ensuring Proper Coverage And Placement
Proper coverage and placement of a 6 Mil vapor barrier on concrete is crucial for effective moisture control and to prevent potential damage to your flooring. In this section, we will discuss two important aspects that need careful consideration: checking for any gaps or overlaps in the vapor barrier and sealing around obstacles such as pipes or wires.
Checking for any gaps or overlaps in the vapor barrier
Before you begin the installation process, it is essential to inspect the vapor barrier for any gaps or overlaps. These issues can compromise the barrier’s integrity and allow moisture to seep through. To ensure proper coverage:
- Thoroughly examine the entire surface of the concrete to identify any existing gaps or overlaps in the existing vapor barrier.
- Use a tape measure or ruler to measure the distance between the edges of the barrier. Ideally, each overlap should be at least 6 inches wide to provide adequate protection against moisture infiltration.
- If you come across any gaps or inadequate overlaps, place an additional sheet of the vapor barrier to cover the exposed area. Ensure a secure seal by overlapping the existing barrier by at least 6 inches and using a heavy-duty adhesive tape to bond the edges together.
- Check the entire barrier once again to verify that there are no remaining gaps or overlaps.
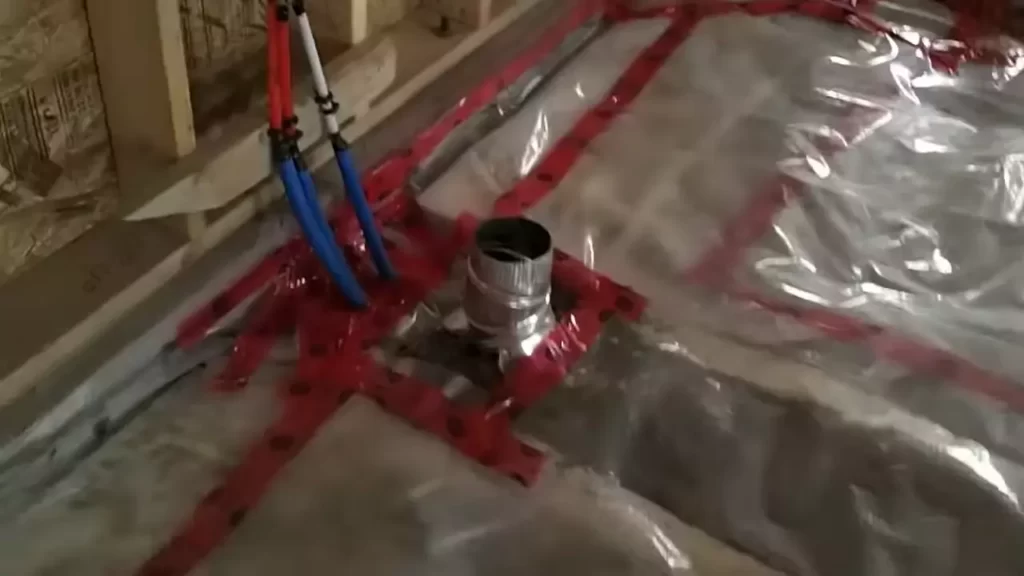
Sealing around obstacles such as pipes or wires
Pipes, wires, and other obstacles that penetrate through the concrete can create potential points of moisture ingress. It is crucial to properly seal these areas to maintain the vapor barrier’s integrity. Here’s how to do it:
- Identify any pipes or wires that pass through the concrete surface.
- Using a utility knife, carefully cut a hole in the vapor barrier slightly smaller than the diameter of the obstacle.
- Apply a generous amount of high-quality silicone caulk around the perimeter of the hole to create an airtight seal.
- Press the vapor barrier firmly against the obstacle, ensuring that it adheres tightly.
- Apply another layer of silicone caulk around the edges of the hole to reinforce the seal.
By following these steps and ensuring proper coverage and placement of the 6 Mil vapor barrier on concrete, you can effectively protect your flooring from moisture-related issues and ensure its longevity.
Additional Tips And Recommendations
Proper installation of a 6 mil vapor barrier on concrete is crucial for creating a moisture barrier and protecting your space from potential water damage. In addition to the installation process, here are some important tips and recommendations to keep in mind:
Proper disposal of excess vapor barrier material
After you have successfully installed the 6 mil vapor barrier on your concrete surface, you may have some excess material that needs to be disposed of. It is important to handle this waste properly to minimize environmental impact and maintain a clean workspace.
- Consult your local waste management guidelines to determine the proper disposal method for your area. Some regions have specific regulations for disposing of construction materials.
- If the vapor barrier material is still in good condition and can be reused, consider donating it to local community organizations or individuals who may benefit from it.
- If disposing of the vapor barrier, make sure to seal it in a heavy-duty plastic bag or container to prevent any potential leakage. This will ensure that any moisture or contaminants trapped within the material are contained.
- Contact your local recycling center to inquire if they accept plastic vapor barrier materials for recycling. If they do, follow their guidelines for drop-off or collection.
Maintenance and inspection of the vapor barrier over time
While a properly installed 6 mil vapor barrier provides excellent protection against moisture, it is important to maintain and inspect it over time to ensure its effectiveness. Regular maintenance will help identify any potential issues early on and allow for timely repairs.
- Perform regular visual inspections of the vapor barrier to check for any signs of damage, such as tears, punctures, or degradation.
- If you notice any damage, it is important to repair or replace the affected area as soon as possible to maintain the integrity of the vapor barrier.
- Keep the area surrounding the vapor barrier clean and free from debris to prevent any potential damage or obstruction.
- In regions with extreme temperature fluctuations, consider using insulation over the vapor barrier to provide additional protection against condensation.
- When conducting any repairs or modifications to the concrete surface, take extra care not to damage or compromise the vapor barrier.
By following these additional tips and recommendations, you can ensure that your 6 mil vapor barrier remains effective and provides long-lasting protection against moisture for your concrete surfaces.
Frequently Asked Questions Of How To Install 6 Mil Vapor Barrier On Concrete
How Do You Adhere Vapor Barrier To Concrete?
To adhere a vapor barrier to concrete, follow these steps:
1. Clean the concrete surface thoroughly.
2. Apply adhesive to the concrete using a trowel or roller.
3. Lay the vapor barrier onto the adhesive.
4. Smooth out any wrinkles or bubbles.
5. Allow the adhesive to dry completely before proceeding.
Is 6 Mil Good For Vapor Barrier?
A 6 mil vapor barrier is considered good for most applications. It provides an effective barrier against moisture and helps prevent condensation in various settings such as homes, commercial buildings, and agricultural structures.
Do You Tape Down Vapor Barrier?
Yes, it is recommended to tape down the vapor barrier during installation. Taping ensures a proper seal, preventing moisture from passing through and causing potential damage to the building structure. It helps create an effective barrier against water vapor and promotes energy efficiency.
Is A 6 Mil Thick Vapor Barrier Placed Under Concrete Slabs?
Yes, a 6 mil thick vapor barrier is commonly placed under concrete slabs. The vapor barrier helps prevent moisture from the ground from seeping into the concrete, protecting against potential damage and mold growth.
Conclusion
Installing a 6 mil vapor barrier on concrete is a crucial step in protecting your home or building from moisture damage. By following the steps outlined in this guide, you can ensure a successful installation process. Remember to thoroughly clean and prep the concrete surface, secure the barrier properly, and seal any seams or punctures.
With the right materials and techniques, you can achieve a moisture-free environment and enjoy a durable and healthy living or working space.