To install a 30 Amp RV outlet, follow these steps: First, turn off the power supply and disconnect the breaker panel. Then, mount the outlet box, run the conduit, and connect the wires to the outlet.
Introducing a 30 Amp RV outlet to your setup can provide a convenient power source for your recreational vehicle. Whether you’re planning a camping trip or need to charge your RV at home, having a dedicated outlet can make your life easier.
In this guide, we’ll walk you through the simple process of installing a 30 Amp RV outlet. By following these steps, you’ll be able to safely and efficiently connect your RV to a reliable power source. So let’s get started and ensure that your RV has the power it needs wherever you go.
Choosing The Right Location
Determining the optimal location for the RV outlet
When it comes to installing a 30 Amp RV outlet, choosing the right location is crucial for a smooth and efficient setup. It’s important to consider factors such as convenience, accessibility, and safety. To help you make an informed decision, we’ve outlined a few key considerations to keep in mind.
Ensuring accessibility and safety considerations
Accessibility and safety should be your top priorities when selecting a location for your RV outlet. Make sure that the area is easily accessible for your RV’s power cord and that it is not obstructed by any obstacles, such as trees or fences. Additionally, ensure that the outlet is installated away from any flammable materials and is protected from the elements, such as rain or snow. This will prevent any damage or accidents that could occur due to exposure to the elements.
Evaluating power supply requirements
Another important factor to consider is the power supply requirements of your RV. Different RVs may have different power needs, so it’s crucial to evaluate your specific requirements before installing the outlet. Determine whether you need a 30 Amp outlet or if a different amperage will suffice. Consult your RV’s documentation or consult with a professional electrician to ensure that the power supply meets the requirements of your RV.
By taking the time to determine the optimal location, ensure accessibility and safety considerations, and evaluate power supply requirements, you can install a 30 Amp RV outlet that will meet your needs and provide a reliable source of power for your RV. So, let’s dive deeper into each of these considerations to help you make the best choice!
Gathering The Tools And Materials
Before you start installing a 30 Amp RV outlet, it’s important to gather all the necessary tools and materials. Having everything you need on hand will make the installation process much smoother and more efficient. In this section, we’ll discuss the tools you’ll need, the materials required, and how to double-check for any additional components.
Understanding the Tools Necessary for the Installation
Installing a 30 Amp RV outlet requires a specific set of tools to ensure a safe and successful installation. Here are the essential tools you’ll need:
| Tool | Description |
|---|---|
| Screwdriver | [Description of a screwdriver] |
| Wire strippers | [Description of wire strippers] |
| Wire cutter | [Description of a wire cutter] |
| Hammer | [Description of a hammer] |
| Drill | [Description of a drill] |
| Measuring tape | [Description of a measuring tape] |
Assembling the Required Materials
In addition to the tools mentioned above, you’ll also need the following materials to complete the installation:
- 30 Amp RV outlet
- Electrical wire (size and length will depend on your specific installation)
- Electrical conduit
- Conduit fittings
- Wire connectors
- Electrical tape
- Mounting box
Double-Checking for Any Additional Components Needed
Before you begin the installation, it’s crucial to double-check if there are any additional components needed. Depending on your RV and the specific requirements of your installation, you may need to gather the following:
- GFCI breaker
- Weatherproof cover for the outlet
- Grounding components
- Circuit breaker panel
- Permits and inspections *
* Note: Permits and inspections may be required based on your local building codes. Ensure you comply with all regulations to ensure a safe and legal installation.
By gathering all the necessary tools and materials, double-checking for any additional components, you’ll be well-prepared to install your 30 Amp RV outlet. In the next section, we’ll dive into the actual installation process, guiding you through each step.
Circuit Breaker Installation
Circuit breaker installation is a crucial step when installing a 30 Amp RV outlet. This ensures proper electrical safety and protection for your RV. In this section, we will walk you through the process of installing the circuit breaker, covering everything from shutting off the electricity to selecting the appropriate amperage and wiring it to the electrical panel.
Shutting off the electricity to the designated area
Before starting the circuit breaker installation, it is essential to shut off the electricity to the designated area. This ensures your safety and prevents any accidents from occurring. Here’s how to do it:
- Locate the main electrical panel in your home or RV.
- Open the panel door and locate the circuit breaker that supplies power to the area where you intend to install the RV outlet.
- Switch off the circuit breaker by flipping it to the “Off” position.
- Test the area with a voltage tester to ensure the power is completely shut off.
Selecting the appropriate amperage for the circuit breaker
Choosing the right amperage for your circuit breaker is crucial to ensure the safe and efficient operation of your RV outlet. Follow these steps to select the appropriate amperage:
- Determine the power requirements of your RV by referring to the manufacturer’s specifications or consulting with an electrician.
- Consider any additional electrical appliances or equipment you may want to power simultaneously.
- Choose a circuit breaker with an amperage rating that matches or exceeds the total power requirements of your RV and any additional appliances.
Wiring the circuit breaker to the electrical panel
Once you have shut off the electricity and selected the appropriate amperage, it’s time to wire the circuit breaker to the electrical panel. Follow these steps for a successful installation:
- Ensure you have the necessary tools and materials, including a circuit breaker compatible with your electrical panel and appropriate wire size.
- Carefully remove the cover of the electrical panel to access the wiring connections.
- Identify the neutral bus bar and the ground bus bar within the electrical panel and connect the appropriate wires accordingly.
- Connect the hot wire from the circuit breaker to the corresponding terminal in the electrical panel. Make sure the connection is secure.
- Tighten all wire connections and replace the cover of the electrical panel.
By following these steps, you can successfully install the circuit breaker for your 30 Amp RV outlet. Remember, it’s crucial to prioritize safety throughout the installation process. If you’re unsure or uncomfortable with any step, consult a licensed electrician for assistance. Now that the circuit breaker is in place, you’re one step closer to enjoying the convenience of your RV outlet!
Running Electrical Wire
Running electrical wire is a critical step in installing a 30 Amp RV outlet. It involves selecting the appropriate wire gauge, determining the ideal pathway for the wire, and safely routing and securing the electrical wire. Let’s explore each of these steps in detail.
Selecting the appropriate wire gauge
Choosing the right wire gauge is crucial to ensure safe and efficient electrical power delivery to your RV. The appropriate wire gauge for a 30 Amp RV outlet is typically 10-gauge wire. This wire gauge can handle the maximum current requirements of your RV without overheating. It is essential to use the correct wire gauge to prevent electrical fires and damage to your RV’s electrical system.
Determining the ideal pathway for the wire
Before running the electrical wire, you need to determine the ideal pathway to ensure proper installation and protection. It is advisable to run the wire through conduit or raceway to shield it from potential damage. Additionally, consider the shortest and most direct route to minimize voltage drop and enhance electrical efficiency. Avoid running the wire near areas with high heat, sharp edges, or potential hazards that may damage the wire.
Safely routing and securing the electrical wire
Once you have determined the pathway, it’s time to safely route and secure the electrical wire. Here are some key steps to follow:
- Use appropriate fasteners, such as clips or staples, to secure the wire along its pathway. Ensure the fasteners are compatible with the chosen pathway material.
- Leave enough slack for easy connections at both ends of the wire.
- Avoid sharp bends or excessive tension on the wire as this can cause abrasion or damage to the insulation.
- Consider using cable clamps or grommets where the wire passes through holes or sharp edges to protect it from potential cuts or abrasions.
Always refer to the manufacturer’s instructions and local electrical codes when routing and securing the electrical wire to ensure compliance and safety.
By carefully following these steps, you can effectively run electrical wire for your 30 Amp RV outlet, providing a reliable power supply to enjoy your camping adventures to the fullest.
Installing The Rv Outlet
In order to safely power your RV while it’s parked at your home or campsite, you’ll need to install a 30 Amp RV outlet. This outlet is specifically designed to handle the electrical demands of your RV, providing a reliable power source for all your appliances and devices. In this guide, we’ll walk you through the process of installing the RV outlet, from choosing the right type to connecting the wires and ensuring proper mounting and grounding.
Choosing the type of RV outlet
Before you begin the installation process, it’s important to choose the right type of RV outlet for your specific needs. There are a few different options to consider, including:
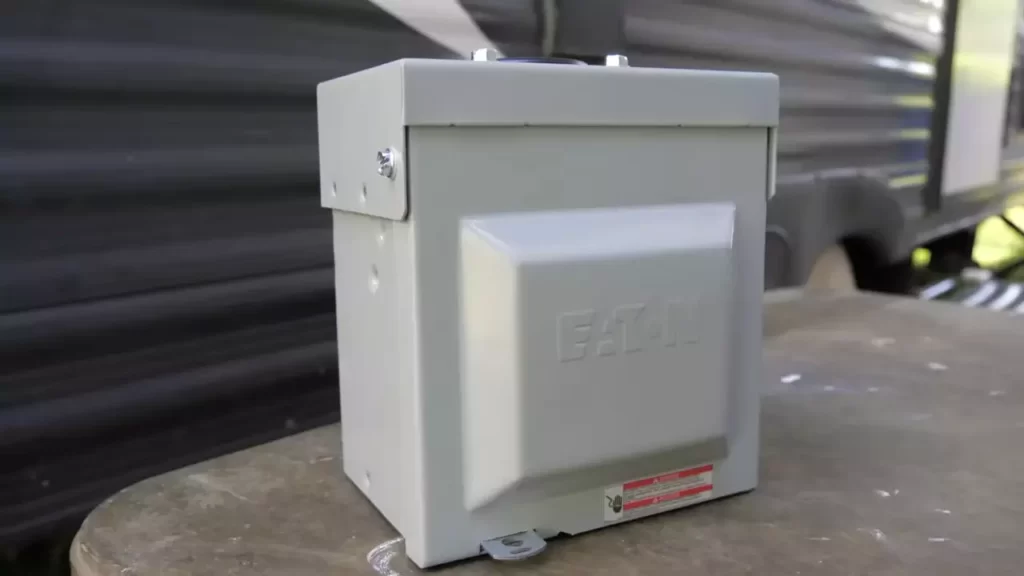
- Standard 30 Amp RV Outlet: This is the most common type of RV outlet, providing enough power for most RVs.
- Weather-resistant RV Outlet: If your RV outlet will be exposed to the elements, such as rain or snow, it’s a good idea to choose a weather-resistant option to ensure durability and safety.
- RV Outlet with GFCI Protection: Ground Fault Circuit Interrupter (GFCI) protection is an important safety feature that can help prevent electrical shocks. Consider installing an RV outlet with built-in GFCI protection for added safety.
Connecting the wires to the outlet
Once you have chosen the right type of RV outlet, it’s time to connect the wires. The first step is to turn off the power supply to the installation area to ensure your safety. Then, follow these steps:
- Strip the insulation from the ends of the wires, exposing about 1/2 inch of bare wire.
- Attach the black wire to the brass terminal screw, the white wire to the silver terminal screw, and the green or bare wire to the green terminal screw.
- Tighten the terminal screws securely to ensure a solid connection.
Mounting and grounding the RV outlet
With the wires connected, you can now proceed to mount and ground the RV outlet:
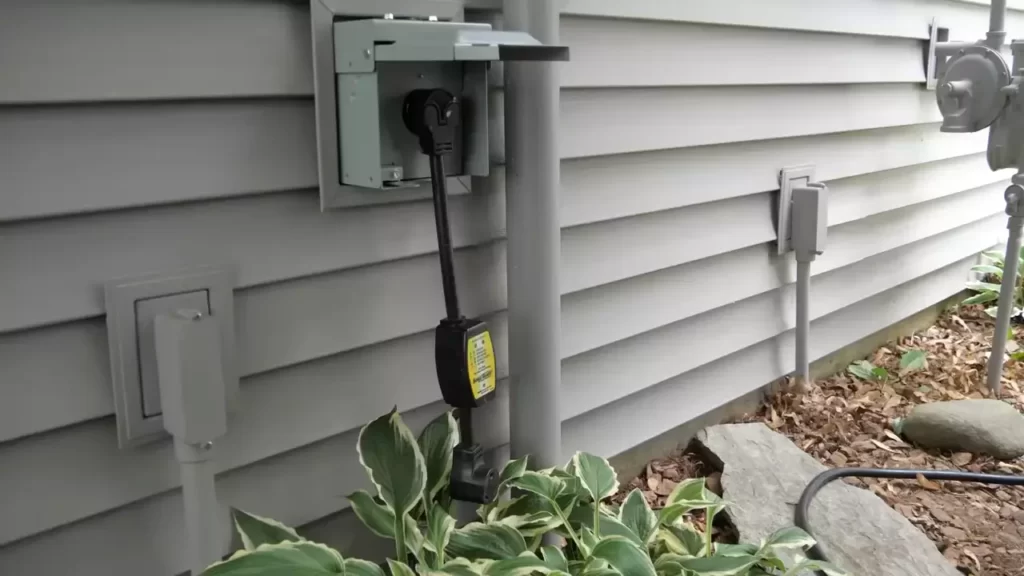
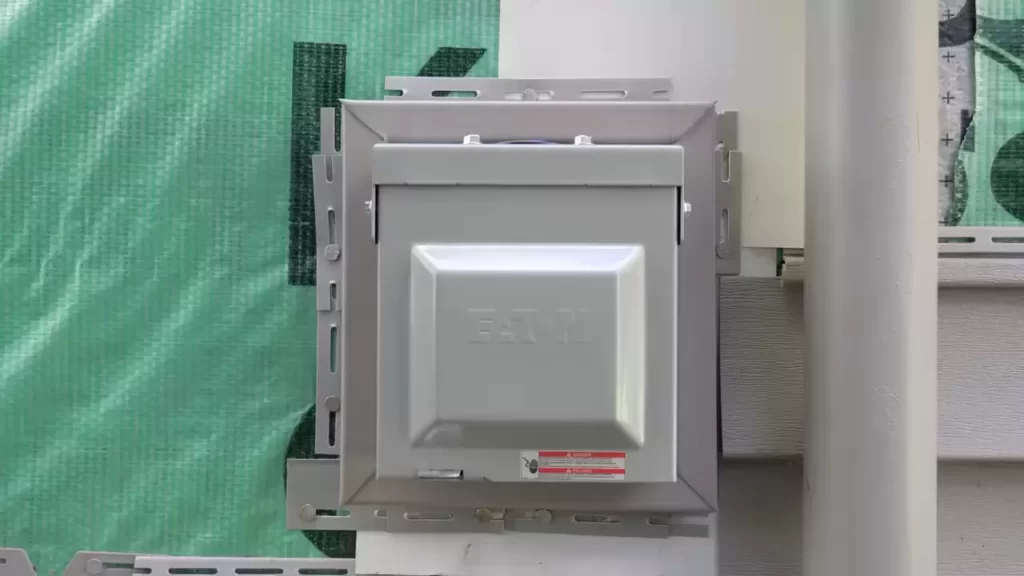
- Select a suitable location for the outlet, ensuring it is easily accessible and protected from the elements.
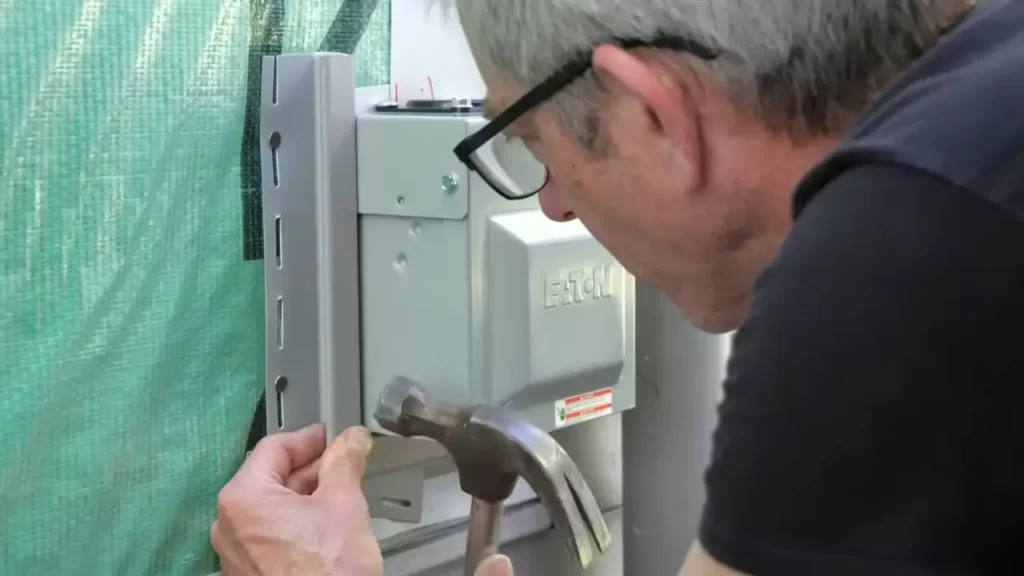
- Mount the RV outlet box securely using screws or anchors, following the manufacturer’s instructions.
- Connect the green or bare wire to the grounding screw on the outlet box, ensuring a tight connection.
- Note: It is important to consult the local electrical codes and regulations for specific grounding requirements in your area.
By following these steps, you can successfully install a 30 Amp RV outlet, providing a safe and reliable power source for your RV. Remember to always prioritize your safety and consult a professional electrician if you are unsure or uncomfortable with any aspect of the installation process.
Testing And Ensuring Proper Functionality
Once you have successfully installed a 30 Amp RV outlet, it is essential to test and ensure its proper functionality to guarantee the safety and reliability of your electrical setup. This step-by-step guide will walk you through the necessary processes to verify connections, secure electrical components, conduct a thorough inspection, and ultimately test the functionality of your newly installed RV outlet.
Verifying connections and securing electrical components
Before proceeding with testing, it is crucial to verify that all connections are properly made and secure. Incorrect or loose connections can lead to potential hazards and electrical issues. Follow these steps to ensure proper connection verification and component security:
- Examine all electrical outlets for any loose or exposed wires, corrosion, or damage. Repair or replace any faulty components.
- Check the wiring connections at the main electrical panel and the RV outlet. Tighten any loose connections but be cautious not to overtighten.
- Inspect the RV outlet for any signs of loosening or damage. Tighten any screws or bolts to secure the outlet tightly in place.
- Make sure the wiring is protected by covering it with approved electrical conduit or wiring channels. This prevents accidental damage and ensures long-term usability.
- Test the electrical connections with a multimeter to ensure there are no open circuits or voltage irregularities. Ensure that the voltage reading matches the required 30 Amps for an RV outlet.
Conducting a thorough inspection for potential issues
After verifying the connections and securing electrical components, it is crucial to conduct a thorough inspection of the entire installation. This inspection helps identify any potential issues or necessary modifications. Follow these steps to ensure a comprehensive inspection:
- Check for any exposed wires, loose fittings, or irregularities in the electrical conduit or wiring channels. Repair or replace any damaged components.
- Inspect the grounding system to ensure it is properly connected and providing a reliable electrical path. This is essential for safety purposes.
- Verify that the RV outlet is positioned in a location that allows for easy access and protection from external elements such as rain, snow, or excessive heat.
- Ensure that all installed components, such as the circuit breaker and outlet cover, are in good condition and securely fastened.
Testing the functionality of the RV outlet
Once you have completed the initial verification and inspection, it is time to test the functionality of your newly installed 30 Amp RV outlet. Follow these steps to ensure proper functionality:
- Ensure the main power supply is turned off before initiating any testing procedures.
- Connect your RV’s power cord to the outlet and switch the main power supply on.
- Verify that the RV is receiving power by checking if the lights, appliances, and other electrical components are working correctly.
- Test each outlet within the RV to confirm that they are all receiving the appropriate voltage and functioning properly.
- If any issues are detected during the testing phase, repeat the verification, inspection, and testing steps to identify and resolve the problem.
By following these steps, you can ensure that your newly installed 30 Amp RV outlet is functioning correctly and ready to provide the electrical power needed for all your RV adventures. Regularly inspect and test your RV outlet to catch and address any potential issues before they escalate into major problems.
Frequently Asked Questions On How To Install 30 Amp Rv Outlet
How Do I Add A 30 Amp Rv Outlet To My House?
To add a 30 amp RV outlet to your house, hire a licensed electrician who will ensure that it is installed safely and up to code. They will determine the appropriate location, install a new circuit breaker in your electrical panel, run the necessary wiring, and mount and connect the RV outlet.
Is A 30 Amp Camper Plug 220 Or 110?
A 30 amp camper plug is typically used for 110 volts.
What Is Needed For A 30 Amp Rv Plug?
For a 30 amp RV plug, you’ll need a 30 amp electrical outlet with the corresponding wiring and breaker. It’s important to ensure that your RV is compatible with a 30 amp system to avoid any electrical issues.
How Is A 30 Amp Rv Plug Wired?
A 30 amp RV plug is wired using a three-prong configuration: a hot wire, a neutral wire, and a ground wire. The hot wire carries the electrical current, the neutral wire returns it, and the ground wire provides safety. This wiring setup ensures the proper operation of the RV’s electrical system.
Conclusion
To conclude, installing a 30 Amp RV outlet is a straightforward process that can greatly enhance your RV experience. By following the steps outlined in this guide, you can ensure a safe and efficient installation. Remember to consult local codes and regulations, and seek professional assistance if needed.
With a properly installed outlet, you’ll have the power you need to enjoy all the comforts of home while on the road. Happy RVing!