To install a window air conditioner in a wall sleeve, follow these steps precisely. First, measure the dimensions of the wall sleeve and ensure it matches the size of the air conditioner unit.
Then, carefully position the unit into the sleeve, ensuring it is level and secure. Installing a window air conditioner in a wall sleeve requires careful planning and execution. It is important to ensure that the dimensions of the wall sleeve match the size of the air conditioner unit you intend to install.
By carefully positioning the unit into the sleeve, making sure it is level and secure, you can ensure proper functioning and optimal cooling of your space. We will provide a step-by-step guide to help you successfully install a window air conditioner in a wall sleeve. So, let’s get started!
Selecting The Right Wall Sleeve
When it comes to installing a window air conditioner in a wall sleeve, selecting the right wall sleeve is crucial. The wall sleeve serves as the framework that holds the air conditioner securely in place, ensuring proper insulation and preventing any air leaks. However, with a myriad of options available, it can be overwhelming to choose the right one. Here are a few factors to consider when selecting a wall sleeve:
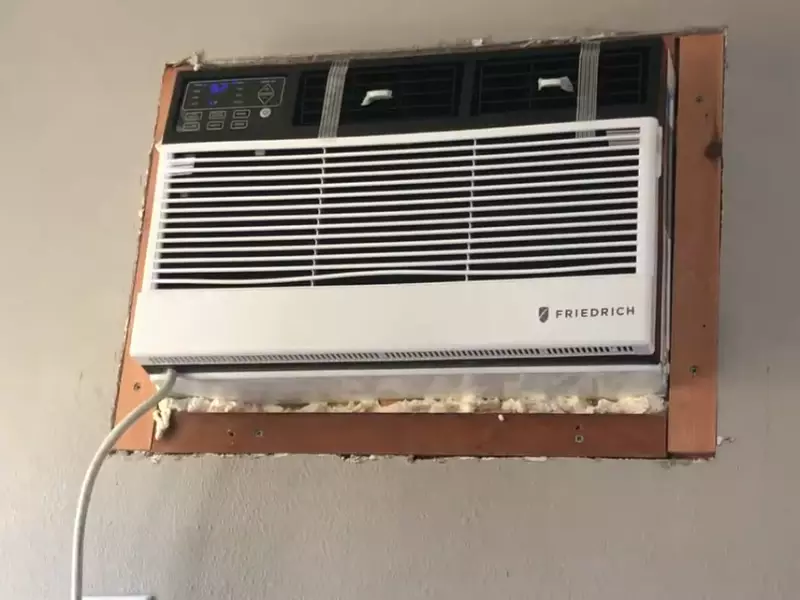
Factors to consider when choosing a wall sleeve
- Size and compatibility: Measuring the dimensions of both the window air conditioner and the wall sleeve is the first step in ensuring compatibility. The wall sleeve should be wide and tall enough to accommodate the air conditioner without any gaps or excessive spacing. Check the manufacturer’s specifications for the recommended sleeve size for your specific air conditioner model.
- Material and construction: The material and construction of the wall sleeve are important factors to consider. Opt for a high-quality sleeve made from sturdy materials such as metal or heavy-duty plastic. This ensures durability and helps prevent any damage to the sleeve when installing or removing the air conditioner.
- Insulation and weatherproofing: To keep your home energy-efficient, it’s crucial to choose a wall sleeve with good insulation properties. Look for sleeves that have insulation built-in or those that can be easily insulated with foam or weatherstripping. This will help prevent any air leakage and maintain a comfortable temperature indoors.
- Mounting options: Consider the mounting options provided by the wall sleeve. Some sleeves offer different mounting methods, such as through-the-wall or flush-mount installation. Choose the one that best suits your situation and preferences.
Measuring the window air conditioner and the wall sleeve
Before purchasing a wall sleeve, it’s important to accurately measure the dimensions of both the window air conditioner and the wall sleeve itself. Grab a tape measure and follow these simple steps:
- Measure the width of the air conditioner from side to side. Note down this width measurement.
- Measure the height of the air conditioner from top to bottom. Note down this height measurement.
- Measure the width of the wall sleeve opening. Note down this width measurement as well.
- Measure the height of the wall sleeve opening. Note down this height measurement too.
Ensure that the measurements of the air conditioner and the wall sleeve align properly for a snug fit. If the measurements differ significantly, consider purchasing a different wall sleeve or air conditioner model that better suits your requirements.
Ensuring compatibility between the air conditioner and the wall sleeve
With the measurements of both the air conditioner and the wall sleeve in hand, it’s time to ensure compatibility. Check the manufacturer’s specifications for both the air conditioner and the wall sleeve to verify that they are compatible with each other. Look for compatibility in terms of size, mounting options, and any specific requirements mentioned by the manufacturer.
Remember, a proper fit between the air conditioner and the wall sleeve is crucial for optimal performance and efficiency. Taking the time to select the right wall sleeve will ensure a hassle-free installation and long-lasting comfort for your home.
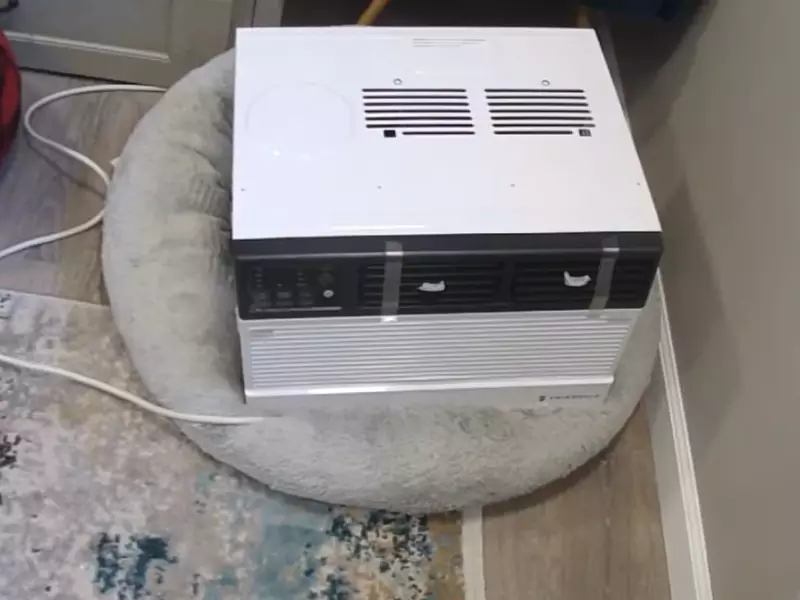
Gathering The Necessary Tools And Materials
Before you begin the installation process for your window air conditioner in a wall sleeve, it is essential to gather all the necessary tools and materials. By having everything ready, you can complete the installation smoothly and efficiently. This will save you time and ensure that the air conditioner is securely installed.
In this section, we will explore the essential tools you’ll need, the additional materials required for a secure installation, and the importance of understanding the manufacturer’s instructions. Let’s dive in!
Essential tools for installation
To get started, make sure you have the following tools:
- A screwdriver (preferably both flathead and Phillips head)
- A measuring tape
- A level
- A utility knife
- A wire cutting/stripping tool
- A power drill
- A socket wrench set
Additional materials required for a secure and effective installation
In addition to the tools, you will need the following materials to ensure a secure and effective installation:
- A wall sleeve kit
- Exterior caulk
- A foam insulation strip
- Screws and brackets (if not included in the wall sleeve kit)
- Mounting hardware (if not included in the wall sleeve kit)
- Electrical tape
- A power cord (if not included with the air conditioner unit)
- Extension cord (if necessary)
Understanding the instructions provided by the manufacturer
Now that you have gathered all the necessary tools and materials, it is crucial to understand the instructions provided by the manufacturer of your window air conditioner and wall sleeve kit. These instructions will guide you through the installation process and ensure that the unit functions properly.
Pay close attention to any specific requirements or recommendations mentioned in the instructions, such as the recommended distance between the air conditioner and the wall sleeve, the positioning of brackets and screws, and any electrical connections that need to be made.
By fully understanding and following these instructions, you can prevent any installation mishaps and ensure the safe and efficient operation of your window air conditioner.
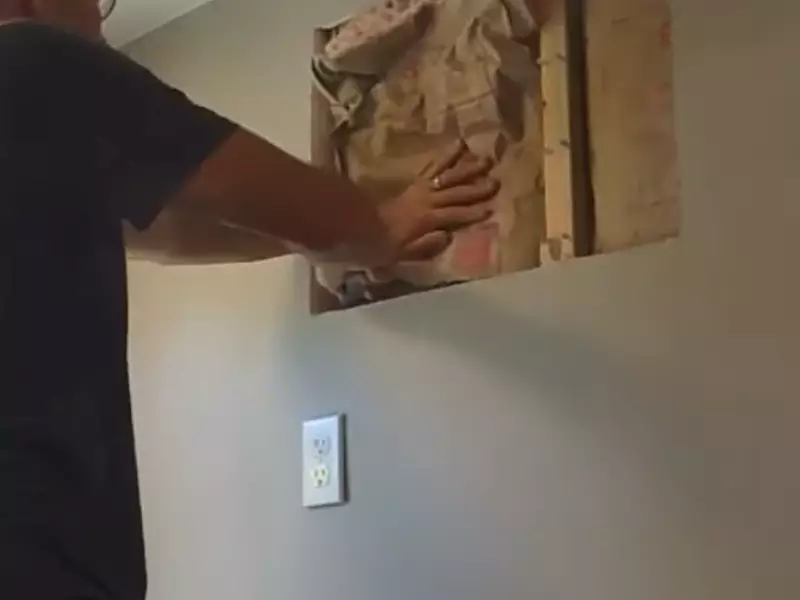
Preparing The Wall Sleeve And Surrounding Area
Before installing a window air conditioner in a wall sleeve, it is important to properly prepare the wall sleeve and the surrounding area. This ensures a smooth and secure installation, allowing the air conditioner to function optimally. The following steps outline how to prepare the wall sleeve and the area around it.
Removing any obstructions or debris from the wall sleeve
Start by carefully inspecting the wall sleeve to remove any obstructions or debris that may interfere with the installation. This can include dirt, dust, leaves, or any other unwanted material. Use a broom, brush, or vacuum cleaner to thoroughly clean the inside of the wall sleeve. Ensure that the airway is clear and unrestricted to achieve proper airflow once the air conditioner is installed.
Evaluating the condition of the wall sleeve and making necessary repairs
Next, evaluate the condition of the wall sleeve to identify any damages or areas in need of repair. Look for cracks, holes, or signs of corrosion. These issues can compromise the integrity of the installation and the overall performance of the air conditioner. If any damages are identified, it’s important to make the necessary repairs before proceeding with the installation.
Minor cracks can be filled with an appropriate sealant or caulk. If the damage is more extensive, consider consulting a professional for guidance or assistance. Remember, a properly sealed wall sleeve will help prevent drafts and reduce energy loss.
Preparing the wall and window area for installation
Now that the wall sleeve is clean and in good condition, it’s time to prepare the wall and window area for installation. Follow these steps:
- Remove any curtains, blinds, or window treatments that may obstruct the installation process.
- Clean the area around the window thoroughly, removing any dirt, dust, or residues that may impact the installation.
- Measure the dimensions of the wall sleeve to ensure a proper fit.
- Inspect the window frame for any damages or loose components. Tighten or repair as necessary.
By properly preparing the wall sleeve and the surrounding area, you are setting the stage for a successful installation of your window air conditioner. Taking the time to remove obstructions, evaluate the condition of the wall sleeve, and prepare the wall and window area will ensure that your air conditioner operates efficiently and effectively for years to come.
Installing The Wall Sleeve And Air Conditioner
Installing a window air conditioner in a wall sleeve is a great option when you want to cool a room without the need for a traditional window installation. This method not only helps you save space but also allows for better insulation and sealing, leading to improved energy efficiency. In this guide, we will walk you through the step-by-step process of positioning and securing the wall sleeve in the window opening, mounting the air conditioner into the wall sleeve, and ensuring proper insulation and sealing around the unit.
Positioning and Securing the Wall Sleeve in the Window Opening
Before you begin, it’s important to measure the dimensions of your wall sleeve and ensure that it fits perfectly into your window opening. Here are the steps to follow:
- Start by cleaning the window opening thoroughly to remove any dirt or debris that may interfere with the installation process.
- Place the wall sleeve into the window opening, ensuring that it is centered and level. Use a leveler to double-check the positioning.
- Secure the wall sleeve in place by screwing it into the surrounding wall or frame. Make sure to use fasteners that are suitable for the material of your wall.
- Once the wall sleeve is securely attached, use weatherstripping or insulation foam to seal any gaps between the wall sleeve and the surrounding structure. This will help prevent air leakage and improve energy efficiency.
Mounting the Air Conditioner into the Wall Sleeve
With the wall sleeve in place, it’s time to install the air conditioner unit itself. Follow these steps:
- Start by attaching the mounting bracket or frame to the back of the air conditioner unit, following the manufacturer’s instructions.
- Lift the air conditioner and carefully slide it into the wall sleeve, making sure it fits securely.
- Secure the air conditioner unit to the wall sleeve according to the manufacturer’s instructions. This usually involves using screws or brackets.
- Once the unit is securely mounted, connect the power cord to an electrical outlet and test the air conditioner to ensure it is functioning properly.
Ensuring Proper Insulation and Sealing Around the Unit
To maximize the energy efficiency of your installed air conditioner, it’s crucial to properly insulate and seal around the unit. Here’s what you need to do:
- Inspect the area around the air conditioner for any gaps or openings. Common areas to check include the top, bottom, and sides of the unit.
- Use weatherstripping or insulation foam to seal any gaps or openings. Apply a generous amount of sealant to create an airtight seal.
- Pay special attention to the area where the air conditioner and the wall sleeve meet. This junction is a common area for air leakage, so ensure that it is properly sealed.
- Lastly, check the insulation on the exterior of the wall sleeve. If it appears worn or damaged, consider replacing it to maintain optimal energy efficiency.
By following these steps, you can successfully install a window air conditioner in a wall sleeve. Not only will this provide you with effective cooling during the hot months, but it will also help you save energy and keep your space comfortable.
Testing And Troubleshooting
Once you have successfully installed your window air conditioner into a wall sleeve, it’s essential to conduct thorough testing of its functions to ensure optimal performance. Testing the air conditioner will help identify any installation issues and troubleshoot common problems.
Conducting thorough testing of the air conditioner’s functions
Before relying on your newly installed window air conditioner, it is important to conduct a comprehensive test to ensure that all its functions are working correctly. Follow these steps for a thorough testing:
- Power on the air conditioner and check if it starts up without any issues. Listen for any unusual sounds or vibrations.
- Set the thermostat to various temperature settings and observe if the air conditioner responds accordingly. Make sure it reaches the desired temperature and maintains it.
- Switch between different modes, such as cooling, fan, and energy-saver, to check if the air conditioner transitions smoothly between them.
- Inspect the fan speed settings and ensure that each speed option operates correctly. Ensure the airflow is adequate at each speed.
- Check the air conditioner’s timer feature, if applicable, to verify that it can be programmed and activates/deactivates at the desired times.
- Test the dehumidification function, if present, to ensure it effectively removes excess moisture from the air.
- Lastly, inspect the remote control, if provided, and verify that all the buttons work satisfactorily.
Troubleshooting common installation issues
In certain instances, you may encounter problems during or after the installation process. Here are some common issues and troubleshooting steps to resolve them:
| Installation Issue | Troubleshooting Steps |
|---|---|
| The air conditioner doesn’t power on | – Ensure the unit is securely plugged into a functioning power outlet – Check the circuit breaker or fuse box to confirm there are no electrical issues – Inspect the power cord for any damage – Contact a professional if the problem persists |
| Poor cooling performance | – Verify that the air conditioner is properly sized for the room – Clean or replace the air filters regularly to ensure unrestricted airflow – Check for any air leaks around the unit or in the wall sleeve – Make sure the temperature setting is appropriate for the cooling requirements |
| Excessive noise or vibration | – Ensure the unit is securely mounted in the wall sleeve – Check for any loose or damaged components – Inspect the fan blades for any obstructions or damage – Contact the manufacturer if the noise/vibration persists |
Ensuring proper ventilation and airflow for optimal performance
Proper ventilation and airflow are crucial for an air conditioner’s optimal performance. To ensure these factors are met:
- Clean or replace the air filters regularly to prevent dust and debris buildup, which can restrict airflow.
- Ensure there is sufficient clearance around the air conditioner unit for proper airflow. Avoid blocking vents or obstructing air intake.
- Inspect the condenser coils for dirt or debris and clean them if necessary. Dirty coils can hinder heat transfer and reduce efficiency.
- Check the condition of the wall sleeve and seal any gaps or cracks that may interfere with airflow.
- Consider using a circulating fan or ceiling fan to improve air circulation in the room, which can help distribute cool air more efficiently.
By conducting thorough testing, troubleshooting common issues, and ensuring proper ventilation, you can maximize the performance and longevity of your newly installed window air conditioner in a wall sleeve.
Maintaining And Extending The Lifespan Of Your Air Conditioner
Proper maintenance and care are essential for ensuring the longevity and efficient performance of your window air conditioner. Regular cleaning and adherence to certain practices can go a long way in extending its lifespan. Additionally, it is crucial to recognize signs that indicate the need for professional assistance. In this section, we will discuss various tips and practices for maintaining and extending the lifespan of your air conditioner.
Regular cleaning and maintenance practices to keep the unit running efficiently
To keep your window air conditioner running smoothly and efficiently, it is essential to perform regular cleaning and maintenance tasks. Here are some key practices to consider:
- Clean the air filters: The air filters in your air conditioner collect dust and debris over time, obstructing airflow and reducing efficiency. Regularly cleaning or replacing these filters can significantly improve the unit’s performance. Refer to the manufacturer’s instructions for proper cleaning techniques.
- Clean the condenser coils: Over time, the condenser coils can accumulate dirt, dust, and grime, hindering heat transfer. Gently brush the coils with a soft brush or use a vacuum cleaner with a brush attachment to remove any buildup. This will enhance the unit’s cooling capacity.
- Clean the condensation drain: The condensation drain collects excess moisture from the air conditioner. If clogged, it can lead to water leakage. Regularly inspect the drain and ensure it is clear of any debris or blockages. You can use a mixture of bleach and water to clean the drain and prevent mold growth.
- Inspect and clean the fan blades: The fan blades can accumulate dust and dirt, affecting their efficiency and increasing noise levels. Carefully clean the blades using a soft brush or cloth to optimize airflow and reduce noise.
- Check electrical connections: Over time, electrical connections can become loose. Periodically inspect the wiring and connections, ensuring they are secure and free from any damage or corrosion.
- Keep the exterior clean: Dust and dirt can accumulate on the exterior of the air conditioner, impacting its efficiency. Regularly wipe down the exterior with a damp cloth to maintain its appearance and prevent any debris from entering the unit.
Tips for extending the lifespan of your window air conditioner
Here are some additional tips to help extend the lifespan of your window air conditioner:
- Proper insulation: Ensure that the wall sleeve containing the air conditioner is properly insulated to prevent air leaks and reduce the unit’s workload.
- Protect from direct sunlight: Direct exposure to sunlight can strain the air conditioner and reduce its efficiency. Use curtains, blinds, or window films to shield the unit from excessive sunlight.
- Adjust temperature settings: Setting the temperature at a moderate level rather than extremes can help reduce wear and tear on the compressor and other components.
- Minimize strain on the unit: Avoid overworking the air conditioner by ensuring doors and windows are properly sealed, minimizing drafts, and closing off unused rooms.
- Professional maintenance: Despite regular cleaning and maintenance, it is advisable to have a professional inspect and service your air conditioner annually or as recommended by the manufacturer. They can check for any potential issues and perform necessary repairs or replacements to keep the unit in optimal condition.
Recognizing signs that indicate the need for professional assistance
While regular maintenance can address most issues, some situations require professional assistance. Here are some signs that indicate the need for professional intervention:
- Strange noises: Unusual rattling, buzzing, or grinding noises coming from the air conditioner can indicate a problem with the fan motor, compressor, or other components. It’s best to have a professional assess and resolve the issue.
- Inefficient cooling: If your air conditioner is no longer cooling the room efficiently despite regular maintenance, it may signify a refrigerant leak or another malfunction that requires professional attention.
- Excessive energy consumption: If you notice a sudden increase in energy bills without any changes in usage, it could be a sign of an underlying issue in the air conditioner that needs professional troubleshooting.
- Water leakage: A leaking air conditioner can indicate a clogged condensate drain or other drainage issues. Professional assistance can help identify and rectify the cause of the leakage.
By following these maintenance practices, implementing preventive measures, and seeking professional assistance when necessary, you can prolong the lifespan and improve the efficiency of your window air conditioner, ensuring optimal cooling even during hot summer months.
Safety Precautions And Best Practices
When it comes to installing a window air conditioner in a wall sleeve, safety should always be a top priority. By following the right safety precautions and best practices, you can ensure a smooth installation process and enjoy safe operation and maintenance of your air conditioner. In this section, we will outline the essential safety guidelines, offer tips for safe operation and maintenance, and help you understand and address potential safety hazards.
Following safety guidelines during installation
Installing a window air conditioner in a wall sleeve requires careful attention to safety guidelines. By following these guidelines, you can prevent accidents and ensure a successful installation:
- Read the instruction manual: Before you begin the installation process, carefully read the instruction manual provided by the manufacturer. This will help you understand the specific safety measures and guidelines recommended for your particular model.
- Turn off the power: Before starting the installation, make sure to turn off the power to the area where you will be working. This will prevent any electrical accidents and ensure your safety.
- Use protective gear: While installing the air conditioner, it is important to wear protective gear such as safety goggles and gloves. This will protect you from any potential injuries or accidents.
- Secure the wall sleeve: Before mounting the air conditioner, ensure that the wall sleeve is securely attached to the wall. This will prevent any instability or collapse during the installation process.
- Properly seal the gaps: To ensure efficient cooling and prevent any air leakage, make sure to properly seal the gaps between the wall sleeve and the air conditioner. This will also help in maintaining the unit’s energy efficiency.
Tips for safe operation and maintenance of the air conditioner
To keep your air conditioner running smoothly and safely, it is important to follow these tips for safe operation and maintenance:
- Regularly clean the air filters: Cleaning the air filters on a regular basis will help maintain the air conditioner’s performance and prevent clogging. Refer to the instruction manual to know how often you should clean the filters and the proper cleaning method.
- Check for leaks: Periodically inspect the air conditioner for any signs of leaks, such as water dripping or unusual noises. If you notice any leaks, it is essential to address them promptly to avoid further damage.
- Avoid overworking the unit: Operating the air conditioner beyond its recommended capacity can strain the system and lead to overheating. Ensure that you are using the air conditioner within its recommended cooling capacity and avoid running it continuously for extended periods without breaks.
- Keep the area around the unit clear: Make sure to remove any obstacles or debris near the air conditioner, both inside and outside. This will ensure proper air circulation and prevent potential hazards.
- Schedule regular professional maintenance: To ensure optimal performance and safety, it is recommended to schedule regular maintenance checks by a professional technician. They can inspect the unit, identify any potential issues, and perform necessary repairs or maintenance tasks.
Understanding and addressing potential safety hazards
As with any electrical appliance, window air conditioners come with potential safety hazards. It is important to understand and address these hazards to minimize the risk of accidents or damage. Some potential safety hazards to be aware of include:
| Hazard | Safety Measures |
|---|---|
| Electrical shock |
|
| Fire hazards |
|
| Falls or injuries during installation |
|
By being aware of these potential safety hazards and taking necessary precautions, you can ensure the safe installation, operation, and maintenance of your window air conditioner.
Frequently Asked Questions For How To Install A Window Air Conditioner on a Wall Sleeve
Can I Put A Window AC in A Wall Sleeve?
Yes, you can install a window AC in a wall sleeve. The wall sleeve should be properly sized to fit the AC unit and provide adequate ventilation. It is important to follow the manufacturer’s guidelines for installation to ensure proper functioning and avoid any risks.
Do I Need A Sleeve For Through Wall Ac?
Yes, you need a sleeve for a through-wall AC. A sleeve provides support and helps secure the AC unit in place, ensuring proper installation and efficient functioning. It also helps insulate the wall and prevents air leaks. Proper installation is important for optimal performance and longevity of the AC unit.
What Is A Wall Sleeve Air Conditioner?
A wall sleeve air conditioner is a cooling unit designed to be installed through a wall. It provides efficient cooling for a specific room or area.
How Do You Install A mounted AC unit?
To install a wall-mounted AC unit, follow these steps:
1. Choose a suitable location on the wall.
2. Install a mounting bracket securely.
3. Attach the AC unit to the bracket.
4. Connect the electrical and refrigerant lines.
5. Test the unit to ensure proper functioning.
Conclusion
Installing a window air conditioner in a wall sleeve is a simple and efficient way to cool your space. By following the step-by-step instructions in this guide, you can ensure a smooth and successful installation process. Remember to measure the wall sleeve properly, secure the air conditioner firmly, and seal any gaps to maximize efficiency.
With your new window air conditioner in place, you’ll be able to enjoy a cool and comfortable environment all summer long. Stay cool and beat the heat with this easy installation method!
