To install an electric water heater first, turn off the power supply at the breaker box and shut off the water supply to the heater. Then, drain the old water heater and disconnect the electrical and plumbing connections.
Next, set the new water heater in place and reconnect the electrical and plumbing connections. Finally, open the water supply valve and fill the tank before turning the power back on. Installing an electric water heater involves turning off power and water supplies, draining the old heater, disconnecting connections, setting up the new heater, and reconnecting electrical and plumbing connections.
Understanding The Basics Of Electric Water Heaters
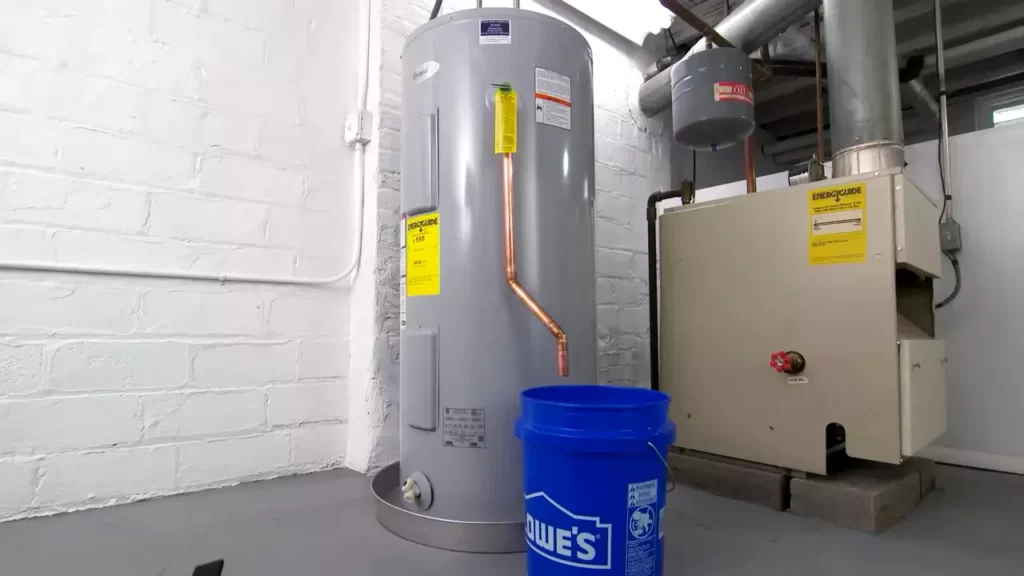
Electric water heaters are a popular choice for many homeowners due to their efficiency, convenience, and ease of installation. If you’re considering installing an electric water heater in your home, it’s important to understand the basics of how they work and what components are involved.
In this section, we’ll explore the benefits of electric water heaters, the components that make up these systems, and how to choose the right electric water heater for your home.
The Benefits of Electric Water Heaters
When it comes to choosing a water heating system, electric water heaters offer several advantages. Here are some of the benefits:
- Energy Efficiency: Electric water heaters are highly energy-efficient, converting nearly 100% of the energy supplied into heat for your water.
- Cost Savings: Electric water heaters have lower upfront costs and can save you money on your monthly energy bills, especially if you have a lower electricity rate.
- Easy Installation: Unlike gas water heaters that require venting, electric water heaters can be installed in virtually any location with access to electricity.
- Convenience: Electric water heaters provide a constant supply of hot water without the need for a storage tank, making them ideal for households with high hot water demands.
- Environmentally Friendly: Electric water heaters produce zero emissions and have a smaller carbon footprint compared to gas-powered alternatives.
Components of an Electric Water Heater
An electric water heater consists of the following main components:
- Heating Elements: Most electric water heaters have one or two heating elements, typically made of copper or stainless steel, that are responsible for heating the water.
- Thermostat: The thermostat regulates the temperature of the water by turning the heating elements on or off as needed.
- Dip Tube: The dip tube is a plastic tube that directs cold water from the top of the tank to the bottom, ensuring it is heated properly.
- Anode Rod: The anode rod is made of aluminum or magnesium and helps protect the tank from corrosion by attracting corrosive elements in the water.
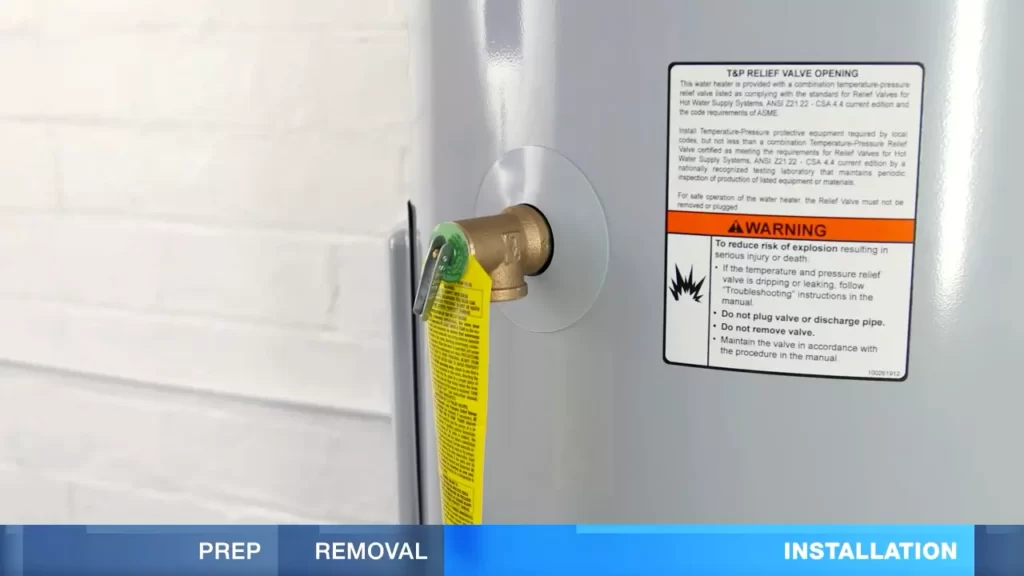
- Pressure Relief Valve: This safety device prevents excessive pressure from building up in the tank and releases it if necessary.
Choosing the Right Electric Water Heater for Your Home
When choosing an electric water heater for your home, there are a few key factors to consider:
- Capacity: Determine your household’s hot water demand to choose the right size water heater. A larger capacity is necessary for larger households or those with high hot water usage.
- Energy Efficiency: Look for an electric water heater with a high Energy Factor (EF) rating to ensure optimal energy efficiency and cost savings.
- Warranty: Check the warranty offered by the manufacturer to ensure you’re protected against any defects or malfunctions.
- Installation Requirements: Consider the space available and any installation requirements, such as voltage and wiring, to ensure compatibility with your home.
By understanding the basics of electric water heaters and considering these factors, you can make an informed decision when selecting and installing the right electric water heater for your home. With their efficiency and convenience, electric water heaters are an excellent choice for ensuring a constant supply of hot water in your household.

Preparing For The Installation Process
When it comes to installing an electric water heater, proper preparation is key to a successful and safe process. Before you dive into the installation, there are a few important steps you need to take. In this section, we will walk you through gathering the necessary tools and materials, assessing the space for the water heater, and shutting off the power and water supply. Let’s get started!
Gathering the Necessary Tools and Materials
To begin the installation process, you’ll need to gather the necessary tools and materials. Having everything you need on hand will not only save you time but also ensure a smooth installation. Here’s a list of essential items you should have:
| • Screwdriver | • Adjustable wrench | • Pipe cutter |
| • Pipe thread tape | • Tubing cutter | • Cable clamp |
| • Wire stripper | • Voltage tester | • Level |
| • Safety gloves | • Safety goggles | • Teflon tape |
By having these tools and materials ready, you’ll be well-equipped to handle any challenges that may arise during the installation process.
Assessing the Space for the Water Heater
Before you start installing the electric water heater, it’s crucial to assess the space where it will be placed. This will help you ensure that the water heater fits properly and that there is enough clearance for proper ventilation. Here’s what you need to do:
- Measure the dimensions of the space where the water heater will be installed.
- Check the manufacturer’s specifications to ensure that the space meets the minimum requirements.
- Ensure there is sufficient clearance around the water heater for proper airflow.
- If necessary, make any modifications to the space to accommodate the water heater.
Taking the time to assess the space beforehand will save you from potential headaches down the line. It’s better to be proactive and make any necessary adjustments now rather than dealing with issues during or after the installation.
Shutting Off the Power and Water Supply
Before you begin the installation process, it’s crucial to shut off the power and water supply to the existing water heater. This step is essential to ensure your safety and prevent any accidents. Follow these steps to shut off the power and water supply:
- Locate the circuit breaker for the water heater and switch it off.
- Turn off the main water supply valve to the water heater.
- Open a faucet in your home to relieve any pressure in the water lines.
- Make sure the power and water supply are completely shut off before proceeding.
By shutting off the power and water supply, you eliminate the risk of electrocution or water damage. Safety should always be the first priority when working with electrical appliances.
In conclusion, preparing for the installation of an electric water heater involves gathering the necessary tools and materials, assessing the space for the water heater, and shutting off the power and water supply. By following these steps, you’ll be well-prepared to proceed with the installation process smoothly and safely.
Step 1: Removing The Old Water Heater
Before you can install a new electric water heater, you’ll need to remove the old unit. This step may seem daunting, but with the right instructions, you can perform it safely and efficiently. In this guide, we’ll break down the process into three simple tasks: draining the old water heater, disconnecting electrical and plumbing connections, and safely removing and discarding the old unit.
Draining the Old Water Heater
First, you’ll need to drain the old water heater to prevent any water spills or leaks. Follow these steps:
- Turn off the power supply to the water heater by flipping the circuit breaker labeled for the water heater in your electrical panel.
- Next, locate the drain valve at the bottom of the water heater. Attach a hose to the valve and route the other end to a suitable drainage location, like a floor drain or outdoor area.
- Once the hose is securely attached, open the drain valve by turning it counterclockwise. You may also need to open a nearby hot water faucet to facilitate the draining process.
- Allow the water to drain completely from the tank. Remember that the water may be hot, so take caution to avoid any burns.
- After the tank is empty, close the drain valve by turning it clockwise. Remove the hose and make sure to store it properly.
Disconnecting Electrical and Plumbing Connections
With the water drained, it’s time to disconnect the electrical and plumbing connections:
- Once again, ensure the power supply to the water heater is turned off at the circuit breaker.
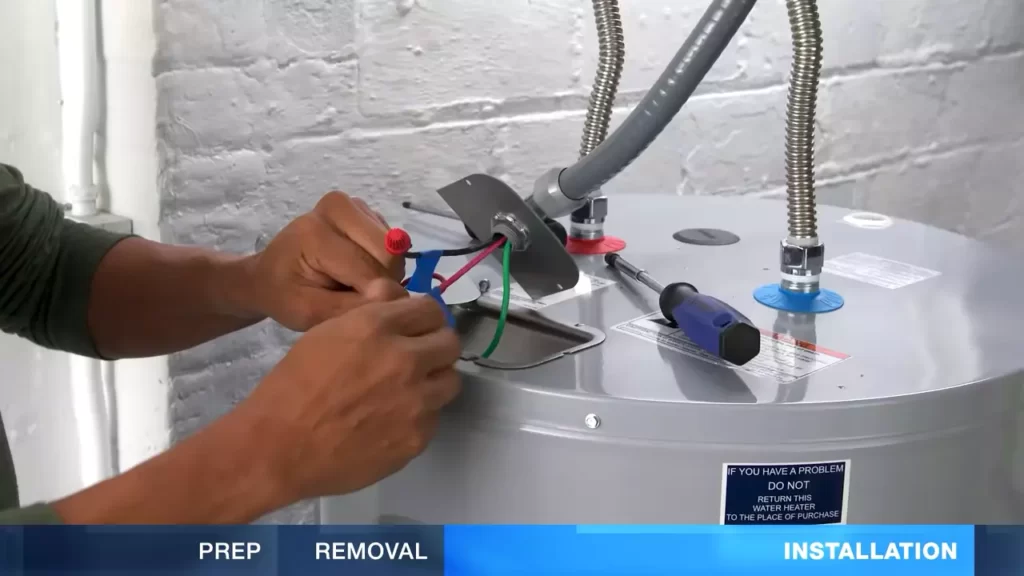
- Locate the electrical junction box on the top or side of the water heater. Remove the cover carefully using a screwdriver.
- Inside the junction box, you will find the electrical connections. Take note of their arrangement or take a picture for future reference.
- Disconnect the electrical connections by loosening the screws or nuts, depending on the type of connection. Make sure to wrap each disconnected wire with electrical tape to prevent any accidental contact.
- Now, move on to the plumbing connections. Turn off the cold water supply valve, which is usually located above the water heater.
- Use a wrench to disconnect the cold water supply line from the inlet valve of the water heater. If necessary, use a bucket or towel to catch any residual water.
- Lastly, disconnect the hot water outlet pipe from the water heater using a wrench.
Safely Removing and Discarding the Old Unit
With all the connections detached, you’re ready to safely remove and discard the old water heater:
- If you’re working with a gas water heater, it’s essential to turn off the gas supply valve and shut off the gas using the control valve near the burner.
- After ensuring the water heater is no longer connected to any power or utilities, use a hand truck or dolly to carefully transport the unit to a suitable location for disposal.
- Dispose of the old water heater according to your local regulations. You may need to contact a waste management provider or recycling center for proper disposal instructions.
Congratulations! You’ve successfully completed the first step of installing your new electric water heater. Now, let’s move on to the next phase.
Step 2: Preparing The Installation Area
Properly Positioning the New Water Heater
After ensuring that you have gathered all the necessary tools and materials for the installation, the next crucial step is to properly position the new electric water heater. This will require some careful considerations to ensure its functionality and safety. Here’s how you can do it:
- Locate the installation area: Find a suitable location for your water heater that meets the necessary code requirements. It should be easily accessible for maintenance purposes and have sufficient space for proper ventilation.
- Clear the area: Remove any obstructions or clutter around the installation area. This includes ensuring there is enough clearance for removal of the old water heater and installation of the new one.
- Level the surface: Use a level to ensure that the floor or platform where the water heater will be placed is perfectly level. This is essential for the water heater to function properly and to prevent any leaks.
- Consider a drain pan: If your water heater is located in an area where water damage could occur, it’s highly recommended to install a drain pan. This will help catch any potential leaks and prevent damage to your property. Ensure the drain pan is properly hooked up to a suitable drain line.
By following these steps, you can properly position your new electric water heater, setting the stage for a successful installation.
Preparing the Electrical Connections
Before proceeding with the installation, it is important to ensure that the electrical connections are properly prepared. Here’s what you need to do:
- Shut off the power: Locate the circuit breaker or fuse for your water heater and switch it off to cut off the power supply.
- Plan the wiring: Determine the appropriate wire size and circuit breaker rating based on the specifications provided by the manufacturer. This will ensure that the electrical system can handle the load of the water heater.
- Prepare the wiring: Carefully strip the insulation from the electrical wires and connect them to the corresponding terminals on the water heater. Ensure that all connections are securely tightened to prevent any loose wiring.
- Double-check the connections: Once all the electrical connections are made, carefully review them to ensure they are correct and secure. Verify that the wires are properly attached to the water heater terminals and that there are no exposed or frayed wires.
- Test the electrical connections: With the power still switched off, use a non-contact voltage tester to confirm that there is no electricity flowing through the system. This is an essential safety step to prevent any accidents during the installation process.
By following these steps, you can ensure that the electrical connections of your electric water heater are properly prepared and ready for installation.
Preparing the Plumbing Connections
Now that you have successfully positioned and prepared the electrical connections for your new electric water heater, it’s time to move on to the plumbing connections. Here’s what you need to do:
- Shut off the water supply: Locate the main water shut-off valve and turn it off to stop the water flow to the existing water heater.
- Drain the water heater: Connect a hose to the drain valve of the old water heater and drain the remaining water into a suitable drain or container. This will prevent any water from spilling during the removal process.
- Remove the old water heater: Carefully disconnect the plumbing connections from the old water heater. This includes removing any pipes, fittings, and valves that are connected to it. Have a bucket or towels nearby to catch any water that may be left in the pipes.
- Prepare the plumbing connections: Thoroughly clean the pipe ends and fittings to ensure a proper seal. Apply plumber’s tape or joint compound to the threaded ends of the pipes to prevent leaks.
- Connect the new water heater: Install the new water heater by reconnecting the plumbing connections. Make sure to tighten all fittings securely and check for any signs of leaks.
- Turn on the water supply: Once all the plumbing connections are made, open the main water shut-off valve to allow water to flow into the new water heater. Check for any leaks and ensure that the water is flowing smoothly.
By following these steps, you can properly prepare and connect the plumbing connections of your electric water heater, ensuring that it functions efficiently and reliably.
Step 3: Installing The New Water Heater
Connecting the Electrical Wiring
Once you have positioned your new electric water heater in place, it’s time to connect the electrical wiring. Safety is paramount, so be sure to turn off the power to your water heater at the breaker panel.
You’ll need to refer to the manufacturer’s instructions for your specific model, but here are the general steps to follow:
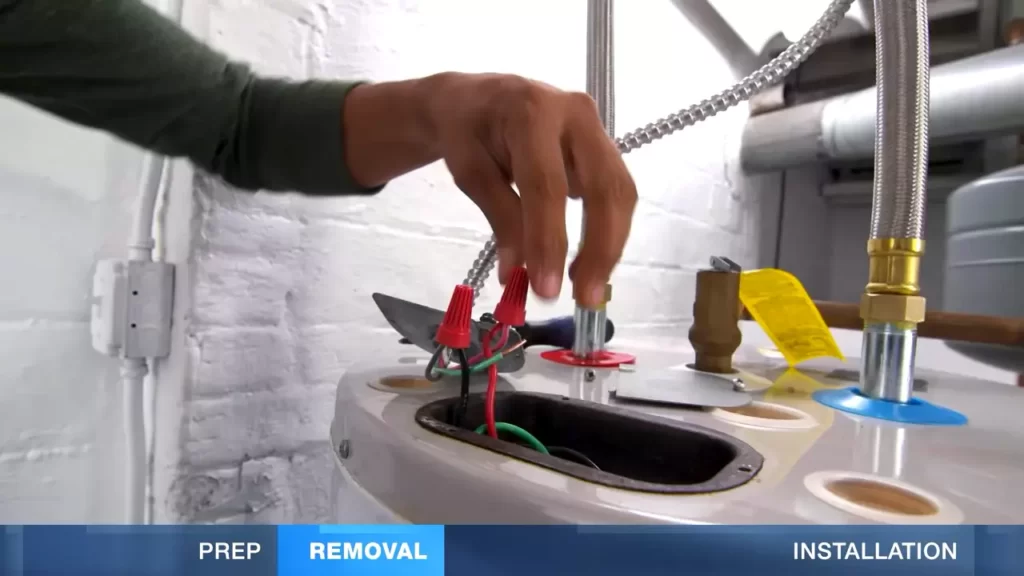
- Remove the electrical access panel on the water heater.
- Identify the incoming power wires, usually black and white, and the ground wire, often green or bare copper.
- Strip the insulation from the end of each wire, exposing about 1 inch of copper.
- Connect the black wire to the black wire from the water heater using a wire connector or electrical tape.
- Connect the white wire to the white wire from the water heater in the same manner.
- If your water heater has a ground wire, connect it to the green or bare copper ground wire using a wire connector or grounding screw.
- Once all the connections are secure, replace the electrical access panel.
Remember to check your local electrical codes and regulations to ensure compliance and safety.
Attaching the Plumbing Connections
With the electrical wiring complete, it’s time to attach the plumbing connections to your new water heater. Follow these steps:
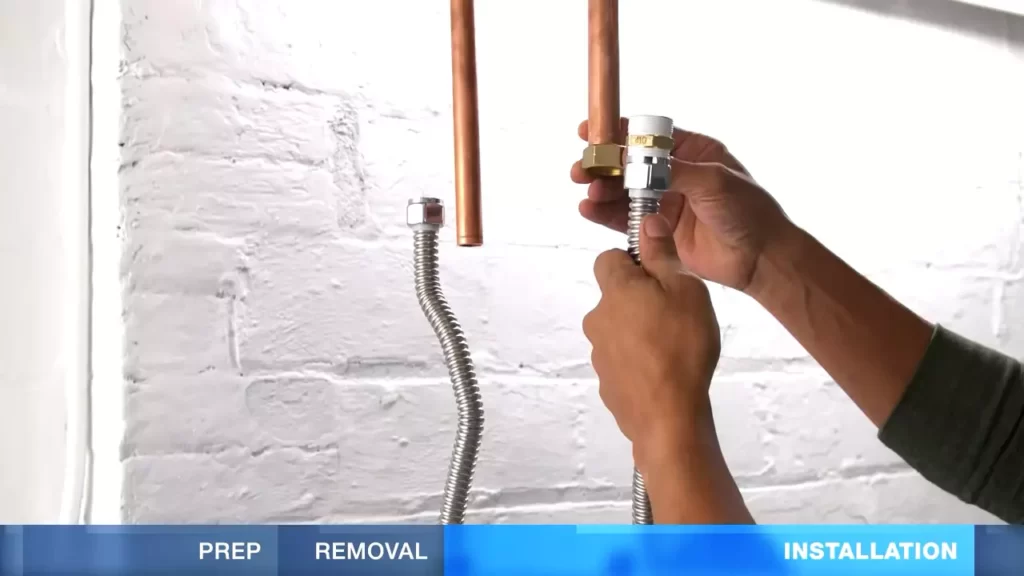
- Locate the hot and cold water pipes on your water heater.
- Apply the plumber’s tape or thread sealant to the threaded ends of the pipes.
- Connect the hot water pipe to the outlet fitting on the top of the water heater and tighten it with a wrench.
- Connect the cold water pipe to the inlet fitting on the side of the water heater and tighten it with a wrench.
- Once the connections are snug, turn on the water supply and check for any leaks. If you notice any leaks, tighten the connections further or use thread sealant.
Securing the Water Heater in Place
Now that the electrical and plumbing connections are in place, it’s important to secure your water heater properly to prevent any accidents or damage. Here’s how:
- Use earthquake straps or brackets to secure the water heater to the wall.
- Attach the straps or brackets to the water heater and then to the wall studs or other securely anchored points.
- Ensure the water heater is level by using a carpenter’s level.
- Tighten the straps or brackets to hold the water heater securely in place.
By following these steps, you can safely and correctly install your new electric water heater. Remember to always consult the manufacturer’s instructions for your specific model and comply with local codes and regulations for a hassle-free installation.
Step 4: Testing And Finalizing The Installation
Filling the Water Heater and Checking for Leaks
After successfully connecting the water supply and all necessary pipes in the previous steps, it’s time to fill your electric water heater and check for any potential leaks. Follow these steps to ensure a proper filling process and prevent any water damage in your home:
- Close the drain valve located at the bottom of the water heater.
- Open a hot water faucet in one of your sinks to allow the air to escape from the system.
- Turn on the cold water supply to fill the water heater slowly.
- Monitor the water heater closely and check for any leaks around the connections and valves.
- Once the tank is full, close the hot water faucet.
- Inspect the area surrounding the water heater for any signs of moisture or leaks.
If you notice any leaks, it’s crucial to address them immediately. Tighten the connections or replace faulty components to prevent further damage. Remember, a properly filled and leak-free water heater is essential for its efficient operation.
Turning on the Power and Verifying Proper Function
With the water heater filled and no leaks identified, it’s time to move on to the final steps of the installation process: turning on the power and verifying the proper function. Follow these simple steps to complete this crucial part of the installation:
- Make sure the water heater’s power switch or circuit breaker is turned off.
- Connect the water heater to a power supply, following the manufacturer’s instructions and local electrical codes.
- Turn on the power switch or flip the circuit breaker to provide electricity to the water heater.
- Wait for the water heater to heat the water. This may take some time, so be patient.
- While waiting, observe the water heater for any unusual noises or smells that could indicate a problem.
- Check the hot water temperature at one of your faucets to ensure it reaches the desired level.
If you encounter any issues during this process, refer to the manufacturer’s instructions or consult a professional to troubleshoot and resolve the problem promptly.
Tips for Troubleshooting Common Installation Issues
Sometimes, despite following the installation process carefully, issues may still arise. Here are some helpful tips to troubleshoot and resolve common installation issues:
- If you experience no hot water flow, check the water supply valves to ensure they are fully open.
- If the water temperature is not reaching the desired level, adjust the temperature setting on the water heater according to the manufacturer’s instructions.
- If you notice unusual noises coming from the water heater, it could indicate a sediment buildup. Consider draining and flushing the water heater to remove any accumulated sediment.
- For any persistent leaks, ensure all connections are tight and secure. If necessary, apply thread sealant or plumber’s tape to prevent leaks.
- If you encounter any electrical issues, it’s best to seek professional assistance rather than attempting any repairs yourself.
By following these troubleshooting tips, you can tackle common installation issues and ensure your electric water heater operates efficiently and reliably for years to come.
Frequently Asked Questions Of How To Install Electric Water Heater
Can I Install An Electric Water Heater Myself?
Yes, you can install an electric water heater yourself. However, it is important to follow the manufacturer’s instructions carefully and ensure you have the necessary skills and knowledge to do it safely. Additionally, you may need to obtain any necessary permits and comply with local building codes.
Always consult a professional if you are unsure.
Is Installing An Electric Water Heater Hard?
Installing an electric water heater is relatively straightforward. It doesn’t require advanced technical skills. Simply follow the instructions provided in the user manual or hire a professional for assistance.
Do Electric Water Heaters Need Special Wiring?
Yes, electric water heaters need special wiring. This is because they require a higher voltage and amperage than regular household appliances. Proper wiring is necessary to ensure the heater functions safely and efficiently. Hiring a licensed electrician is recommended for installation to ensure compliance with local electrical codes.
What Are The Electrical Requirements For An Electric Water Heater?
An electric water heater typically requires a dedicated circuit with a voltage of 240 volts and a wattage that depends on the size and capacity of the water heater. It is recommended to consult a qualified electrician to ensure compliance with local electrical codes.
Conclusion
Installing an electric water heater doesn’t have to be intimidating or complicated. By following the step-by-step guide provided in this blog post, you can successfully install your own electric water heater with ease. Remember to shut off the power, gather the necessary tools, and follow all safety precautions.
With a little patience and attention to detail, you’ll have a reliable and efficient source of hot water in no time. Now, go ahead and make your home more comfortable with your newly installed electric water heater!