To install a new gas stove, first disconnect the old unit and ensure you have the necessary gas and electrical connections in place. Then, carefully align and connect the new stove to the gas supply and secure it to the floor.
Choosing The Right Gas Stove For Your Needs
Consider your cooking habits and requirements
When it comes to choosing a new gas stove for your kitchen, it’s essential to consider your cooking habits and requirements. This will help you find the stove that best meets your needs and enhances your cooking experience.
Start by evaluating how often you cook and what types of dishes you typically prepare. Are you an occasional cook who prefers simple meals, or do you consider yourself a culinary enthusiast who loves experimenting with complex recipes? The answers to these questions will influence the features you should prioritize in a gas stove.
If you tend to cook frequently and enjoy trying out various recipes, a gas stove with multiple burners and a spacious oven would be ideal. This allows you to simultaneously cook multiple dishes and bake larger items like roasts or holiday turkeys. On the other hand, if you primarily cook quick meals or live alone, a smaller gas stove with fewer burners might suit you better.
Determine the size and type of gas stove suitable for your kitchen layout
Once you’ve considered your cooking habits, it’s time to determine the size and type of gas stove that will fit perfectly within your kitchen layout. This step is crucial to ensure optimal functionality and aesthetics in your cooking space.
Begin by measuring the available space in your kitchen where the stove will be installed. Take note of the width, depth, and height of the designated area. These measurements will guide you in selecting a gas stove that fits seamlessly into your kitchen without any compatibility issues.
Additionally, consider the layout of your kitchen and how the stove will be positioned in relation to other appliances and countertops. If you have limited space, a compact and freestanding gas stove might be the best choice. However, if you have ample room and prefer a more integrated look, you may opt for a built-in gas stove that can be incorporated into your cabinetry.
Lastly, consider whether you want a gas stove with additional features such as a convection oven, griddle, or grill. These extras can greatly enhance your cooking capabilities but also require extra space. Choose wisely based on your preferences and the available kitchen space.
Gathering The Necessary Tools And Materials
Before you begin the installation process for your new gas stove, it’s important to gather all the necessary tools and materials. Having everything at hand will make the process smoother and save you time and frustration. Here are the essential tools and materials you’ll need:
GAS HOSE
The gas hose is a crucial component for connecting your gas stove to the gas supply. Make sure to choose a high-quality, durable hose that meets safety standards. It’s essential to measure the distance between the stove and the gas supply to ensure you purchase the correct length of hose. This will prevent any unnecessary tension or bending which may lead to leaks or damage.
GAS SHUT-OFF VALVE
A gas shut-off valve is an important safety mechanism that allows you to quickly and easily turn off the gas supply in case of emergencies or when the stove needs maintenance. It’s typically located near the gas meter or close to the stove. Before starting the installation process, ensure that the shut-off valve is easily accessible and fully functional.
PIPE WRENCH
A pipe wrench is a must-have tool for installing a new gas stove. This adjustable wrench will help you tighten and secure the gas hose connections, ensuring a leak-free installation. Make sure to choose a pipe wrench that fits comfortably in your hand and has a strong grip, allowing you to apply enough force to tighten the connections properly.
PIPE SEALANT
When connecting the gas hose to the gas supply, it’s crucial to use a pipe sealant to create a tight and secure seal. This sealant is specially formulated for gas connections and helps to prevent gas leaks. Be sure to select a pipe sealant that is compatible with both the materials of your gas hose and the gas supply pipes.
TEFLON TAPE
Another essential item you’ll need for a gas stove installation is Teflon tape, also known as plumber’s tape. This thin tape is used to wrap around the threaded parts of the gas hose connections to create a reliable seal. The Teflon tape helps to prevent leaks and ensures proper gas flow. Make sure to wrap the tape in the direction of the thread to prevent it from unraveling during the connection process.
ADJUSTABLE WRENCH
In addition to a pipe wrench, it’s useful to have an adjustable wrench on hand. This versatile tool will come in handy for various aspects of the installation process, such as removing or adjusting gas supply pipes and fittings. Choose an adjustable wrench that fits comfortably in your hand and has a wide opening range to accommodate different sizes of nuts and bolts.
SCREWDRIVER
A screwdriver is a common tool that most people have in their toolbox. However, double-check that you have one available that matches the types of screws typically used in gas stove installations. A flathead or Phillips head screwdriver is usually sufficient for most purposes during the installation process.
By gathering these necessary tools and materials before you start the installation, you’ll save time and ensure a smooth and successful process. Remember to follow all safety precautions and manufacturer’s instructions while installing your new gas stove.
Measuring And Preparing The Space
Before installing a new gas stove in your kitchen, it is essential to measure the space and properly prepare the area to ensure a safe and efficient installation. This step-by-step guide will walk you through the process, starting with measuring the space for the gas stove.
Measure the space for the gas stove
The first step in installing a new gas stove is accurately measuring the space where it will be placed. This ensures that the stove will fit perfectly and allows for any necessary adjustments or modifications to be made beforehand. Here’s how to do it:
- Clear the area: Begin by removing any objects or appliances near the designated spot to create a clear workspace.
- Measure the width: Use a tape measure to determine the width of the space where the gas stove will be installed. Take measurements at the narrowest point to ensure a proper fit.
- Measure the depth: Next, measure the depth from the back wall to the front edge of the countertop. This measurement will help determine how far the stove should protrude into the room.
- Measure the height: Measure the height from the floor to the underside of the countertop to ensure that the stove will fit comfortably beneath it.
- Record the measurements: Write down the width, depth, and height measurements, as these will be crucial when selecting a gas stove that fits your space.
Once you have measured the space, it’s time to move on to the next step of preparing the area and ensuring proper ventilation.
Clean the area and ensure proper ventilation
Cleaning the area and providing adequate ventilation are essential for the safe installation and operation of a gas stove. Follow these steps to ensure a clean and well-ventilated space:
- Clear any debris: Remove any dirt, dust, or debris from the area where the gas stove will be placed. This will help prevent any obstructions or damage during the installation process.
- Check for gas leaks: Before installing the new stove, it’s important to inspect the gas line for any leaks. You can do this by using a mixture of dish soap and water and applying it to the connections. If you see bubbles forming, there may be a gas leak, and you should contact a professional immediately.
- Ensure proper ventilation: Gas stoves produce combustion gases that need to be properly vented to the outside. Make sure that the kitchen has adequate ventilation, such as an exhaust fan or a window that can be opened during cooking.
- Clear the surrounding area: Remove any flammable items, such as curtains or papers, from the vicinity of the gas stove to prevent fire hazards.
By measuring the space accurately and preparing the area properly, you can ensure a smooth and successful installation of your new gas stove. In the next section, we will guide you through the process of connecting the gas supply and installing the stove.
Checking Gas Connection And Safety Precautions
Before installing a new gas stove, it is crucial to check the gas connection and take the necessary safety precautions. Gas is a highly flammable substance, so ensuring a secure and accurate gas connection is essential for the safety of your household. In this section, we will guide you through the process of inspecting the existing gas line, turning off the gas supply, and verifying the functionality of safety valves.
Inspect the existing gas line
Begin by carefully examining the existing gas line to ensure it is in proper condition and free from any leaks or damages. Look for any signs of wear and tear, such as corrosion or cracks, and inspect the fittings for tightness. If you notice any abnormalities or suspect a gas leak, it is crucial to seek professional assistance immediately. Remember, safety should always be your top priority.
Ensure the gas supply is turned off
Prior to any installation work, it is crucial to turn off the gas supply to avoid any accidents or hazards. Locate the gas shut-off valve, usually located near the gas meter or in a utility room, and turn it off by rotating it to the perpendicular position to the gas line. This step is essential to prevent any gas from escaping during the installation process.
Verify that all safety valves are functioning accurately
Checking the functionality of the safety valves is a critical step to ensure the safe operation of your gas stove. Start by examining the pressure relief valve, which is designed to release excess pressure from the gas line. Test the valve by gently lifting the lever and allowing it to snap back into place. If the valve does not snap back or if you notice any leaks, it is necessary to replace the valve before proceeding.
In addition to the pressure relief valve, also inspect the shut-off valve, which is responsible for controlling the gas flow to the stove. Make sure the valve is in good condition and functions smoothly. To check its proper operation, turn the handle to open and close the valve, ensuring it turns easily and completely shuts off the gas supply.
By inspecting the existing gas line, turning off the gas supply, and verifying the accurate functioning of safety valves, you can ensure a safe environment and prevent any potential gas-related accidents or hazards. Taking these necessary precautions is essential before proceeding with the installation of your new gas stove.
Disconnecting And Removing The Old Gas Stove
Are you looking to upgrade to a new gas stove in your kitchen? Installing a new gas stove can not only enhance the look and functionality of your kitchen but also provide you with more efficient cooking. However, before you can enjoy your new appliance, you need to disconnect and remove the old gas stove. In this section, we will guide you through the process, step by step, ensuring a smooth transition from your old appliance to the new one.
Shut off the gas supply
The first step in disconnecting and removing your old gas stove is to shut off the gas supply. This is an essential safety measure to prevent any gas leaks during the process. Locate the gas shut-off valve, typically situated on the gas line near the stove. Turn the valve clockwise until it is fully closed. This will cut off the gas supply to the stove, ensuring a safe working environment while you proceed with the removal.
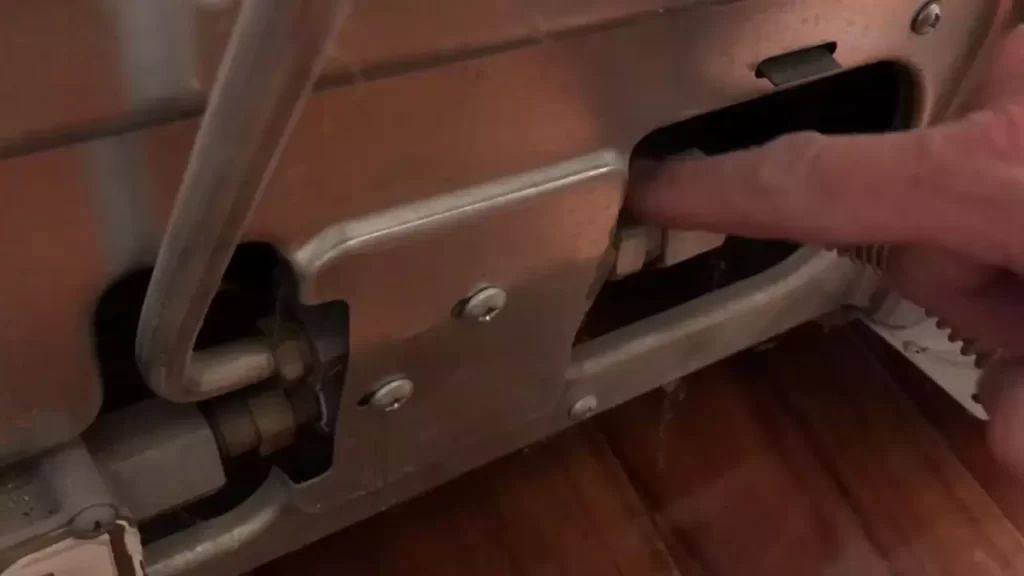
Disconnect the gas line
Once the gas supply is shut off, you can move on to disconnecting the gas line from the old stove. Start by locating the gas flex line, which is connected to the back of the stove. Using an adjustable wrench, loosen the connector nuts on both ends of the flex line by turning them counterclockwise. Take caution not to damage the line or the fittings while doing so. Once the nuts are loosened, carefully remove the flex line from both the stove and the gas line outlet.
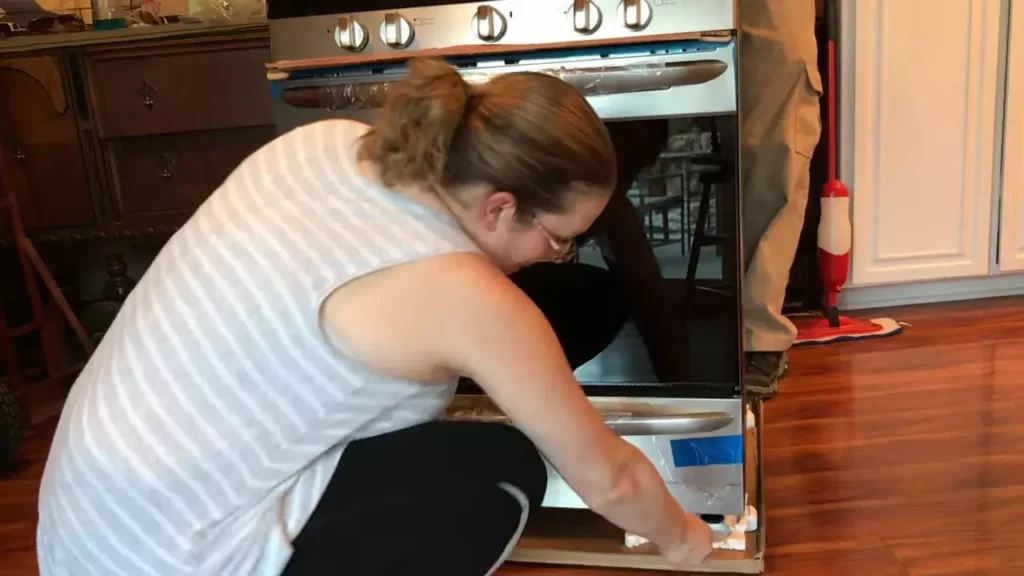
Remove the old gas stove from its position
With the gas line disconnected, it’s time to remove the old gas stove from its position. Before proceeding, make sure you have a clear path and enough space to safely maneuver the appliance. Start by removing any cookware or accessories from the stove, ensuring it is empty and lightweight. Carefully pull the stove away from the wall, being mindful of any gas or electrical connections that may still be attached. If needed, ask someone to assist you in lifting and moving the stove to avoid strain or injury.
If the stove is secured to the wall or floor, such as with screws or brackets, use appropriate tools to remove these fasteners. Take note of the location of these fasteners, as you may need to reattach them when installing the new gas stove.
Once the old gas stove is completely detached and removed from its position, you can proceed to the next step of installing your new gas stove. But before you do that, it’s a good idea to clean the area where the old stove was located, ensuring a fresh and tidy start for your new appliance.
Connecting The Gas Line And Installing The New Gas Stove
Connecting the gas line and installing a new gas stove can seem like a daunting task, but with the right knowledge and proper precautions, it can be done safely and efficiently. In this section, we will take you through the step-by-step process of connecting the gas line to your new gas stove. We will cover everything from applying pipe sealant and Teflon tape to securing the gas hose properly and testing for gas leaks. So let’s get started!
Connect the Gas Line to the New Gas Stove
Firstly, before connecting the gas line to your new gas stove, ensure that the gas supply valve is turned off. This valve is usually located behind the stove or in the basement near the gas meter. Once the valve is closed, you can proceed with the following steps:
- Locate the gas line connection on the back of your new gas stove. It is typically a metal nipple or a threaded connection.
- Inspect the connection to ensure it is clean and free from any debris or damage. If needed, clean the connection using a soft cloth.
- Apply pipe sealant to the threads of the gas line connection. This will help create a tight seal and prevent any gas leaks. Use a brush or your finger to evenly apply the sealant.
- Next, wrap Teflon tape clockwise around the threads of the gas line connection. Make sure to wrap it tightly and evenly to ensure a proper seal.
- Gently thread the gas line connection onto the gas line connection on the back of your new gas stove. Use an adjustable wrench to tighten it securely, but be careful not to over-tighten.
Secure the Gas Hose Properly
After connecting the gas line to your new gas stove, it is essential to secure the gas hose properly to ensure the safe operation of your appliance. Follow these steps to secure the gas hose:
- Locate the other end of the gas hose, which should be connected to the gas supply valve.
- Inspect the hose for any damage or wear. If you notice any signs of damage, replace the hose before proceeding.
- Ensure that the hose is long enough to reach from the gas supply valve to the gas line connection on the back of the stove without any strain or tension.
- Using a wrench, tighten the hose connection at both ends. Make sure the connections are secure to prevent any gas leaks.
- Position the hose in a way that it does not obstruct the stove or create any tripping hazards. You can use cable ties or clips to secure the hose in place.
Test for Gas Leaks
Safety is paramount when it comes to working with gas appliances. To ensure there are no gas leaks, it is crucial to perform a thorough test. Here’s how you can test for gas leaks:
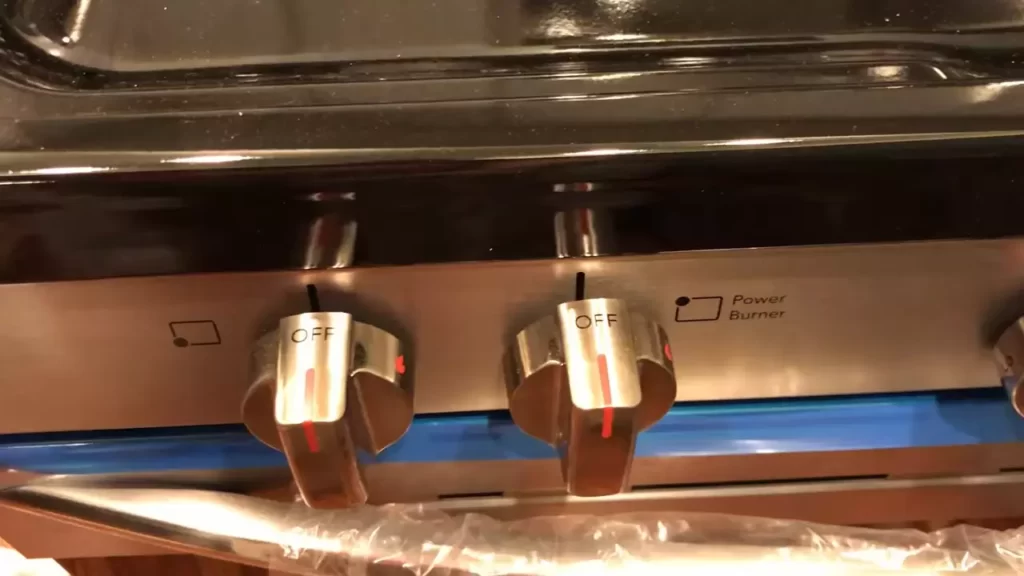
- Turn on the gas supply valve and ensure that all burner knobs on the stove are in the off position.
- Mix a solution of water and dish soap in a spray bottle.
- Spray the soapy solution around the connections on the gas line, hose, and stove connection.
- Observe if any bubbles form. If bubbles appear, it indicates a gas leak. In this case, turn off the gas supply immediately and tighten the connections. If the issue persists, consult a professional.
- If no bubbles appear, you can proceed to test the burners and oven to ensure they ignite properly and function as intended.
By following these steps and taking the necessary precautions, you can safely and successfully connect your gas line and install your new gas stove. Always consult the stove manufacturer’s instructions and, if necessary, seek professional assistance to ensure a trouble-free installation and optimal performance of your gas stove.
Checking For Gas Leaks
Apply a soapy water solution to the connections
One crucial step in installing a new gas stove is checking for gas leaks. This is an essential safety precaution to ensure that the connections are secure and the gas is not escaping. To do this, you will need to apply a soapy water solution to the connections. This solution will help you detect any gas leaks by forming bubbles if there is a leak.
Observe for any bubbles, indicating a gas leak
After you have applied the soapy water solution to the connections, it’s time to observe for any bubbles, indicating a possible gas leak. Bubbles will form if there is a leak, making it easier for you to identify and fix the problem. Take your time and carefully examine each connection to ensure there are no leaks present.
If you notice any bubbles forming around the connections, it is important to take immediate action. A gas leak can be hazardous and should be addressed promptly. In case you encounter a gas leak, it is recommended to turn off the gas supply and seek professional assistance to fix the issue. Your safety is paramount, and it’s always better to be cautious when dealing with gas appliances.
Remember:
- Apply the soapy water solution to each connection.
- Take your time and observe for any bubbles.
- Address any gas leaks immediately.
- Turn off the gas supply if a leak is detected.
- Seek professional help to fix the issue.
Testing The Functionality Of The Gas Stove
Once you have successfully installed your new gas stove, it’s important to ensure that all the burners and the oven are working properly. This step is crucial to ensure the safety and efficiency of your appliance. In this section, we will guide you on how to test the functionality of your gas stove and make any necessary adjustments.
Ensure all burners and the oven are working properly
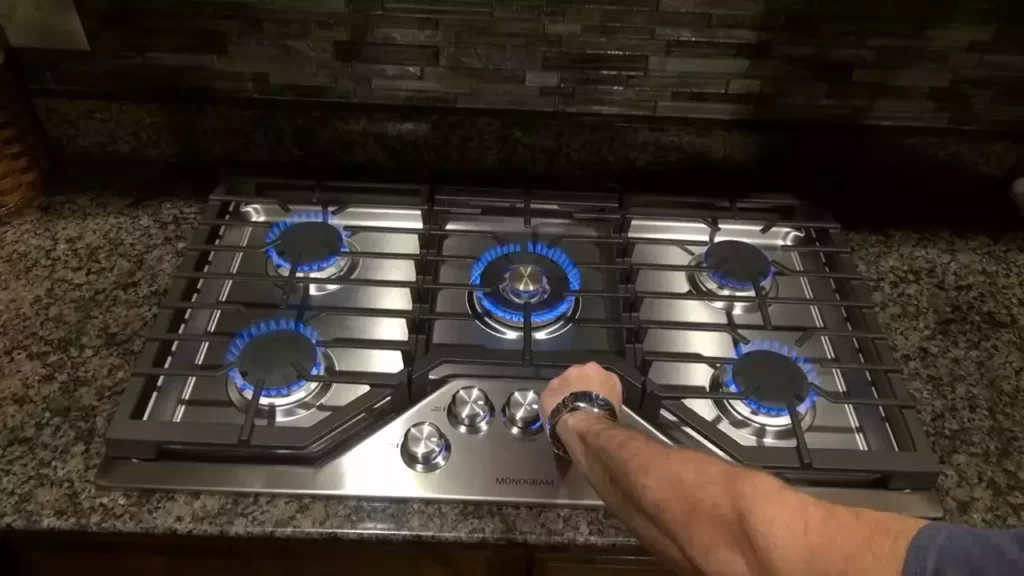
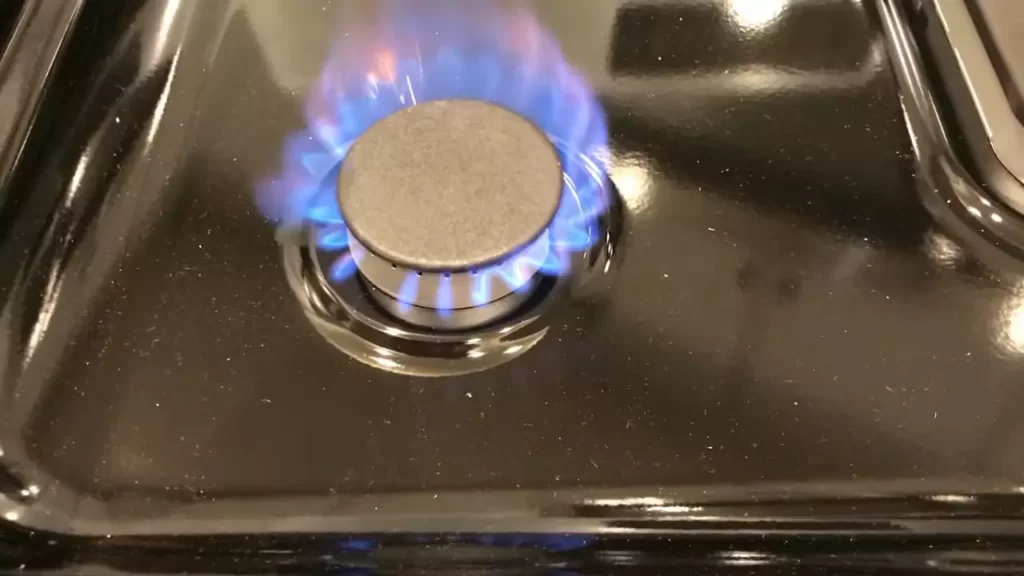
Start by checking each burner individually. Turn the knobs to ‘Light’ or the appropriate setting, depending on the model of your stove. You should hear a clicking sound indicating that the ignition is working. Look for a blue flame with a yellow tip, which is a sign of proper combustion. If any burner fails to ignite or produces a yellow or orange flame, there might be an issue with the gas flow or the burner itself.
If you notice any problems with the burners, check that the gas supply valve is fully open and the gas line is securely connected. Additionally, ensure that the burner caps and grates are properly placed and aligned, allowing for proper airflow. If the issue persists, it is recommended to consult a professional for further assistance.
Next, move on to testing the oven. Set the oven temperature to a desired level and allow it to preheat. Make sure the oven door is properly closed during the preheating process. Once the oven reaches the desired temperature, check for any unusual smells, sounds, or fluctuations in the temperature. If everything seems normal, the oven is functioning correctly.
Adjust the flame height as necessary
It’s important to ensure that the flame height is appropriately adjusted for optimal cooking results and energy efficiency. To do this, follow these steps:
- Turn on one of the burners to the desired temperature.
- If the flame is too low or too high, locate the flame adjustment screw. This screw is usually located near the burner control knob or inside the burner itself.
- Using a flat-head screwdriver, turn the adjustment screw clockwise to increase the flame height or counterclockwise to decrease it.
- Make small adjustments and keep checking the flame until you achieve the desired height.
Remember, it’s essential to keep the flame height consistent across all burners to ensure even cooking.
By testing the functionality of your gas stove and making any necessary adjustments, you can ensure that you will enjoy safe and efficient cooking experiences in your kitchen. If you encounter any persistent issues or concerns, it is advisable to seek professional assistance to address them effectively.
Securing And Levelling The Gas Stove
Once you have successfully disconnected and removed your old gas stove, it’s time to install the new one. Properly securing and levelling the gas stove is crucial for both safety and optimal performance. In this section, we will guide you through the steps to ensure your gas stove is securely in place and properly levelled. Let’s get started!
Ensure the gas stove is securely in place
Securing your gas stove is of utmost importance to prevent any accidents or movement during operation. To ensure it is securely in place, follow these steps:
- Locate the mounting brackets or legs on the bottom of your gas stove. These are designed to keep the stove stable.
- Place the stove in the desired position, aligning the brackets or legs with the designated spots on the floor.
- Use a screwdriver or wrench to tighten the screws or bolts on the mounting brackets or legs, ensuring they are firmly attached to the floor. This will provide additional stability and prevent any movement during use.
By securely fastening the gas stove, you can have peace of mind knowing it won’t shift or wobble while cooking, minimizing the risk of accidents and damage to the stove or surrounding area.
Use a level to ensure it is properly leveled
Leveling the gas stove is essential for its optimum performance and longevity. A properly leveled stove ensures even cooking and efficient heat distribution. Follow these steps to level your gas stove:
- Place a level on top of the gas stove, positioning it in the center.
- Check the bubble indicator on the level. If it is centered between the lines, your stove is already properly leveled. If not, proceed to the next step.
- Adjust the legs or leveling feet on the bottom of the stove. Turn them clockwise to raise the stove or counterclockwise to lower it, depending on the direction needed to level the stove. Use the level to check the progress and make necessary adjustments until the bubble indicator is centered.
Properly leveling your gas stove ensures that your pots and pans sit flat on the burners, allowing for even cooking and preventing any potential spills or accidents.
Remember, securing and leveling your gas stove are essential steps in the installation process. By following these guidelines, you can ensure the safety and optimal performance of your new gas stove. Next, we will move on to the final steps of connecting the gas supply and testing for leaks. Stay tuned!
Cleaning And Finishing Touches
Remove any dirt or debris
Before installing your new gas stove, it is essential to ensure that the area is clean and free from any dirt or debris. This will not only improve the aesthetics but also prevent any potential hazards or malfunctions. So, take the time to thoroughly clean the space where the stove will be placed.
Install any additional accessories or features
In order to enhance the functionality and convenience of your gas stove, it is important to consider installing any additional accessories or features. This could include a range hood for better ventilation, a backsplash to protect the wall from grease stains, or even a storage drawer for your cookware. To ensure a seamless installation, carefully follow the manufacturer’s instructions and seek professional help if needed.
Give the gas stove a final wipe down
Once the gas stove has been properly installed, it is time to give it a final wipe down. This step helps in removing any fingerprints, smudges, or dust that might have accumulated during the installation process. Use a gentle non-abrasive cleaner and a soft cloth to wipe the surfaces of the stove, including the control knobs, glass cooktop, and stainless steel exterior. Pay attention to any hard-to-reach areas and ensure that the stove is sparkling clean.
Important Safety Reminders
When installing a new gas stove in your home, it is crucial to prioritize safety. Gas stoves can be convenient and efficient for cooking, but they also pose certain risks if not handled properly. To ensure the well-being of yourself and your family, keep these important safety reminders in mind:
Keep flammable items away from the gas stove
One of the primary safety precautions to observe when installing a new gas stove is to keep flammable items far away from the stove. This includes things like towels, curtains, paper, and plastic. These materials can easily catch fire if they come into contact with the open flame or hot surfaces of the stove. To minimize the risk of accidents, make sure there is adequate clearance around the stove, about 30 inches on each side, and at least 24 inches of space above it. This will help prevent any potential ignition of nearby flammable objects.
Regularly inspect and clean the gas stove and components
Maintaining a clean and well-functioning gas stove is not just about aesthetics; it is also crucial for safety. Regularly inspect the gas stove and its components for any signs of wear, damage, or blockages. Check the gas lines for leaks, ensuring that they are properly connected and tightened. Clear any debris or obstructions from the burner ports and ensure they are functioning correctly.
Additionally, inspect the burner caps, grates, and igniters for any buildup of grease or residue, as this can increase the risk of fire. Clean these components with warm soapy water or a mild degreaser to maintain optimal performance and safety. By conducting periodic inspections and cleanings, you can prevent potential hazards and extend the lifespan of your gas stove.
Remember, safety should always be your topmost priority when installing and using a gas stove. By following these important safety reminders, you can enjoy the benefits of a new gas stove without compromising your well-being or peace of mind.
Disclaimer: This blog post is intended for informational purposes only. Consult with a professional for specific installation guidelines and safety recommendations.
Gas Stove Maintenance Tips
Proper maintenance is essential to keep your gas stove running efficiently and safely. Regular cleaning and checking for worn-out parts can help prolong the lifespan of your stove and prevent any issues in the future. In this section, we will discuss two key gas stove maintenance tips: cleaning the burners and oven regularly and checking and replacing any worn-out parts.
Clean the burners and oven regularly
Regular cleaning of the burners and oven is crucial to maintain the performance and appearance of your gas stove. Built-up grease and food residues can not only affect the efficiency of the burners but also pose a fire hazard. Here are some steps to follow when cleaning your stove:
- Remove the grates and burner caps: Start by removing the grates and burner caps from your gas stove. These parts can usually be lifted off easily. Place them in a sink filled with warm, soapy water to soak.
- Scrub the burners: Using a scrub brush or toothbrush, gently scrub the burners to remove any stubborn residue. Make sure to clean the small holes thoroughly to ensure proper gas flow. Rinse the burners with warm water and allow them to dry completely before reassembling.
- Clean the oven: If your gas stove has a built-in oven, it’s essential to clean it regularly as well. Wipe down the interior with a damp cloth or sponge, and use an oven cleaner for more stubborn stains. Don’t forget to clean the oven racks as well.
- Reassemble and test: Once the burners and oven are completely dry, reassemble them carefully. Test that the burners ignite properly and the oven heats up as expected.
Check and replace any worn-out parts
Regularly inspecting your gas stove for any worn-out parts is essential for safety and efficient performance. Here are a few components to check:
- Gas supply lines: Inspect the gas supply lines for any signs of wear or damage. Look for cracks, corrosion, or loose connections. If you notice any issues, it’s best to consult a professional to repair or replace the gas lines.
- Igniters: Test the igniters on your stove to ensure they are working correctly. If you notice any sparking issues or weak ignition, it may be time to replace the igniters.
- Control knobs: Check the control knobs for any damage or signs of wear. Replace any knobs that are cracked, loose, or difficult to turn.
- Seals and gaskets: Inspect the seals and gaskets around the oven door for any wear or damage. Damaged seals can cause heat loss and affect the cooking process. Replace any worn-out seals to maintain optimal performance.
Remember, if you are unsure about any gas stove maintenance tasks, it’s always best to consult a professional. Regular cleaning and checking for worn-out parts will not only keep your gas stove performing at its best but also ensure the safety of your kitchen.
Frequently Asked Questions On How To Install A New Gas Stove
Can You Install A Gas Stove Yourself?
No, it is not advisable to install a gas stove yourself. This task should be performed by a professional to ensure safety and compliance with regulations.
Is It Difficult To Replace A Gas Stove?
Replacing a gas stove is not difficult. It can be a straightforward process if done carefully and by following the proper guidelines. Seek professional help if you are unsure or need assistance.
What Do I Need To Install New Gas Stove?
To install a new gas stove, you will need a gas line hookup, appropriate ventilation, a gas shut-off valve, a flexible hose or pipe for connection, and a power source if the stove has any electrical components. Make sure to hire a professional for installation to ensure safety and compliance with local regulations.
Do You Need A Gas Hookup For A Gas Stove?
Yes, a gas stove requires a gas hookup.
Conclusion
To sum up, installing a new gas stove might seem daunting at first, but with the right knowledge and preparation, it can be a smooth process. From gathering the necessary tools to ensuring safety precautions, following the step-by-step instructions will simplify the installation.
Remember to refer to the manufacturer’s manual for specific guidelines. By taking your time and paying attention to details, you’ll have a functional and stylish gas stove in no time. Happy cooking!