To install an island range hood, you will need to carefully measure and mark the location, attach the bracket and support system, connect the exhaust duct, secure the hood, and test the functionality. Proper installation ensures effective ventilation and a sleek and stylish addition to your kitchen.
An island range hood is an essential appliance in any kitchen as it helps remove smoke, fumes, and odors while cooking. Installing a range hood above an island can be a bit more challenging compared to a wall-mounted one. However, with the right tools and following these simple steps, you can easily install an island range hood and enhance the functionality and aesthetics of your kitchen.
We will guide you through the process of installing an island range hood so that you can enjoy a clean and odor-free kitchen environment.
Requirements For Installing An Island Range Hood
Installing an island range hood in your kitchen can greatly improve the air quality and aesthetic appeal of the space. However, before you begin the installation process, there are several requirements you need to consider. From choosing the right hood for your kitchen to ensuring proper ventilation, here are the essential steps and materials you’ll need to successfully install an island range hood.

Choosing the right hood for your kitchen
When selecting an island range hood, several factors need to be taken into account. Firstly, consider the size of your kitchen and the amount of cooking you typically do. A larger kitchen or one that involves heavy cooking may require a more powerful hood with higher CFM (cubic feet per minute) capacity.
Additionally, think about the aesthetics of your kitchen and choose a hood that complements the overall design. Make sure to measure the space above your cooktop to ensure the hood fits appropriately. Look for hoods with adjustable heights and widths for a perfect fit.
Ensuring proper ventilation
Proper ventilation is crucial for the effective operation of an island range hood. Begin by identifying the location of your kitchen’s existing vent stack or ductwork. If your kitchen doesn’t have one, you may need to create a new duct path to exhaust the air outside your home. Ensure that the ductwork is wide enough and has a straight path for maximum efficiency.
Furthermore, consider the distance between the hood and the duct outlet, making sure it is within the manufacturer’s recommended guidelines. If required, consult a professional to help with the installation of the ductwork and to ensure it complies with building codes.
Gathering the necessary tools and materials
Now that you have chosen the right hood and sorted out the ventilation, it’s time to gather the necessary tools and materials for the installation process. Here is a list of items you’ll require:
- Screwdriver (Phillips and flathead)
- Drill
- Tape measure
- Pencil
- Level
- Wire nuts
- Screws
- Electrical wire
- Wall mounting brackets
- Rope or pulley system (for lifting the hood into place)
Ensure that you have all the necessary tools and materials before you begin the installation to avoid any delays or disruptions during the process. It’s also a good idea to familiarize yourself with the manufacturer’s instructions for your specific hood model and have them on hand.
By following these requirements and ensuring you have chosen the right hood for your kitchen, addressing proper ventilation, and gathering the necessary tools and materials, you’ll be well-prepared to install an island range hood in your kitchen. This installation will not only enhance the functionality of your cooking space but also elevate its visual appeal.

Preparing The Kitchen For Installation
Before installing an island range hood in your kitchen, it is important to properly prepare the area to ensure a successful and efficient installation. This includes measuring and marking the position for the hood, checking for obstructions or obstacles, and determining the required electrical and ventilation connections.
Measuring and marking the position for the hood
One of the first steps in preparing the kitchen for the installation of an island range hood is to measure and mark the position where the hood will be installed. This will ensure that the hood is centered above the cooking surface and properly aligned with the rest of the kitchen.
- Start by measuring the width of your cooktop or range. This will help you determine the appropriate width for your range hood.
- Next, mark the center point above your cooktop or range. This can be done by measuring the width of the cooktop or range and dividing it in half.
- Using a tape measure, measure the distance between the bottom of the hood and the cooking surface. This will help you determine the appropriate height for your range hood.
- Mark the desired height on the wall, making sure to account for any decorative elements or cabinets that may be in the way.
- Finally, use a level to ensure that the marks are straight and evenly aligned.
Checking for obstructions or obstacles
Prior to installing the island range hood, it is essential to check for any obstructions or obstacles that may interfere with the installation process. By doing this, you will be able to address any issues before they become a problem and ensure a smooth installation.
- Inspect the ceiling to ensure that there are no low-hanging light fixtures or other items that may obstruct the installation.
- Check the ventilation system to make sure that there are no exhaust vents or ductwork in the way.
- Verify that there are no electrical outlets or switches that will interfere with the installation.
- Take note of any structural elements, such as beams or joists, that may need to be accounted for during the installation process.
Determining the required electrical and ventilation connections
Proper electrical and ventilation connections are crucial for the functioning of an island range hood. Before starting the installation, it is important to determine the requirements for these connections and ensure they are in place.
| Electrical Connections | Ventilation Connections |
|---|---|
| Consult the manufacturer’s instructions to determine the electrical requirements for the range hood. This may include the voltage, amperage, and type of wiring required. | Identify the location of the range hood’s ventilation duct. Determine whether it will require a ducted or ductless installation. If ducted, ensure there is a clear path for the ductwork from the hood to the exterior of the home. |
| Consult a qualified electrician to install the necessary electrical outlets or make any electrical modifications as required. | If a ductless installation is chosen, make sure there is adequate space for a charcoal filter or recirculation kit. |
| Consider the placement of the electrical outlet and ensure it is easily accessible for connection to the range hood. | If a ducted installation is chosen, determine the appropriate size and type of ductwork required. |
By carefully measuring and marking the position for the hood, checking for obstructions or obstacles, and determining the required electrical and ventilation connections, you will be well-prepared to install an island range hood in your kitchen. These preliminary steps will help ensure a smooth and successful installation process, resulting in a functional and aesthetically pleasing addition to your kitchen space.

Installing The Island Range Hood
Installing an island range hood not only adds a stylish and functional element to your kitchen, but it also improves the air quality by effectively removing smoke, odors, and heat from the cooking area. To ensure the proper installation of your island range hood, follow these steps:
Assembling the hood components
Before you begin the installation process, it’s essential to assemble all the necessary components of the island range hood. This typically includes the hood body, chimney extensions (if required), mounting brackets, screws, and other hardware. Refer to the manufacturer’s instructions to make sure you have all the correct parts.
To assemble the hood, follow these steps:
- Place the hood body on a flat surface, such as a countertop or floor.
- Attach the chimney extensions (if applicable) to the top of the hood body, following the manufacturer’s instructions.
- Secure the chimney extensions using the provided screws or fasteners.
- Double-check that all the components are securely attached and aligned correctly.
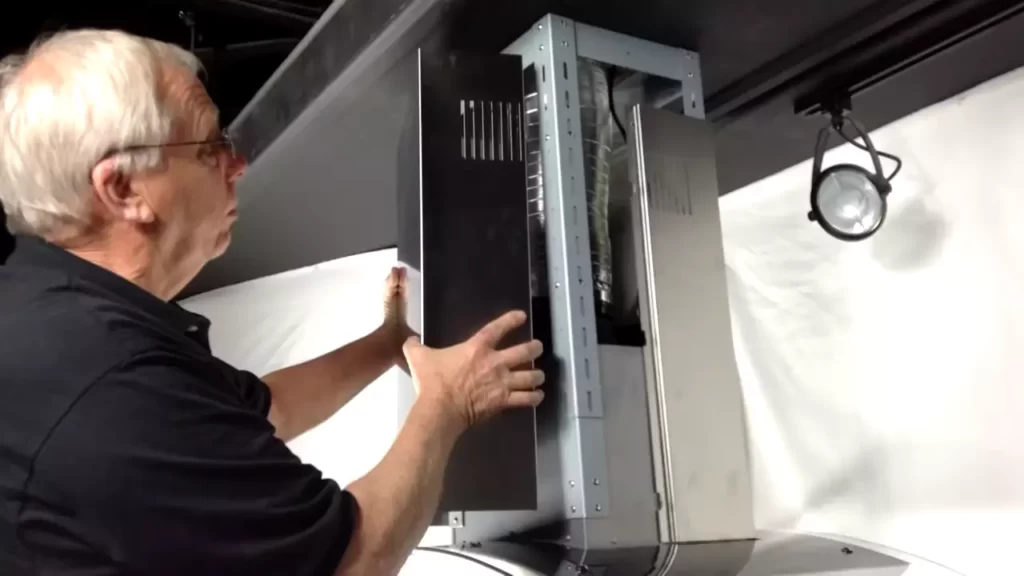
Mounting the hood to the ceiling
Once you have assembled the hood components, it’s time to mount the island range hood to the ceiling. Keep in mind that the specific mounting method may vary depending on the model and design of your hood. Refer to the manufacturer’s instructions for precise guidance. In general, the mounting process involves these steps:
- Identify the mounting bracket locations on the ceiling, ensuring they are positioned to align with the hood’s mounting holes.
- Secure the mounting brackets to the ceiling using appropriate screws or anchors.
- Gently lift the hood and align the mounting holes with the brackets.
- Securely attach the hood to the brackets using the provided screws or hardware.
- Ensure the hood is level and properly aligned before tightening all the screws.
Making electrical connections
Once the hood is securely mounted, the next step is to make the necessary electrical connections. It’s crucial to consult a licensed electrician if you’re not confident with electrical work. To make the electrical connections:
- Locate the electrical wiring connection point on the hood.
- Connect the corresponding wires from the hood to the electrical supply, following proper wiring practices and safety guidelines.
- Secure the wires with wire connectors or terminal blocks, ensuring a secure and reliable connection.
- Double-check that all electrical connections are tight and properly insulated to avoid any electrical hazards.
Connecting the hood to the ventilation system
Finally, it’s time to connect the island range hood to the ventilation system, which will ensure the efficient removal of cooking fumes and odors. The specific method may vary depending on your kitchen’s configuration and the type of ventilation system you have. Here’s a general guide:
- Determine the location of the ventilation duct or pipe that will connect to the hood.
- Carefully measure and cut a hole in the ceiling or wall through which the ventilation duct will pass.
- Connect the ventilation duct to the appropriate opening or collar on the hood, following the manufacturer’s instructions.
- Secure the duct connection using clamps or duct tape, ensuring an airtight seal.
- Test the ventilation system by running the hood’s fan and checking for proper airflow.
By following these step-by-step instructions, you can successfully install an island range hood in your kitchen, improving both the aesthetics and functionality of your cooking space. Remember to consult the manufacturer’s instructions and seek professional assistance for any complex installation tasks.
Testing And Troubleshooting
After installing your island range hood, the next step is to ensure that it is functioning properly. This section will guide you through the process of testing and troubleshooting to make sure your range hood is working as expected.
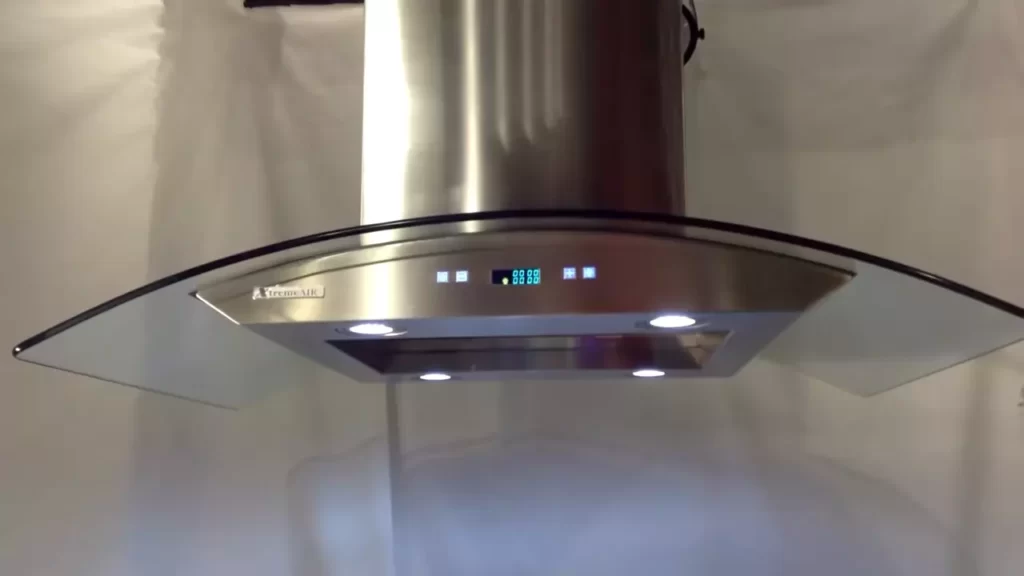
Checking for proper functionality
Once you have completed the installation, begin by checking for proper functionality of your island range hood. Here are the steps to follow:
- Turn on the power switch or plug in the range hood.
- Ensure that the lights on the range hood are working by turning them on.
- Power on the fan and check if it is operating smoothly. Listen for any strange noises or vibrations that could indicate a problem.
- Test the different fan speeds to ensure they are functioning correctly. Depending on the model, you may have multiple speed options available.
- Check if all control buttons are working. Press each button to confirm they are responsive and controlling the desired function.
Adjusting the fan settings and speeds
If you find that the fan speeds on your island range hood are not meeting your needs, you can adjust them. Follow these steps to adjust the fan settings and speeds:
- Refer to the manufacturer’s instructions to locate the fan speed settings on your range hood.
- Adjust the fan speed to your desired level using the control buttons or switches provided.
- Test the fan at different speeds to ensure it is functioning properly and generating the desired airflow.
- If necessary, make further adjustments until you are satisfied with the fan speed settings.
Troubleshooting common installation issues
In case you encounter any problems during or after the installation, here are some common installation issues and their possible solutions:
Issue 1: Range hood not turning on
Possible solution:
- Check if the power switch is turned on or if the range hood is properly plugged in.
- Inspect the circuit breaker or fuse box to ensure there is no electrical issue.
- If all else fails, consult the manufacturer’s manual or contact their customer support for assistance.
Issue 2: Excessive noise or vibrations
Possible solution:
- Ensure that all mounting screws and brackets are tightened securely.
- If the noise persists, check if any loose parts need to be tightened or if any parts need replacement.
- Consider installing vibration pads or isolating mounts to minimize noise and vibrations.
Issue 3: Inefficient airflow
Possible solution:
- Inspect the venting system for any obstructions or blockages that could be restricting airflow.
- Ensure that the vent ducts are properly connected and free from any leaks.
- If necessary, clean or replace the air filters to improve airflow.
By following the testing and troubleshooting steps provided above, you can ensure that your island range hood is properly installed and functioning optimally. Remember, if you encounter any persistent issues, always consult the manufacturer’s manual or seek assistance from their customer support.
Final Steps And Safety Measures
After successfully mounting your island range hood and ensuring its stable connection to the ceiling, it’s time to move on to the final steps and safety measures. These steps will help you maximize the performance of your range hood and ensure a safe and clean kitchen environment.
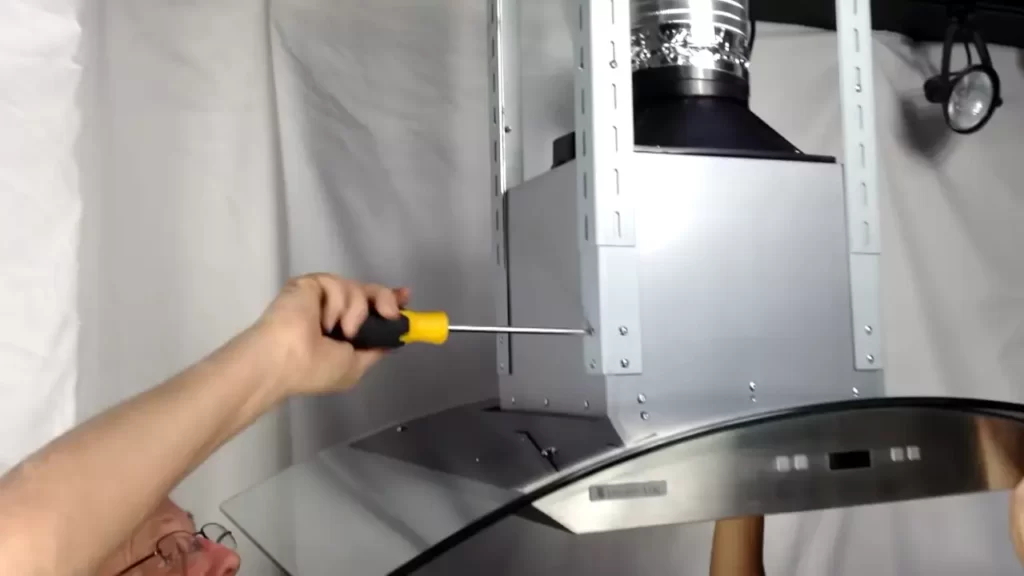
Securing the hood in place
Now that the range hood is securely mounted, it’s important to take further steps to ensure its stability and prevent any potential accidents. Here’s how you can properly secure the hood:
- Use screws to secure the hood to the ceiling mount, following the manufacturer’s instructions.
- Double-check that all screws are tightened securely to avoid any wobbling or movement of the hood.
- If your range hood has an extension piece, make sure it is properly attached to the main hood and secured in place.
- Inspect the connections for any loose parts or gaps, and tighten or adjust them as necessary.
Ensuring proper ventilation
Proper ventilation is crucial for the efficient operation of your island range hood and for maintaining good air quality in your kitchen. Here are some steps you can take to ensure proper ventilation:
- Check the ductwork for any potential leaks, damage, or blockages. If you find any issues, promptly repair or clean them.
- Ensure that the ductwork is properly connected to the hood and to the exterior vent. Use foil tape to seal any gaps or leaks.
- Consider installing a backdraft damper to prevent outside air from entering the kitchen when the hood is not in use.
- Regularly clean or replace the range hood filters to maintain optimal airflow and prevent grease buildup.
Cleaning and maintaining the hood for optimal performance
To ensure your island range hood continues to perform at its best, regular cleaning and maintenance are essential. Here are some tips to keep your hood in top shape:
- Wipe down the exterior surfaces of the hood regularly with a damp cloth and mild detergent to remove any grease or residue buildup.
- Clean the grease filters at least once a month, or as recommended by the manufacturer. Soak them in warm, soapy water, rinse, and allow them to air dry before reinstalling.
- Inspect the exhaust fan blades for any dust or debris accumulation. Use a soft brush or cloth to gently clean them.
- Check the light bulbs and replace any that are burnt out or dim. Remember to turn off the power before replacing the bulbs.
Following these final steps and safety measures will ensure your island range hood is securely installed, properly ventilated, and well-maintained. This will not only enhance the functionality and efficiency of your hood but also contribute to a clean and safe cooking environment in your kitchen.
Frequently Asked Questions On How To Install A Island Range Hood
Can You Put A Range Hood Over An Island?
Yes, you can install a range hood over an island. It helps to vent smoke, odors, and grease while cooking. This is essential for maintaining a clean and safe kitchen environment.
How Much Does It Cost To Install A Hood Vent Over An Island?
The cost of installing a hood vent over an island varies depending on factors like materials and labor. It typically ranges from $500 to $2,000.
Can I Install A Range Hood Myself?
Yes, you can install a range hood yourself. Just follow the installation instructions provided with the product. Make sure to turn off the power, mount the hood securely, and connect the wiring properly. If you’re not confident, it’s best to hire a professional for the installation to avoid any potential mistakes.
How Do You Position An Island Range Hood?
Position an island range hood by placing it directly above your cooktop so it can effectively capture and remove smoke, heat, and odors. Ensure it is mounted securely, at the appropriate height, and with proper ventilation to provide optimal performance.
Conclusion
Installing an island range hood can greatly enhance your kitchen’s functionality and aesthetics. By following the step-by-step guide provided in this blog post, you can easily complete the installation process. From measuring and preparing the space to connecting the ductwork and testing the hood, each stage is explained in detail to ensure a successful installation.
Now you can enjoy the benefits of a properly installed island range hood, such as improved air quality and a stylish focal point in your kitchen.