To install a gas line for a range, shut off the gas supply, disconnect the old line, connect a new flexible gas line to the range, and check for leaks using soapy water. Today, many households prefer using gas ranges for their cooking needs.
Gas ranges provide a more consistent and precise heat source compared to electric ranges. If you’re considering installing a gas line for your range, it is important to follow the proper procedure to ensure safety and functionality. We will guide you through the step-by-step process of installing a gas line for a range, from shutting off the gas supply to checking for leaks.
By following these instructions, you can have your gas range up and running in no time. So let’s get started!
Safety Precautions For Gas Line Installation
When it comes to installing a gas line for your range, safety should always be your top priority. Gas leaks and faulty installations can lead to serious risks, such as fire, explosions, and carbon monoxide poisoning. Therefore, it is crucial to follow strict safety precautions throughout the installation process.
Importance of following safety precautions
Following safety precautions is of paramount importance during gas line installation. Taking the necessary safety measures reduces the risk of accidents and ensures the well-being of everyone in the household. It not only protects you and your loved ones but also prevents any potential damage to your property.
Necessary safety equipment
Prior to starting the gas line installation, you must gather the necessary safety equipment. This ensures that you are adequately protected throughout the process. The essential safety equipment you will need includes:
- Protective eyewear
- Gloves
- Fire extinguisher
- Leak detection solution
- Gas valve shut-off tool
- Properly fitted masks and respirators
Make sure to wear your safety gear at all times during the installation to minimize any potential risks.
Steps to ensure safety while installing gas line
Installing a gas line requires careful attention to detail, and it’s crucial to follow the necessary steps to maintain safety. Here are the steps you should follow to ensure a safe gas line installation:
- Turn off the gas supply: Before starting any work, it is essential to shut off the main gas supply to your home. Locate the gas meter and turn the valve to the “off” position.
- Inspect existing gas lines: Check the existing gas lines for any signs of damage, corrosion, or leaks. If you notice any abnormalities, it’s best to consult a professional before proceeding.
- Plan the installation route: Determine the optimal route for the new gas line. Avoid placing it near electrical wires, water pipes, or flammable materials to minimize potential risks.
- Measure and cut the pipe: Using a measuring tape and pipe cutter, measure and cut the pipe to the appropriate length. Ensure a smooth and even cut to prevent leaks.
- Secure the pipe: Attach the pipe to the mounting brackets using appropriate fasteners. Make sure it is secure and does not have any sharp bends or kinks.
- Tighten fittings and valves: Use a wrench to tighten the fittings and valves securely. This helps prevent gas leaks and ensures a proper connection.
- Check for leaks: Apply a leak detection solution to all connections and joints. If there are any bubbles, it indicates a leak. In such cases, immediately shut off the gas supply and seek professional help.
- Test the system: Once you have completed the installation, open the gas supply valve and test the system for functionality. Ensure all appliances connected to the gas line are working correctly.
By following these safety precautions and steps, you can ensure a safe and successful gas line installation for your range. Remember, if you are uncertain or uncomfortable with any aspect of the installation process, it is always recommended to consult a professional gas line installer.
Assessing The Gas Supply And Appliance Requirements
Checking the existing gas supply
Before installing a gas line for your range, it is important to assess the existing gas supply to ensure it is suitable for the installation. Start by locating the gas meter, usually found on the exterior of your home. Check the gas meter to confirm that it is properly functioning and that the gas supply is active.
Next, inspect the existing gas lines to determine if they are in good condition. Look for any signs of corrosion, leaks, or damage. If you notice any issues, it is crucial to contact a professional gas fitter to assess and repair the lines before proceeding with the installation.
Determining the gas line capacity
To properly install a gas line for your range, you need to determine the capacity of the gas line. This is crucial as a gas line with insufficient capacity can lead to poor performance of the range and potential safety hazards.
To determine the gas line capacity, you will need to identify the size of the existing gas line. The size of the gas line is usually denoted by its diameter, measured in inches. A common size for residential gas lines is 1/2 inch, but it can vary depending on the gas load requirements of your home.
To confirm the size of the gas line, you can refer to the manufacturer’s manual or consult a professional gas fitter. Additionally, you can measure the diameter of the gas line by using a pipe measuring tool or comparing it to a known standard size.
Identifying the appliance requirements
Once you have assessed the gas supply and determined the gas line capacity, the next step is to identify the specific requirements of your range. Each range model may have different gas pressure and flow rate requirements, so it is essential to consult the manufacturer’s manual or specifications for your particular range.
The appliance requirements may include the necessary gas pressure, measured in pounds per square inch (PSI), and the required flow rate, measured in British thermal units per hour (BTU/h). These specifications are important to ensure the range operates efficiently and safely.
Keep in mind that if your gas supply does not meet the appliance requirements, you may need to upgrade the gas line or adjust the gas pressure using a suitable regulator. It is recommended to consult a professional gas fitter for assistance in making these adjustments.
Planning The Gas Line Installation
Before installing a gas line for your range, it’s crucial to carefully plan the entire process. By considering the necessary factors and following the proper steps, you can ensure a safe and efficient installation. This section will guide you through the various aspects to consider during the planning stage.
Obtaining necessary permits and permissions
One of the first and most important steps when planning a gas line installation is obtaining the necessary permits and permissions. Check with your local building department to understand the specific requirements for gas line installations in your area. Make sure to adhere to all safety regulations and obtain the required permits to avoid any legal issues.
Choosing the appropriate type of gas line
The type of gas line you choose for your range installation plays a crucial role in ensuring safety and efficiency. There are different options available, such as flexible, rigid, or semi-rigid gas lines. Consider factors such as the distance between the gas source and your range, local building codes, and your personal preferences when selecting the appropriate type of gas line.
Measuring and determining the route for the gas line installation
Accurate measurements and careful route planning are vital to ensure proper gas flow and avoid any obstructions. Measure the distance between the gas source and your range to determine the length of the gas line needed. Take into account any potential obstacles, such as walls or cabinets, and plan the route accordingly to minimize bends and ensure a smooth installation process.
Considering ventilation and clearance requirements
Proper ventilation and clearance are essential for a safe gas line installation. Ensure that there is sufficient space around the gas line and range to prevent any ventilation issues or overheating. Refer to the manufacturer’s guidelines for specific ventilation requirements and clearance distances to maintain the safety and performance of your range.
Selecting the right fittings and connectors
Choosing the right fittings and connectors is crucial for a secure and leak-free gas line installation. Use fittings and connectors that are compatible with your chosen gas line type and ensure they meet all safety standards. It’s also essential to check for any leaks or damage to fittings and connectors before and after installation to ensure the integrity of the gas line system.
Installing The Gas Line
Installing a gas line for your range is an essential task when it comes to upgrading your kitchen appliances. Whether you’re replacing an old gas line or installing a new one, it’s important to follow the necessary steps to ensure a safe and efficient installation. In this guide, we will walk you through the process of installing a gas line for your range, from turning off the gas supply to checking for leaks.
Turning off the gas supply
The first step in installing a gas line for your range is to turn off the gas supply. Safety should always be the top priority when dealing with gas, so make sure to locate and turn off the main gas valve in your home. It is usually located near the gas meter or in the basement. Once the gas supply is turned off, make sure to open windows and provide proper ventilation.
Removing the old gas line (if applicable)
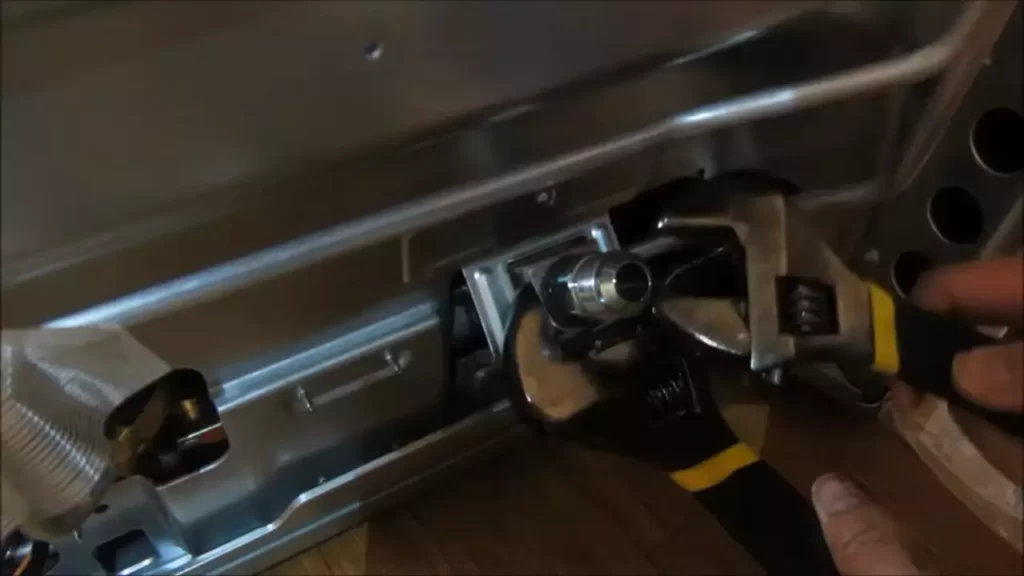
If you’re replacing an old gas line, the next step is to carefully remove the old line. Start by disconnecting it from the range and then use a pipe wrench to loosen any fittings. Be sure to have a bucket or some towels on hand to catch any residual gas or debris. Once the old gas line is completely disconnected, inspect it for any signs of damage or corrosion before disposing of it properly.
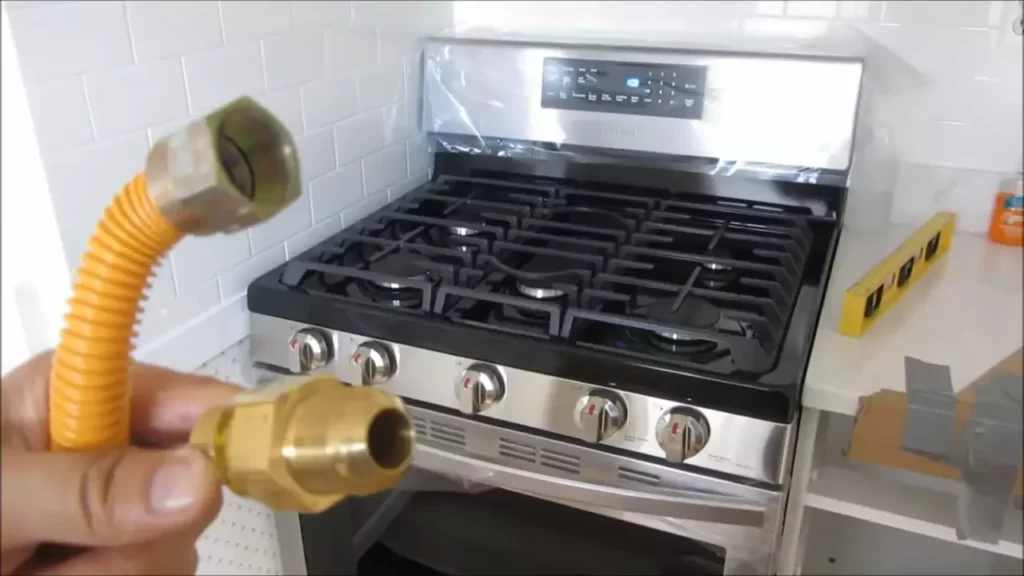
Cutting and preparing the new gas line
Now that the old gas line is out of the way, it’s time to cut and prepare the new gas line. Measure the distance from the gas supply connection to the range to determine the length of the new line. Use a tubing cutter or hacksaw to cut the new line to the appropriate length, making sure to remove any burrs or sharp edges.
Applying thread sealant and connecting pipe sections
Before connecting the pipe sections, it’s important to apply thread sealant to ensure a secure and leak-free connection. Apply a generous amount of sealant to the male end of each pipe section, spreading it evenly around the threads. Then, carefully connect the pipe sections using a pipe wrench to tighten the fittings. Be careful not to overtighten, as this can damage the threads.
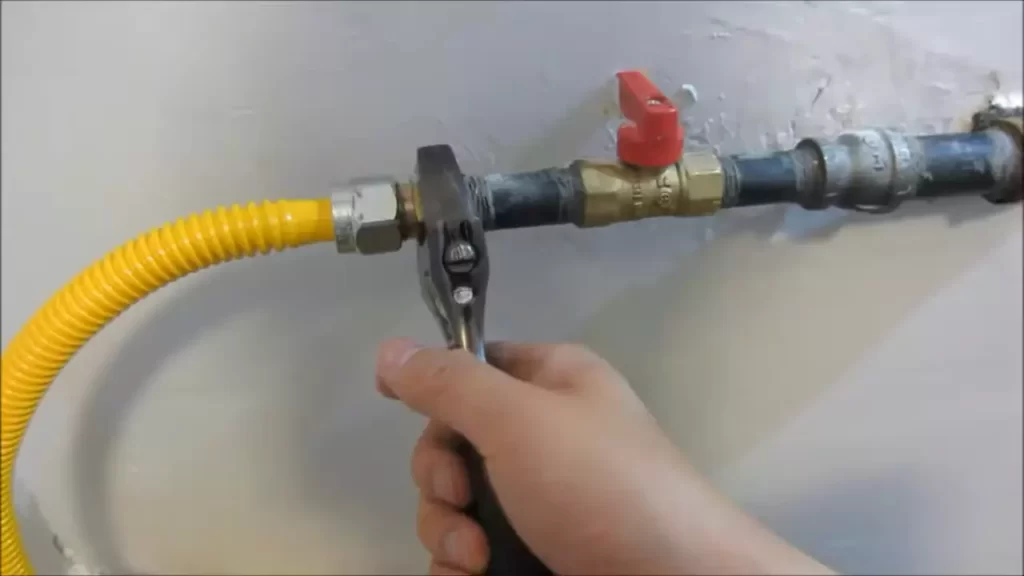
Installing shutoff valves and pressure regulators
Once the pipe sections are connected, it’s time to install shutoff valves and pressure regulators. Shutoff valves allow you to control the flow of gas to the range, while pressure regulators ensure a steady gas flow. Follow the manufacturer’s instructions to install these components properly, making sure to check for any leaks or loose fittings.
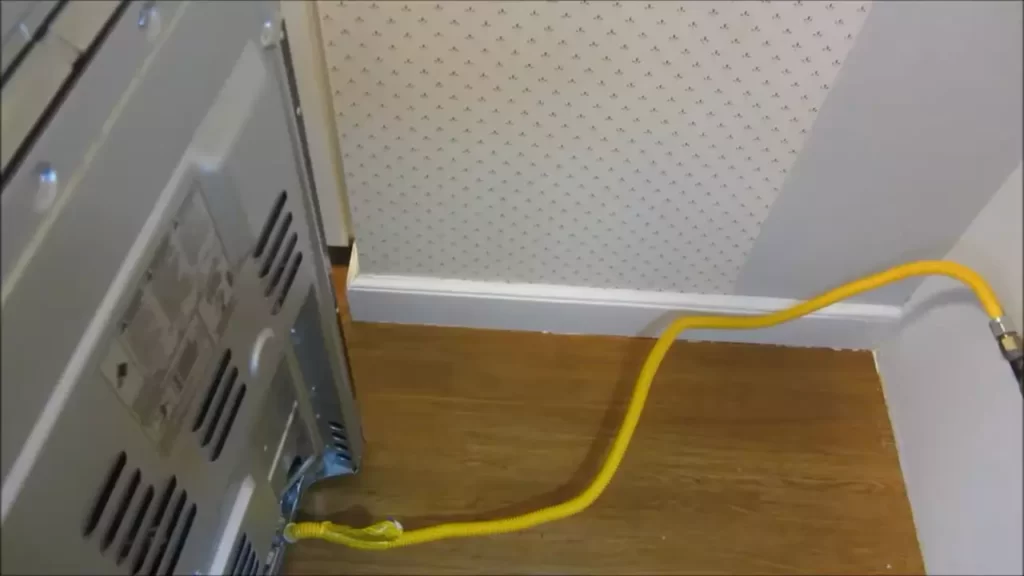
Securing the gas line and checking for leaks
With the gas line in place, it’s important to secure it properly to prevent any movement or damage. Use pipe straps or clips to secure the line along its route, making sure to leave enough slack for any movement of the range. Once the gas line is secured, it’s time to check for leaks. Apply a mixture of soap and water to all connections and fittings, then turn on the gas supply. If you see any bubbles forming, it indicates a leak. In such cases, turn off the gas supply immediately and tighten the connections further or seek professional assistance.
By following these steps, you can install a gas line for your range safely and efficiently. Remember to always prioritize safety and, if in doubt, consult a professional for assistance. Now that you have successfully installed the gas line, you can enjoy cooking your favorite meals with peace of mind and confidence.
Testing And Inspecting The Gas Line
Welcome to the next phase of installing a gas line for your range: testing and inspecting. This crucial step ensures your gas line is safe, reliable, and compliant with building codes and regulations. In this section, we will guide you through the necessary steps to conduct a pressure test, check for gas leaks, ensure proper connections and fittings, and perform a thorough inspection for compliance. Remember, if you are unsure or uncomfortable with any of these tasks, it’s always best to seek professional assistance.
Conducting a Pressure Test
A pressure test is essential to evaluate the integrity of your gas line. It involves pressurizing the line with air to detect any potential leaks. Before you begin, gather the necessary equipment:
- Pressure gauge
- Adapter fittings
- Soap and water mixture for leak detection
- Teflon tape for sealing connections
Here’s a step-by-step guide to conducting a pressure test:
- Turn off the gas supply at the main valve.
- Disconnect the range connector from the gas line.
- Attach the pressure gauge to the line using adapter fittings.
- Slowly open the gas supply valve.
- Monitor the pressure gauge for at least 15 minutes to ensure it remains steady. If the pressure drops, it indicates a leak.
- To detect leaks, apply the soap and water mixture to each connection and look for bubbles. If bubbles form, there is a leak.
- Tighten any loose connections and retest. If the problem persists, seek professional assistance.
Checking for Gas Leaks
Gas leaks can pose serious safety hazards, so it’s crucial to check for leaks before using your range. Here’s how:
- Ensure all connections are properly sealed using Teflon tape.
- Apply the soap and water mixture to all connections, including the range connector and shut-off valve.
- If bubbles form, there is a leak. Immediately turn off the gas supply at the main valve and seek professional assistance.
- If no bubbles appear, wipe away the soapy solution and proceed to the next step.
Ensuring Proper Connections and Fittings
Proper connections and fittings are vital to the functionality and safety of your gas line. Follow these best practices:
- Use appropriate adapter fittings to ensure a secure and leak-free connection.
- Tighten all connections firmly, but avoid over-tightening, as it may damage the fittings.
- Inspect the range connector for any signs of wear or damage. Replace it if necessary.
Inspecting for Compliance with Building Codes and Regulations
Compliance with building codes and regulations ensures that your gas line installation meets the required safety standards. During your inspection, pay attention to the following:
- Proper grounding of the gas line.
- Appropriate distances of gas line from electrical sources.
- Clearances around the range and venting system.
Seeking Professional Assistance, If Needed
While installing a gas line for your range can be a DIY project, it’s important to recognize your limits. If you encounter any challenges or are uncertain about any aspect of the installation, it’s always best to seek professional assistance. Licensed gas technicians have the expertise and experience to ensure a safe and successful installation.
Congratulations! You’ve completed the testing and inspection phase of installing a gas line for your range. The next step is connecting your range and enjoying the convenience of cooking with gas!
Connecting The Range To The Gas Line
Once you have properly positioned your range and ensured that it meets the necessary clearance requirements, it’s time to connect the range to the gas line. This step is crucial to ensure the safe and efficient operation of your range. In this section, we will guide you through the process of connecting your range to the gas line.
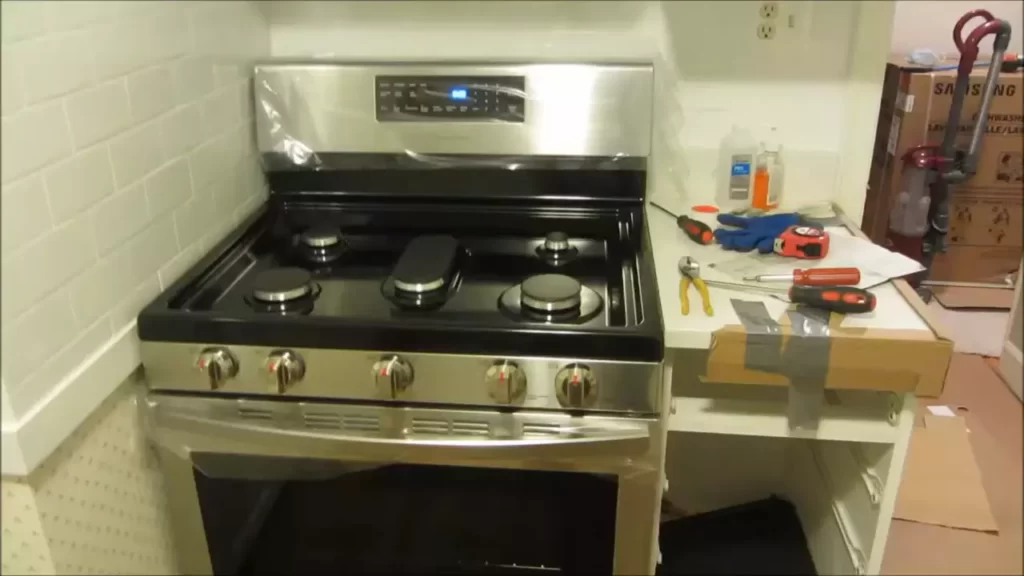
Properly positioning the range
Before connecting the range to the gas line, it’s important to position it correctly in your kitchen. This involves taking into account the necessary clearances specified by the manufacturer, as well as ensuring that the range is level. Here are the steps to follow:
- Refer to the installation manual provided by the manufacturer for specific clearance requirements.
- Measure and mark the exact location where the range will be installed.
- Ensure that the floor is level and make any necessary adjustments by using shims if needed.
- Slide the range into position, ensuring that it is aligned with the marked location.
- Double-check the levelness of the range and make any final adjustments if necessary.
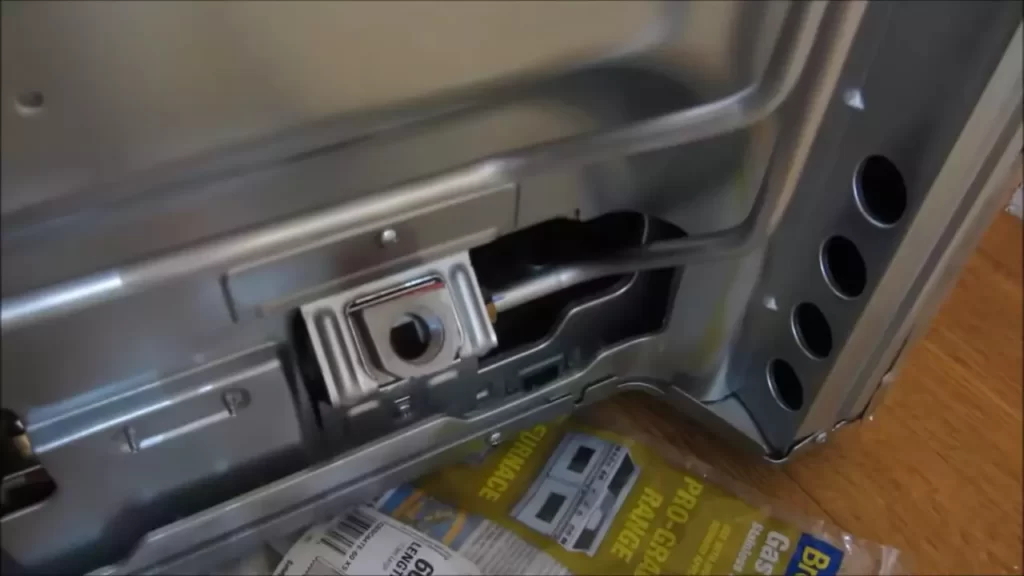
Connecting the range to the gas line
Now that your range is properly positioned, it’s time to connect it to the gas line. Here are the steps to follow:
- Locate the gas shut-off valve near the range and ensure that it is in the closed position.
- Apply pipe joint compound or suitable gas-rated Teflon tape to the threads of the gas connection on the range.
- Carefully align the gas line with the connection on the range and hand-tighten the connection.
- Use a wrench to tighten the connection, ensuring that it is snug but not over-tightened.
- Perform a soap bubble leak test by applying a solution of soapy water to the connection. If bubbles appear, you have a leak and should immediately shut off the gas supply and seek professional assistance.
Testing the gas supply and range functionality
After connecting the range to the gas line, it’s essential to test the gas supply and ensure that the range functions properly. Follow these steps to perform the necessary tests:
- Open the gas shut-off valve by turning it counterclockwise.
- Check for any gas odor around the range. If you detect a strong smell of gas, shut off the gas supply immediately and seek professional help.
- Turn on one of the burners and make sure it ignites properly.
- Repeat this process for all burners, checking for proper ignition each time.
- Test the oven by setting it to a low temperature and verifying that it heats up.
Adjusting and fine-tuning the gas flow, if necessary
Once you have tested your range and found that it is functioning properly, you may need to adjust and fine-tune the gas flow to achieve the desired flame. Follow these steps if necessary:
- Refer to the range’s manual to determine how to adjust the gas flow.
- Turn on one of the burners and observe the flame.
- If the flame is too high or too low, locate the adjustment screw at the base of the burner and use a screwdriver to make the necessary adjustments.
- Repeat this process for each burner, adjusting the flame height as needed.
- Test the range again to ensure that the adjusted flame is satisfactory.
By properly connecting your range to the gas line and testing its functionality, you can enjoy safe and efficient cooking in your kitchen. Remember to always follow the manufacturer’s instructions and seek professional assistance if you encounter any difficulties or leaks.
Regular Maintenance And Troubleshooting
Proper maintenance and troubleshooting are essential for ensuring the efficient and safe operation of your gas line for the range. By regularly cleaning and maintaining the gas line, recognizing and troubleshooting common issues, and promptly identifying signs of gas leaks, you can keep your gas line in top-notch condition. In this section, we will outline the steps you need to follow for regular maintenance and troubleshooting to keep your gas line running smoothly.
Cleaning and maintaining the gas line
Regular cleaning and maintenance of the gas line are crucial for preventing clogs, ensuring proper fuel flow, and maximizing the performance of your range. Here are some tips for cleaning and maintaining the gas line:
- Inspect the gas line regularly for any signs of damage, such as cracks or leaks. If you notice any issues, they should be addressed immediately.
- Use a soft cloth dampened with mild soapy water to wipe down the exterior of the gas line, removing any dirt or debris.
- For stubborn stains or grease buildup, you can use a non-abrasive cleaner specifically designed for gas lines. Be sure to follow the manufacturer’s instructions for safe usage.
- Check the gas line fittings and connections for any loose or damaged parts. Tighten or replace them as necessary.
- Inspect the gas line for any obstructions or clogs. If you notice any blockages, remove them carefully using a soft brush or compressed air.
- Regularly clean the burner orifices to remove any debris that might hinder the proper flow of gas. Refer to the manufacturer’s guidelines for your specific range model.
Recognizing and troubleshooting common issues
Even with proper maintenance, gas line issues can still arise. By recognizing and troubleshooting common problems early on, you can prevent further damage and ensure the continued functionality of your gas line. Here are some common issues you might encounter:
- Weak or uneven flame: This may indicate a clogged or partially blocked gas line. Clean the orifices and inspect for any obstructions.
- Gas odor: If you detect a strong gas smell, it could be a sign of a gas leak. Shut off the gas supply immediately and contact a professional for emergency assistance.
- Ignition problems: If the range fails to ignite or the igniter sparks continuously, there may be an issue with the ignition system. Check the spark module or ignition switch and replace if necessary.
Identifying signs of gas leaks and taking immediate action
Gas leaks can pose serious risks, including fire and explosion hazards. It is crucial to know how to identify signs of a gas leak and take immediate action to ensure your safety. Look out for the following indicators:
| Signs of Gas Leak | Immediate Action |
|---|---|
| Strong smell of gas | Evacuate the area and call the gas company or emergency services. |
| Hissing or whistling sound | Do not use any electrical appliances, open flames, or ignite any switches. Leave the premises immediately and call for help. |
| Dead or dying vegetation near gas lines | Notify the gas company of the potential leak and avoid the area until professionals have addressed the issue. |
Contacting professionals for repairs and maintenance
While regular maintenance and troubleshooting can help prevent and address minor issues, it is important to enlist the services of professionals for more complex repairs and extensive maintenance tasks. Gas line repairs should always be handled by licensed technicians who have the necessary skills and experience to ensure safety and compliance. Don’t hesitate to reach out to professionals for any concerns or issues you may have with your gas line.
By following these regular maintenance and troubleshooting steps, you can keep your gas line for the range in optimal condition, avoiding safety hazards and ensuring the efficient functioning of your appliance.
Frequently Asked Questions Of How To Install Gas Line For Range
Is It Safe To Install A Gas Range Yourself?
It is not safe to install a gas range yourself. Professional installation is recommended to ensure proper connections and prevent gas leaks.
What Size Gas Line Is Needed For A Gas Range?
A gas range typically requires a 1/2-inch or 3/4-inch gas line for optimal functioning. It’s important to consult a professional during installation to ensure the appropriate sizing for your specific gas range model. Incorrect gas line sizing can lead to inadequate gas supply and potential hazards.
Can I Use a Flexible Gas Line For the Stove?
Yes, you can use a flexible gas line for your stove. It is a safe and convenient option that allows for easy installation and flexibility in positioning the stove. However, it is important to ensure that the gas line is installed correctly by a professional to prevent any potential leaks or safety hazards.
Do I Need A 1 2 Or 3 4 Gas Line For A Range?
You need a 1/2-inch or 3/4-inch gas line for a range, depending on the size and power requirements of the appliance. It’s best to consult a professional to determine the appropriate gas line size for your specific range.
Conclusion
Installing a gas line for your range is not as complicated as it may seem. This step-by-step guide has provided you with all the necessary information to ensure a safe and efficient installation process. By following these guidelines, you can enjoy the convenience and benefits of cooking with gas in your kitchen.
Remember to prioritize safety, obtain necessary permits, and consult with professionals when needed. Happy cooking!