Installing a gas line to your stove is a straightforward process that requires careful planning and attention to detail. This guide will provide you with step-by-step instructions on how to safely and effectively install a gas line on your stove.
Whether you’re a seasoned DIYer or a novice, this article will walk you through the necessary steps, from gathering the required materials to connecting and testing the gas line. With proper preparation and following the necessary safety precautions, you’ll be able to enjoy cooking with your gas stove in no time.
Understanding The Basics
When it comes to installing a gas line for your stove, understanding the basics is crucial. Proper installation not only ensures the safe and efficient operation of your appliance but also reduces the risk of gas leaks and potential hazards. In this section, we will discuss the importance of proper gas line installation and the safety precautions and regulations you need to consider.
The Importance of Proper Gas Line Installation
Proper gas line installation is essential for the safe and efficient functioning of your stove. Whether you are installing a new gas line or making modifications to an existing one, it is crucial to ensure that it is done correctly. Here’s why:
- Preventing gas leaks: A well-installed gas line minimizes the chances of gas leaks, which can be extremely dangerous. Gas leaks not only pose a threat to your health but also increase the risk of fire and explosions.
- Optimizing stove performance: A properly installed gas line ensures that your stove receives an adequate and consistent supply of gas, enabling it to operate at its optimal performance. This helps to maintain the desired cooking temperatures and ensures even heat distribution.
- Prolonging appliance lifespan: Proper gas line installation helps prevent damage to your stove. Improper gas flow or pressure can lead to malfunctions, which can shorten the lifespan of your appliance and result in costly repairs.
Safety Precautions and Regulations to Consider
When it comes to installing a gas line for your stove, safety should be your top priority. Ignoring safety precautions and regulations can have serious consequences. Here are some key points to keep in mind:
- Hiring a professional: Unless you are an experienced professional, it is best to hire a qualified gas technician or plumber to handle the installation. They have the knowledge and expertise to ensure proper installation and adhere to the local building codes and regulations.
- Inspecting the area: Before starting the installation, carefully inspect the area where the gas line will be installed. Look for any signs of damage, corrosion, or deterioration. Ensure proper ventilation is provided to prevent the accumulation of gas in confined spaces.
- Using approved materials: It is important to use approved materials, such as flexible stainless steel tubing or black iron pipe, for the gas line installation. Using substandard or incompatible materials can lead to leaks and safety hazards.
- Testing for leaks: After the installation is complete, it is essential to perform a leak test. A professional will use specialized equipment to check for any leaks in the gas line. This step is crucial to ensure the safety of your home and family.
By understanding the basics of gas line installation and following the necessary safety precautions and regulations, you can ensure a safe and reliable gas supply to your stove. Remember, when it comes to gas, it’s always better to be safe than sorry.
Assessing Your Needs
Before installing a gas line to your stove, it’s important to assess your needs to ensure a safe and efficient installation. This involves determining the required size and length of the gas line, as well as choosing the right materials and components for the installation.
Determine the required size and length of the gas line
Firstly, you need to determine the size and length of the gas line that is needed for your stove installation. This will depend on factors such as the BTU (British Thermal Units) rating of your stove and the distance between the gas source and the stove location.
To determine the required size, you should calculate the total BTU rating of all the appliances connected to the same gas line, including the stove. The BTU rating can usually be found on the appliance’s label or in the manufacturer’s documentation.
Once you have the total BTU rating, you can consult a gas pipe sizing chart to find the appropriate pipe size. The chart will take into account the BTU rating and the distance between the gas source and the stove location to determine the correct pipe size.
Keep in mind that if the gas line distance exceeds a certain length, additional calculations may be required to account for pressure drop. It is recommended to consult a professional plumber or gas fitter to ensure the correct size and length of the gas line for your specific needs.
Choosing the right materials and components for the installation
When it comes to installing a gas line for your stove, it is crucial to choose the right materials and components to ensure safety and durability. Here are some key considerations:
- Pipe material: Select a pipe material that is approved for gas line installations. Common options include black iron, stainless steel, and flexible corrugated stainless steel tubing (CSST).
- Fittings: Use approved fittings, such as threaded fittings or compression fittings, to securely connect the gas line components together.
- Shut-off valve: Install a shut-off valve near the stove for easy access in case of emergencies or maintenance needs.
- Flexible connector: Consider using a flexible connector to connect the gas line to the stove. This allows for easier installation and flexibility in case the stove needs to be moved in the future.
- Hoses and connectors: Ensure that any hoses or connectors used are rated for gas line installations and comply with relevant safety standards.
- Permits and regulations: Check with your local building authority or gas utility provider to determine if any permits or approvals are required for the gas line installation.
By carefully assessing your needs and selecting the appropriate size, length, materials, and components for your gas line installation, you can ensure a safe, reliable, and efficient connection to your stove. Remember to consult a professional if you have any doubts or concerns, as gas line installations should always be done by trained experts.
Preparing For Installation
Before you begin installing a gas line to your stove, it’s essential to properly prepare. This involves gathering the necessary tools and equipment, shutting off the gas supply, and ensuring proper ventilation in the area where you’ll be working.
Gathering the necessary tools and equipment
The first step in preparing for the gas line installation is to gather all the required tools and equipment. Having everything you need on hand will save you time and frustration during the installation process. Here’s a list of the items you’ll need:
| Tools | Equipment |
|---|---|
| Adjustable wrench | Gas flex line |
| Pipe wrench | Pipe joint compound |
| Teflon tape | Gas leak detector |
| Tube cutter | Gas shut-off valve |
Make sure you have these tools and equipment readily available before you proceed further with the installation.
Shutting off the gas supply and ensuring proper ventilation
Prior to installing the gas line, it’s crucial to shut off the gas supply to avoid any potential hazards. Locate the main gas shut-off valve and turn it off. This valve is typically located near the gas meter or outside the house. Once the gas supply is off, ensure there is proper ventilation in the area where you’ll be working. Open windows and doors to allow fresh air to circulate and dissipate any potential gas fumes.
Remember, safety should always be prioritized when working with gas lines. Properly preparing for installation will help ensure a smooth and safe process.
Planning The Gas Line Route
Planning the Gas Line Route
When installing a gas line for your stove, careful planning is essential to ensure a safe and efficient setup. Mapping out the route of the gas line is the first step in this process, as it will determine how the line will be run and where it will be located. Identifying the best pathway for the gas line requires consideration of factors such as accessibility and code compliance.
Identifying the Best Pathway for the Gas Line
Choosing the most suitable pathway for the gas line involves a thorough analysis of your kitchen layout and the location of your stove. Here are some guidelines to help you identify the best route:
- Start by examining the area beneath your kitchen where the gas line will be installed. Look for any existing ductwork, electrical wiring, or plumbing that may obstruct the path. It’s essential to avoid running the gas line parallel to or in close proximity to these utilities to minimize potential hazards.
- Consider the most direct route from the gas supply source to the stove. Taking the shortest distance will minimize the chances of gas leakage and reduce the overall cost of installation.
- Evaluate the available space in your kitchen. If there are cabinets or appliances in the way, you may need to make adjustments to create a clear and unobstructed pathway for the gas line. Keep in mind that the line should be easily accessible for maintenance and repairs in the future.
- Check for any potential obstructions, such as structural supports or load-bearing walls. Installing the gas line around these obstructions may require additional planning and potentially the assistance of a professional contractor to ensure compliance with local building codes.
Considering Accessibility and Code Compliance
Once you have identified the best pathway for the gas line, it is crucial to consider accessibility and code compliance. Here are a few key points to keep in mind:
- Ensure that the gas line is easily accessible for inspection, maintenance, and repairs. A clear and unobstructed path will save time and effort in case of any future issues.
- Comply with local building codes and regulations. Gas line installations must adhere to specific guidelines to ensure safety. Confirm the required setbacks, clearances, and materials with your local building department or a licensed gas line contractor.
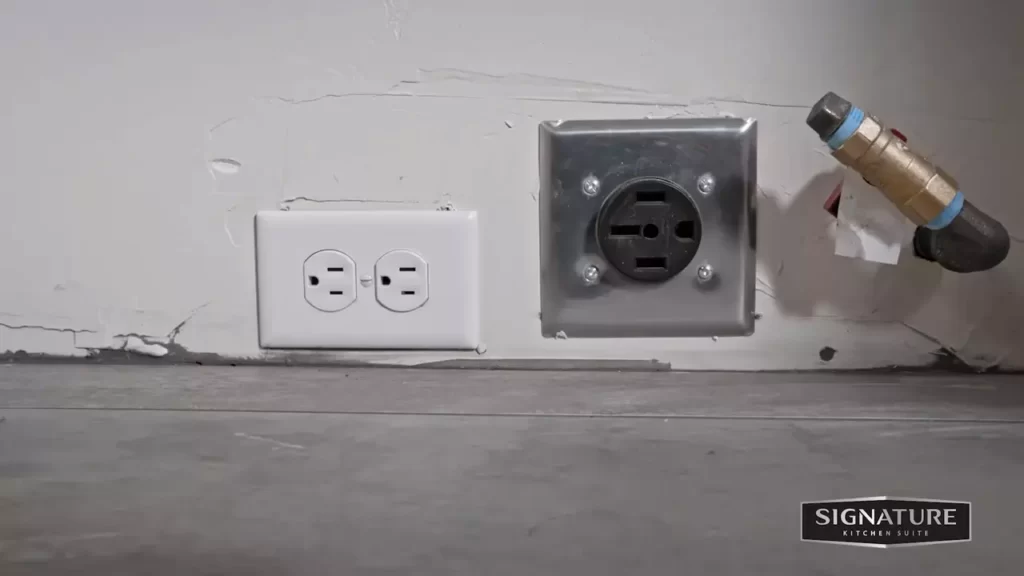
- Consider the proximity of the gas line to potential ignition sources, such as electrical outlets or open flames. The line should be routed in a manner that minimizes the risk of accidental contact or exposure to high heat.
Taking the time to plan the gas line route properly will contribute to a successful and worry-free installation. By identifying the best pathway for the gas line and ensuring accessibility and code compliance, you can enjoy the benefits of a safe and efficient gas-powered stove in your kitchen.
Installing The Gas Line
When it comes to installing a gas line for your stove, it is crucial to follow the necessary steps accurately. One of the most important aspects of the installation process is measuring and cutting the pipe correctly. Additionally, it is crucial to join the pipes and fittings securely to ensure a safe and efficient gas flow. In this section, we will provide a detailed guide on how to measure and cut the pipe accurately, as well as how to join pipes and fittings securely.
Measuring and Cutting the Pipe Accurately
To ensure a proper fit and prevent any leaks, it is essential to measure and cut the gas line accurately. Follow these step-by-step instructions:
- Start by determining the length of the pipe needed. Measure the distance between the gas source and the stove, making sure to account for any bends or turns in the line.
- Mark the measured length on the pipe using a permanent marker.
- Next, use a pipe cutter to make a clean and precise cut at the marked location. Remember to wear safety goggles and gloves for protection.
- After cutting the pipe, ensure that the ends are smooth and free from any burrs or sharp edges. You can use a deburring tool or sandpaper to accomplish this.
By measuring and cutting the pipe accurately, you can ensure a proper fit and minimize the risk of leaks or damages during the installation process.
Joining Pipes and Fittings Securely
After cutting the pipe, the next step is to join the pipes and fittings securely to create a continuous gas line. Follow these guidelines to ensure a secure connection:
- Inspect the pipe ends to ensure they are clean and free from debris. Any dirt or foreign substances can hinder a tight connection, potentially leading to gas leaks.
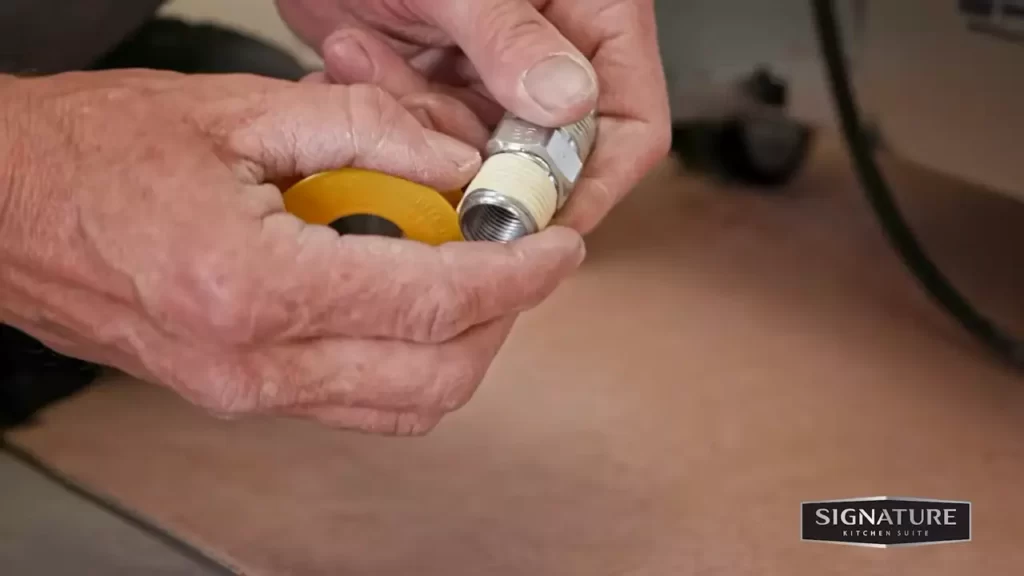
- Apply an even layer of pipe joint compound to the threaded ends of the pipes and fittings. This compound helps create a tight seal and prevents leaks.
- Hand-tighten the pipes and fittings together until they are snug. To ensure a secure connection, use two pipe wrenches, one to hold the fitting steady and the other to tighten the connection.
- Inspect the connection for any signs of leakage. Apply a soap and water solution to the connection and look for bubbles. If bubbles appear, tighten the connection further or replace the fittings if necessary.
Remember to conduct a thorough inspection of the entire gas line once the installation is complete. This includes checking all connections for leaks and ensuring that the line is properly supported and secured.
Connecting The Stove
When it comes to installing a gas line for your stove, connecting the stove itself is a crucial step. The proper installation of the shutoff valve and flex line, as well as positioning and securing the stove connection, ensures a safe and efficient gas supply to your appliance.
Installation of the Shutoff Valve and Flex Line
Installing the shutoff valve and flex line is an important part of connecting your stove to the gas line. Follow these steps to ensure a secure and leak-free connection:
- Turn off the gas supply: Before starting the installation, it is essential to shut off the main gas supply to your home. Locate the shutoff valve and turn it to the closed position to prevent any gas flow.
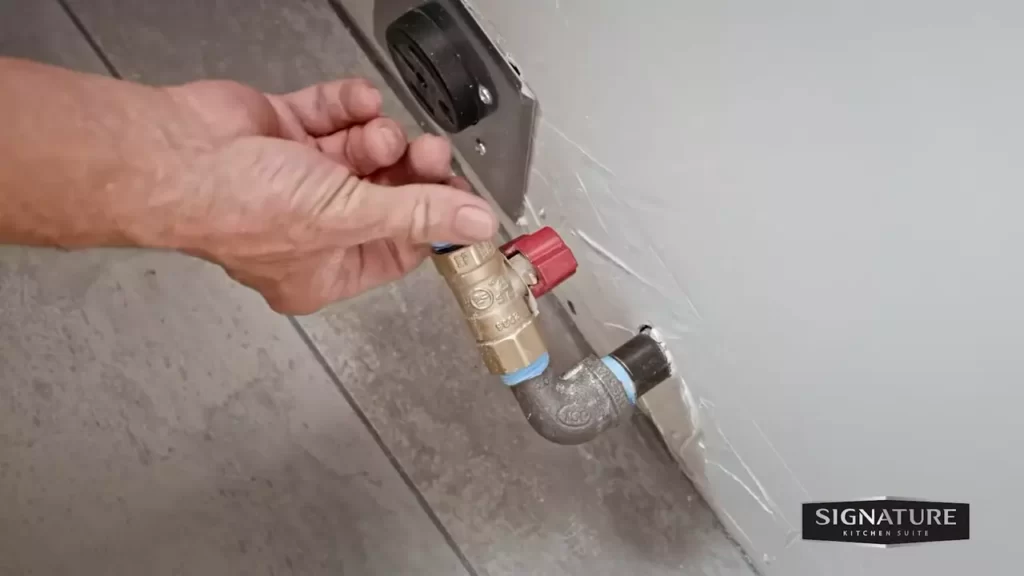
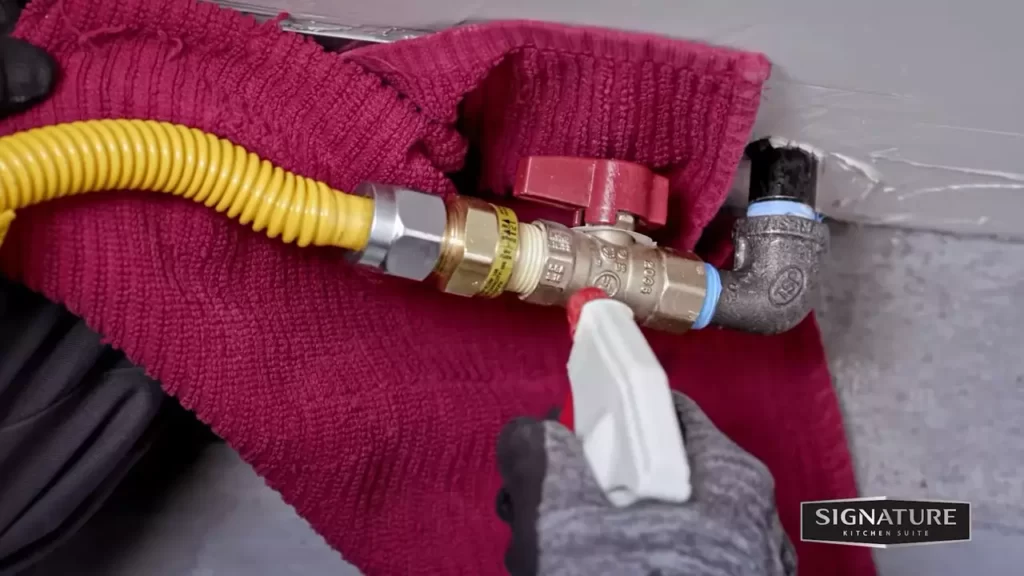
- Connect the shutoff valve: The shutoff valve is an essential safety feature that allows you to control the flow of gas to your stove. Using a wrench, connect the shutoff valve to the gas line. Make sure to use a pipe joint compound or Teflon tape to seal the connection and prevent any leaks.
- Attach the flex line: The flex line acts as a flexible connector between the shutoff valve and the stove. Measure the distance between the valve and the stove connection, ensuring you have enough length to allow for easy installation. Attach one end of the flex line to the shutoff valve using a wrench, making sure it is screwed tightly to ensure a secure connection.
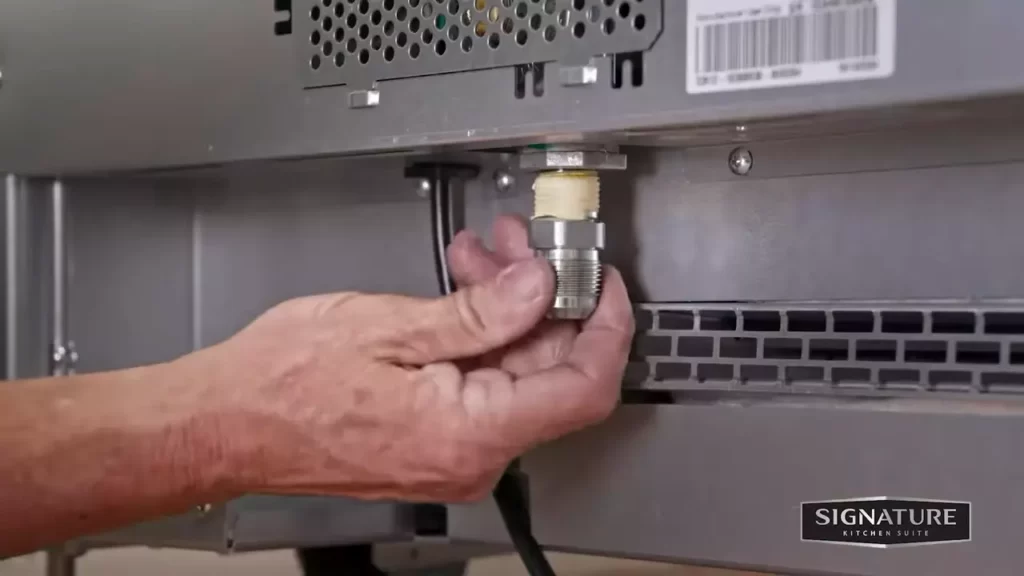
- Secure the flex line to the stove: Position the stove in its designated location, ensuring that there is enough space for the flex line to reach the connection point. Carefully slide the stove into place, making sure not to damage the flex line. Once the stove is in position, use a wrench to attach the other end of the flex line to the stove connection, ensuring it is securely fastened.
Positioning and Securing the Stove Connection
Properly positioning and securing the stove connection is essential to ensure safe operation. Consider the following tips:
- Keep clearances in mind: When positioning the stove, make sure to adhere to the manufacturer’s recommended clearances. This includes maintaining a certain distance from walls, cabinets, and other appliances to prevent heat buildup and potential fire hazards.
- Check for levelness: Use a level tool to ensure that the stove is positioned correctly. A leveled stove prevents uneven heating and potential damage to the appliance.
- Secure the stove: Once the stove is in place, use any included securing mechanisms, such as brackets or screws, to ensure it remains stable. This prevents any accidental movement that could damage the gas line connection or cause a potential gas leak.
By following these steps to install the shutoff valve, flex line, and properly position and secure the stove connection, you can confidently enjoy the benefits of a safe and efficient gas supply to your stove. Always remember to consult a professional if you are unsure or uncomfortable with performing the installation process yourself.
Pressure Testing And Inspection
Conducting a thorough pressure test and inspection is an essential step when installing a gas line on your stove. This process ensures that the gas line is properly installed, free from leaks, and meets all safety standards. By following the steps outlined below, you can ensure the safety and efficiency of your gas stove installation.
Conducting a thorough pressure test to check for leaks
The first step in pressure testing your gas line is to shut off all gas appliances and ensure the gas valve to your stove is in the closed position. Safety should be the top priority during this process, so always wear protective gloves and eyewear.
To conduct a pressure test, you will need a manometer or a gas pressure gauge, a pressure test plug, and joint compound suitable for gas lines. Start by connecting the pressure test plug to the gas line. Apply joint compound to the threads to ensure a secure seal. Tighten the plug securely using a wrench.
Next, connect the manometer or pressure gauge to the test plug. Follow the manufacturer’s instructions to ensure proper connection. Open the gas valve slowly to allow gas to flow into the line. Keep an eye on the pressure gauge or manometer and monitor for any drop in pressure. If the pressure drops, it indicates a potential leak.
To identify the source of the leak, you can apply a soap and water solution to the gas line connections. If any bubbles form, it indicates a leak. In such cases, tighten the connections or replace any faulty components. Repeat the pressure test to ensure the leak has been resolved. Once the pressure remains consistent, move on to the inspection step.
Scheduling an inspection by a qualified professional
To ensure the safety and compliance of your gas line installation, it’s crucial to schedule an inspection by a qualified professional. Local building codes may require inspections to be conducted by a licensed gas inspector or a certified technician.
During the inspection, the qualified professional will verify that the gas line has been installed correctly and meets all safety requirements. They will examine the connections, fittings, and overall integrity of the installation. If any issues are identified, they will provide guidance on how to rectify them.
It’s important not to skip or overlook the inspection process. A professional inspection ensures that your gas line installation is up to code and reduces the risk of potential accidents or leaks in the future.
Completion And Final Checks
Once you have successfully installed the gas line to your stove, there are a few important steps you need to take to ensure that everything is completed correctly and that your stove is functioning safely. These final checks will give you peace of mind and help prevent any potential issues in the future.
Properly sealing all connections and joints
One of the most crucial aspects of installing a gas line to your stove is ensuring that all connections and joints are properly sealed. This step is essential to prevent any gas leaks, which can be incredibly dangerous. Here are some key points to remember when sealing the connections:
- Use Teflon tape: Wrap Teflon tape around the threaded ends of the gas line fittings. This helps create a tight seal and prevents any gas from escaping.
- Tighten fittings securely: Use a wrench to tighten all fittings securely. Be careful not to overtighten, as this can damage the fittings.
- Check for leaks: After sealing the connections, use a gas leak detector or apply a soap and water solution to all joints and connections. If you notice any bubbles, it indicates a leak. In such cases, immediately turn off the gas and fix the issue before proceeding.
Testing the stove for proper functionality and safety
Once all connections are properly sealed, it is essential to test the stove for proper functionality and safety. Here’s how you can do it:
- Check the gas supply: Ensure that the gas supply valve is open, allowing the flow of gas to the stove.
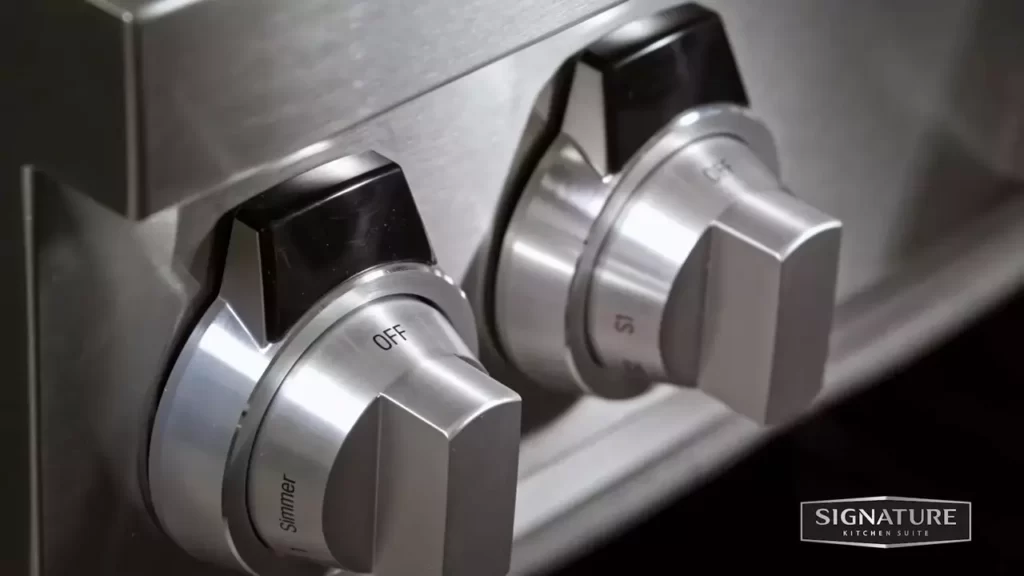
- Ignite each burner: Turn the knobs on the stove to the ignite position to test if each burner lights up properly. Check for any irregular flames or excessive yellow flames, as these could indicate problems with the gas flow.
- Test the oven: Turn on the oven and check if it heats up properly. Watch for any unusual smells or sounds that could indicate malfunctions.
- Verify safety features: Ensure that all safety features, such as the automatic shut-off valve, are functioning correctly. Test them by turning off the gas supply and observing if the stove shuts off immediately.
Completing these final checks will not only ensure the proper functionality and safety of your stove but also provide you with the peace of mind knowing that the installation has been done correctly. Remember, if you have any doubts or concerns, it’s always best to consult a professional gas line installer. Safety should never be compromised when it comes to gas appliances.
Frequently Asked Questions On How To Install Gas Line To Stove
How Hard Is It To Run A Gas Line For A Stove?
Running a gas line for a stove isn’t overly difficult. It requires proper materials, skilled installation, and adherence to safety guidelines. Hiring a professional plumber or licensed gas fitter is recommended to ensure a successful and safe installation.
Can I Hook Up A Gas Stove Myself?
No, it is not recommended to hook up a gas stove yourself. Gas connections can be dangerous and require professional installation for safety reasons. It is crucial to hire a licensed technician to ensure proper installation and avoid potential hazards.
How Do You Hook Up A Gas Pipe To An Oven?
To hook up a gas pipe to an oven: Turn off the gas supply. Connect the pipe to the oven’s gas line using a wrench, ensuring a tight fit. Apply pipe joint compound or gas-rated Teflon tape to prevent leaks.
Open the gas supply valve and test for leaks using soapy water.
What Is Needed To Hook Up A Gas Range?
To hook up a gas range, you need a gas line connection, a flexible gas line, a shut-off valve with a flexible connector, and a gas pressure regulator. Make sure to hire a professional to handle the gas line installation for safety and compliance with local regulations.
Conclusion
Installing a gas line to your stove can seem daunting, but with the right knowledge and guidance, it can be a straightforward process. By following the steps outlined in this guide, you can ensure a safe and efficient installation. Remember to prioritize safety and consult a professional if you feel unsure at any point.
With the right tools and careful planning, you’ll have your gas stove up and running in no time. Enjoy the convenience and flexibility that gas cooking can bring to your kitchen!