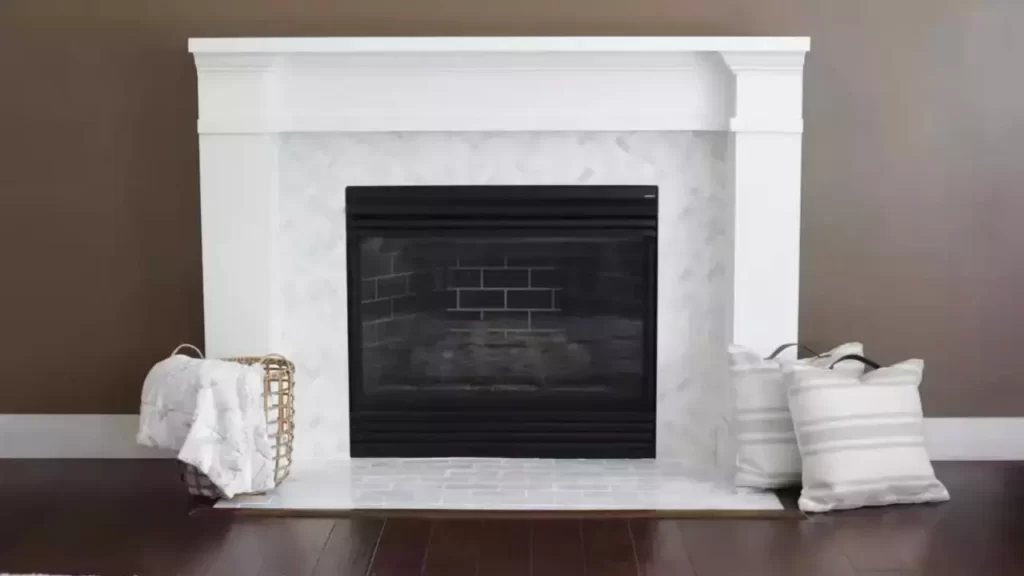
To install tile around a fireplace, measure the area, prepare the surface, apply adhesive, set the tile, and grout the joints. Adding tile around your fireplace is a great way to enhance its visual appeal and create a focal point in your living space.
Whether you prefer a sleek and modern look or a classic and timeless design, installing tile around the fireplace can completely transform the aesthetics of your room. In this guide, we will walk you through the step-by-step process of installing tile around a fireplace.
By following these instructions, you will be able to achieve professional-looking results and enjoy a beautiful fireplace that will impress your guests. Let’s get started!
Assessing The Fireplace Area
When it comes to installing tile around a fireplace, it is crucial to begin by assessing the fireplace area. Properly assessing the area will help you determine the dimensions of the fireplace, identify any obstacles or uneven surfaces, and prepare the existing surface for tiling. Follow the steps below to ensure a successful tile installation.
Measuring the dimensions of the fireplace
Before you start installing tile, take accurate measurements of the fireplace. This step will help you determine the amount of tile you need to purchase, reducing the chances of running out of tiles in the middle of the project. Use a tape measure or ruler to measure the height, width, and depth of the fireplace. It is also important to measure any protruding hearths or mantels that may intersect with the tiled area.
Identifying any obstacles or uneven surfaces
Inspect the fireplace area for any obstacles that may hinder the tiling process. Common obstacles may include electrical outlets, switches, vents, or gas lines. It is crucial to identify these obstacles beforehand so that you can plan the tile layout accordingly. Additionally, carefully examine the surfaces around the fireplace for any unevenness. Uneven surfaces can affect the appearance and durability of the tile installation. Address any uneven areas by using leveling compounds or patching materials before proceeding with the tiling process.
Preparing the existing surface for tiling
Before applying tile, the existing surface around the fireplace must be properly prepared. Remove any existing materials, such as old tile, wallpaper, or paint, ensuring that the surface is clean and free from debris. If the surface is painted, consider roughing it up using sandpaper to improve tile adhesion. Additionally, inspect the surface for any cracks or damage and repair them as necessary. Ensure that the surface is smooth and level before proceeding to the next step.
By carefully assessing the fireplace area, measuring the dimensions, identifying obstacles and uneven surfaces, and preparing the existing surface, you are setting the stage for a successful tile installation around your fireplace. Take your time during this process to ensure a seamless and visually appealing result.
Choosing The Right Tile
When it comes to installing tile around your fireplace, choosing the right tile is essential. Researching different tile materials and finishes, considering factors such as durability and heat resistance, and selecting a tile design that complements the overall aesthetic are all important aspects to consider.
Researching different tile materials and finishes
Before diving into the installation process, it’s crucial to do your research and explore the various tile materials and finishes available. With the wide range of options out there, you can find everything from ceramic and porcelain tiles to natural stone and glass tiles.
Each tile material has its own unique properties and benefits. Ceramic and porcelain tiles are popular choices due to their durability, ease of maintenance, and affordability. Natural stone tiles like marble or slate offer a more luxurious and timeless look but require regular sealing to maintain their appearance. Glass tiles, on the other hand, can add a touch of elegance and color to your fireplace.
Considering factors such as durability and heat resistance
When selecting a tile for your fireplace, it’s important to consider factors such as durability and heat resistance. The fireplace area can be exposed to high temperatures, so choosing a tile that can withstand the heat is crucial to ensure long-lasting performance.
Look for tiles that are specifically labeled as heat-resistant or suitable for fireplace installations. These tiles are designed to withstand high temperatures without cracking, discoloring, or warping. Additionally, ensure that the tile you choose is durable enough to withstand regular use and potential accidents, such as a stray ember or accidental impact.
Selecting a tile design that complements the overall aesthetic
Apart from functionality, the tile you choose should also enhance the overall aesthetic of your fireplace area. The design and color of the tile should complement the room’s décor, creating a visually cohesive and inviting space.
Consider the existing color palette and style of your room when selecting a tile design. If you have a contemporary-styled room, sleek and minimalistic tiles in neutral tones can be a great choice. For a more traditional or rustic look, natural stone tiles with warm hues can add a cozy touch. If you want to make a bold statement, opt for vibrant-colored or patterned tiles to create a focal point around your fireplace.
In conclusion, taking the time to choose the right tile for your fireplace installation is crucial for both functional and aesthetic reasons. By researching different tile materials and finishes, considering factors such as durability and heat resistance, and selecting a design that complements the overall aesthetic, you can create a stunning fireplace area that becomes the centerpiece of your room.
Removing Old Tiles Or Obstacles
Safely removing any existing tiles or obstacles around the fireplace
Before installing new tiles around your fireplace, it is crucial to remove any old tiles or obstacles that may be present. This not only provides a clean surface for the new tile installation but also ensures a smooth and seamless finish. To safely remove the old tiles or obstacles, follow these steps:
Gather the appropriate tools and materials:
- Protective gloves and eyewear to safeguard yourself from any sharp edges or debris
- Chisel and pry bar to carefully remove the old tiles
- Hammer to gently tap the chisel and pry bar if necessary
Begin the removal process:
- Start by identifying the loose or damaged tiles around the fireplace. Use a chisel and hammer to carefully loosen the tiles from the surface. Be cautious not to damage the surrounding area.
- Once the loose tiles are removed, examine the remaining tiles for any adhesive or grout residue. Use the chisel and pry bar to carefully scrape off any remaining adhesive or grout. This step is essential to ensure a clean and even surface for the new tile installation.
- If there are any obstacles, such as nails, screws, or brackets, use pliers or a screwdriver to remove them. This will prevent any interference with the new tile installation process.
By safely removing any existing tiles or obstacles around your fireplace, you are ensuring a solid foundation for the new tile installation. Taking the time to properly prepare the surface will not only result in a professional and visually appealing finish but also prolong the lifespan of your new tiles.
Cleaning And Leveling The Surface
When it comes to installing tile around a fireplace, one of the crucial steps is cleaning and leveling the surface. This ensures that your tile installation will be smooth and seamless, enhancing the aesthetic appeal of your fireplace. In this section, we will guide you through the process of clearing away any debris, dust, or dirt from the area, repairing any cracks or unevenness on the surface, and leveling the area to ensure proper tile installation.
Clearing away any debris, dust, or dirt from the area
Before starting the tile installation process, it is essential to clear away any debris, dust, or dirt from the area surrounding your fireplace. This will ensure better adhesion and a clean working space. Here’s how you can do it:
- Begin by removing any loose objects or furniture near the fireplace.
- Use a broom or brush to sweep away any loose debris or dirt.
- For stubborn dirt or grime, you can use a vacuum cleaner or a damp cloth to wipe the surface clean.
- Make sure to pay extra attention to the corners and edges of the fireplace to ensure a thorough cleaning.
Repairing any cracks or unevenness on the surface
To achieve a smooth and even tile installation, it is crucial to repair any cracks or unevenness on the surface of your fireplace. Here’s how you can do it:
- Inspect the surface for any cracks or visible damage.
- Using a scraper or putty knife, remove any loose or chipped sections of the surface.
- Apply a suitable filler or patching compound to the cracks or uneven areas.
- Smooth out the filler or compound to create a level surface.
- Allow sufficient time for the filler or compound to dry and cure before proceeding with the tile installation.
Leveling the area to ensure proper tile installation
Ensuring a level surface is vital for the success of your tile installation. Here are the steps to follow when leveling the area:
- Measure the height of the existing fireplace surface.
- If needed, use a chisel or grinder to level any high spots or uneven areas.
- Apply a self-leveling compound to fill in any low spots or uneven surfaces.
- Use a straightedge or level to ensure that the compound is evenly spread and creates a level surface.
- Allow the self-leveling compound to dry thoroughly before proceeding with the tile installation.
By following these steps to clean and level the surface around your fireplace, you will be ready for the next exciting phase of tile installation. Stay tuned for our next blog post, where we will guide you through the process of choosing the right tiles and methods for installing them to enhance the beauty and functionality of your fireplace.
Applying Tile Adhesive
Applying tile adhesive is a crucial step in installing tile around a fireplace. The adhesive not only provides a strong bond between the tile and the surface, but it also helps ensure that the tile stays in place for a long time. In this section, we will discuss how to choose the right adhesive for your tile material, how to apply the adhesive evenly on the surface, and the proper application technique to ensure a successful installation.
Choosing the right adhesive for your tile material
When it comes to choosing the adhesive for your tile, it’s important to consider the material of the tile itself. Different types of tile require different adhesives to achieve the best results. Here are some common tile materials and the corresponding adhesives:
| Tile Material | Recommended Adhesive |
|---|---|
| Ceramic or porcelain | Thinset mortar |
| Natural stone | Modified thinset mortar |
| Glass | Glass tile adhesive |
By choosing the right adhesive, you can ensure that your tile will adhere properly and withstand the test of time.
Applying the adhesive evenly on the surface
Before applying the adhesive, it’s important to prepare the surface by cleaning and removing any dust or debris. You can use a damp sponge or a mild detergent to clean the surface and ensure proper adhesion.
Next, you’ll want to mix the adhesive according to the manufacturer’s instructions. It’s important to follow the correct mixing ratio to achieve the right consistency. Using a trowel, spread the adhesive evenly on the surface. Ensure that the adhesive covers the entire area where the tile will be placed.
For larger tiles, you may need to back-butter the tile as well. This means applying a thin layer of adhesive to the back of the tile before placing it on the surface. Back-buttering helps ensure a strong bond and prevents air pockets from forming underneath the tile.
Using the proper application technique
When applying the adhesive, it’s important to use the proper technique to achieve the best results. Here are some tips to keep in mind:
- Hold the trowel at a 45-degree angle and apply even pressure to create ridges in the adhesive. These ridges help create a strong bond between the tile and the surface.
- Work in small sections to prevent the adhesive from drying out before you can place the tile.
- Place the tile firmly onto the adhesive, pressing down and wiggling it slightly to ensure full contact.
Repeat this process for each tile, taking care to maintain a consistent gap between tiles for grouting.
By following these steps and using the right adhesive, you can ensure a successful tile installation around your fireplace. Remember to always read and follow the manufacturer’s instructions for the adhesive you choose to achieve the best results.
Setting The Tiles
Once you have prepared the fireplace surface and applied the adhesive, it’s time to start setting the tiles. This step requires careful attention to detail to ensure a professional-looking finished product. In this section, we will guide you through the process of setting the tiles around your fireplace.
Starting from the center and working outward
It is essential to start tiling from the center of the fireplace and work your way outward. This method ensures an even distribution of tiles on both sides, creating a balanced and symmetrical look. By starting from the center, you can determine the placement and alignment of the tiles more accurately.
To begin, find the center point of the fireplace and mark it with a pencil. Then, apply adhesive to a small portion of the surface, starting from the center and working your way out. Place the first tile directly on the adhesive, aligning it with the center mark. Repeat this process for additional tiles, always checking the alignment and spacing as you go.
Ensuring proper spacing and alignment
Having consistent spacing between the tiles is crucial for a professional finish. Use tile spacers to maintain the desired gap between each tile. These spacers are available in various sizes, allowing you to choose the spacing that best suits your aesthetic preferences.
When placing the tiles, make sure to align them properly. Use a level or straightedge to verify that each tile is perfectly horizontal or vertical, depending on the design. Adjust as needed to achieve a visually pleasing result. Taking the time to ensure proper spacing and alignment will make a significant difference in the overall appearance of your fireplace.
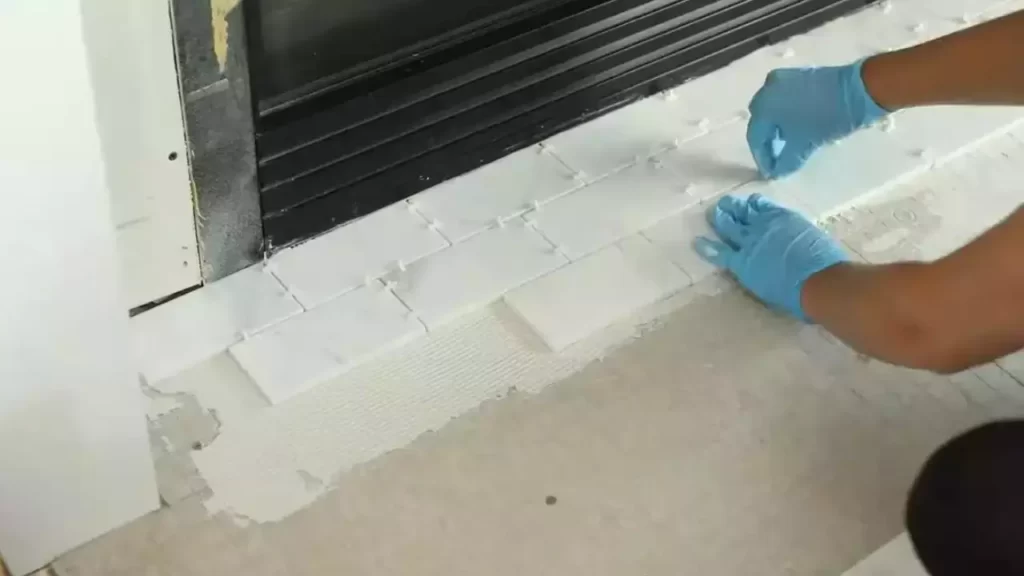
Pressing the tiles firmly into the adhesive
As you place each tile, press it firmly into the adhesive to ensure a secure bond. This step requires applying even pressure to the tile surface, using a tile float or a hand trowel. The goal is to eliminate any air pockets and ensure that the tile adheres firmly to the adhesive.
It’s essential to check and adjust the level of each tile as you go. This will help you maintain a consistent and professional look throughout the installation process.
Remember to work in small sections, applying adhesive and setting tiles gradually. This approach prevents the adhesive from drying out before you can set the tiles in place. Continue this process until you have covered the entire area around the fireplace.
By following these steps and keeping a close eye on the positioning, spacing, and alignment of the tiles, you can achieve a beautifully tiled fireplace that adds a touch of elegance to your living space.
Cutting And Trimming Tiles
Cutting and trimming tiles is a crucial step when installing tile around a fireplace. It requires precision and accuracy to ensure a seamless fit and a professional finish. In this section, we will explore two important aspects of cutting and trimming tiles for your fireplace installation project: measuring and marking tiles for precise cuts, and using tile cutters or tools for accurate trimming.
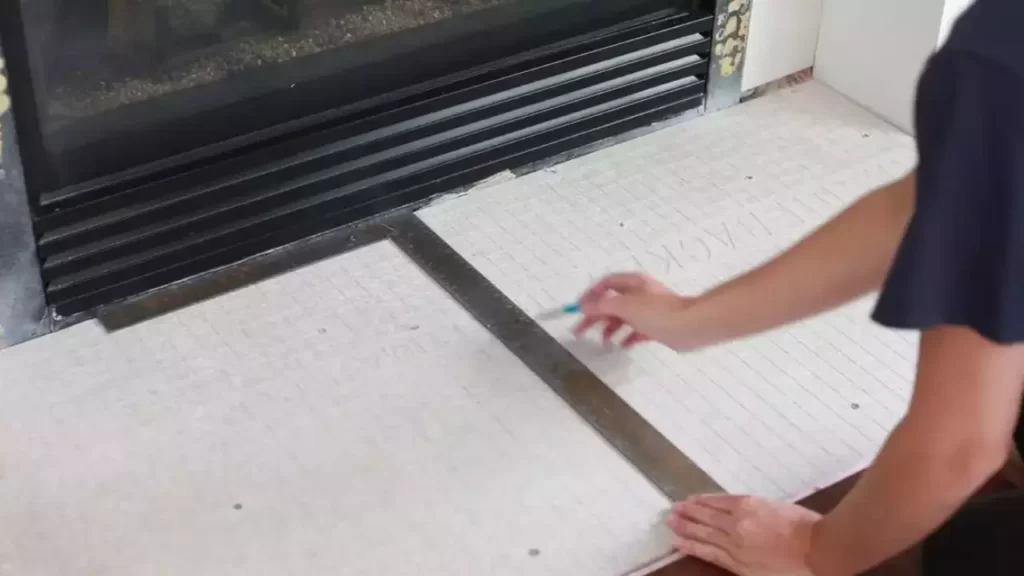
Measuring and marking tiles for precise cuts
Before cutting any tiles, it is essential to measure and mark them accurately. This will help you achieve precise cuts and ensure a seamless fit. Here’s a step-by-step guide to measuring and marking tiles:
- Start by carefully measuring the area where the tile needs to be cut. Use a measuring tape to get the exact dimensions.
- Transfer the measurements onto the tile using a pencil or a marker. Make sure to use a straightedge or a ruler to create straight lines.
- Double-check the measurements and markings before proceeding to cut the tile. It’s better to be cautious and ensure accuracy.
By following these steps, you can minimize the risk of errors and create precise cuts that will fit perfectly around your fireplace.
Using tile cutters or tools for accurate trimming
Now that you have measured and marked the tiles, it’s time to trim them to the desired size. Tile cutters and tools can help you achieve accurate cuts and ensure a professional finish. Here are some popular tile-cutting tools you can use:
- Tile cutter: This tool is specifically designed for cutting tiles. It typically consists of a scoring wheel and a breaker mechanism. By applying pressure along the marked line, you can score the tile and then use the breaker mechanism to snap it.
- Wet saw: A wet saw is a power tool that uses a diamond blade to cut through tiles. It is especially useful when dealing with porcelain or stone tiles that require more precision.
- Angle grinder: An angle grinder with a diamond blade can be used for more intricate cuts or to trim tiles to fit around corners or edges.
Remember to wear safety goggles and gloves when using these tools, as they can produce sharp edges and debris. Always follow the manufacturer’s instructions for each tool to ensure safety and accuracy.
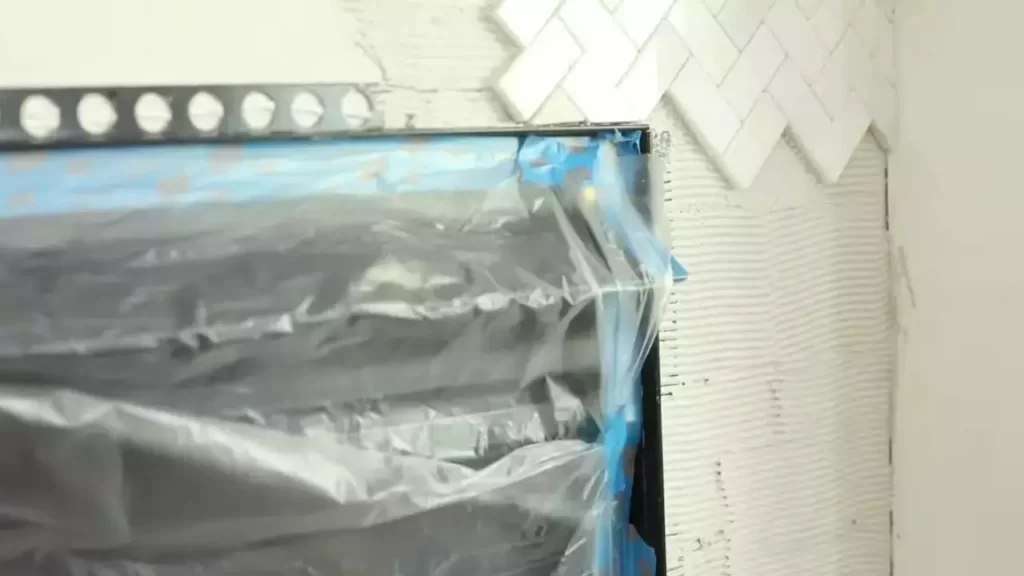
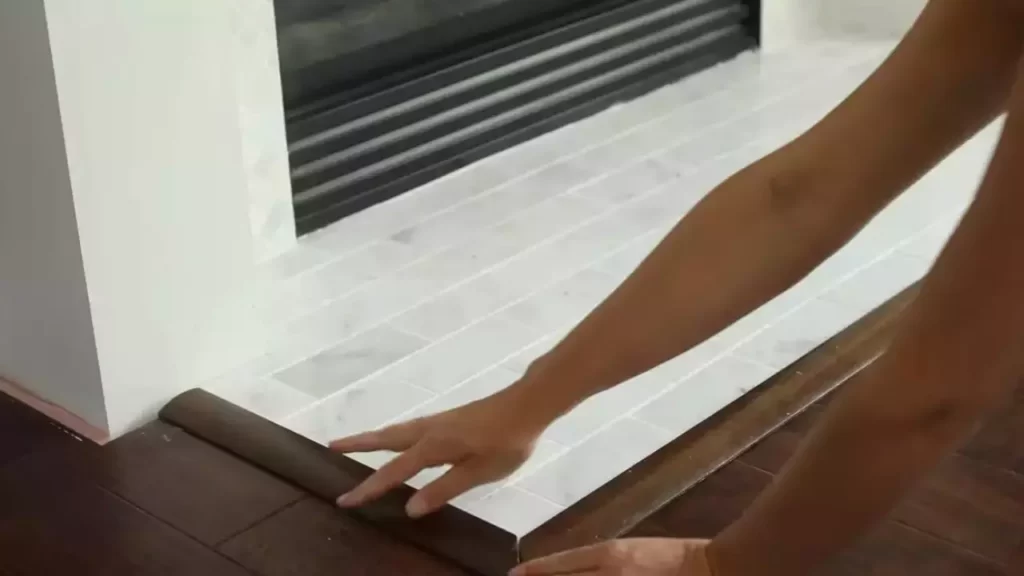
Ensuring a seamless fit around corners and edges
When installing tiles around a fireplace, achieving a seamless fit around corners and edges is crucial for a polished look. Here are some tips to ensure a seamless fit:
- Measure and mark the tiles accurately, considering the additional space needed for grout lines. This will help you achieve a tight fit.
- Use a tile cutter or a grinder to trim the tiles precisely, taking into account any angles or curves.
- Test the fit of each tile before applying adhesive. Make any necessary adjustments to ensure a seamless connection.
By following these tips, you can ensure that each tile fits perfectly around corners and edges, resulting in a professional-looking installation.
In conclusion, cutting and trimming tiles is a crucial step when installing tile around a fireplace. By measuring and marking tiles accurately, using the right tools for trimming, and ensuring a seamless fit around corners and edges, you can achieve a professional finish that enhances the beauty of your fireplace.
Mixing And Applying Grout
One of the final steps in the process of installing tile around a fireplace is mixing and applying the grout. This is an important step that not only fills the gaps between the tiles but also enhances the overall appearance of the design. In this section, we will discuss how to select a grout color that complements the tile design, properly mix the grout according to the manufacturer’s instructions, and apply it evenly between the tiles to achieve a professional and finished look.
Selecting the grout color that enhances the tile design
When it comes to selecting the right grout color for your fireplace tile, it is important to consider the overall aesthetic you are trying to achieve. The right grout color can either enhance or detract from the beauty of your tile design. Here are a few tips to help you choose the perfect grout color:
- Consider the color and pattern of your tile: Take a close look at the color and pattern of your tile. Choose a grout color that either matches or complements the dominant color in your tile design. A contrasting grout color can create a bold and dramatic effect, while a matching grout color can create a seamless and cohesive look.
- Test your grout color: Before committing to a grout color, it’s a good idea to test it on a small portion of your tile. This will give you a better idea of how the color will look once it is applied. Keep in mind that grout can darken as it dries, so it’s always a good idea to test it beforehand.
- Consider the maintenance: Different grout colors can show dirt and stains differently. If you’re concerned about maintenance, choose a grout color that is less likely to show dirt or stains. For example, a darker grout color is generally better at hiding dirt than a lighter grout color.
Mixing the grout according to the manufacturer’s instructions
In order to ensure the grout sets properly and adheres well, it is crucial to mix it correctly. Here’s a step-by-step guide on how to mix grout:
- Gather your materials: Before you begin mixing the grout, make sure you have all the necessary materials on hand. These typically include a mixing container, a grout float, a grout sponge, and a clean bucket of water.
- Read the manufacturer’s instructions: It’s important to carefully read the manufacturer’s instructions on the grout packaging before you start mixing. Different grout products may have different mixing ratios and instructions, so make sure you follow them accordingly.
- Pour the grout into the mixing container: Measure out the appropriate amount of grout powder and pour it into your mixing container.
- Add water gradually: Slowly add water to the grout powder, following the recommended ratio in the manufacturer’s instructions. Use a trowel or a mixing paddle to mix the grout and water together. Continue adding water as needed until you achieve a smooth and lump-free consistency. Avoid overmixing, as this can introduce air bubbles into the grout mixture.
- Let the grout rest: Once the grout is mixed, let it rest for a few minutes before using it. This allows the chemicals in the grout to activate and helps achieve better adhesion.
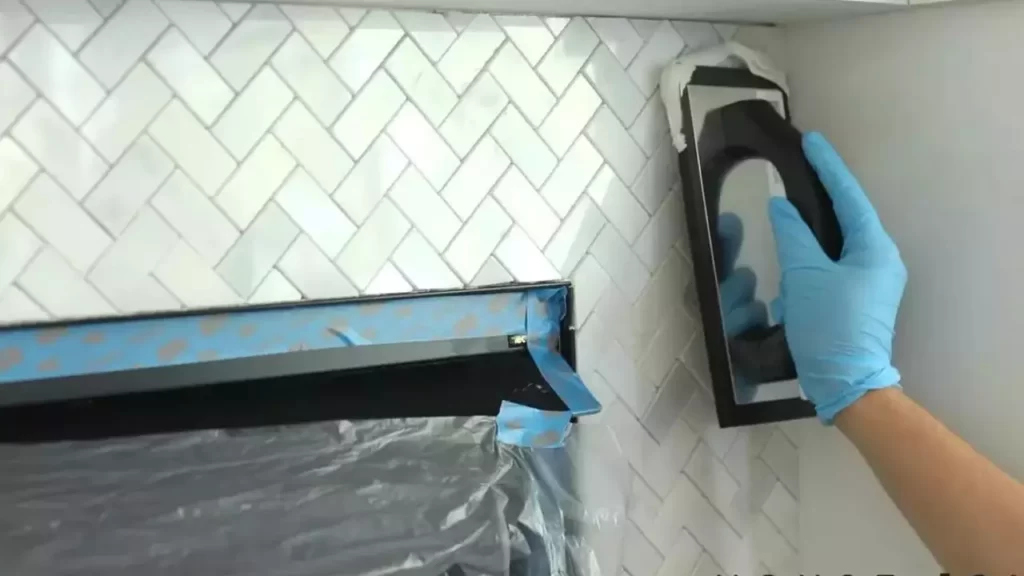
Applying the grout evenly between the tiles
Now that you have mixed the grout, it’s time to apply it between the tiles. Follow these steps to ensure an even and professional result:
- Prepare the grout float: Wet the grout float and squeeze out any excess water. This will prevent the grout from sticking to the float and make it easier to spread.
- Scoop the grout onto the float: Use the grout float to scoop up a generous amount of grout.
- Apply the grout between the tiles: Hold the grout float at a 45-degree angle and use it to apply the grout to the gaps between the tiles. Press firmly and move the float in a diagonal motion to ensure the grout fills the gaps completely.
- Remove excess grout: Once the grout is applied, remove any excess using the edge of the grout float. This will help create clean lines and prevent the grout from drying on the tile surface.
- Clean the tile surface: After you have applied the grout, use a damp grout sponge to gently wipe away any grout haze from the tile surface. Rinse the sponge frequently and continue wiping until the tiles are clean and the grout lines are neat and even.
- Allow the grout to cure: Finally, allow the grout to cure according to the manufacturer’s instructions. This typically involves keeping the area clean and free from moisture for a certain period of time.
By following these steps, you can ensure that the grout is mixed and applied properly, resulting in a beautiful and long-lasting tile installation around your fireplace.
Cleaning And Sealing
Cleaning and sealing the tile around your fireplace is an essential step in the installation process. Not only does it ensure a finished, polished look, but it also protects the grout and tiles against stains and moisture. In this section, we will guide you through the steps of removing excess grout with a damp sponge, sealing the grout, and cleaning the tiles.
Removing excess grout with a damp sponge
Before you can proceed with sealing the grout and cleaning the tiles, it is crucial to remove any excess grout. Excess grout can leave a hazy film on the tiles, which can be difficult to remove once it dries. Here’s how to remove it:
- Dampen a sponge with clean water.
- Gently wipe the surface of the tiles in a circular motion, focusing on the grout lines.
- Rinse the sponge frequently to prevent the buildup of grout residue.
- Continue this process until all excess grout is removed and the tiles are clean.
Sealing the grout to protect against stains and moisture
Sealing the grout is an essential step in preventing stains and moisture from seeping into the tiles. By creating a protective barrier, you can prolong the life of your tiles and maintain their beauty. Here’s how to seal the grout:
- Ensure that the grout is fully dry before application. This typically takes about 48-72 hours.
- Choose a high-quality grout sealer that is suitable for your type of tile and grout. Read the instructions on the product carefully to ensure proper application.
- Using a small brush or applicator, apply the sealer evenly to the grout lines. Be sure to follow the manufacturer’s instructions regarding the drying time between coats.
- Allow the sealer to dry completely. This may take a few hours or overnight, depending on the product.
Cleaning the tiles for a finished, polished look
Once the grout is sealed, it’s time to clean the tiles for a finished, polished look. Here’s how to clean the tiles:
- Mix a mild detergent with warm water in a bucket.
- Dip a soft cloth or sponge into the soapy water and wring out any excess liquid.
- Gently scrub the tiles, paying attention to any stubborn stains or spots.
- Rinse the tiles thoroughly with clean water to remove any residue.
- Dry the tiles with a clean, lint-free cloth to prevent water spots.
By following these steps, you can ensure that your tile installation around the fireplace looks flawless. Remember to remove excess grout, seal the grout, and clean the tiles for a finished polished look. With proper maintenance, your fireplace will be a stunning centerpiece in your home for years to come.
Finalizing The Installation
Now that you have successfully installed the tiles around your fireplace, it’s time to give your project those final touches to ensure a flawless finish. In this section, we will discuss how to inspect the tile installation for any imperfections, make any necessary touch-ups or adjustments, and allow sufficient drying time before using the fireplace.
Inspecting the tile installation for any imperfections
Before your tile installation is complete, it’s crucial to carefully inspect the area for any imperfections that may have occurred during the process. Here are a few key points to focus on during your inspection:
- Check for any cracked or chipped tiles that need to be replaced. Ensure there are no gaps or uneven areas between the tiles.
- Ensure the tiles align perfectly and are level with each other. A slight misalignment can be easily noticeable and can impact the overall aesthetic appeal.
- Inspect the grout lines to ensure they are consistent in width and filled properly. Clean any excess grout that may have dried on the tiles.
- Take a step back and evaluate the overall appearance of the fireplace. Look for any visual imperfections or areas that need additional attention.
By thoroughly inspecting your tile installation, you can catch any imperfections and address them before moving forward with the final steps of the project.
Making any necessary touch-ups or adjustments
After inspecting the tile installation, you may identify areas that require touch-ups or adjustments. Here are some steps to follow:
- If you notice any cracked or chipped tiles during your inspection, carefully remove them using a chisel or grout saw. Replace them with new tiles of the same size and design.
- If you find any uneven tiles, use a rubber mallet and a piece of wood to gently tap them into the correct position. Ensure they are level with the surrounding tiles.
- Use a grout removal tool to fix any inconsistencies in the grout lines. Carefully remove excess or uneven grout and reapply it using a grout float, ensuring proper filling and smooth lines.
- If you encounter any stubborn grout stains on the tile surface, use a mild grout cleaner and a soft brush to gently scrub them away. Rinse the tiles thoroughly to remove any residue.
By making these necessary touch-ups and adjustments, you can achieve a polished and professional look for your fireplace.
Allowing sufficient drying time before using the fireplace
Once you have completed the inspection and made all the necessary touch-ups, it’s essential to allow the tiles and grout to properly dry before using the fireplace. Follow these guidelines for an optimal drying process:
- Refer to the manufacturer’s instructions to determine the recommended drying time for the type of tile and grout you have used.
- Avoid walking on or placing any heavy objects on the newly installed tiles for the specified drying period to prevent damage.
- Ensure the area is well-ventilated to facilitate proper drying. Open windows or use fans to improve air circulation.
- Avoid exposing the tiles to excessive moisture during the drying period. If necessary, cover the area with a tarp or plastic sheet to protect it from water or humidity.
By allowing sufficient drying time, you prevent premature damage to the tile installation and ensure its durability in the long run. Once the tiles and grout have dried completely, you can confidently enjoy the warmth and beauty of your fireplace.
Frequently Asked Questions On How To Install Tile Around Fireplace
What Do You Put Behind Tile On A Fireplace?
The material typically used behind tile on a fireplace is cement backer board. It provides a stable and fire-resistant surface for the tile installation.
Do You Need Special Adhesive For Tile Around A Fireplace?
Yes, a special adhesive is needed for tile around a fireplace. The heat and flames produced by the fireplace require an adhesive that can withstand high temperatures. Using regular adhesive may cause the tile to loosen or crack due to the extreme heat.
It is important to choose a heat-resistant adhesive specifically designed for fireplace tile installation.
How Do You Finish Tile Edges On A Fireplace?
To finish tile edges on a fireplace, you can use bullnose tiles, metal edge trim, wood molding, or caulk. These options provide a clean and professional look while protecting the edges of the tiles. It’s important to choose the appropriate method based on the style and materials used for the fireplace.
How Do You Attach Tile To A Brick Fireplace?
To attach the tile to a brick fireplace, follow these steps:
- Clean the brick surface thoroughly.
- Apply a layer of mortar or adhesive to the brick.
- Press the tiles firmly onto the brick, making sure they are level.
- Use tile spacers for even spacing between tiles.
- Allow the adhesive to dry completely before grouting the tiles.
Conclusion
Adding tile around a fireplace can enhance the aesthetic appeal of your living space while protecting the surrounding walls. By following the step-by-step guide in this blog post, you can easily install tile around your fireplace and bring a charming and stylish touch to your home.
Remember to thoroughly prepare the surface, choose the right type of tile, and ensure proper installation for a beautiful and functional result. Enjoy your newly transformed fireplace!