To install recessed lighting with attic access, follow these steps:
- Prepare the necessary tools and materials.
- Turn off the power to the area where you’ll be working.
- Measure and mark the locations of the recessed lights.
- Cut the holes using a drywall saw or hole saw.
- Install the recessed light housings and electrical boxes.
6. Connect the wiring to each light fixture. 7. Secure the fixtures in place. 8. Turn the power back on and test the lights to ensure they’re working properly.
Safety Precautions
When it comes to installing recessed lighting with attic access, safety should always be a top priority. Taking the necessary precautions can help prevent accidents and ensure a smooth installation process. In this section, we will discuss the importance of safety precautions, the necessary safety equipment, and measuring the load capacity of the attic floor.
Importance of Safety Precautions
Before diving into the installation process, it is crucial to understand the importance of safety precautions. Here are a few reasons why these precautions should never be overlooked:
- Preventing Accidents: By implementing safety measures, you reduce the risk of accidents such as falls or electrical injuries.
- Protecting Yourself and Others: Safety precautions not only safeguard your well-being but also the well-being of those around you, such as family members or other workers.
- Complying with Regulations: Adhering to safety guidelines ensures that you meet the necessary legal requirements and building codes.
Necessary Safety Equipment
Equipping yourself with the right safety gear is imperative to carry out the installation process successfully. Here are some essential safety equipment you should have:
- Protective Eyewear: Safety goggles or glasses will shield your eyes from dust, debris, and potential hazards.
- Gloves: Wear gloves to protect your hands from sharp objects, electrical wires, or any potential injuries.
- Hard Hat: A hard hat will provide protection from falling objects or accidental bumps in the attic.
- Non-Slip Footwear: Ensure you wear sturdy, non-slip footwear to maintain stability and prevent slips or trips.
- Insulated Tools: Insulated tools help reduce the risk of electrical shocks when handling wiring or connectors.
Measuring the Load Capacity of the Attic Floor
It is crucial to determine the load capacity of the attic floor before installing recessed lighting to avoid creating structural issues. Follow these steps to make sure the floor can support the weight:
- Locate the Joists: Identify the location of the ceiling joists using a stud finder or by tapping the ceiling to listen for solid sounds.
- Measure the Joist Spacing: Measure the distance between each joist to determine the load capacity of the floor.
- Consult Structural Support Guides: Refer to building codes and structural support guides to ensure your attic floor can handle the additional weight of the recessed lighting.
By following these steps, you can ensure a safe and secure installation process while preventing any damage to the attic’s structural integrity.
Determine Placement Of Recessed Lighting
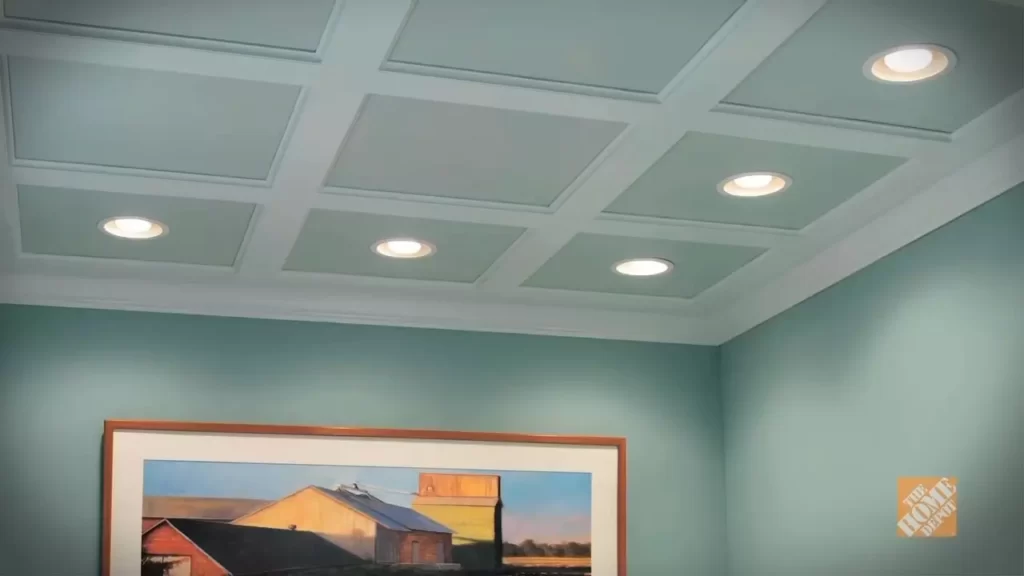
Proper placement of recessed lighting can make a significant difference in the overall ambiance and functionality of a room. Whether you’re looking to add lighting to a new construction or upgrading your existing lighting, it’s essential to determine the ideal placement for recessed lighting. In this section, we will explore the steps to determine the placement of recessed lighting in your space.
Evaluating Existing Lighting Layout
The first step in determining the placement of recessed lighting is to evaluate the existing lighting layout. Take a look at the current fixtures and identify any areas that could benefit from additional or improved lighting. Consider the purpose of the room and the tasks that are typically performed in that space. Is the lighting evenly distributed, or are certain areas left in shadow?
When evaluating the existing lighting layout, consider the following:
- Identify areas that require concentrated lighting for specific tasks, such as kitchen countertops or office workspaces.
- Take note of areas that need accent lighting to highlight artwork, architectural features, or decorative elements.
- Consider the overall mood and atmosphere you want to create in the room. Is it cozy and intimate, or bright and energizing?
Factors to Consider for Optimal Placement
Several factors should be considered to ensure the optimal placement of recessed lighting. These factors will help you achieve a balanced and functional lighting design in your space.
When determining the optimal placement of recessed lighting, consider the following:
- Room size and layout: The size and shape of the room will determine the number and placement of recessed lights needed for proper illumination.
- Ceiling height: The height of the ceiling will impact the optimal placement and spacing of recessed lighting. Higher ceilings may require more lights to adequately light the space.
- Furniture placement: Consider the location of furniture and other fixtures in the room. Ensure that the recessed lighting does not cast shadows or create glare on surfaces.
- Natural light sources: Take into account the natural light sources in the room, such as windows or skylights. Strategically place recessed lights to complement or supplement the natural light.
- Electrical considerations: Plan the placement of recessed lighting while keeping in mind the available electrical wiring and access points.
Calculating the Number of Recessed Lights Needed
To ensure proper illumination, it’s important to calculate the number of recessed lights needed for your space. This will help you determine the spacing between each light fixture.
Follow these steps to calculate the number of recessed lights needed:
- Measure the dimensions of the room, including the width and length.
- Divide the total square footage of the room by the recommended square footage coverage per light fixture. This will give you an estimate of the number of lights needed.
- Adjust the number of lights based on the factors mentioned earlier, such as room layout, ceiling height, and furniture placement.
By considering these criteria and calculating the appropriate number of recessed lights, you can achieve an optimal lighting design that enhances both the functionality and aesthetics of your space.
Gathering Tools And Materials
Before you begin installing recessed lighting with attic access, it’s important to gather all the necessary tools and materials. Having everything you need on hand will not only make the installation process smoother, but it will also help you work efficiently. Here is a list of tools and materials you will need:
List of tools required:
- Wire cutters/strippers
- Screwdriver (flathead and Phillips)
- Drill with a hole saw attachment
- Tape measure
- Fish tape
- Utility knife
- Staple gun
- Ladder or step stool
- Safety goggles
- Gloves
Materials needed for installation:
- Recessed lighting fixtures
- Remodel or new construction recessed light housings
- Bulbs (compatible with your chosen recessed lighting fixtures)
- Electrical wire
- Wire connectors
- Wire staples
- Electrical tape
- Extension cord (if needed)
- Attic access cover or board
Choosing the right type of recessed lights
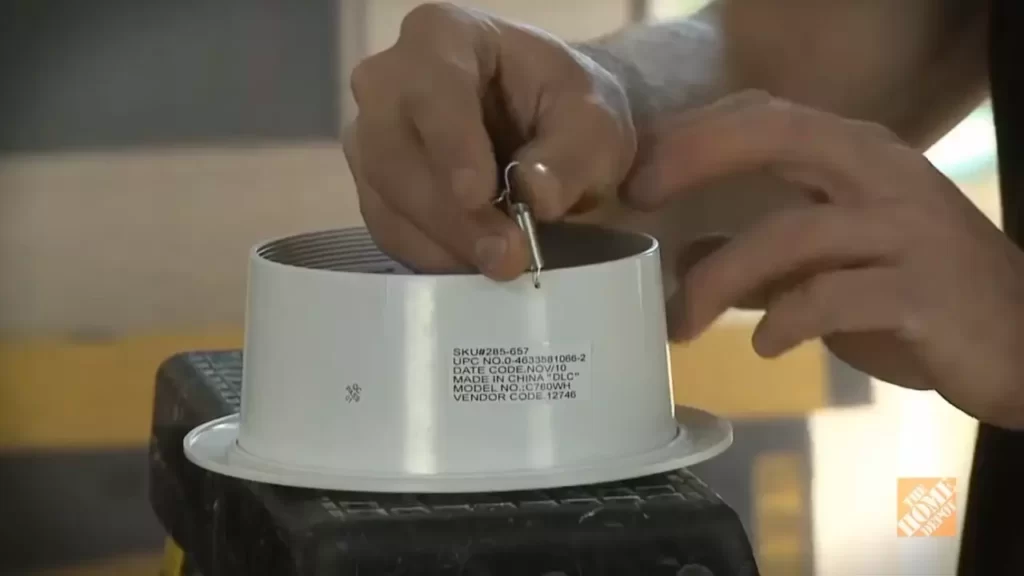
When it comes to choosing the right type of recessed lights, there are a few factors to consider. First, you need to decide whether you want to use remodeled recessed light housings or new construction recessed light housings. Remodel housings are suitable if you already have an existing ceiling and want to install recessed lights without making major structural changes. On the other hand, new construction housings are ideal if you are building a new ceiling or making significant modifications to an existing one.
Secondly, you need to choose the type of recessed lighting fixtures that best suit your needs. There are different types available, such as LED, incandescent, and CFL. LED lights are energy-efficient, have a long lifespan, and produce minimal heat, making them a popular choice. Incandescent lights emit a warm, natural light but are less energy-efficient. CFL lights offer energy efficiency and a longer lifespan compared to incandescent lights, but they can take some time to reach full brightness.
By considering your specific requirements and preferences, you can choose the right type of recessed lights that will provide the desired lighting effect for your space.
Preparing The Attic Space
Before you can start installing recessed lighting with attic access, it’s important to prepare the attic space properly. This involves clearing clutter and obstacles, evaluating insulation and ventilation, and creating access points in the ceiling. By following these steps, you’ll ensure a smooth and successful installation process.
Clearing Clutter and Obstacles
The first step in preparing the attic space is to clear out any clutter and obstacles. This includes removing any items or debris that may impede your access or pose a safety hazard during the installation process. Take the time to organize your attic and remove any unnecessary items to create a clean and clear workspace.
Evaluating Insulation and Ventilation
Next, it’s important to evaluate the insulation and ventilation in your attic. Proper insulation plays a crucial role in maintaining energy efficiency and preventing heat loss. Check for any damaged or inadequate insulation and make the necessary repairs or upgrades. Additionally, assess the ventilation in your attic to ensure proper airflow and prevent moisture buildup.
Creating Access Points in the Ceiling
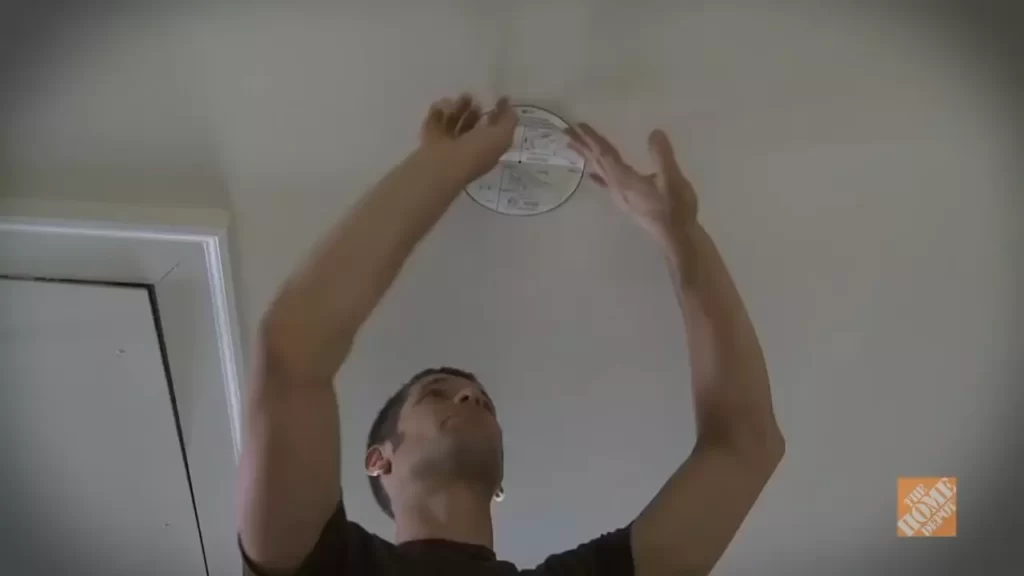
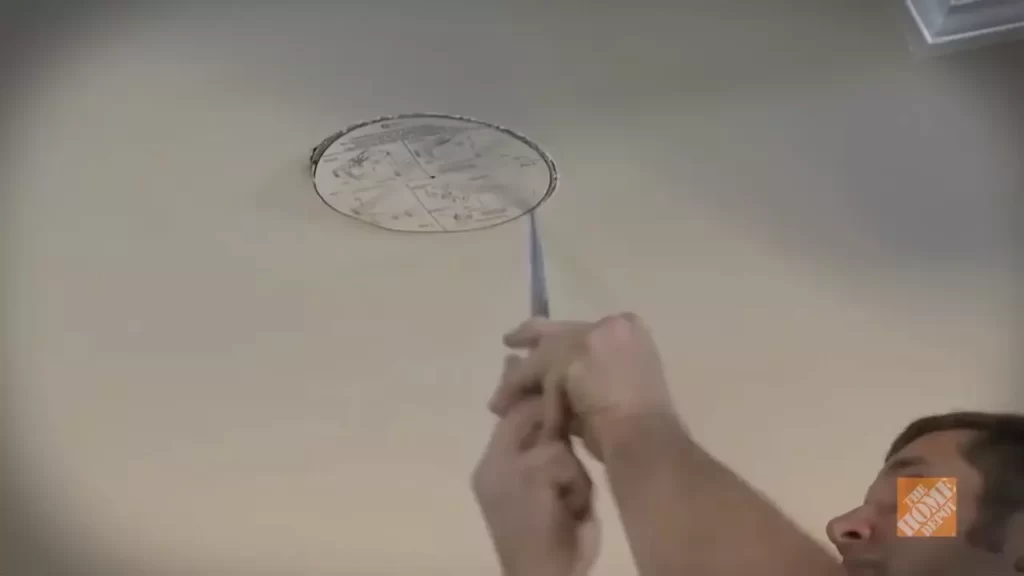
In order to install recessed lighting, you’ll need to create access points in the ceiling. This involves carefully measuring and marking the locations where you want the lights to be installed. Use a stud finder to locate the ceiling joists and avoid cutting into them. Once you’ve marked the locations, use a drywall saw or a hole saw to cut out the openings for the recessed lights. Make sure to adhere to the manufacturer’s specifications for hole size and spacing.
Note: It’s important to exercise caution when working in the attic. Wear appropriate safety gear, such as gloves, goggles, and a dust mask, and be mindful of any electrical wiring or other hazards that may be present. If you’re unsure about any aspect of the installation process, consult a professional electrician.
Wiring Considerations
When installing recessed lighting with attic access, proper wiring considerations are crucial to ensure safety and compliance with electrical codes and regulations. Understanding the codes and regulations, identifying existing wiring and circuits, and extending electrical circuits for new lights are key factors to consider. Let’s delve deeper into each of these aspects to make your recessed lighting installation a seamless and hassle-free process.
Understanding Electrical Codes and Regulations
Before you begin any electrical work, it’s important to familiarize yourself with the electrical codes and regulations in your area. These codes are in place to ensure the safety of you, your home, and everyone who resides in it. Adhering to these codes not only avoids potential accidents but also keeps you compliant with the law.
When it comes to recessed lighting installations, some common electrical codes and regulations include:
- Minimum clearance requirements around the fixtures
- Using the appropriate gauge of wire for the circuits
- Installing ground fault circuit interrupters (GFCI) in wet or damp areas
Always consult with a licensed electrician or your local authorities to ensure you’re following the specific electrical codes and regulations in your area.
Identifying Existing Wiring and Circuits
Prior to installing recessed lighting, it’s crucial to identify the existing wiring and circuits in your attic. This step helps you understand the available power sources and determine the best approach for extending circuits to accommodate the new lights.
Here’s how you can identify existing wiring and circuits:
- Locate the electrical panel: Begin by locating the main electrical panel in your home. This is where all the circuit breakers or fuses are housed.
- Map out the circuits: As you inspect the panel, create a visual map of all the circuits and label them accordingly. This will help you identify the circuits that can be extended for your recessed lighting.
- Trace existing wiring: Follow the existing wiring from the electrical panel to determine where it leads. This will give you an idea of the existing circuits’ paths within your home.
Taking the time to identify existing wiring and circuits ensures you have a clear understanding of your electrical system and enables you to plan the installation process efficiently.
Extending Electrical Circuits for New Lights
Once you’ve identified the existing wiring and circuits, you can proceed with extending the electrical circuits to accommodate the new recessed lighting. This step involves connecting additional wiring to the existing circuit and routing it to the desired locations for the new lights.
Here are some important considerations when extending electrical circuits for new lights:
- Choose the right wire gauge: Ensure you select the appropriate wire gauge based on the electrical load and length of the circuit. This will prevent overheating and potential hazards.
- Use wire connectors: When connecting new wiring to the existing circuit, use proper wire connectors to ensure secure and reliable connections.
- Route the wiring carefully: Take the time to route the wiring neatly and safely, avoiding any sharp edges or areas prone to damage.
Extending electrical circuits requires precision and caution to avoid any electrical mishaps. If you’re uncertain or lack experience in this area, it’s advisable to hire a qualified electrician for the job.
By understanding electrical codes and regulations, identifying existing wiring and circuits, and extending electrical circuits with due diligence, you’ll be well-equipped to install recessed lighting with attic access confidently and safely.
Cutting And Securing Holes In The Ceiling
Installing recessed lighting can not only enhance the overall look of your space but also provide efficient and focused illumination. When it comes to installing recessed lighting with attic access, one crucial step you need to master is cutting and securing holes in the ceiling. This step ensures that the lights are properly placed and securely fastened, resulting in a seamless and professional installation. In this section, we will guide you through the process of measuring and marking the locations for lights, using a hole saw or drywall saw for cutting, and securing support brackets for recessed lights.
Measuring and marking the locations for lights
Before you begin cutting holes in the ceiling, it is important to measure and mark the precise locations where you want to install the recessed lights. Start by identifying the layout and arrangement that best suits your needs. Once you have a plan in mind, use a measuring tape to mark the exact spots on the ceiling where the lights will be positioned. It is recommended to space the lights evenly and consider factors like room dimensions and furniture layout to ensure balanced lighting.
Using a hole saw or drywall saw for cutting
Once you have marked the locations, it’s time to cut the holes in the ceiling for the recessed lights. There are two common tools you can use for this task: a hole saw or a drywall saw. A hole saw is a specialized tool that creates precise circular holes by drilling into the ceiling. Ensure that the size of the hole saw matches the diameter of your recessed lights. On the other hand, a drywall saw is a hand tool that allows you to cut the necessary openings with precision. Whichever tool you choose, make sure to follow the marked locations accurately and use steady but gentle pressure to avoid damaging the ceiling.
Securing support brackets for recessed lights
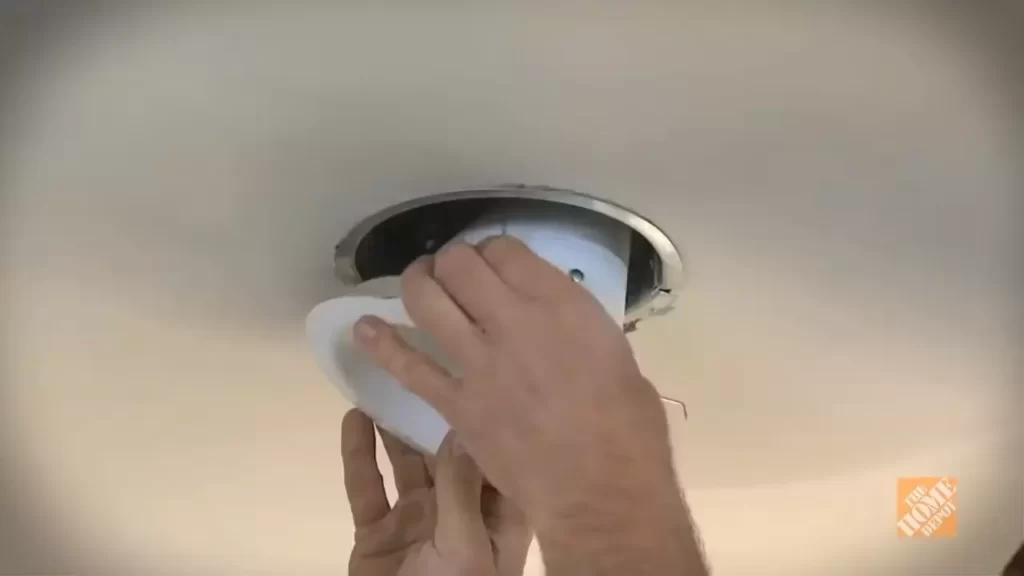
After cutting the holes, the next step is to secure the support brackets for the recessed lights. These brackets help hold the lights in place and provide stability. To do this, follow the manufacturer’s instructions on how to install the support brackets. Typically, this involves positioning the brackets within the cut holes and attaching them securely to the ceiling joists. Make sure to double-check that the brackets are straight and securely fastened, as this will ensure the proper installation and stability of the recessed lights.
By following these steps for cutting and securing holes in the ceiling, you will be well on your way to successfully installing recessed lighting with attic access. Remember to measure and mark the locations accurately, use the appropriate tools for cutting, and securely fasten the support brackets. This will result in professionally installed recessed lights that provide both functionality and aesthetic appeal to your space.
Installing The Recessed Lighting Fixtures
Once you have accessed your attic and prepared the area for installation, it’s time to start installing the recessed lighting fixtures. This step-by-step guide will walk you through the process, ensuring a successful and safe installation.
Connecting the wiring to the light fixtures
Before securing the light fixtures in the ceiling, you need to connect the wiring to each one. Follow these steps:
- Turn off the power to the circuit you’ll be working on by flipping the corresponding circuit breaker in your electrical panel.
- Locate the wiring that runs through your attic to the area where you’ll be installing the recessed lighting fixtures.
- Strip about 3/4 inch of insulation from the end of each wire. This will expose the copper conductor.
- Next, connect the wires to the corresponding color-coded wires on the recessed lighting fixture. Twist the exposed wires together and secure them with wire nuts.
- It’s important to follow the manufacturer’s instructions for wiring connections. Make sure all connections are tight and secure.
- Use electrical tape to cover the wire nuts, ensuring no exposed wires are visible.
Securing the fixtures in the ceiling
Once the wiring is connected, you can proceed with securing the recessed lighting fixtures in the ceiling. Here’s how:
- Position each fixture in the desired location, making sure it is aligned with the cutout hole in the ceiling.
- Insert the fixture into the hole, ensuring it fits snugly against the ceiling.
- Using the provided screws or clips, secure the fixture to the ceiling joists or mounting brackets. Follow the manufacturer’s instructions for proper installation.
- Double-check that the fixture is securely fastened and stable. Test it to ensure it does not move or wobble.
Installing trim and adjusting the light angle
With the fixtures securely in place, you can now install the trim and adjust the light angle to your preference. Follow these steps:
- Select the trim style that best suits your aesthetic preferences and fits the recessed lighting fixtures.
- Insert the trim into the fixture, following the manufacturer’s instructions.
- Adjust the light angle by rotating the trim or using any adjustable mechanisms provided.
- Ensure the light is directed toward the desired area, taking into consideration the purpose of the lighting.
Once you have completed these steps for each recessed lighting fixture, you can turn the power back on at your electrical panel, and your newly installed recessed lighting will illuminate your space with a beautiful and functional glow.
Testing And Adjusting The Lights
After successfully installing recessed lighting with attic access, the next step is to test and adjust the lights for optimal performance. This crucial step ensures that your new lighting fixtures are functioning correctly and properly illuminating your space. In this section, we will walk you through the process of double-checking the electrical connections, testing the lights for proper functioning, and adjusting the direction and angle of the lights.
Double-checking the electrical connections
Before testing the lights, it’s important to double-check all the electrical connections to ensure everything is wired correctly. This step helps prevent any potential issues such as flickering lights or power supply problems. To double-check the connections:
- Turn off the power to the lights at the circuit breaker.
- Remove the trim and bulb from each recessed light fixture.
- Inspect the electrical connections, ensuring that all wires are securely connected.
- Tighten any loose connections using a screwdriver or pliers, if necessary.
- Replace the trim and bulb back into each fixture.
- Turn the power back on and check if the lights turn on without any issues.
Testing the lights for proper functioning
Once you have double-checked the electrical connections, it’s time to test the lights to ensure they are functioning properly. Follow these steps to test the lights:
- Turn on the power to the lights at the circuit breaker.
- Stand a few feet away from the recessed lights and observe their performance.
- Check if all the lights turn on and emit the desired level of brightness.
- If any lights are not turning on or appear dim, double-check the electrical connections and replace the bulb if necessary.
- Make a note of any lights that require further adjustments.
Adjusting the direction and angle of the lights
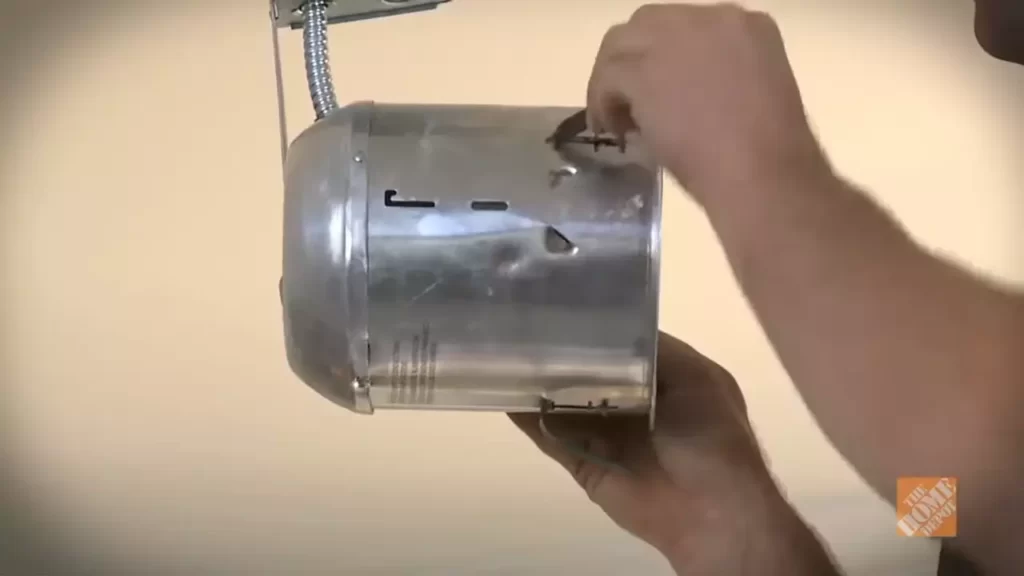
After testing the lights, you may find that some fixtures require adjustment in terms of direction and angle to achieve optimal lighting coverage. Here’s how to do it:
- Turn off the power to the lights at the circuit breaker.
- Remove the trim from the recessed fixture that needs adjustment.
- Use a screwdriver or pliers to loosen the adjustment screws on the fixture.
- Rotate and tilt the fixture to the desired position to achieve the desired lighting effect.
- Tighten the adjustment screws to secure the fixture in place.
- Replace the trim back onto the fixture.
- Turn the power back on and observe the adjusted fixture’s performance.
By following these steps and thoroughly testing and adjusting the lights, you can ensure that your recessed lighting installation is a success. Take the time to double-check the electrical connections, test the lights for proper functioning, and make necessary adjustments for optimal lighting coverage. With these tasks completed, you can now fully enjoy the benefits of your newly installed recessed lighting.
Finishing Touches And Cleanup
Once you have successfully installed recessed lighting with attic access, you are nearly finished with your project. However, there are a few important finishing touches and cleanup tasks to complete before you can fully enjoy your newly illuminated space. By following these steps, you can ensure a seamless transition from installation to final result.
Patching and Painting the Ceiling as Needed
If your recessed lighting installation required cutting holes in the ceiling, it is crucial to patch and paint those areas to create a polished and cohesive look. Begin by gently sanding any rough edges around the newly created holes, ensuring a smooth surface for patching. Next, apply a thin layer of patching compound to fill in the holes, using a putty knife to achieve a flush finish.
Allow the compound to dry completely, and then lightly sand the patched areas once more to ensure a seamless blend with the surrounding ceiling. Finally, apply a coat of paint that matches the existing ceiling, utilizing a brush or roller for a consistent and professional appearance.
Cleaning up the Work Area
After completing any installation project, it is important to thoroughly clean up the work area to remove any debris, dust, or tools that may have accumulated during the process. Start by collecting all discarded packaging materials, unused wiring, and any other trash that may have accumulated.
Dispose of these items properly according to local regulations. Next, use a broom or vacuum cleaner to eliminate any loose dust or debris on the floor and surrounding surfaces. Wipe down any tools or equipment that were used during the installation to ensure they are kept in good condition. By taking the time to tidy up, you can enjoy both a clean work area and a pristine lighting installation.
Final Inspection and Safety Checks
Before you can fully enjoy your newly installed recessed lighting, it is essential to perform a final inspection and safety check to ensure everything is working properly and there are no potential hazards. Begin by visually inspecting all components of the lighting system, including the bulbs, housings, and electrical connections.
Look for any signs of damage, loose connections, or exposed wires that may pose a risk. Next, turn on the lights and ensure that each fixture is illuminating as expected. Test the switches to verify they are functioning correctly. Finally, double-check that the junction boxes are securely fastened and that there are no gaps or exposed wiring. By conducting this thorough inspection, you can have peace of mind knowing that your new recessed lighting is both functional and safe.
Installing recessed lighting with attic access is an excellent way to enhance the aesthetics and functionality of any space. By following these steps for finishing touches and cleanup, you can effectively complete your project and enjoy the benefits of well-lit surroundings. Remember to patch and paint the ceiling, clean up the work area, and perform a final inspection and safety checks for a seamless and satisfying finish.
Frequently Asked Questions For How To Install Recessed Lighting With Attic Access
How Do You Install Recessed Lights Without A Can?
To install recessed lights without a can, you can use retrofit LED kits. These kits consist of a trim and a LED light module that can be installed directly into the ceiling. Just remove the existing light fixture, connect the wiring, and secure the retrofit LED kit in place.
How Do You Remove Can Lights Without Attic Access?
To remove can lights without attic access, follow these steps: First, turn off the power to the lights. Then, remove the light bulb and trim. Unscrew the retaining clips holding the fixture in place. Carefully pull the fixture from the ceiling, being mindful of any wiring.
Finally, disconnect the electrical connections.
Do All Recessed Lights Have To Be In A Box?
Recessed lights do not have to be in a box. However, in some cases, a junction box might be required for safety and to meet electrical code requirements. It is always best to consult with a licensed electrician to determine the specific requirements for your installation.
Can You Install A Ceiling Light Without Existing Wiring?
Yes, it is possible to install a ceiling light without existing wiring by using a wireless light fixture or a battery-powered light. These options eliminate the need for electrical wiring, making it a convenient solution for areas where wiring is not easily accessible or permitted.
Conclusion
Installing recessed lighting with attic access is a straightforward process that can enhance the ambiance and functionality of any space. By following the step-by-step instructions outlined in this guide, you can confidently tackle this home improvement project. Remember to prioritize safety, plan the layout carefully, and consult a professional if needed.
With a little time and effort, you can transform your home with beautiful recessed lighting. Get started today and enjoy the benefits of a well-lit space.
