To install a pull-down attic ladder, you need to follow a few simple steps. This guide will walk you through the process, from measuring and preparation to installation and finishing touches.
By the end, you’ll have a safe and convenient access point to your attic. A pull-down attic ladder provides an easy solution for accessing your storage space or attic while saving valuable floor space. It’s a practical addition to any home that can enhance convenience and functionality.
So, let’s get started on installing a pull-down attic ladder.
Factors To Consider When Selecting An Attic Ladder
When it comes to installing a pull-down attic ladder, there are several important factors to consider. These factors can greatly impact the functionality and safety of your ladder, making it essential to choose the right one for your specific needs. In this section, we will dive into the key factors that must be taken into account when selecting an attic ladder.
Weight Capacity
The weight capacity of an attic ladder is a crucial consideration. It determines the maximum amount of weight the ladder can safely support without any risk of accidents or collapsing. To ensure safety and durability, be sure to choose a ladder with a weight capacity that exceeds the maximum weight you plan to carry up and down. This will not only provide a secure and stable climbing experience but also extend the lifespan of the ladder by preventing strain or damage due to overloading.
Ceiling Height
The height of your ceiling is another vital factor to consider. Attic ladders are available in various sizes to accommodate different ceiling heights. Before making a purchase, measure the distance from the floor to your ceiling accurately. This measurement will help you determine the ladder length you need and ensure a proper fit. It is essential to choose a ladder that can fully extend to your ceiling height, ensuring easy access to your attic without any inconvenience.
Opening Size
The size of your attic opening is a crucial factor to think about when selecting an attic ladder. Different models of ladders have different dimensions, and you want to ensure that the ladder you choose fits perfectly into your existing opening. Measure the width and length of your attic opening carefully, and compare it with the specifications of the ladder you are considering. Choosing a ladder that matches your opening size will guarantee a seamless installation process, eliminating the need for any modifications or adjustments.
Material and Durability
Material and durability are essential factors to evaluate while choosing an attic ladder. The material used in the construction of the ladder determines its strength, stability, and longevity. Common options include aluminum, wood, and steel. Each material has its own advantages and disadvantages, so it’s important to assess your specific needs and preferences. Consider factors such as weight, insulation, maintenance requirements, and budget when deciding on the right material for your attic ladder. Opting for a ladder made from high-quality and durable materials will ensure long-lasting performance and peace of mind.
Step-By-Step Guide To Measuring And Determining The Right Size Ladder
Installing a pull-down attic ladder can be a great addition to your home, providing easier access to storage space in your attic. However, before you start the installation process, it’s important to measure and determine the right size ladder for your attic. In this step-by-step guide, we will walk you through the process of measuring the ceiling height, measuring the opening size, and considering additional space requirements, ensuring that you choose the perfect ladder for your attic.
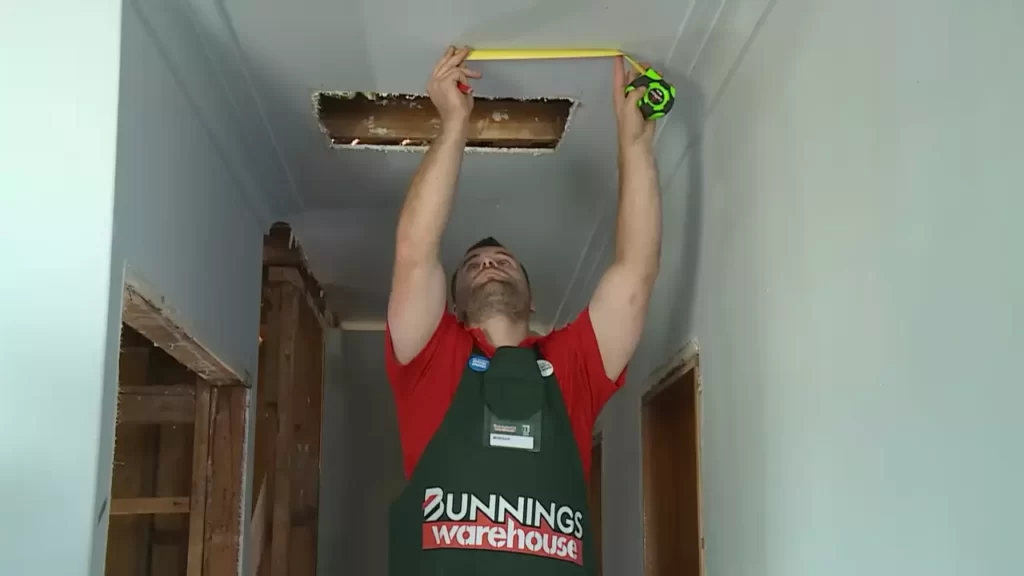
Measure the Ceiling Height
One of the first steps in determining the right size ladder is to measure the ceiling height in your attic. This measurement will help you ensure that the ladder will fit properly and allow for comfortable access. To measure the ceiling height, follow these steps:
- Start by locating the highest point of your attic ceiling.
- Use a tape measure to measure from the floor to the highest point of the ceiling. Make sure to measure at multiple points to account for any variations in ceiling height.
- Record the measurements and take note of the highest measurement you obtained. This will be the required height for your ladder.
Measure the Opening Size
Next, you’ll need to measure the opening size of your attic. This measurement will help you determine the width and length of the ladder needed to fit into the attic entrance. Follow these steps to measure the opening size:
- Measure the width of the attic opening by measuring the distance between the two sides of the opening at its widest point.
- Measure the length of the attic opening by measuring the distance between the top and bottom of the opening at its longest point.
- Record both measurements for reference when choosing the ladder size.
Consider Additional Space Requirements
Aside from the ceiling height and opening size, it’s also important to consider any additional space requirements for your attic ladder. This includes clearance space in the attic for the ladder to fully extend and retract, as well as any obstacles that may hinder the ladder’s operation. Consider the following:
- Make sure there is sufficient clearance space above the attic entrance to accommodate the ladder when it is fully extended.
- Check for any obstructions, such as electrical wires or ductwork, that may hinder the ladder’s operation or pose a safety risk.
- Take into account any weight limitations or load capacity requirements if you plan on using the ladder for carrying heavy items.
By following this step-by-step guide, you can accurately measure and determine the right size pull-down attic ladder for your home. Taking the time to properly measure and consider the space requirements will ensure that your ladder fits perfectly, providing easy access to your attic while maintaining safety and convenience.
Essential Tools And Materials
When it comes to installing a pull-down attic ladder, having the right tools and materials is essential. This will not only make the installation process smoother but also ensure that the ladder is installed securely, providing easy access to your attic. In this section, we will explore the necessary tools and materials you will need for a successful installation.
List of Required Tools
Before you begin the installation, make sure you have the following tools on hand:
- A drill with a 1/4-inch bit
- A tape measure
- A pencil
- A level
- A reciprocating saw or a jigsaw
- A hammer
- A screwdriver (both Phillips and flathead)
- A wrench or pliers
- A utility knife
- Safety glasses
- Gloves
Having these tools readily available will save you time and minimize any potential frustrations during the installation process.
Necessary Materials and Supplies
In addition to the tools, you will also need a list of necessary materials and supplies to complete the installation:
- A pull-down attic ladder kit (make sure it fits the dimensions of your attic opening)
- Screws (check the manufacturer’s instructions for the recommended type and size)
- Nails
- Wood shims
- Insulation
- Staple gun
- Caulk or expanding foam
- Ladder shoes or brackets for added stability
- Duct tape or weather stripping for sealing any gaps
These materials and supplies are essential for not only installing the ladder but also ensuring its functionality and energy efficiency.
Safety Precautions To Keep In Mind
When it comes to installing a pull-down attic ladder, safety should always be your top priority. Taking the necessary precautions will not only minimize the risk of accidents but also ensure a smooth installation process. In this section, we will highlight some key safety measures you need to keep in mind before you begin.
Clearing the Work Area
Before you start the installation process, it is crucial to clear the work area of any obstacles or clutter that could pose a safety hazard. Ensure that the area around the attic entrance is free from furniture, boxes, or any other items that may impede your movement. This will provide you with enough space to work comfortably and reduce the risk of tripping or falling.
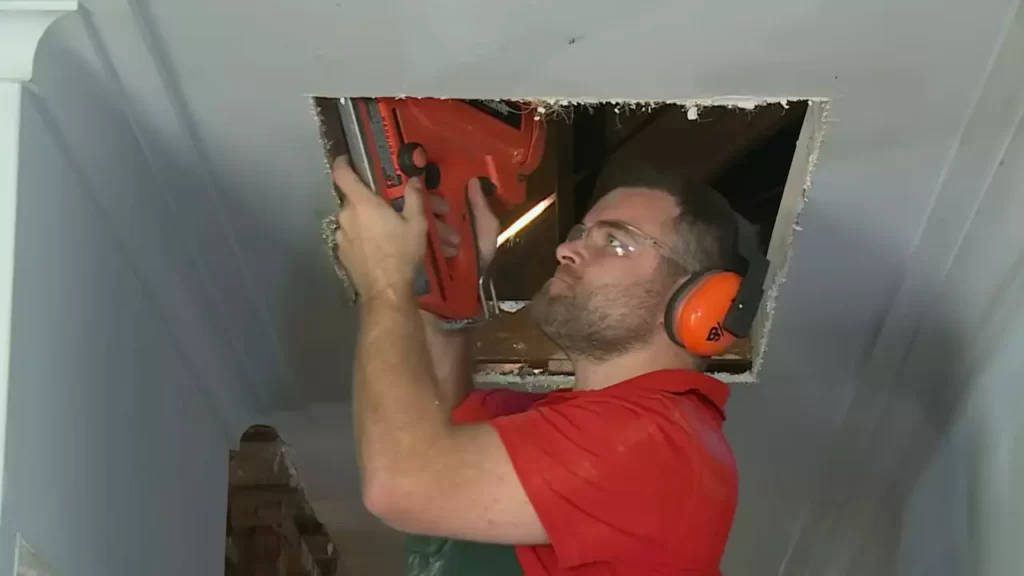
Using Personal Protective Equipment (PPE)
Personal Protective Equipment (PPE) is essential to protect yourself from potential hazards during the installation process. Ensure that you wear the appropriate gear, including safety goggles to shield your eyes from debris, work gloves to protect your hands, and a hard hat to prevent head injuries. Additionally, it is recommended to wear a dust mask to prevent inhaling any dust or insulation particles that may be present in the attic.
Ensuring Proper Ventilation
Proper ventilation is crucial when working in an attic space. Attics can be hot and poorly ventilated, leading to discomfort or even health issues like heat stroke. Make sure there is sufficient airflow by opening windows or installing fans before you begin. If needed, you can also wear lightweight, breathable clothing to stay cool during the installation process.
In conclusion, before you start installing a pull-down attic ladder, take the necessary safety precautions to ensure a safe and hassle-free experience. Clear the work area, ensure you are equipped with the proper personal protective equipment, and maintain proper ventilation. By following these safety measures, you can complete the installation process efficiently while minimizing any potential risks.
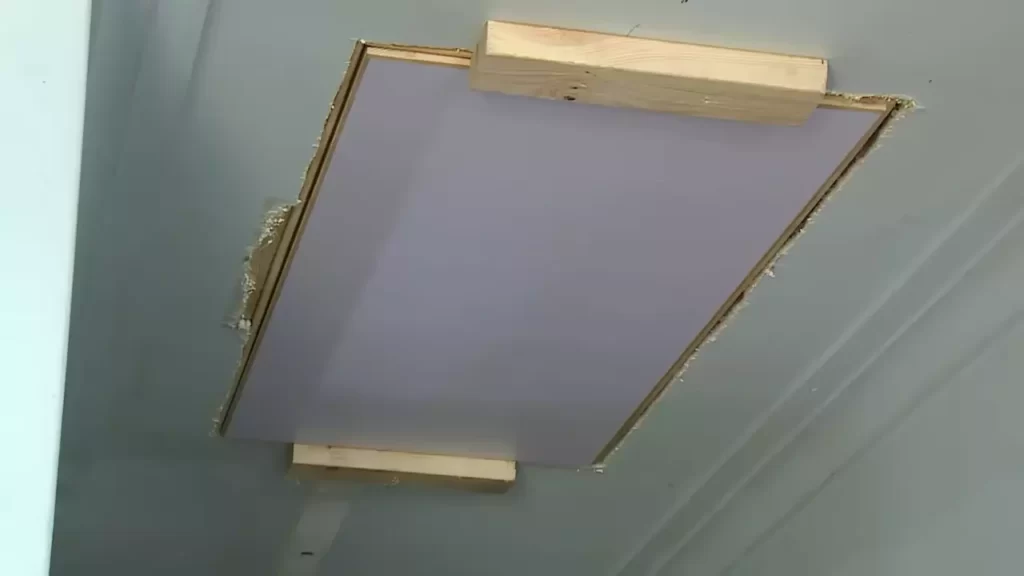
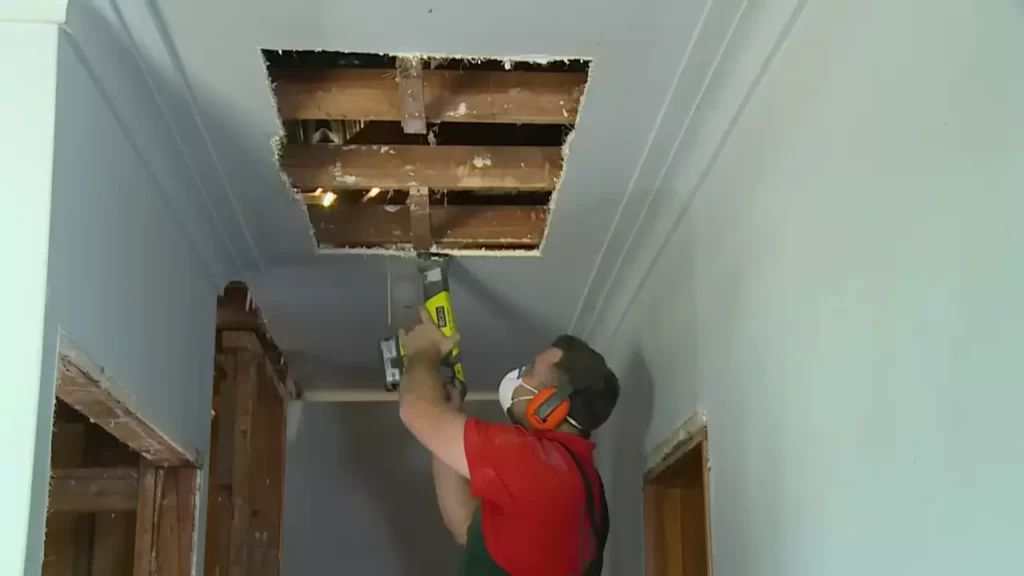
Step 1: Clearing And Preparing The Attic Opening
Before you can install a pull-down attic ladder, it’s crucial to clear and prepare the attic opening properly. This will ensure a smooth and hassle-free installation process. Follow these steps to get started:
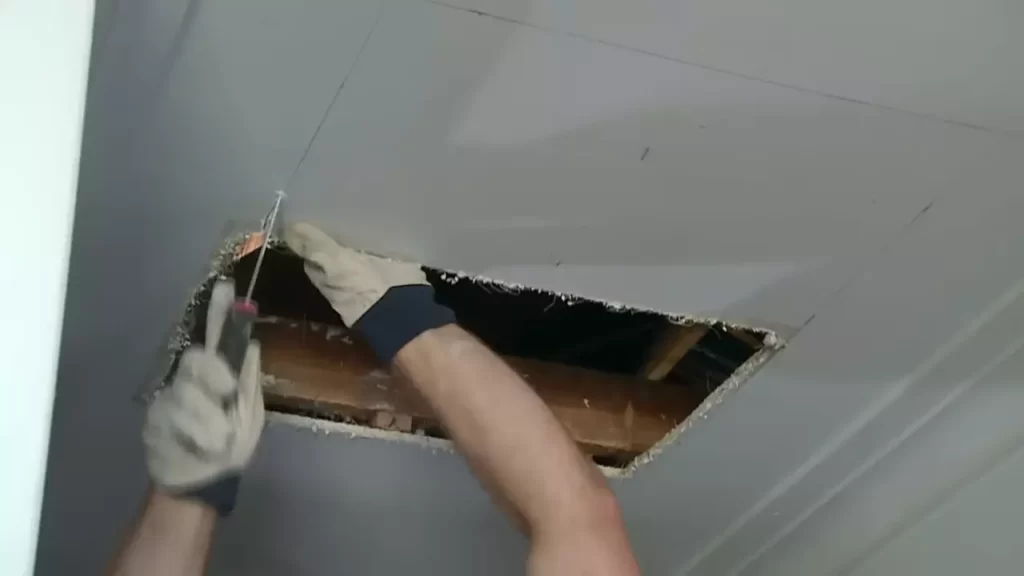
Removing any Obstructions
Before you begin, take a look at the attic opening and make sure there are no obstructions blocking your way. Any debris, old insulation, or other items should be cleared out to create a clear and safe working area.
Here’s how you can remove any obstructions:
- Wear protective clothing, gloves, and a face mask to minimize exposure to dust and allergens.
- Carefully remove any loose debris, such as leaves, twigs, and dirt, from the attic opening using a broom or vacuum cleaner.
- If there are any large items or old insulation blocking the way, move them out of the opening to create enough space for the ladder installation.
- Inspect the surrounding area for any protruding nails or sharp objects that may cause injury during the installation process. Remove or hammer them down.
Cleaning the Area
Once you have cleared away any obstructions, it’s time to clean the attic opening to ensure a clean and secure installation. Here’s what you need to do:
- Using a damp cloth or sponge, wipe down the edges and surfaces of the attic opening to remove dust, dirt, and any other debris.
- If you notice any mold or mildew, clean it off using a mixture of water and mild detergent. Be sure to wear protective gloves and a mask while doing this.
- Inspect the attic opening for any signs of damage, such as cracks or rotting wood. If you spot any issues, repair or reinforce the area before proceeding with the ladder installation.
- Not only will cleaning the area improve the overall aesthetic appeal, but it will also create a safer environment for the installation process.
By thoroughly removing any obstructions and cleaning the area, you are setting the stage for a successful pull-down attic ladder installation. These steps may seem simple, but they are crucial for ensuring a smooth and hassle-free process. Now that your attic opening is cleared and prepared, it’s time to move on to the next step: measuring and framing the opening. Stay tuned for our detailed guide on Step 2!
Step 2: Assembling The Ladder Components
Once you have familiarized yourself with the parts of the pull down attic ladder, it’s time to start assembling them. This step is crucial to ensure a safe and functioning ladder that will make accessing your attic a breeze. In this section, we will guide you through the process of assembling the ladder components, following the manufacturer’s instructions.
Familiarizing Yourself with the Parts
Before diving into the assembly process, take a moment to familiarize yourself with the various parts of the pull down attic ladder. Understanding the components will make it easier to follow the instructions and properly assemble the ladder. The main components typically include:
| Part | Description |
|---|---|
| Ladder sections | Individual sections that make up the ladder. |
| Hinges | Connect the ladder sections and allow for smooth folding and unfolding. |
| Pivot arms | Attach the ladder to the attic entrance and act as the pivot point. |
| Door panel | The panel that covers the attic entrance when the ladder is folded up. |
| Handrail | Provides stability and support while climbing up and down the ladder. |
| Hardware | Screws, bolts, and other fasteners that hold the ladder together. |
Following the Manufacturer’s Instructions
Now that you are familiar with the ladder components, it’s time to follow the manufacturer’s instructions for assembling them. Each pull down attic ladder may have specific instructions, so it’s important to carefully read and follow them to ensure proper installation. Here is a general guideline to assembling the ladder:
- Start by placing the ladder sections on a flat surface, making sure they are aligned correctly.
- Attach the hinges to connect the ladder sections, following the provided instructions.
- Secure the pivot arms to the attic entrance, ensuring they are properly aligned and sturdy.
- Attach the door panel to the ladder, ensuring it opens and closes smoothly.
- Check that all the components are securely tightened using the provided hardware.
Remember, it is crucial to follow the manufacturer’s instructions carefully to ensure a safe and reliable installation. Don’t rush through this step, as a properly assembled ladder will not only provide easy access to your attic but also promote safety in your home.
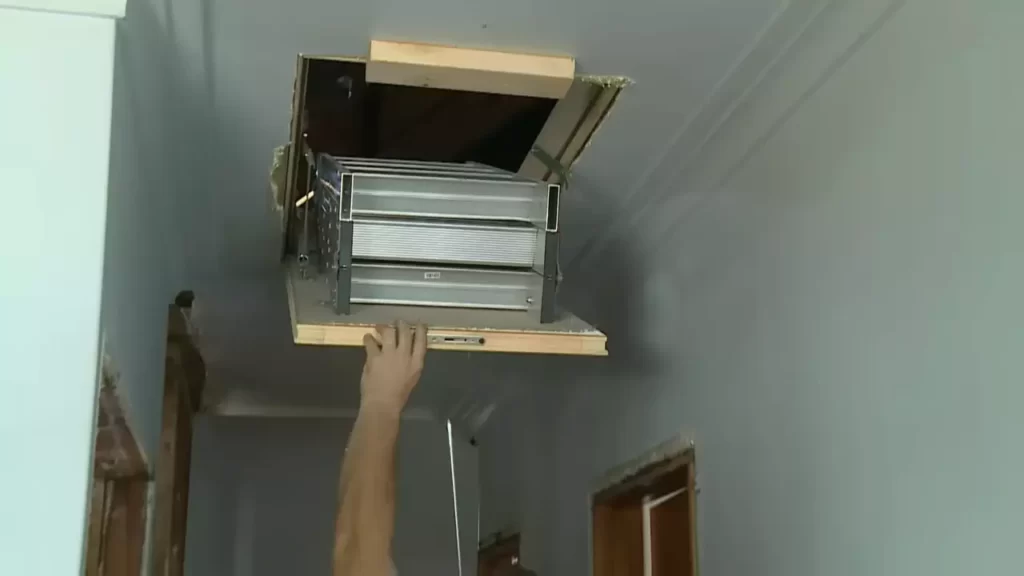
Step 3: Attaching The Ladder To The Ceiling
After properly positioning the pull-down attic ladder in the opening, the next crucial step is to secure it to the ceiling. This ensures the ladder is stable and safe to use. By following these simple instructions, you’ll have your ladder securely attached in no time.
Positioning the Ladder in the Attic Opening
Before you can attach the ladder to the ceiling, it’s important to ensure that it’s positioned correctly in the attic opening. Here’s a step-by-step guide to getting it right:
- Make sure the ladder is aligned straight and centered above the opening. This will ensure stability and safe usage.
- Confirm that there is enough clearance for the ladder to fully extend without hitting any obstructions in the attic, such as electrical wires or pipes.
- Double-check that the hinges are properly aligned with the attic opening, as this will ensure smooth operation when pulling the ladder down and pushing it back up.
Following these steps will help you position the ladder accurately, reducing the risk of any potential accidents.
Securing the Ladder to the Ceiling Joists
Now that you’ve properly positioned the ladder, it’s time to secure it to the ceiling joists. This step is crucial to guarantee the ladder’s stability and safety. Follow these instructions carefully:
- Mark the position of the ladder’s brackets on the ceiling joists. This will act as your reference point for attaching the ladder.
- Drill pilot holes into the ceiling joists at the marked positions. Use a drill bit that matches the size of your screws to ensure a secure fit.
- Place the ladder’s brackets over the pilot holes and align them properly. Ensure that the bracket is flush against the ceiling and centered over the opening.
- Secure the brackets to the ceiling by driving the screws through the bracket holes and into the pilot holes. Make sure the screws are tight, but avoid overtightening to prevent damage.
- Repeat this process for all the brackets, making sure they are evenly spaced for proper weight distribution.
Once all the brackets are securely attached to the ceiling joists, your pull-down attic ladder is ready to be used. Just ensure that all the screws are tightened properly and inspect the installation for any potential issues to make sure it’s safe for use.
By following these steps, you’ll be able to attach a pull-down attic ladder to your ceiling easily and securely. With a properly secured ladder, you’ll have convenient and safe access to your attic whenever you need it.
Step 4: Adjusting For Proper Fit And Functionality
Once you have securely installed your pull-down attic ladder, it’s time to fine-tune its fit and ensure smooth functionality. This step is crucial to guarantee easy access to your attic while maintaining safety. In this section, we will outline the necessary adjustments you need to make to achieve the perfect fit and optimal functionality.
Checking the Ladder’s Alignment
Before proceeding with any adjustments, it’s essential to ensure that the ladder is correctly aligned. This will prevent any issues that may arise from a misaligned ladder, such as it getting stuck or not closing properly. Here’s how to check and adjust the alignment:
- Stand beneath the ladder and observe its position. It should be centered and level with the attic opening.
- If you notice any misalignment, use a carpenter’s level to determine the exact adjustments needed.
- Loosen the bolts that secure the ladder frame to the attic joists, allowing slight movement for alignment purposes.
- Once you have made the necessary adjustments, re-tighten the bolts, ensuring the ladder is now perfectly aligned.
Adjusting the Springs and Hinges
In order to ensure smooth operation and prevent any sudden movements or accidents, it’s crucial to properly adjust the springs and hinges of your pull-down attic ladder. Follow these steps to achieve reliable functionality:
- Begin by examining the springs and hinges to identify any signs of damage or wear. Replace any faulty components before proceeding with adjustments.
- Using a wrench or pliers, make any necessary spring tension adjustments. The springs should provide enough support to help the ladder open and close smoothly.
- Test the ladder’s movement multiple times, ensuring it opens and closes effortlessly. Make additional adjustments as needed until you achieve the desired functionality.
Remember, properly adjusting your pull-down attic ladder is crucial for maintaining its long-term functionality and safety. Take the time to check the alignment carefully and adjust the springs and hinges accordingly. This extra effort will result in an attic ladder that will serve you reliably and provide easy access to your attic whenever needed.
Step 5: Insulating And Finishing Touches
Now that you have successfully installed your pull-down attic ladder, it’s time to focus on insulating and adding those finishing touches that will make your attic space more energy-efficient and comfortable. This step is crucial in preventing any heat loss or draft and ensuring the attic ladder is well-sealed. Here are the essential steps to take for insulation and finishing touches:
Insulating around the Attic Opening
Properly insulating the area around the attic opening is essential to prevent any heat transfer between your living space and the attic. Here’s how you can insulate this area effectively:
– Begin by measuring the dimensions of the attic opening. This will help you determine the amount of insulation material needed.
– Choose an insulation material such as fiberglass batts or foam boards. Make sure the material fits the dimensions of the attic opening snugly.
– Cut the insulation material to the appropriate size and place it around the attic opening. Ensure there are no gaps or spaces left uncovered.
– Use a staple gun or nails to secure the insulation material in place. This will prevent it from shifting or coming loose over time.
– If there are any gaps or spaces left, use caulking or expanding foam insulation to seal them. This will provide an airtight barrier and prevent any drafts from entering your living space.
Adding a Cover or Seal
To further enhance the insulation and energy efficiency of your attic ladder, consider adding a cover or seal. This will help prevent any air leakage and keep your home better insulated. Here are a few options to consider:
– Install an attic door cover: Attic door covers are specifically designed to fit over the attic opening and provide an extra layer of insulation. They are usually made of foam or insulated material and can easily be installed using adhesive strips or Velcro.
– Use weatherstripping: Apply weatherstripping around the edges of the attic opening to create a tight seal. Weatherstripping tape is an easy and cost-effective solution that helps to reduce any air leakage.
– Install a draft stopper: A draft stopper, also known as a door sweep, can be attached to the bottom edge of the attic door. It acts as a barrier against drafts and helps to maintain a consistent temperature within your living space.
By taking these steps to insulate and add finishing touches to your attic ladder installation, you can ensure that your attic space remains well-protected from temperature fluctuations while also enhancing the overall energy efficiency of your home.
Tips For A Smooth Installation Process
When it comes to installing a pull-down attic ladder, following a few tips can make the process go much smoother. From enlisting the help of a friend or family member to carefully following the instructions, these helpful suggestions can make your installation project a breeze.
Enlisting the Help of a Friend or Family Member
Installing a pull-down attic ladder involves handling heavy materials and maneuvering in tight spaces. Having an extra set of hands can be invaluable during this process. Invite a friend or family member to assist you in tackling this project together. Not only will it make the installation easier, but it can also promote safety, as you’ll have someone to help stabilize the ladder and hold things steady while you work.
Following the Instructions Carefully
The key to a successful installation is to carefully review and follow the manufacturer’s instructions provided with the attic ladder. These instructions are designed to guide you through every step of the process, from initial preparation to the final adjustments. By paying close attention to the details outlined in the instructions, you can ensure that your attic ladder is installed correctly and safely.
Before you start the installation, take the time to read through the instructions in their entirety. Familiarize yourself with each component of the ladder and understand the tools and materials needed. This will help you gather everything you need before you begin the installation process.
During the installation, follow each step meticulously. Take your time to understand the instructions fully before proceeding to the next step. If you encounter any difficulties or questions, refer back to the instructions or contact the manufacturer for clarification. Don’t rush through the installation; instead, focus on accuracy and precision to ensure a safe and sturdy ladder.
By following these tips, you can have confidence in your ability to install a pull-down attic ladder successfully. Remember, patience, attention to detail, and teamwork are key when it comes to completing this project.
Common Challenges And How To Overcome Them
Installing a pull-down attic ladder can seem like a daunting task, but with the right approach and some know-how, you can tackle any challenges that come your way. In this section, we will address two common challenges that many homeowners face when installing a pull-down attic ladder: Dealing with Obstructed Attic Space and Troubleshooting Issues with the Ladder Mechanism.
Dealing with Obstructed Attic Space
One of the most frustrating challenges when installing a pull-down attic ladder is dealing with obstructed attic space. Whether it’s insulation, HVAC ducts, or electrical wiring, these obstructions can make it difficult to secure and operate the ladder effectively. However, there are a few strategies you can employ to overcome this challenge:
- Clearing the Area: Before installing the ladder, make sure to clear away any obstructions in the area where the ladder will be positioned. This may involve moving insulation aside, rerouting ductwork, or working with an electrician to move wiring. By creating an open space, you can ensure smooth operation of the ladder.
- Choosing a Compact Design: If space is limited in your attic, consider selecting a pull-down attic ladder with a compact design. This will allow for easier installation in tight spaces where obstructions may be present. Look for ladders that fold up neatly and have a small footprint, so you can maximize your attic space.
- Professional Assistance: If you feel overwhelmed by the prospect of dealing with obstructions in your attic space, don’t hesitate to seek professional assistance. A licensed contractor or handyman can help assess the situation, provide guidance, and even handle the installation for you. It’s better to have the peace of mind knowing the job is done right.
Troubleshooting Issues with the Ladder Mechanism
Even with careful installation, issues with the ladder mechanism can occur, making it difficult to operate the pull-down attic ladder. Here are a few troubleshooting tips to help you overcome these problems:
- Lubrication: Over time, the moving parts of the ladder mechanism may become stiff or squeaky. Regular lubrication of hinges, springs, and other moving components will ensure smooth operation. Use a silicone-based lubricant and apply it to the necessary parts as per the manufacturer’s instructions.
- Adjustment: If your ladder is not extending or retracting properly, it may be a result of misalignment or incorrect tension. Refer to the ladder’s instruction manual for guidance on how to adjust the tension or realign the ladder. Always follow the manufacturer’s instructions carefully to avoid damaging the ladder.
- Regular Maintenance: Prevention is key when it comes to troubleshooting ladder mechanism issues. Regularly inspect the ladder and its components for any signs of wear or damage. Promptly address any minor issues before they turn into major problems. This will ensure the longevity and consistent functionality of your pull-down attic ladder.
By following these tips, you can overcome common challenges you may encounter when installing a pull-down attic ladder. Remember to approach each challenge with patience and persistence, and don’t hesitate to reach out for professional help when needed.
Credit: www.homedepot.com
Final Inspection And Testing
Once you have successfully installed your pull-down attic ladder, the final step is to perform a thorough inspection and test its stability and operation. This step is crucial to ensure the ladder is safe to use and meets your specific needs.
Testing the Ladder’s Stability and Operation
The first aspect to evaluate is the ladder’s stability. Pull down the ladder and check if it is securely anchored to the ceiling. Make sure all screws are tightly fastened, ensuring there is no wobbling or looseness. A stable ladder is essential for safe ascending and descending.
To assess the ladder’s operation, climb up and down a few times, checking for smoothness and ease of use. Pay attention to any resistance or sticking points that may hinder smooth operation. If you encounter any issues, inspect the ladder components including hinges and springs to identify the cause of the problem.
Here are some key points to consider during the ladder’s stability and operation test:
- Check for proper alignment of ladder rungs, ensuring they are evenly spaced and securely attached.
- Inspect the ladder’s locking mechanism. Ensure it engages smoothly and firmly when the ladder is in the fully extended position.
- Test the ladder’s weight capacity by placing some weight on it, simulating the load it will bear during actual use. Verify that it can handle the expected weight without any signs of strain or weakness.
Remember, safety should be a priority during the final inspection and testing process. Do not skip any step and carefully assess each aspect of the ladder’s stability and operation. Making sure everything is in perfect working order will provide peace of mind and prevent any accidents or mishaps in the future.
Maintaining And Caring For The Attic Ladder
Installing a pull-down attic ladder can be a game-changer for homeowners, providing convenient access to extra storage space. However, like any other household fixture, it requires regular maintenance and care to ensure its longevity and continued functionality. In this section, we will explore two key aspects of maintaining your attic ladder: regular cleaning and lubrication, and inspecting for wear and tear.
Regular Cleaning and Lubrication
Just like any other mechanical component, your attic ladder can accumulate dust, dirt, and debris over time. Regular cleaning is essential to prevent build-up that can interfere with its smooth operation. To clean your ladder:
- Use a soft cloth or brush to remove any loose dirt and cobwebs.
- Wipe down the ladder with a mild detergent solution and warm water. Avoid using harsh chemicals or abrasive cleaners that could damage the ladder’s surface.
- Rinse thoroughly with clean water and dry with a soft cloth.
Additionally, lubricating the moving parts of your attic ladder will help ensure smooth and quiet operation. Check the manufacturer’s instructions for the recommended type of lubricant. Here’s how to lubricate your attic ladder:
- Apply a small amount of lubricant to the hinges, springs, pulleys, or any other moving parts as specified by the manufacturer.
- Operate the ladder a few times to distribute the lubricant evenly.
- Wipe off any excess lubricant to prevent dirt and dust from sticking to the ladder.
Inspecting for Wear and Tear
Regular inspections are crucial for identifying any signs of wear and tear on your attic ladder. By catching and addressing issues early on, you can prevent accidents and extend the lifespan of your ladder. Follow these steps to inspect your attic ladder:
- Check for loose screws or bolts and tighten them if necessary.
- Examine the hinges and springs for any signs of rust or corrosion. If corrosion is present, remove it with a wire brush and apply a rust-inhibiting spray.
- Inspect the ladder for any cracks, splintered wood, or damaged steps. If you notice any damage, repair or replace the affected parts promptly.
- Test the ladder’s locking mechanism to ensure it engages securely. If the mechanism is faulty, contact a professional to make the necessary repairs.
By incorporating regular cleaning and lubrication into your maintenance routine and performing thorough inspections, you can keep your attic ladder in optimal condition. This will not only prolong its lifespan but also provide you with safe and easy access to your attic for years to come.
Frequently Asked Questions For How To Install A Pull Down Attic Ladder
How Much Space Is Needed For Pull Down Attic Stairs?
Pull down attic stairs typically require a minimum of 22. 5 square feet of space to be properly installed.
How To Build Pull Down Attic Stairs?
To build pull-down attic stairs, follow these steps: 1. Measure the opening in the ceiling. 2. Purchase a pull-down attic stair kit that fits your measurements. 3. Install the frame and attach it securely to the ceiling joists. 4. Attach the stairs to the frame, ensuring they are properly balanced and functional.
5. Test the stairs for stability and safety before regular use.
What Is The Rough Opening For A Pull Down Attic Ladder?
The rough opening for a pull-down attic ladder typically measures around 22. 5 inches by 54 inches. It’s important to ensure the ladder fits properly in the attic access area for easy installation and safe usage.
Do Attic Ladders Need To Touch The Ground?
Attic ladders do not necessarily need to touch the ground. They are designed to mount on the attic floor, allowing easy access from below without requiring direct contact with the ground. These ladders are retractable, enabling them to be folded and stored when not in use.
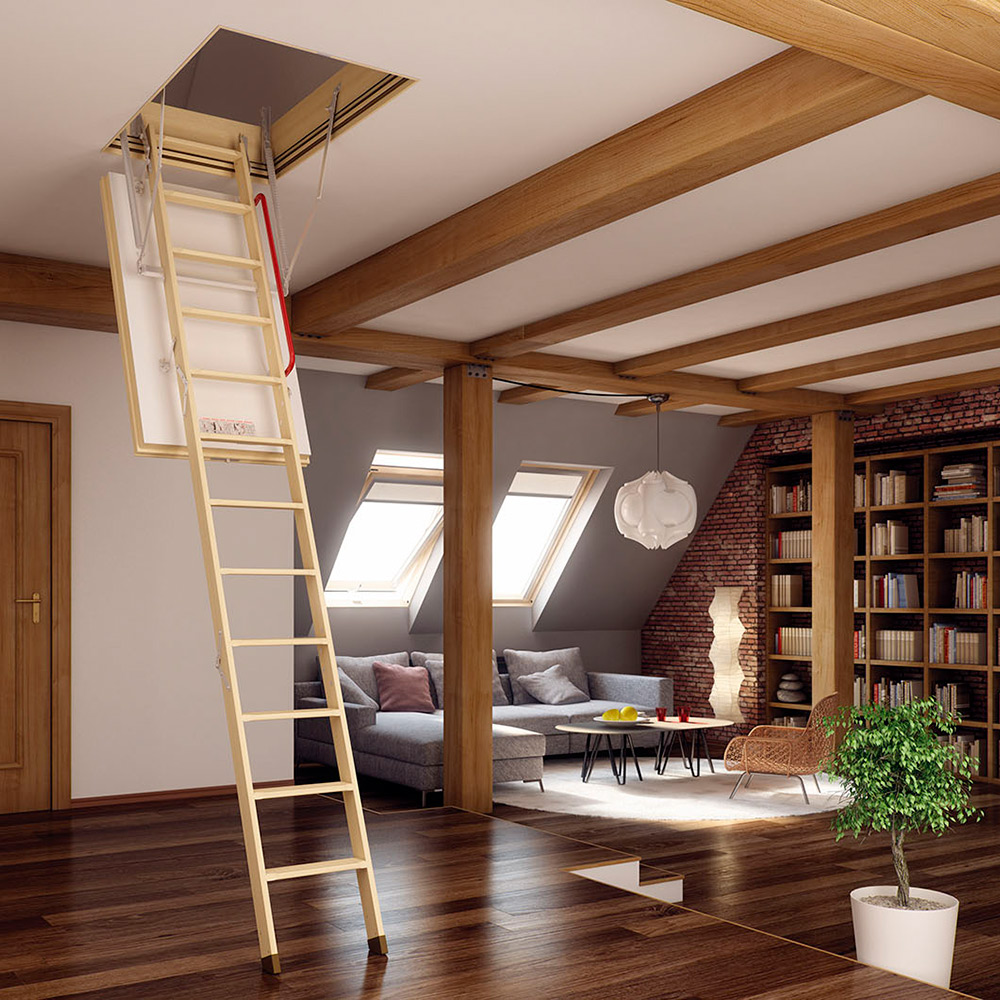
Conclusion
Installing a pull-down attic ladder can provide easier access to your attic space, making it more functional and convenient. By following these step-by-step instructions, you can successfully install a pull-down attic ladder and transform your attic into a valuable storage or living area.
Remember to always prioritize safety and consult any manufacturer guidelines or professional assistance as necessary. With a little time and effort, you can enjoy the benefits of a pull-down attic ladder for years to come.