To install a home generator, hire a licensed electrician for safe installation and connect it to the home’s electrical panel. A home generator can provide a reliable backup power supply during power outages, ensuring the smooth functioning of essential appliances and systems.
Installing a generator requires professional expertise to ensure proper connection and compliance with electrical codes. By hiring a licensed electrician, you can have peace of mind knowing that the installation will be conducted safely and effectively. We will discuss the necessary steps and considerations involved in installing a home generator, helping you make an informed decision and maintain the functionality of your home during unexpected power disruptions.
Understanding The Importance Of A Home Generator
Power outages can be inconvenient and sometimes even dangerous, leaving you without electricity for hours or even days at a time. This is where a home generator can prove to be an invaluable asset. In this article, we will explore why having a generator at home is crucial during power outages, the benefits of installing one, and how it can provide peace of mind and convenience during emergencies.
Why having a generator at home is crucial during power outages
During a power outage, your everyday activities can come to a standstill. The lights go out, the refrigerator stops working, and you’re left without any means to power essential appliances. This is where a home generator comes into play. It acts as a backup power source, ensuring that you have electricity when the main grid fails to deliver. Having a generator means you can continue using your appliances, keeping your food from spoiling, maintaining a comfortable temperature indoors, and even powering medical devices if needed.
Exploring the benefits of installing a home generator
Installing a home generator offers numerous benefits that go beyond just providing power during outages. Let’s take a closer look at some of these advantages:
- Convenience: With a home generator, you don’t have to rely on candles or flashlights during power outages. You can continue with your daily routines seamlessly without any disruption.
- Safety: A generator can power essential appliances like security systems, keeping your home and loved ones safe even when the main power is down. It can also prevent potential hazards like trips and falls in the dark.
- Comfort: No more sweltering in the heat or shivering in the cold during an outage. A home generator can keep your HVAC system running, providing a comfortable indoor environment all year round.
- Financial savings: Power outages can lead to food spoilage, damage to electronic equipment, and even hotel bills if you need to relocate temporarily. Having a generator can help you avoid these additional expenses.
- Increased home value: Installing a home generator is an investment that can increase the value of your property. It offers potential buyers peace of mind, knowing that they won’t have to worry about power outages in the future.
How a generator can provide peace of mind and convenience during emergencies
In times of emergencies, having a home generator can provide a sense of security and peace of mind. Whether it’s a natural disaster, an extended power outage, or a medical emergency, you can rest assured knowing that you have a reliable backup power source to rely on. Additionally, a generator eliminates the hassle of finding alternative accommodation or relying on external assistance during prolonged outages. It offers convenience and ensures that you can continue with your daily activities uninterrupted.
Overall, installing a home generator is a wise decision that can bring you immense benefits during power outages and emergencies. It not only provides power and convenience but also keeps you and your loved ones safe and comfortable. Consider investing in a generator today to enjoy these advantages for years to come.
Assessing Your Power Needs And Choosing The Right Generator
When it comes to installing a home generator, one of the key steps is assessing your power needs and choosing the right generator that can meet those requirements. To make sure you don’t end up with a generator that won’t be able to power your home during an outage, it’s important to calculate your wattage needs, understand the different types and sizes of generators, and consider other relevant factors.
Calculating the wattage requirements for your home
Before you can choose the right generator, you need to calculate the wattage requirements for your home. This will give you an idea of how much power you’ll need during an outage. To calculate the wattage, you’ll need to consider the appliances and electrical devices that will be running simultaneously.
A simple way to calculate your wattage needs is by listing all the appliances and electrical devices you’ll be using when the power is out. Make sure to include essential items such as refrigerators, heaters, and lights, as well as any other appliances or electronics that you want the generator to power.
| Appliance/Device | Wattage |
|---|---|
| Refrigerator | 800 |
| Heater | 1500 |
| Lights | 200 |
| Air Conditioner | 2500 |
Once you have a list of your appliances and their respective wattages, add up the total wattage to get an estimate of how much power your generator needs to provide.
Understanding the different types and sizes of generators available
Generators come in various types and sizes, each with its own strengths and limitations. By understanding the different options, you can select the best generator for your specific needs.
- Portable generators: These generators are versatile and can be moved around easily. They provide temporary power and are great for smaller homes or for specific appliances during emergencies. They typically run on gasoline or propane.
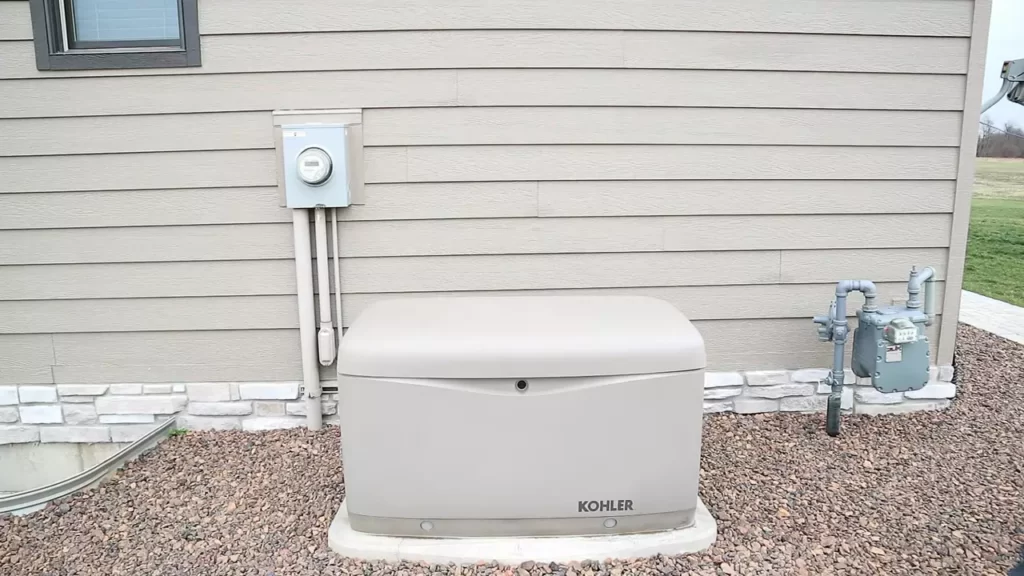
- Standby generators: Unlike portable generators, standby generators are permanently installed and can automatically switch on during a power outage. They can power the entire home and are usually powered by natural gas or propane. Standby generators are ideal for larger homes or those that require continuous power supply.
- Inverter generators: These generators are known for their quiet operation and clean power output. They are more fuel-efficient and produce less noise compared to other types. Inverter generators are suitable for powering sensitive electronics and are often used for camping or outdoor activities.
Factors to consider when selecting the right generator for your needs
When selecting the right generator for your needs, there are several factors that you should consider:
- Fuel type: Consider the availability and cost of the fuel type required by the generator, such as gasoline, propane, or diesel.
- Run-time: Determine how long the generator can run continuously before refueling. This will depend on the generator’s fuel capacity and consumption.
- Noise level: Take into account the noise level produced by the generator, especially if you have neighbors in close proximity.
- Transfer switch compatibility: If you opt for a standby generator, make sure it is compatible with the transfer switch that allows seamless power transfer from the utility grid to the generator.
- Warranty and support: Look for generators that come with a warranty and reliable customer support to address any issues or concerns that may arise.
By considering these factors along with your wattage requirements, you can choose the right generator that will effectively meet your power needs during outages.
Preparing Your Home For Generator Installation
When it comes to installing a home generator, it is crucial to prepare your home in advance to ensure a smooth and efficient installation process. Preparing your home for generator installation involves several important steps, including identifying a suitable location for the generator, obtaining necessary permits meeting local regulations, and ensuring proper ventilation and safety measures.
Identifying a Suitable Location for the Generator
First and foremost, it is essential to identify a suitable location for your generator. This location should be easily accessible for maintenance and repairs, while also being away from combustible materials and protected from extreme weather conditions. Consider installing the generator on a sturdy, level surface, such as a concrete pad, to ensure stability and minimize vibration. Additionally, make sure the location allows for proper ventilation and proper airflow around the generator.
Obtaining Necessary Permits and Meeting Local Regulations
Before beginning the generator installation process, it is crucial to obtain any necessary permits and comply with local regulations. These permits ensure that the installation is done in accordance with safety codes and guidelines. Contact your local building department to determine the specific permits required for your area. Adhering to these regulations not only ensures your own safety but also helps avoid potential penalties or legal complications.
Ensuring Proper Ventilation and Safety Measures
Proper ventilation and safety measures are essential for the safe and efficient functioning of your home generator. Good ventilation helps dissipate heat and prevents the buildup of harmful fumes. Ensure that the generator is placed in a well-ventilated area that complies with the manufacturer’s recommendations. Additionally, install carbon monoxide detectors near sleeping areas and on every level of your home to provide an early warning in case of any gas leaks.
In addition to ventilation, it is important to implement other safety measures. This includes keeping flammable materials away from the generator and providing clear access to the unit for maintenance and repairs. Consider installing a generator transfer switch to prevent back-feed into the utility grid, which can be dangerous for utility workers. It is also recommended to consult with a licensed electrician to ensure proper installation and to address any specific safety concerns related to your home’s electrical system.
Essential Tools And Equipment For Generator Installation
When it comes to installing a home generator, having the right tools and equipment is crucial for a successful installation process. In this section, we will take a look at the essential tools and equipment you will need, as well as where to purchase or rent them. Let’s dive in and get started with the comprehensive list of tools required for the generator installation.
A comprehensive list of tools required for the installation process
Before starting the installation process, it is important to gather all the necessary tools. Here is a comprehensive list of tools you will need:
- Wrenches and Socket Set: These tools will be required for loosening and tightening bolts and connectors during the installation. Make sure to have a set of wrenches in different sizes and a socket set to cover various bolt sizes.
- Screwdrivers: A set of screwdrivers, including both flathead and Phillips-head, will come in handy for removing and installing screws.
- Wire Cutters and Strippers: You’ll need these tools to cut and strip wires for proper connections. Good quality wire cutters and strippers will make the process much easier and more efficient.
- Measuring Tape: Accurate measurements are essential for proper generator placement and ensuring the correct fit. A reliable measuring tape will help you measure distances accurately.
- Level: A leveling tool ensures that the generator is installed evenly. This is important for the generator to function optimally and prevent any potential issues.
- Electrical Tester: An electrical tester or multimeter is necessary to check the voltage, current, and continuity of electrical connections. This tool helps ensure that all electrical components are functioning correctly.
- Drill and Drill Bits: Depending on your installation needs, a drill and drill bits may be required to create holes for mounting brackets or conduits.
- Safety Gear: It is essential to prioritize safety during the installation process. Make sure to wear safety glasses, gloves, and appropriate footwear to protect yourself from any potential hazards.
<h3>Understanding the purpose and usage of each tool</h3>
Now that we have covered the comprehensive list of tools required for the installation process, let’s take a closer look at the purpose and usage of each tool:
| Tool | Purpose | Usage |
|---|---|---|
| Wrenches and Socket Set | To loosen and tighten bolts and connectors | Use the appropriate size wrench or socket to fit the bolt or connector, and turn it clockwise or counterclockwise as needed. |
| Screwdrivers | To remove and install screws | Choose the correct type and size of screwdriver for the respective screwhead, and turn it to tighten or loosen the screw. |
| Wire Cutters and Strippers | To cut and strip wires for proper connections | Use wire cutters to cut wires cleanly and wire strippers to remove insulation for a better connection. |
| Measuring Tape | To measure distances accurately | Extend the tape measure and lock it in place when taking measurements. Ensure the tape is straight and parallel to the surface being measured. |
| Level | To ensure a level installation | Place the level on a flat surface of the generator and adjust it as necessary until the bubble is centered within the marked lines. |
| Electrical Tester | To check voltage, current, and continuity | Select the appropriate setting on the electrical tester and touch the probes to the electrical connections to measure the desired parameters. |
| Drill and Drill Bits | To create holes for mounting brackets or conduits | Choose the right drill bit size for the required hole diameter and use the drill to create the holes carefully. |
| Safety Gear | To protect yourself from potential hazards | Wear safety glasses, gloves, and appropriate footwear to protect your eyes, hands, and feet during the installation process. |
Where to purchase or rent the necessary equipment
When it comes to acquiring the necessary tools and equipment for generator installation, you have a few options. You can choose to purchase these tools from a local hardware store or home improvement center. They typically have a wide selection of tools and can provide expert advice on the best options for your project.
If purchasing all the tools doesn’t align with your budget or if you prefer not to accumulate a collection of tools you may rarely use, you can consider renting them from a tool rental service. These services allow you to rent tools for a specific period, saving you money and storage space.
Additionally, there may be online platforms or classified ads where you can find used tools at a lower price. Just make sure to inspect the tools thoroughly before making a purchase to ensure their quality and functionality.
Remember, having the right tools and equipment is essential for a smooth and successful generator installation process. Whether you choose to purchase or rent the tools, make sure you have all the required items before starting the installation to avoid any unnecessary delays or complications.
Installing A Transfer Switch For Safe Power Transfer
Explaining the importance of a transfer switch in the installation process
When it comes to installing a home generator, one essential part of the process is installing a transfer switch. A transfer switch is a crucial component that allows you to safely transfer power from your home’s electrical system to the generator during a power outage. This switch ensures that the generator’s electricity does not backfeed into the utility lines, which could pose a danger to utility workers trying to restore power. Without a transfer switch, manually plugging devices into the generator can be inconvenient and unsafe. So, let’s dive into the electrical considerations and safety precautions you need to know when installing a transfer switch.
Electrical considerations and safety precautions when installing a transfer switch
Before you start the installation process, it’s important to take note of a few electrical considerations and safety precautions. First and foremost, make sure you have a thorough understanding of your home’s electrical system. Familiarize yourself with the main electrical panel, circuit breakers, and the overall wiring. If you’re not confident in your capabilities, it’s always best to consult a professional electrician to ensure safety and compliance with local codes.
When installing a transfer switch, safety precautions are paramount. Always remember to disconnect the main power supply and turn off all circuit breakers before starting the installation. It’s also crucial to follow proper lockout/tagout procedures to prevent accidental energization. Ensure you have the necessary tools, such as insulated gloves and safety glasses, to protect yourself throughout the process.
Step-by-step instructions on installing the transfer switch correctly
Now, let’s go through the step-by-step process of installing a transfer switch correctly:
- Begin by choosing a suitable location for the transfer switch. It should be near the main electrical panel and easily accessible.
- Shut off the main power supply and all circuit breakers.
- Mount the transfer switch onto the wall, ensuring it is properly grounded.
- Connect the transfer switch to the main electrical panel using appropriate wire gauges, following the manufacturer’s guidelines.
- Install a separate circuit breaker in the electrical panel for the generator’s circuit.
- Connect the generator’s power inlet box to the transfer switch and ensure a secure and proper connection.
- Double-check all connections and tighten any loose screws or wire connections.
- Complete the installation by testing the transfer switch, following the manufacturer’s instructions. Make sure it switches power between the utility and the generator smoothly.
- Finally, label all circuits and switches to indicate the generator’s power source for future reference. This step is crucial for anyone who may need to operate the system.
By following these step-by-step instructions, you can install a transfer switch safely and correctly, ensuring a seamless and reliable power transfer during an outage.
Connecting the generator to your home’s Electrical System
Properly connecting your home generator to your electrical system is crucial to ensure backup power supply during emergencies. It allows you to seamlessly switch to generator power when the main electricity source fails. In this section, we will guide you through the step-by-step process of wiring the generator to the transfer switch, understanding the connection points, and important electrical terminology. Additionally, we will outline the essential safety precautions and guidelines for a successful connection, granting you peace of mind when unexpected power outages occur.
Properly wiring the generator to the transfer switch
Wiring your generator to the transfer switch is a task that requires attention to detail and compliance with electrical safety standards. To proceed with this process:
- Begin by identifying the transfer switch location, ensuring it is easily accessible and close to the electrical panel of your home.
- Shut off the main power supply from the utility grid to avoid any accidents or electrocution during the installation process.
- Install the transfer switch, following the manufacturer’s instructions and guidelines. Ensure it is securely mounted on a sturdy surface.
- Connect the generator inlet box to the transfer switch using appropriate wiring and connectors. This step ensures a direct and safe connection between the generator and the transfer switch.
- Wire the transfer switch to your home’s electrical panel, ensuring the correct identification of circuits to be powered by the generator during outages. This will enable you to prioritize critical systems such as lighting, refrigeration, and HVAC.
- Double-check all connections, ensuring they are tight and free from any loose wires.
Understanding the connection points and electrical terminology
Before embarking on installing the generator, familiarize yourself with the various connection points and commonly used electrical terminology:
| Term | Description |
|---|---|
| Main electrical panel | The central hub of your home’s electrical system, is responsible for distributing electricity throughout your residence. |
| Transfer switch | A device that allows you to switch between utility power and generator power seamlessly. It ensures safe and efficient power transfers during outages. |
| Generator inlet box | A connection point where the generator’s power cord is plugged into the transfer switch, providing a power supply to the electrical panel. |
| Circuits | Individual pathways of electrical current flowing through your home. They are protected by circuit breakers or fuses. |
| Grounding | The process of connecting electrical systems to the earth’s conductive surface to protect against electrical faults and ensure safety. |
Safety precautions and guidelines for a successful connection
Prioritizing safety when connecting your generator to your home’s electrical system is of utmost importance. Adhering to the following precautions and guidelines will help ensure a successful and secure connection:
- Always shut off the main power supply from the utility grid before working on any electrical connections.
- Use appropriate protective gear, such as insulated gloves and safety glasses, to reduce the risk of electrical shock or injury.
- Follow the generator and transfer switch manufacturer’s instructions meticulously.
- Ensure all connections are secure, tight, and free from any loose or exposed wires.
- Have a qualified electrician inspect your installation to ensure compliance with electrical codes and regulations.
By following these safety precautions and guidelines, you can confidently connect your generator to your home’s electrical system, providing a reliable backup power solution for your entire residence. Remember, safety should always be the first priority when working with electricity.
Conducting A Thorough Test And Inspection
After successfully installing your home generator, it’s essential to conduct a thorough test and inspection to ensure its proper functioning. This step is crucial in ensuring that your generator will be ready to provide a reliable power backup in case of an outage. In this section, we will guide you through the step-by-step process of testing your generator after installation, troubleshooting common issues, and highlighting the importance of regular maintenance and inspections.
Step-by-step guide to testing the generator after installation
Once the installation of your home generator is complete, it’s time to put it to the test. Follow these step-by-step instructions to ensure that your generator is running smoothly:
- Start by checking the fuel levels in your generator. Ensure that there is enough fuel for the test run.
- Next, turn off the main power supply to your home. This will simulate an actual power outage and allow the generator to kick in.
- Turn on the generator and let it run for a few minutes to warm up. This also helps identify any unusual noises or vibrations.
- Gradually introduce the electrical load to the generator by turning on a few essential appliances or lights. Monitor the generator’s performance and ensure that it can handle the load without any issues.
- If everything runs smoothly, continue to add additional appliances to test the generator’s capacity. Pay close attention to any changes in performance or signs of overload.
- Once you have tested the generator at different load levels, gradually reduce the load by turning off the appliances. Allow the generator to run for a few minutes before shutting it down.
Troubleshooting common issues and ensuring proper functioning
During the test run, it’s essential to keep an eye out for any potential issues. Here are some common problems you may encounter and their troubleshooting steps:
| Issue | Troubleshooting Steps |
|---|---|
| No Power Output | Check fuel levels, circuit breakers, and reset if necessary. Inspect wires for any damage or loose connections. |
| Overload Shutdown | Reduce the electrical load on the generator. Ensure the total load does not exceed the generator’s capacity. |
| Unusual Noises or Vibrations | Inspect the generator for any loose parts or signs of wear. Tighten any loose screws or bolts. |
| Smoke or Burning Smell | Shut down the generator immediately. Check for fuel or oil leaks and address them. Consult a professional if needed. |
Importance of regular maintenance and inspections
To ensure the long-term functionality of your home generator, regular maintenance and inspections are essential. Here’s why they matter:
- Maintaining the generator can help identify and resolve any issues before they escalate, preventing costly repairs.
- Regular inspections allow you to ensure that all components are in good working condition and that the generator is ready for any power outage.
- Performing routine maintenance tasks such as changing oil and filters, checking fuel levels, and cleaning air filters can prolong the lifespan of your generator.
By following these steps and staying on top of regular maintenance, you can ensure that your home generator remains in optimal condition, ready to provide a reliable power backup whenever you need it.
Maintaining Your Home Generator For Longevity
Installing a home generator is a smart investment that can provide you with peace of mind during power outages. However, like any other piece of equipment, it requires regular maintenance to ensure its longevity and optimal performance. With proper care and attention, you can keep your home generator running smoothly for many years to come. In this section, we will discuss essential maintenance tasks, routine maintenance schedules, troubleshooting common problems and when to seek professional help.
Essential maintenance tasks to keep your generator in optimal condition
Maintaining your home generator involves a few essential tasks that can significantly contribute to its longevity and reliability. By performing these tasks regularly, you can avoid costly repairs and ensure that your generator is always ready to provide backup power whenever you need it. The following are some essential maintenance tasks to keep your generator in optimal condition:
- Checking the oil levels and changing it as per the manufacturer’s recommendations.
- Inspecting and cleaning or replacing the air filter to prevent debris from clogging the system.
- Testing the battery and replacing it if necessary to ensure proper starting and operation.
- Examining the spark plugs and replacing them if worn out to maintain efficient combustion.
- Inspecting and tightening all electrical connections to prevent loose connections that can lead to electrical issues.
- Checking the fuel system for any leaks or blockages and draining old fuel to prevent engine damage.
- Inspecting the generator enclosure for any signs of wear or damage and repairing it if needed to protect the internal components.
Understanding routine maintenance schedules and guidelines
To ensure the optimal performance and longevity of your home generator, it’s important to follow the routine maintenance schedule provided by the manufacturer. Each generator model may have different maintenance requirements, so it’s crucial to consult the user manual for specific guidelines. The routine maintenance schedule generally includes tasks such as:
- Checking and changing the oil at regular intervals.
- Inspecting and cleaning or replacing the air filter.
- Testing and replacing the battery if necessary.
- Examining and replacing spark plugs as recommended.
- Inspecting and tightening electrical connections.
- Checking the fuel system and replacing the fuel if needed.
- Inspecting and maintaining the generator enclosure.
By adhering to the routine maintenance schedule and following the manufacturer’s guidelines, you can ensure that your home generator operates efficiently and remains in good working condition for years to come.
Troubleshooting common problems and when to seek professional help
Despite regular maintenance, home generators can sometimes encounter common problems that need troubleshooting. It’s important to be familiar with these issues, their possible causes, and the steps you can take to resolve them. Some common problems you may encounter with your home generator include:
| Problem | Possible Cause | Resolution |
|---|---|---|
| No power output | Tripped circuit breaker, faulty transfer switch, or low fuel level | Reset the circuit breaker, check the transfer switch, and refill fuel if necessary |
| Deteriorating performance | Dirty air filter, clogged fuel system, or aging spark plugs | Clean or replace the air filter, check and clean the fuel system, or replace spark plugs |
| Excessive noise or vibrations | Loose components or damaged enclosure | Tighten loose components and repair or replace the damaged enclosure |
While you can troubleshoot and resolve minor issues yourself, it’s essential to know when to seek professional help. If you encounter complex problems or if your generator requires repairs beyond your expertise, it’s always best to contact a qualified generator technician or the manufacturer’s service center. They have the knowledge and experience to diagnose and fix any major issues, ensuring the optimal performance and longevity of your home generator.
Remember to keep track of your maintenance tasks and schedule them regularly to keep your home generator in top shape throughout the year. By following the essential maintenance tasks, routine maintenance schedules, and troubleshooting tips discussed in this section, you can enjoy an uninterrupted power supply whenever you need it, allowing you to focus on what truly matters.
Frequently Asked Questions For How To Install Home Generator
Can I Install A Home Generator Myself?
No, it is not recommended to install a home generator yourself. Professional installation is necessary to ensure safety and compliance with local codes.
How Do I Hook Up An Outdoor Generator To My House?
To hook up an outdoor generator to your house, follow these steps:
1. Purchase a generator that matches your power needs.
2. Install a transfer switch to connect the generator to your electrical panel.
3. Ensure proper grounding of the generator.
4. Connect the generator to your house using a power cord or a professionally installed inlet box.
5. Start the generator and switch the transfer switch to supply power from the generator.
What Is The Legal Way To Connect A Generator To Your House?
To legally connect a generator to your house, you should follow these steps:
1. Install a transfer switch to safely switch between utility and generator power.
2. Hire a licensed electrician who can ensure proper wiring and grounding for your generator.
3. Comply with local building codes and obtain any necessary permits.
4. Regularly maintain your generator to ensure safe and reliable operation.
How Much Is A Generator For A 2000 Sq Ft House?
The cost of a generator for a 2000 sq ft house varies depending on factors such as brand, power capacity, and additional features. It is recommended to obtain quotes from reliable suppliers or consult with an electrician for an accurate estimate.
Conclusion
Installing a home generator is a smart investment that provides peace of mind during power outages. By following these step-by-step instructions and safety guidelines, you can easily install a generator and ensure an uninterrupted power supply to your home. Remember to consult the manufacturer’s manual and have a qualified electrician inspect the installation for safety purposes.
Stay prepared and keep your home powered with a reliable generator.