Install a roof vent cap by first determining the proper location for installation and then cutting a hole in the roof to fit the vent cap. Roof vent caps are essential for proper ventilation in your home or building.
By allowing fresh air to enter and stale air to exit, they help regulate temperature and moisture levels, preventing mold and rot. Knowing how to install a roof vent cap is essential for maintaining a healthy and comfortable living environment.
The process involves a few simple steps that can be completed with basic tools and materials. We will guide you through the process and provide helpful tips to ensure a successful installation.
Understanding The Purpose And Benefits Of A Roof Vent Cap
Importance of proper ventilation for a healthy home
Proper ventilation is essential for maintaining a healthy home environment. Without adequate ventilation, a range of problems can arise, including poor indoor air quality, excessive moisture buildup, and the potential for mold and mildew growth. These issues can not only impact the structural integrity of your home but also pose a risk to your family’s health.
When your home lacks proper ventilation, stale air becomes trapped, and pollutants such as dust, pet dander, and chemicals can accumulate. This can lead to respiratory issues and exacerbate allergies and asthma symptoms. Furthermore, excess moisture in the air can cause condensation on walls, ceilings, and windows, leading to the growth of mold, mildew, and rot.
Ensuring proper ventilation is crucial in maintaining a healthy and comfortable living space. One effective way to improve ventilation is by installing a roof vent cap.
Benefits of installing a roof vent cap
Installing a roof vent cap offers a range of benefits that go beyond just improving ventilation. Here’s why you should consider adding one to your home:
- Improved air circulation: A roof vent cap helps facilitate the proper flow of air in and out of your home. By allowing stale air to escape and fresh air to enter, it helps create a healthier and more comfortable living environment.
- Reduced moisture buildup: One of the main advantages of installing a roof vent cap is that it helps prevent moisture buildup in your attic or roof space. Excess moisture can lead to mold growth, rotting of structural elements, and potential damage to insulation and other materials.
- Energy efficiency: When your home is properly ventilated, it can be more energy-efficient. By allowing hot air to escape in the summer and preventing heat loss in the winter, a roof vent cap can help reduce the strain on your HVAC system and potentially lower your energy bills.
- Extended roof lifespan: Excessive heat buildup in the attic can shorten the lifespan of your roof. By installing a roof vent cap, you can help dissipate heat and prevent damage caused by extreme temperature fluctuations, ultimately extending the life of your roof.
How a roof vent cap works to improve ventilation
A roof vent cap works by allowing air to flow freely in and out of your home through the roof. It consists of a cap placed on top of a ventilation pipe or a series of pipes. The cap is designed to prevent rain, debris, and pests from entering the pipe while still allowing air to pass through.
When warm air rises in your home, it naturally creates an upward airflow. The roof vent cap takes advantage of this principle by providing an outlet for the warm air to escape. As hot air exits through the cap, cooler air from outside is drawn into the house, promoting a more balanced and comfortable indoor environment.
In addition to its airflow benefits, a roof vent cap also acts as a barrier against rain and snow, preventing moisture from seeping into your attic or roof space. This helps protect against potential water damage and the growth of mold and mildew.
Installing a roof vent cap is a relatively simple and cost-effective way to improve ventilation and ensure a healthier and more comfortable home. By allowing for proper air circulation, reducing moisture buildup, enhancing energy efficiency, and extending the lifespan of your roof, a roof vent cap is a worthwhile investment for any homeowner.
Factors To Consider When Choosing A Roof Vent Cap
When it comes to installing a roof vent cap, choosing the right one for your specific needs is crucial. There are several factors to consider that will ensure you make the right decision. From different types of roof vent caps available to considerations based on your specific roof type and needs, and evaluating the durability and quality of the roof vent caps – each aspect plays a vital role in the installation process. Let’s delve into these factors in more detail.
Different types of roof vent caps are available
Roof vent caps come in various types, each designed for specific purposes and functionalities. Before making a decision, it’s important to familiarize yourself with the different types available. Here are some common types:
- Ridge Vent Caps: Designed to be installed at the peak of a roof, these caps allow hot air to escape from the attic.
- Turbine Vent Caps: These caps use wind power to draw out hot air and moisture from your attic.
- Gable Vent Caps: Ideal for homes with gable ends, these caps are installed on the sides of the roof to improve attic ventilation.
- Static Vent Caps: These caps are popular for their simplicity and are designed to allow hot air to escape while preventing rain and debris from entering.
Considerations based on your specific roof type and needs
Before choosing a roof vent cap, it’s essential to consider your specific roof type and needs. Here are a few factors to keep in mind:
- Roof Pitch: The slope of your roof will determine the type of vent cap that is most suitable. Some vent caps may not work well on shallow or steep roofs, so it’s important to select one that is compatible.
- Roof Material: Different roof materials have different requirements. For example, a metal roof may require a specific type of vent cap that is designed to be compatible with metal roofing materials.
- Climate: The climate in your area plays a significant role in determining the type of vent cap you need. If you live in an area prone to heavy rainfall or strong winds, you’ll want to select a vent cap that can withstand these conditions.
Evaluating the durability and quality of roof vent caps
The durability and quality of the roof vent cap are crucial to ensure long-lasting performance. Here’s what to consider:
- Material: Look for vent caps made from high-quality materials such as aluminum or stainless steel that are resistant to rust and corrosion.
- Design: The design of the vent cap should be sturdy and well-constructed to withstand harsh weather conditions.
- Warranty: Check if the manufacturer offers a warranty for their vent cap products. This indicates their confidence in the product’s durability.
Gathering The Necessary Tools And Materials
Before starting the installation process for a roof vent cap, it is crucial to gather all the necessary tools and materials. Having everything ready beforehand will ensure a smooth and efficient installation process. In this section, we will discuss the tools needed for installation and the materials required for a successful installation.
Tools needed for installation
Below is a list of tools you will need to install a roof vent cap:
| Tool | Description |
|---|---|
| Screwdriver | A flat-headed screwdriver will be required to remove any existing screws or nails. |
| Tape Measure | To accurately measure the dimensions of the vent opening on the roof. |
| Utility Knife | To cut through any roofing material or shingles to create an opening for the vent cap. |
| Roofing Nails | These nails will be used to secure the vent cap to the roof. |
| Caulking Gun | To apply a waterproof sealant around the edges of the vent cap. |
| Roofing Cement | Used to further secure and weatherproof the vent cap. |
| Ladder | A sturdy ladder will be needed to safely access the roof. |
Materials required for a successful installation
Here is a list of materials you will need to complete a successful roof vent cap installation:
- Vent cap – Choose a vent cap that is appropriate for the size and type of your roof.
- Flashing – This material ensures a watertight seal between the vent cap and the roof.
- Roofing adhesive – Used to secure the flashing to the roof.
- Duct tape – Helps to seal any gaps between the vent cap and the duct.
- Silicone or roof sealant – Provides an extra layer of waterproofing around the vent cap.
By gathering all the necessary tools and materials ahead of time, you can save yourself from unnecessary trips to the store and complete the roof vent cap installation with ease.
Measuring And Preparing The Ventilation Opening
When it comes to ensuring proper ventilation in your home, installing a roof vent cap is an essential step. A roof vent cap allows for the escape of hot air, humidity, and odors from your attic or other enclosed spaces. In this section, we will guide you through the process of measuring and preparing the ventilation opening for the installation of a roof vent cap.
Measuring the size of the ventilation opening
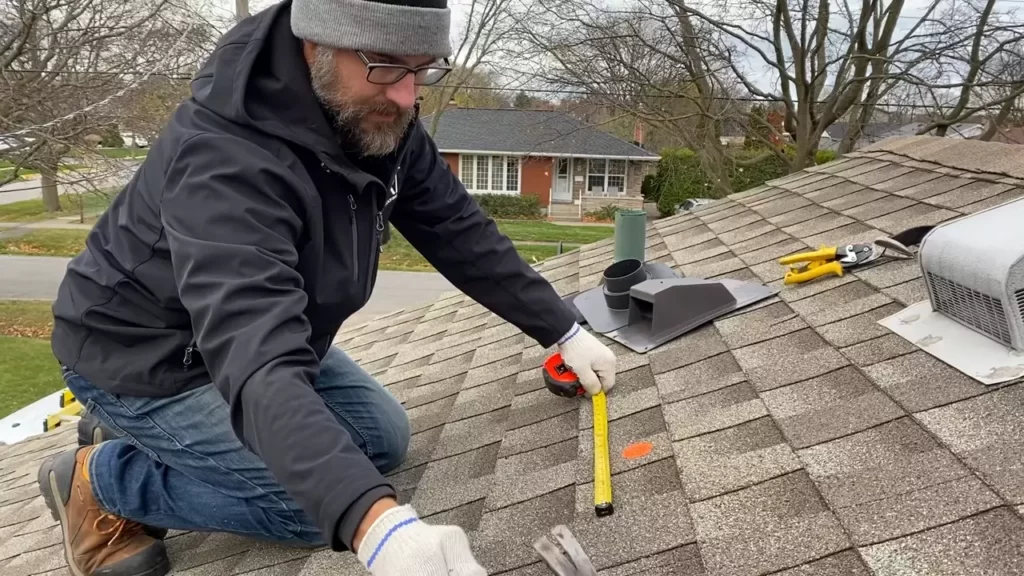
The first step in installing a roof vent cap is to accurately measure the size of the ventilation opening. This will ensure that you choose a vent cap that fits properly and allows for adequate airflow. To measure the ventilation opening, follow these steps:
- Locate the area on your roof where you plan to install the vent cap. This area should be free of any obstructions such as shingles, nails, or debris.
- Measure the width and height of the ventilation opening using a tape measure. Be sure to measure from the inside edges of the opening.
- Record the measurements and use them to select a roof vent cap that matches the size of your ventilation opening. It is recommended to choose a vent cap that has slightly larger dimensions to allow for easier installation and better airflow.
Preparing the surface for installation
Once you have measured the size of the ventilation opening and chosen the appropriate roof vent cap, it is important to prepare the surface for installation. This will ensure a secure and long-lasting installation. Follow these steps to prepare the surface:
- Clean the area around the ventilation opening using a brush or broom to remove any dirt, debris, or loose material.
- Inspect the surface for any cracks, damage, or signs of deterioration. If necessary, repair the surface using appropriate roofing materials.
- Apply a roof sealant or caulk around the edges of the ventilation opening to create a watertight seal. This will prevent water from seeping into your home through the opening.
By accurately measuring the size of the ventilation opening and properly preparing the surface for installation, you will ensure a successful and effective installation of a roof vent cap. In the next section, we will guide you through the steps of actually installing the vent cap.
Removing The Old Vent Cap (If Applicable)
Assessing the condition of the existing vent cap
Before you can proceed with removing the old vent cap, it’s important to assess its condition. This step is crucial because it allows you to determine whether the vent cap needs to be replaced or if it can be reused.
Start by visually inspecting the vent cap for any signs of damage or wear. Look for cracks, dents, or rust that may compromise its effectiveness. If you notice any of these issues, it’s best to replace the vent cap entirely.
If the vent cap appears to be in good condition, you can proceed with further assessment. Check for any loose or missing screws that may need to be tightened or replaced.
Additionally, ensure that the vent cap is the right size and compatible with your roof type. Make note of any specifications or measurements needed when purchasing a new vent cap.
Safely removing the old vent cap
Now that you’ve assessed the condition of the existing vent cap and determined that it needs to be replaced, it’s time to safely remove it. Follow these steps to ensure a smooth removal process:
- Gather the necessary tools: Before starting, make sure you have the right tools on hand. This may include a screwdriver, pliers, and a utility knife.
- Disconnect any power supply: If the old vent cap is connected to any electrical wiring, make sure to disconnect the power supply before proceeding.
- Remove the screws: Use the appropriate tools to carefully remove the screws that secure the vent cap to the roof. Place them in a safe location to avoid losing them.
- Disconnect any ductwork: If your roof vent cap is attached to any ductwork, disconnect it carefully using pliers or other suitable tools.
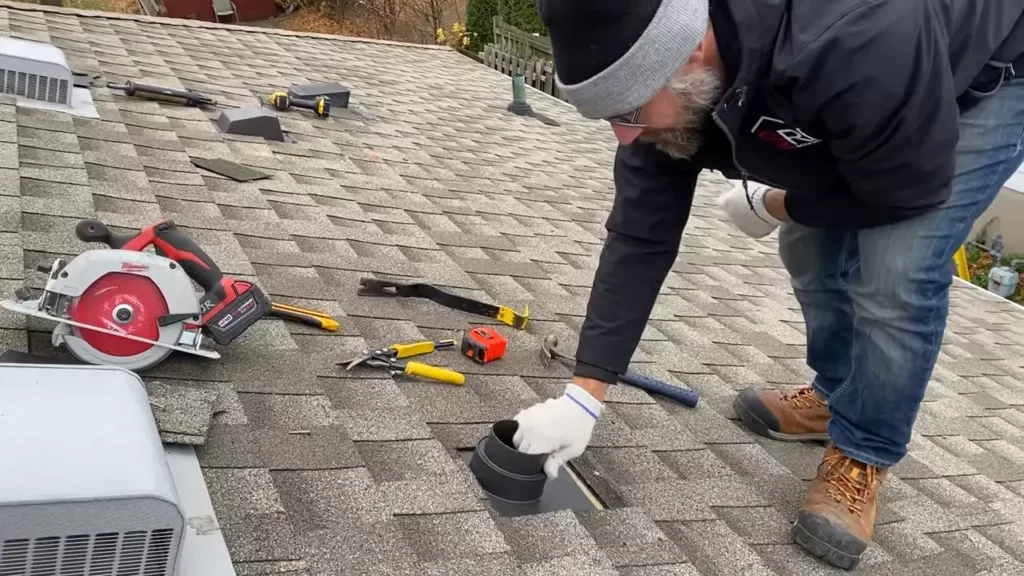
- Cut through any sealant: In some cases, the vent cap may be sealed to the roof using a caulk or sealant. Use a utility knife to carefully cut through the sealant, ensuring not to damage the roof or surrounding areas.
- Gently lift and remove: Once all screws, ductwork, and sealants have been taken care of, gently lift the old vent cap away from the roof. Take caution not to apply excessive force or cause any damage during this process.
After successfully removing the old vent cap, it’s essential to clean and inspect the area before installing the new one. Removing the old vent cap is a crucial step and ensures a smooth installation process for the new vent cap.
Installing The New Roof Vent Cap
Installing a new roof vent cap is an important step in maintaining proper ventilation in your home. A well-functioning vent cap not only assists in preventing excess moisture and heat buildup in your attic, but it also helps to extend the lifespan of your roof. In this section, we will walk you through the process of installing a new roof vent cap, ensuring optimal airflow and weatherproofing.
Positioning the New Vent Cap for Optimal Airflow
The first step in installing your new roof vent cap is to determine the ideal position for optimal airflow. Proper placement will ensure that the vent cap effectively removes stale air and provides a steady flow of fresh air. Here’s how you can position your vent cap correctly:
- Choose a location on your roof that is near the peak, away from any obstructions such as trees or other structures.
- Locate the rafters in your attic and mark the center between two of them. This will be the spot where you will cut the opening for the vent cap.
- Use a measuring tape and a pencil to mark the outline of the vent cap’s base on the roof. Ensure the outline aligns with the center of the rafters for stability and proper installation.
Securing the Vent Cap to the Roof Surface
Once you have positioned the vent cap in the correct location, it’s time to secure it to the roof surface. This step will ensure that the vent cap remains sturdy and withstands any harsh weather conditions. Here’s how you can secure the vent cap:
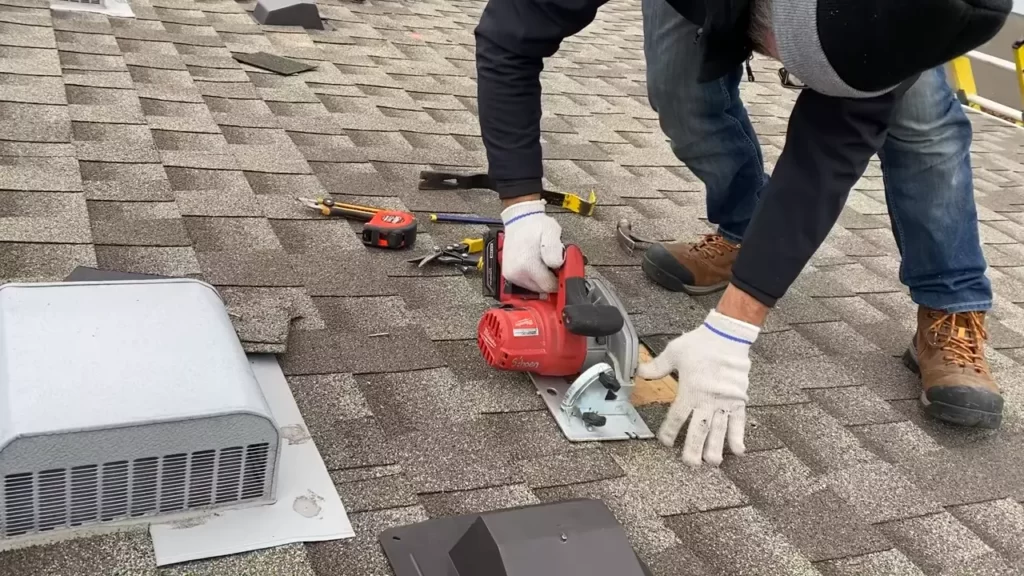
- With a drill, carefully cut a hole along the marked outline for the vent cap’s base. Be sure to wear safety goggles and gloves for protection.
- Place the vent cap over the hole and ensure it is centered. Use roofing nails or screws to secure the cap to the roof surface.
- Double-check that the vent cap is firmly attached by gently pushing and pulling on it.
Sealing and Weatherproofing the Installation
To complete the installation of your new roof vent cap, it’s crucial to seal and weatherproof the area around the vent cap. This will prevent any leaks or water damage from occurring. Follow these steps to properly seal and weatherproof the installation:
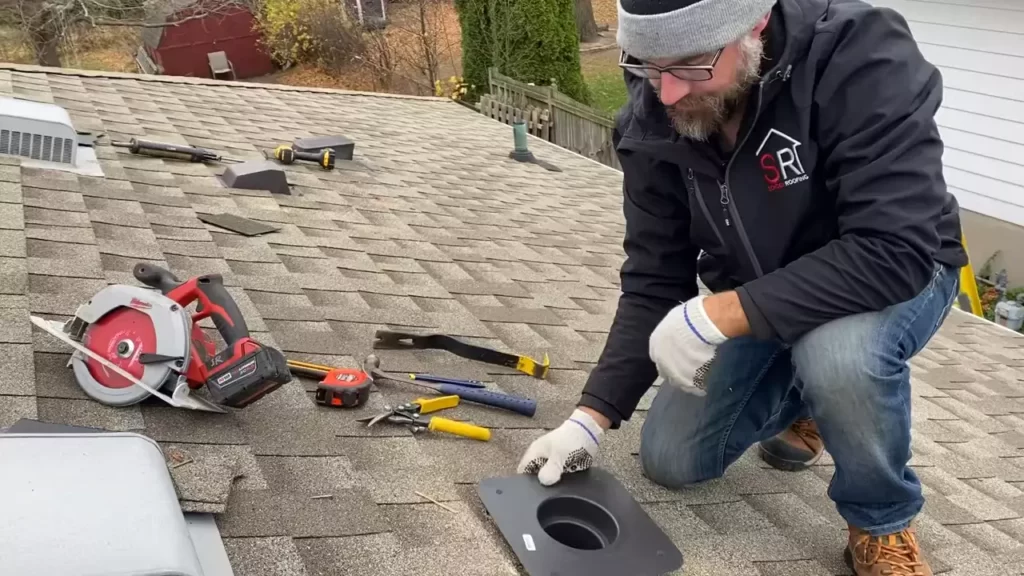
- Apply a generous amount of roofing cement around the base of the vent cap. Smooth it out evenly to create a watertight seal.
- Inspect the surrounding area for any gaps or cracks and seal them with additional roofing cement.
- Check the flashing around the vent cap and make sure it is secure. If needed, apply more roofing cement to ensure a tight seal.
By following these steps, you can successfully install a new roof vent cap with optimal airflow and weatherproofing. Remember, proper installation is essential for maintaining a well-ventilated and durable roof.
Cleaning And Inspecting The Vent Cap Regularly
Importance of Regular Maintenance for Optimal Performance
Regular maintenance of the roof vent cap is crucial to ensure its optimal performance. Over time, dirt, debris, and other external elements can accumulate on the cap, leading to clogs and reduced airflow. This can result in stagnant air, moisture buildup, and potential damage to your roof and ventilation system.
To prevent these issues and extend the lifespan of your vent cap, it is essential to clean and inspect it regularly. By doing so, you can identify any signs of wear, damage, or blockages and take necessary actions to resolve them promptly. Additionally, regular maintenance helps to maintain good indoor air quality, prevent foul odors, and promote energy efficiency in your home.
How to Properly Clean the Vent Cap
To ensure the vent cap functions optimally, you need to follow a proper cleaning routine. Here is a step-by-step guide on how to clean your roof vent cap:
- Start by safely accessing your roof. Use a secure ladder and take necessary precautions to prevent slips, falls, and injuries. If needed, consider hiring a professional for assistance.
- Inspect the vent cap visually. Look for any signs of damage, such as cracks, rust, or loose components. Note down any issues you observe for later repair or replacement.
- Remove any visible debris or obstructions manually. Use a gloved hand or a brush to gently clear away leaves, twigs, dirt, or any other debris that may have accumulated on or around the cap.
- Inspect the cap’s screening or louvers. If they appear dirty or clogged, use a soft brush or cloth to carefully remove the dirt and ensure clear airflow. Avoid using excessive force to prevent damage.
- Next, clean the interior surface of the vent cap. Use a vacuum cleaner or a small brush to eliminate any dust, cobwebs, or accumulated particles. This step will ensure optimal airflow and prevent blockages.
- After cleaning, rinse the vent cap with water. Use a gentle stream of water to flush away any remaining dirt or debris, ensuring all areas are thoroughly cleaned.
- Before leaving the roof, double-check that the vent cap is securely attached and in proper working condition. Tighten any loose screws or fasteners if necessary.
- Finally, dispose of the collected debris in a suitable manner and clean up the work area, leaving no traces behind.
By following these simple steps to clean your vent cap, you can maintain its performance and prolong its lifespan. Regular cleaning not only prevents clogs but also allows you to identify any potential issues early on, saving you from costly repairs or replacements down the line.
Troubleshooting Common Issues
Properly installing a roof vent cap is essential for maintaining good ventilation in your home. However, like any other component, vent caps can experience common issues over time that need to be addressed promptly. In this section, we will discuss how to identify and fix potential problems with the vent cap, as well as provide tips for addressing leaks or blockages.
Identifying and fixing potential problems with the vent cap
If you notice any of the following issues with your roof vent cap, it is important to take action as soon as possible to prevent further damage or complications:
- Visible cracks or damage to the exterior of the cap
- Loose or missing screws
- Excessive rust or corrosion
- Unusual noises or rattling from the vent
To fix these common problems, follow these steps:
- Inspect the cap thoroughly: Carefully examine the cap for any visible cracks, damage, or signs of wear. If you notice any issues, it may be necessary to replace the cap.
- Tighten any loose screws: Use a screwdriver to ensure that all screws holding the vent cap in place are securely tightened. If any screws are missing, replace them with new ones.
- Remove rust or corrosion: If your vent cap shows signs of rust or corrosion, gently scrub the affected area with a wire brush. Once the rust or corrosion has been removed, apply a layer of rust-resistant paint to protect the cap from future damage.
- Check for obstructions: Sometimes, debris or small animals may find their way into the vent cap, causing blockages. Remove any obstructions carefully using a small brush or vacuum cleaner.
Tips for addressing leaks or blockages
If you are experiencing leaks or blockages with your roof vent cap, consider the following tips to resolve these issues:
- Inspect the rubber gasket: Ensure that the rubber gasket around the base of the cap is in good condition. If it appears cracked or damaged, replace it with a new one to prevent leaks.
- Apply a sealant: If you suspect that the cap is not properly sealed to the roof, apply a waterproof sealant around the edges to prevent water from entering.
- Clear blockages from the vent pipe: If you believe that your vent pipe is blocked, carefully remove the cap and check for any debris or buildup. Use a plumbing snake or a high-powered hose to clear any blockages.
By troubleshooting common issues and taking the necessary steps to address them, you can ensure that your roof vent cap continues to function effectively and maintain proper ventilation in your home.
Extending The Lifespan Of Your Roof Vent Cap
A roof vent cap is an essential component of your roofing system as it helps to ventilate your attic and prevent moisture buildup. To ensure that your roof vent cap lasts for a long time and functions effectively, it is important to take certain measures for its maintenance and potential upgrades. In this section, we will discuss some valuable tips for prolonging the durability of the vent cap as well as when to consider replacement or upgrades.
Tips for Prolonging the Durability of the Vent Cap
Implementing a few simple maintenance practices can significantly extend the lifespan of your roof vent cap. Here are some helpful tips to keep in mind:
- Regular cleaning: Remove any debris, leaves, or other obstructions that may accumulate on the vent cap. This prevents blockages and allows for proper airflow.
- Inspect for damage: Periodically examine the vent cap for any signs of cracks, dents, or deterioration. Promptly repair or replace any damaged parts to prevent further issues.
- Sealing: Ensure that all connections between the vent cap and the roof are properly sealed to prevent water leakage. Use appropriate roofing sealant or caulking for a watertight seal.
- Trim nearby overhanging branches: Trim any tree branches that might be touching or rubbing against the vent cap. This prevents damage caused by constant friction or falling branches.
- Regular roof inspections: Schedule regular roof inspections by a professional to identify any potential problems with the vent cap or other roofing components.
When to Consider Replacement or Upgrades
While regular maintenance can significantly extend the lifespan of your roof vent cap, there may come a time when replacement or upgrades are necessary. Here are a few indicators that it may be time to consider these options:
- Visible damage: If there are visible cracks, holes, or significant wear and tear on the vent cap, it is a clear sign that a replacement is needed.
- Reduced performance: If you notice diminished airflow or increased moisture in your attic despite proper maintenance, it may indicate the need for an upgrade to a more efficient vent cap.
- Age: Take into account the age of your current vent cap. Over time, materials can degrade and become less effective, making replacement a wise choice to ensure optimal ventilation.
- Roof renovations: If you’re planning major renovations or replacing your roof, it is a perfect opportunity to upgrade your vent cap to a newer and more advanced model.
By following these tips and knowing when to consider replacement or upgrades, you can ensure that your roof vent cap continues to function effectively and protect your home for years to come.
Frequently Asked Questions For How To Install A Roof Vent Cap
How Do You Install A Vent Pipe Cap?
To install a vent pipe cap, follow these steps:
1. Measure the diameter of the vent pipe.
2. Choose a cap that matches the pipe’s size and type.
3. Slide the cap over the pipe and secure it tightly.
4. Use screws or clamps to ensure a secure fit.
5. Inspect the installation to confirm proper ventilation.
Should A Roof Vent Have A Cap?
Yes, a roof vent should have a cap. A cap helps to protect the vent from rain, snow, debris, and pests, preventing damage and blockages. It also helps to improve the overall ventilation and airflow in your attic or building.
How Do You Install Ridge Cap Venting?
To install ridge cap venting, follow these steps:
1. Begin by measuring and marking the centerline of the ridge.
2. Next, position the ridge cap venting along the marked centerline.
3. Secure the venting in place using roofing nails or screws.
4. Install the remaining sections of ridge cap venting, overlapping each one.
5. Finally, seal any gaps or joints with roofing adhesive to ensure proper ventilation.
How Does A Roof Vent Cap Work?
A roof vent cap works by allowing air to flow in and out of the attic space. It is installed on top of the roof and has a cover to prevent rain and debris from entering. The cap has vents or holes that enable air circulation, preventing moisture buildup and maintaining proper ventilation in the attic.
Conclusion
Installing a roof vent cap may seem like a daunting task, but with the right knowledge and tools, it can be a straightforward process. By following the steps outlined in this blog post, you can ensure proper ventilation for your home and extend the lifespan of your roof.
Remember to prioritize safety, measure accurately, and secure the vent cap tightly. With these guidelines in mind, you’ll be able to successfully install a roof vent cap and enjoy the benefits it brings. So get started and give your home the ventilation it deserves.