To install a storage shed, start by choosing the right location and preparing the ground. Then assemble the shed according to the manufacturer’s instructions.
A storage shed is a great solution for organizing and storing your belongings. Whether you need extra space for gardening tools, outdoor equipment, or household items, a storage shed can be a practical addition to your property. But how do you go about installing one?
In this guide, we will walk you through the steps to install a storage shed, from choosing the location to assembling the shed itself. By following these steps, you can have a sturdy and functional storage shed in no time. So let’s get started!
Choosing The Right Location
Installing a storage shed is an excellent way to declutter your living space and create additional storage options for your belongings. However, before you start assembling your shed, it is crucial to choose the right location. The site you select will determine the shed’s overall stability, accessibility, and functionality.
In this section, we will explore the factors to consider in selecting the ideal site for your storage shed, assessing the landscape and accessibility of potential locations, and how to ensure proper drainage and leveling of the site.
Factors to consider in selecting the ideal site for your storage shed
When it comes to choosing the ideal site for your storage shed, several factors need to be considered to ensure the shed serves its purpose effectively. Here are some crucial factors to keep in mind:
- Sunlight exposure: Ensure that the location receives enough sunlight throughout the day. Adequate sunlight helps to prevent dampness and maintains the condition of items stored inside the shed.
- Functionality and accessibility: Consider how you plan to use the shed and its proximity to other areas of your property. Ensure that the shed is easily accessible, especially if you frequently use the items stored inside.
- Privacy: If you intend to store valuable or personal items, it’s important to select a location that offers privacy and minimizes the risk of theft or prying eyes.
- Local regulations: Before finalizing the location, check with your local authorities or homeowner’s association to ensure compliance with any regulations or restrictions regarding shed placement on your property.
Assessing the landscape and accessibility of potential locations
Once you have narrowed down your options based on the factors mentioned above, it’s time to assess the landscape and accessibility of the potential locations. Here are a few key points to consider:
- Ground stability: Choose a location with a stable and firm ground surface to ensure the shed’s stability and prevent sinking or shifting over time.
- Clearance from obstacles: Take note of any trees, utility lines, or other structures that may obstruct the installation or use of the shed. Make sure there is ample clearance around the shed to avoid any potential hazards.
- Proximity to water sources: Consider the proximity to any water sources, such as a downspout or irrigation system, as excessive water exposure can lead to damage or flooding inside the shed.
How to ensure proper drainage and leveling of the site
Proper drainage and leveling of the site are vital for the longevity and functionality of your storage shed. Here are a few steps to ensure your shed is placed on a well-drained and leveled site:
- Clear the area: Remove any vegetation, debris, or rocks from the site to create a clean and level surface.
- Level the ground: Use a level and a shovel to smooth out the ground and ensure it is level in all directions. If necessary, add or remove soil to achieve the desired level.
- Install a base: Consider installing a solid base, such as a concrete pad or a compacted gravel base, to provide a stable foundation for your shed.
- Ensure proper drainage: To prevent water accumulation around the shed, slope the ground away from the shed’s base. This will help divert any water runoff and prevent water damage.
By carefully considering the factors mentioned above, assessing the landscape and accessibility of potential locations, and ensuring proper drainage and leveling, you can select the perfect spot for your storage shed. Choosing the right location will not only enhance the functionality of the shed but also contribute to its longevity and overall aesthetic appeal.
Preparing The Area For Installation
Before installing a storage shed, it’s crucial to properly prepare the area. By following these steps, you can ensure a smooth and hassle-free installation process.
Clearing the Area of Debris and Vegetation
Start by clearing the installation area of any debris and vegetation. Remove rocks, branches, and any other items that may hinder the shed’s placement. It’s important to create a clean and level space to ensure the shed sits securely.
Removing Any Obstacles That May Hinder the Installation Process
Next, inspect the area for any obstacles that may hinder the installation process. This includes items such as fences, trees, or utility lines that could obstruct the shed’s access or hinder its stability. Make sure to redirect any utility lines or dismantle obstacles that may prevent a smooth installation.
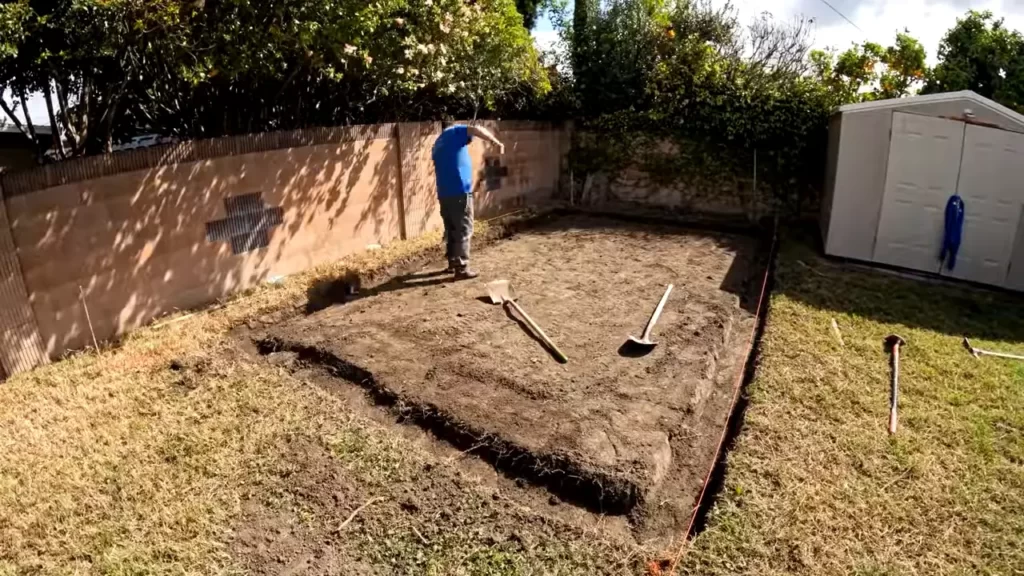
Leveling the Ground and Preparing a Solid Foundation
To ensure a sturdy and durable installation, it’s crucial to level the ground and prepare a solid foundation. Begin by removing any uneven patches of soil or grass, using a shovel or rake to smooth out the area. You can also consider using a hand tamper or a plate compactor to compact the soil, creating a solid base for the shed.
Note: Depending on the shed type and size, you may need to create a foundation using materials such as gravel, concrete, or patio stones. Follow the manufacturer’s instructions and local building codes to determine the appropriate foundation for your shed.
By adhering to these steps and properly preparing the installation area, you can ensure a stable and secure foundation for your storage shed. Taking the time to clear the area, remove obstacles, and level the ground is essential for a successful installation.
Assembling The Storage Shed
Once you have successfully laid the foundation and prepared the site, it’s time to embark on the exciting process of assembling your storage shed. This section will guide you through the necessary steps to organize the shed components, prepare the tools required, assemble the framework and walls, and finally attach the roof to ensure proper stability and support.
Organizing the Shed Components and Preparing the Necessary Tools
Before beginning the assembly process, it is crucial to organize all the shed components and prepare the necessary tools. This will help streamline the installation process and ensure you have everything you need at your fingertips. Here are the steps to follow:
- Clear the area where you will be assembling the shed, removing any obstacles or debris that could hinder the process.
- Unpack the shed kit carefully, ensuring you don’t damage any of the components.
- Sort the components according to their type, such as the framework, walls, doors, and roof panels.
- Refer to the assembly instructions provided by the manufacturer to familiarize yourself with the different components and their specific requirements.
- Gather all the necessary tools, which may include a hammer, screwdriver, level, tape measure, wrench, and any other tools specified in the instructions.
Step-by-Step Instructions for Assembling the Framework and Walls
With the shed components organized and tools prepared, it’s time to start assembling the framework and walls. Follow these step-by-step instructions:
- Begin by laying out the framework components according to the manufacturer’s instructions, ensuring they are aligned correctly.
- Attach the framework securely using the provided screws or nails. Make sure to follow the recommended spacing and fastening techniques to ensure structural integrity.
- Once the framework is assembled, begin attaching the wall panels to the framework, securing them tightly with the recommended fasteners.
- Check for levelness and adjust as necessary, making sure the walls are plumb and square.
- Continue attaching the remaining wall panels until all sides of the shed are enclosed.
Attaching the Roof and Ensuring Proper Stability and Support
Now that the framework and walls are in place, it’s time to attach the roof and ensure proper stability and support for your storage shed. Follow these final steps:
- Refer to the manufacturer’s instructions for attaching the roof panels to the framework, following the recommended methods and using the provided hardware.
- Check that the roof panels fit snugly and are aligned correctly.
- Tighten any loose screws or fasteners to ensure a secure roof structure.
- Inspect the overall stability of the shed, making sure it is balanced and supported evenly on the foundation.
- Lastly, check for any gaps or openings that may compromise the shed’s weatherproofing, and make necessary adjustments or sealant applications.
By following these step-by-step instructions and adhering to the manufacturer’s guidelines, you can assemble your storage shed with confidence and enjoy the benefits of a well-built and functional outdoor storage solution.
Installing Doors And Windows
When it comes to installing a storage shed, one crucial aspect is the proper installation of doors and windows. These elements not only enhance the overall functionality of the shed but also contribute to its security and insulation. In this section, we will delve into the key factors to consider when positioning and securing the doors and windows, as well as the use of appropriate locks and latches for enhanced security measures. Additionally, we will discuss the importance of insulation and weatherproofing for the windows to ensure maximum protection from external elements.
Positioning and securing the doors and windows in the shed
Positioning the doors and windows in your storage shed requires careful planning to optimize accessibility and natural light exposure. Consider these steps to achieve an ideal placement:
- Assess the available space and determine the most suitable locations for the doors and windows based on the shed’s design and functionality.
- Align the doors and windows with the shed’s frame and ensure they fit properly within the designated spaces.
- Securely attach the doors and windows to the shed’s frame using appropriate screws or nails, following the manufacturer’s instructions for installation.
- Ensure the doors and windows are leveled and properly sealed to prevent any gaps or air leaks that could compromise insulation or allow pests to enter the shed.
Enhancing security measures with appropriate locks and latches
To protect your storage shed and its contents from unauthorized access, it is essential to install suitable locks and latches on the doors and windows. Consider the following tips:
- Choose robust locks and latches that offer a high level of security and durability.
- Select locks and latches that are compatible with the material and design of your shed’s doors and windows.
- Install multiple locking mechanisms, such as deadbolts and padlocks, to add layers of security.
- Ensure proper alignment and functionality of the locks and latches, regularly inspecting them for any signs of wear or damage.
Ensuring proper insulation and weatherproofing for windows
Windows are vulnerable spots for heat loss, air infiltration, and water leakage, so it is crucial to prioritize insulation and weatherproofing to maintain a comfortable and protected environment within the shed. Follow these guidelines:
- Use weatherstripping or caulking around the window frames to seal any gaps or cracks that could allow air or water to seep into the shed.
- Consider applying a window film or using double-paned windows to enhance insulation and reduce heat transfer.
- Add window coverings or blinds to provide additional insulation and privacy when needed.
- Regularly inspect and maintain the window seals, replacing any damaged weatherstripping or caulking as necessary.

Finishing Touches And Maintenance
Completing the installation of your storage shed is an exciting accomplishment, but the work doesn’t end there. To ensure the longevity and functionality of your shed, it’s important to pay attention to the finishing touches and maintenance. By applying a protective coating or paint, installing additional features like shelving and hooks, and regularly maintaining your shed, you can keep it in top condition for years to come.
Applying a Protective Coating or Paint to the Shed
One of the most crucial steps in finishing your storage shed is applying a protective coating or paint. This not only enhances the appearance of the shed but also provides an extra layer of defense against the elements. To protect the wood from moisture, sunlight, and other potential damages, follow these steps:
- Clean the surface of the shed by removing any dirt, dust, or debris.
- Repair any cracks or imperfections in the wood using an appropriate filler.
- Sand the entire surface of the shed to create a smooth and even texture.
- Apply a primer, especially if you plan to paint the shed, to ensure optimal adhesion and coverage.
- Use a high-quality exterior paint or a wood stain to coat the shed. Choose a color that matches your preference and blends well with the surrounding environment.
- Apply multiple coats, allowing each coat to dry completely before applying the next one.
- Seal the paint or stain with a clear sealant to provide added protection against moisture and UV rays.
Installing Additional Features Such as Shelving and Hooks
To maximize the functionality of your storage shed, consider installing additional features like shelving and hooks. These additions can help you organize and optimize the available space, making it easier to store and access your items. Here’s how you can do it:
- Measure the dimensions of your shed to determine the appropriate size and placement for shelving units.
- Choose sturdy and durable materials for the shelves that can withstand the weight of your stored items.
- Install the shelves securely, ensuring they are level and properly anchored to the walls or support beams of the shed.
- For hooks and hanging storage, identify the items you want to hang and determine the best locations for easy access.
- Use appropriate hardware, such as hooks, hangers, or racks, to install the hanging storage options securely.
Regular Maintenance Practices to Extend the Lifespan of Your Storage Shed
Maintaining your storage shed on a regular basis is essential to extend its lifespan and keep it in optimal condition. Here are some simple maintenance practices you can follow:
- Regularly inspect the shed for any signs of damage, such as cracks, loose hinges, or roof leaks.
- Repair any issues immediately to prevent further damage.
- Clean the shed regularly by removing any debris, leaves, or dirt that may accumulate on the roof or around the foundation.
- Trim nearby trees or overhanging branches that could potentially damage the shed during storms or strong winds.
- Check and tighten any loose screws, bolts, or fasteners.
- Apply a fresh coat of paint or protective coating every few years to maintain the shed’s appearance and protection against the elements.
By following these finishing touches and maintenance practices, you can ensure that your storage shed remains functional, visually appealing, and durable for many years.
Frequently Asked Questions On How To Install Storage Shed
Do I Need A Concrete Slab For A Storage Shed?
Yes, a concrete slab is recommended for a storage shed. It provides a sturdy and level foundation, ensuring the shed’s stability and protecting it from moisture. Additionally, it helps to prevent pests from entering the shed. A concrete slab also makes it easier to access and organize your belongings inside the shed.
How Do You Prepare The Ground For A Shed?
To prepare the ground for a shed:
1. Clear the area of any obstructions or debris.
2. Level the ground to ensure a stable foundation.
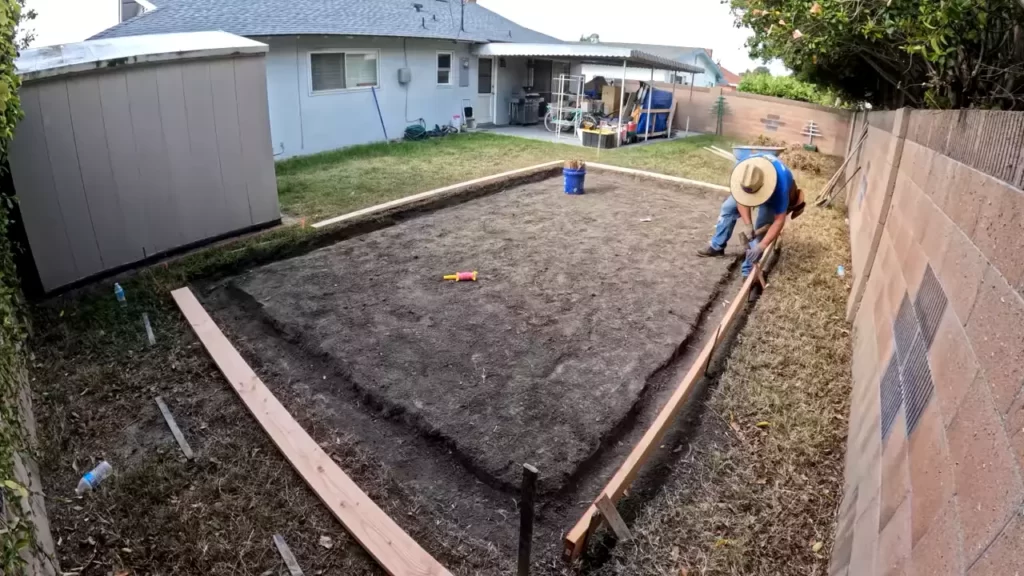
3. Use stakes and string to mark the shed’s dimensions.
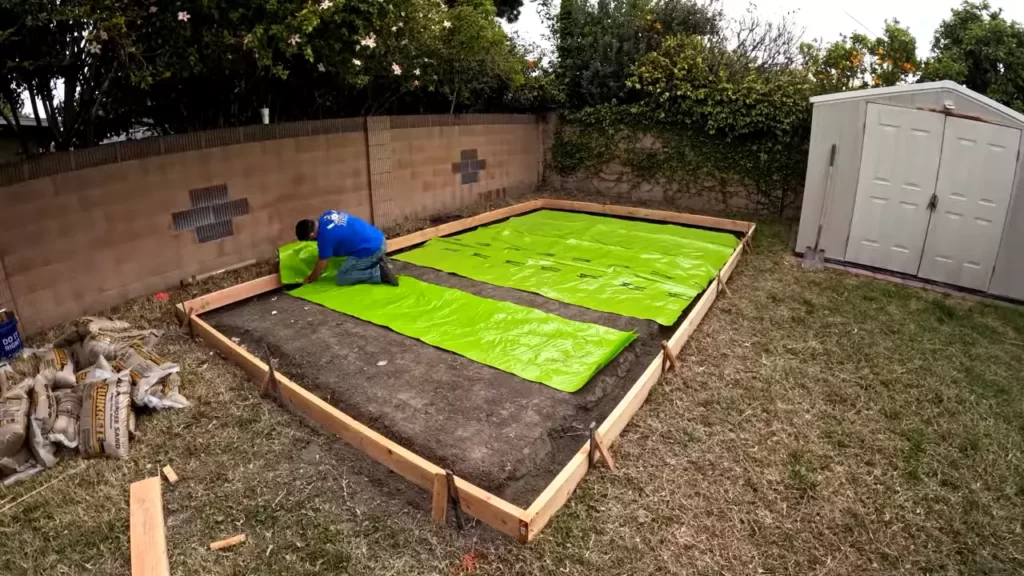
4. Dig and create a gravel base for proper drainage.
5. Compact the ground and lay a weed barrier before installing the shed.
Can You Install A Shed Yourself?
Yes, you can install a shed yourself. It requires careful planning, measuring, and following instructions. Ensure you have the necessary tools and materials. Prepare the site, assemble the shed, and secure it properly. Seek assistance if needed, and enjoy your new shed!
Do You Need A Foundation For A Shed?
Yes, a foundation is necessary for a shed. It provides stability, prevents shifting, and protects from moisture and pests.
Conclusion
Installing a storage shed might seem like a daunting task at first, but with the right tools and step-by-step guidance, it becomes a manageable project for anyone. By following the instructions provided in this blog post, you can confidently set up your own storage shed and create an organized space for all your belongings.
Remember to plan carefully, gather all the necessary materials, and seek assistance when needed. With a little effort and patience, you’ll have a fully functioning storage shed that meets your needs in no time!