To install an attic antenna, first, mount the antenna in the desired location and connect the coaxial cable to the antenna. Then, run the cable to the television set, connect it to the TV’s input, and perform a channel scan to enjoy free over-the-air broadcasts.
When it comes to enjoying free over-the-air broadcasts, installing an attic antenna is a practical and efficient solution. Attic antennas are easy to install and provide excellent reception for TV channels. By following a few simple steps, you can have your attic antenna set up and ready to use in no time.
We will guide you on how to install an attic antenna, step by step. So, let’s get started!
Benefits Of Installing Attic Antenna
An attic antenna can be a game-changer when it comes to improving your TV viewing experience. Not only does it provide increased signal strength, but it also offers a cost-effective alternative to cable or satellite TV. With an attic antenna, you gain access to a wide range of local and network channels, all without having to pay any monthly subscription fees. Let’s dive deeper into the benefits of installing an attic antenna:
Increased Signal Strength
One of the primary advantages of installing an attic antenna is the increased signal strength it provides. Attic antennas are generally placed higher than outdoor antennas, allowing them to receive stronger and more reliable signals. This means you can enjoy crystal-clear reception with minimal interference, ensuring that your favorite shows and sports events are never interrupted by pixelation or loss of signal.
Cost-Effective Alternative to Cable or Satellite TV
For many people, the high cost of cable or satellite TV subscriptions can be a burden on their monthly budget. Fortunately, an attic antenna offers a cost-effective alternative. Once you have installed the antenna, you no longer have to pay any monthly fees to access your favorite TV channels. It’s a one-time investment that can save you a significant amount of money in the long run, allowing you to enjoy your favorite shows without breaking the bank.
Access to Local and Network Channels
Another benefit of installing an attic antenna is that it provides access to a wide range of local and network channels. Many of these channels include popular shows, news broadcasts, sports events, and even movies. With an attic antenna, you can watch local news, catch your favorite network dramas, tune in to live sports games, and stay up to date with everything happening in your community. It’s like having your own personalized TV lineup, tailored to your interests and preferences.
No Monthly Subscription Fees
When you install an attic antenna, you can say goodbye to monthly subscription fees. Unlike cable or satellite TV, which requires a monthly payment for access to channels, an attic antenna provides free over-the-air broadcasts. This means you can enjoy a wide selection of channels without worrying about any additional costs. Installing an attic antenna gives you the freedom to watch TV on your terms, without being tied down by expensive subscription plans.
Choosing The Right Attic Antenna
When it comes to installing an attic antenna, choosing the right one is crucial for optimal reception. With the right antenna, you can enjoy clear, high-quality television signals without the need for a rooftop installation. In this section, we will explore the key factors to consider when choosing the right attic antenna for your setup.
Consider the broadcast towers in your area
Before you start shopping for an attic antenna, it’s important to determine the locations of the broadcast towers in your area. This information will help you select an antenna with the right range and directionality to capture signals from those towers. To find the location of the broadcast towers near you, you can use online tools or mobile apps that provide databases of tower locations based on your address.
Determine the type of antenna suitable for your location
Once you have the information about the broadcast towers in your area, the next step is to determine the type of antenna that is suitable for your location. There are two main types of attic antennas: omnidirectional and directional. Omnidirectional antennas capture signals from all directions, making them ideal for areas with towers scattered in multiple directions. On the other hand, directional antennas focus on capturing signals from a specific direction and are best suited for areas with towers located in a concentrated area.
Factors to consider: range, gain, and directionality
When choosing an attic antenna, it’s essential to consider factors such as range, gain, and directionality. The range refers to the maximum distance at which the antenna can receive signals effectively. If you live in a remote area, you might need an antenna with a greater range to capture signals from distant towers. Gain, on the other hand, determines the antenna’s ability to amplify weak signals, ensuring a clear and stable picture. Lastly, the antenna’s directionality should align with the location of the broadcast towers in your area.
To make an informed decision, consider the following table outlining the key features of different types of attic antennas:
| Antenna Type | Range | Gain | Directionality |
|---|---|---|---|
| Omnidirectional | Medium to short range | Medium | 360 degrees |
| Directional | Long range | High | Specific direction |
Research customer reviews and ratings
Before making a final decision, it’s a good idea to research customer reviews and ratings of the attic antennas you are considering. Customer feedback can provide valuable insights into the performance and reliability of different antennas. Look for antennas with positive reviews and high ratings, as these are often indicators of a quality product that satisfies customers’ reception needs.
By considering the broadcast towers in your area, the type of antenna suitable for your location, factors such as range, gain, and directionality, and researching customer reviews and ratings, you will be well-equipped to choose the right attic antenna for your setup.
Preparing For Installation
Preparing for Installation
Installing an attic antenna is a great way to improve your TV signal reception without the need for an exterior antenna. However, before starting the installation process, it’s important to properly prepare for the job. This involves assessing the available space in your attic, clearing any obstructions that may hamper signal reception, gathering the necessary tools and equipment, and planning the cable routing. By following the steps below, you can ensure a smooth and effective installation process.
Assess available space in the attic
Before installing your attic antenna, it’s crucial to assess the available space in your attic. Measure the area to determine if it can accommodate the antenna size you have chosen. Consider the height and width requirements, as well as any clearance needed around it. Pay close attention to potential obstructions such as beams, rafters, or other objects that may interfere with the signal reception. It’s important to have enough space to position the antenna in a way that maximizes the signal strength.
Clear any obstructions to improve signal reception
To ensure optimal signal reception, it’s necessary to clear any obstructions that may hinder the transmission of signals. Remove any stored items, insulation, or debris that may be blocking the path between the antenna and the broadcast towers. By clearing these obstructions, you can improve the quality and strength of the signals received by your attic antenna.
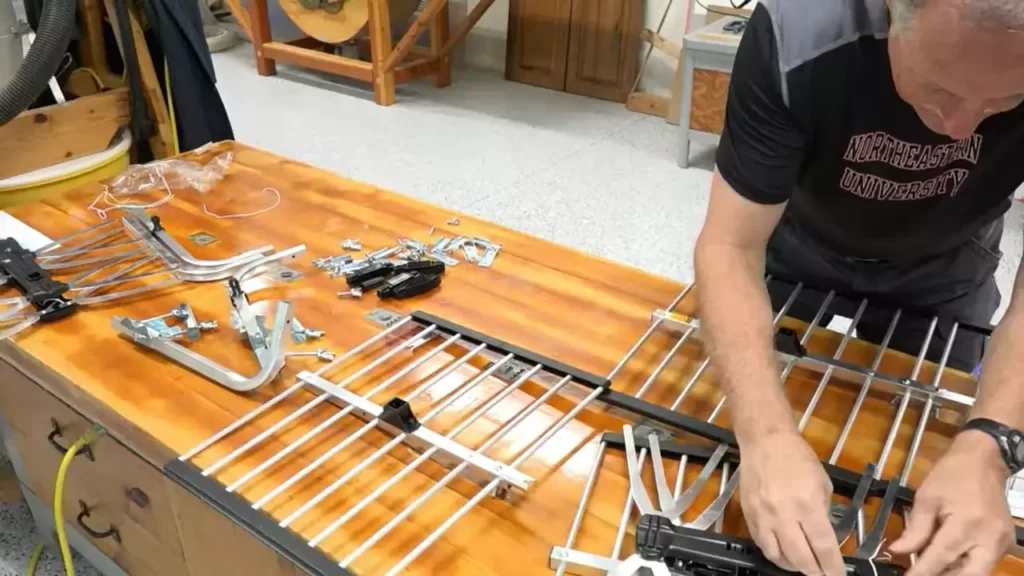
Gather necessary tools and equipment
Before starting the installation, gather all the necessary tools and equipment. This may include a ladder, drill, screws, coaxial cables, cable connectors, and grounding equipment. Having all the required tools and equipment on hand will help you complete the installation smoothly without any interruptions.
Plan the cable routing
Proper cable routing is vital to ensure a clean and organized installation. Plan the route for the coaxial cables from the attic antenna to your TV or set-top box. Consider the shortest and most direct path, minimizing the length of cable required. Avoid excessively long cable runs as they can cause signal loss. Use cable clips or other cable management tools to keep the cables neatly secured along the planned route.
By following these steps and properly preparing for the installation, you can ensure a successful and optimized attic antenna setup. Assessing the available space in the attic, clearing obstructions, gathering necessary tools and equipment, and planning the cable routing will help you achieve optimal signal reception and enhance your overall TV viewing experience.
Installing Attic Antenna Step-By-Step
Installing an attic antenna can be a great way to improve your TV reception and ditch expensive cable bills. Whether you’re cutting the cord or looking for a secondary antenna for extra channels, the attic can be an ideal location for your antenna. In this step-by-step guide, we’ll walk you through the process of installing an attic antenna so you can enjoy crystal-clear TV signals in no time.
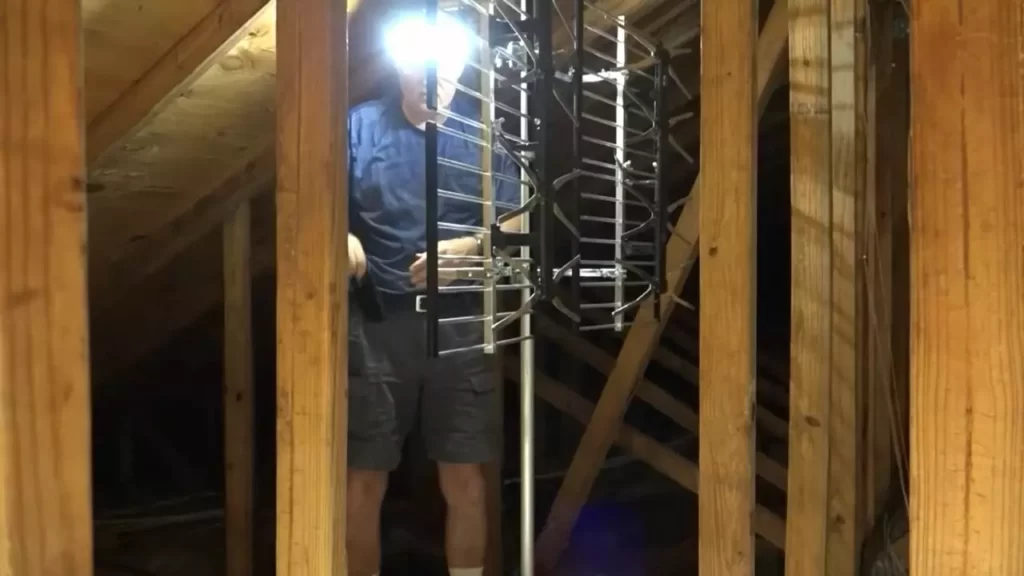
Locating the best spot in the attic for optimal reception
The first step in installing an attic antenna is finding the best spot for optimal reception. To do this, you’ll need to identify the section of your attic that has the least obstruction and is closest to your TV. Look for an area where the roof is not blocked by trees, buildings, or other obstacles. Additionally, you may consider using a signal strength meter to identify the location with the strongest signal.
Considering potential interference sources
Before mounting your attic antenna, it’s important to consider potential sources of interference that may affect your reception. Common sources of interference include nearby power lines, large appliances, and other electronic devices. Keep these in mind as you choose the location of your antenna to minimize any potential disruptions to your signal.
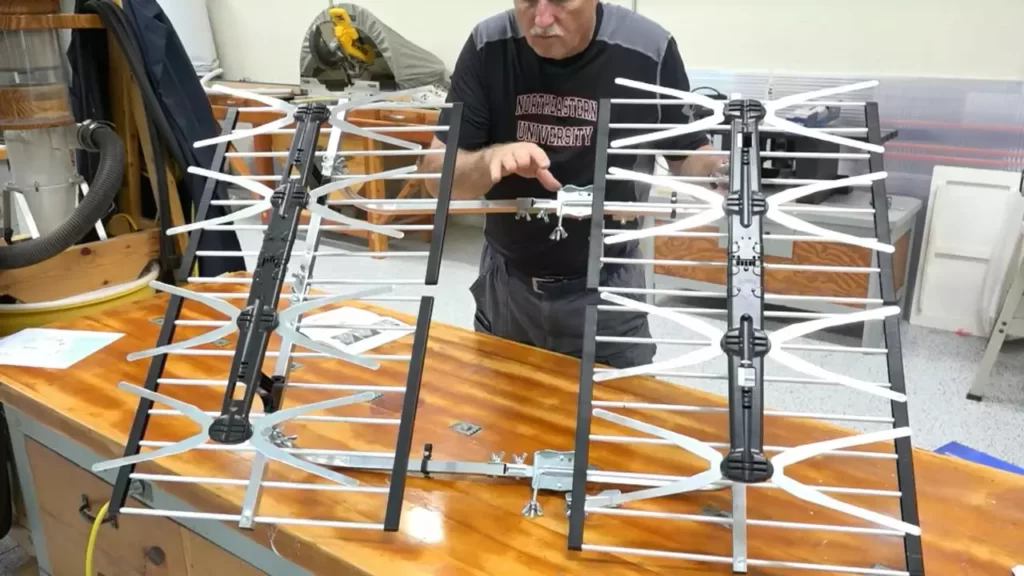
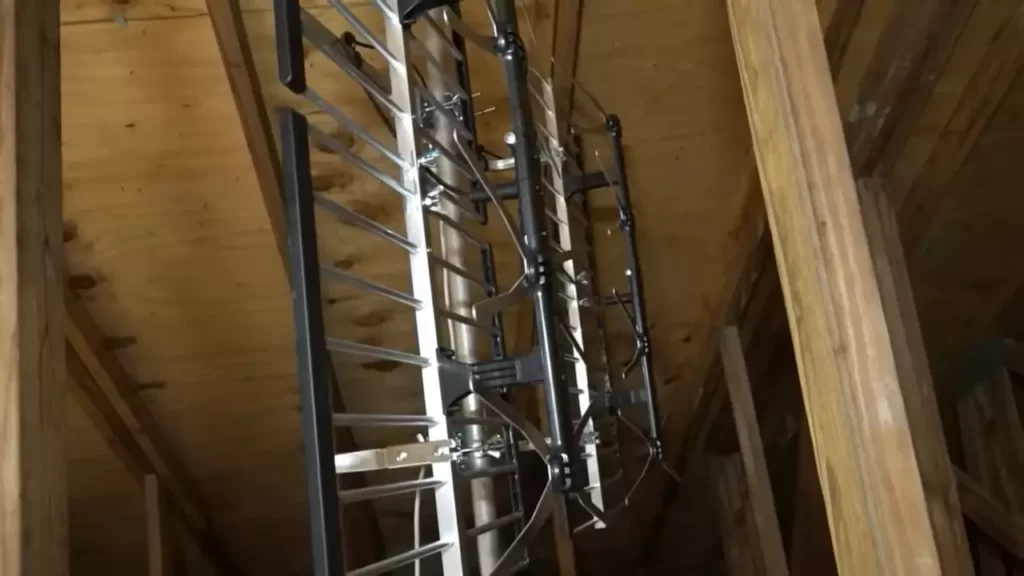
Mounting the antenna securely
Once you’ve identified the optimal location in your attic, it’s time to securely mount your antenna. Use a mounting bracket or mast specifically designed for attic installations. These brackets or masts are typically adjustable to allow for easy positioning and maximizing signal strength. Follow the manufacturer’s instructions to ensure a secure and stable installation.
Selecting a mounting bracket or mast
When selecting a mounting bracket or mast for your attic antenna, choose one that is compatible with your antenna model and suits your specific installation needs. Consider the size and weight of your antenna, as well as any additional equipment you may need to attach to the mount, such as amplifiers or signal boosters. Consult the manufacturer’s recommendations for guidance on selecting the right mounting bracket or mast.
Fastening the antenna to the mount
With your mounting bracket or mast in place, it’s time to attach the antenna. Carefully follow the manufacturer’s instructions to securely fasten the antenna to the mount. Ensure that all bolts and screws are tightened properly to prevent any potential wobbling or instability that could affect your signal quality.
Connecting the antenna to the TV
Once your antenna is securely mounted, it’s time to connect it to your TV. Begin by selecting the appropriate coaxial cable. Consider the length needed to reach your TV and choose a cable with low signal loss for optimal performance. Connect one end of the coaxial cable to the antenna’s output port and the other end to the input port of your TV.
Attaching the cable to the antenna and TV
With the coaxial cable connected to the antenna and TV, it’s important to ensure a secure attachment. Use zip ties or cable clips to fasten the cable along the attic rafters or walls, keeping it neat and organized. This will not only prevent any accidental disconnections but also help avoid potential cable damage due to bending or pulling.
Congratulations! You have successfully installed your attic antenna. Enjoy your newfound access to a wide variety of over-the-air channels and take control of your TV-watching experience without relying on expensive cable subscriptions.
Testing And Tuning The Attic Antenna
Now that the attic antenna is installed, the next step is to test and tune it to ensure optimal reception and a clear signal. This process involves scanning for available channels, checking signal quality and strength, and adjusting the antenna position if needed.
Scanning for available channels
To begin, you’ll first need to scan for available channels to see what stations are being picked up by your attic antenna. This can typically be done through the settings menu on your TV or digital tuner. Follow these steps:
- Access the settings menu on your TV or digital tuner.
- Select the option for channel or signal settings.
- Choose the “scan” or “auto-tune” function.
- Wait for the scanning process to complete, as it may take a few minutes.
- Once the scan is finished, a list of available channels will be displayed.
Make a note of the channels that have been successfully picked up by your attic antenna. This information will be useful for the next steps in testing and tuning the antenna.
Checking signal quality and strength
After scanning for channels, it’s important to check the signal quality and strength of each channel. This will help identify any issues with reception and whether adjustments to the antenna are necessary. Follow these steps:
- Tune your TV or digital tuner to one of the channels picked up by your attic antenna.
- Look for any visual disturbances, such as pixelation or freezing, which may indicate a weak signal.
- Check the signal strength or reception meter on your TV or digital tuner. This can usually be found in the settings menu or by pressing a dedicated button on the remote control.
- Ensure that the signal strength is strong and consistent across all channels. If the signal is weak or fluctuating, adjustments to the antenna position may be needed.
Take note of any channels that have poor signal quality or weak strength. This will help guide the adjustments to the attic antenna.
Adjusting the antenna position if needed
If you experience poor signal quality or weak strength on certain channels, it may be necessary to adjust the position of your attic antenna. Follow these steps:
- Start by referencing the list of channels with poor reception.
- Gradually and slowly adjust the direction of the antenna. This can be done by rotating or tilting the antenna slightly.
- After each adjustment, wait a few seconds to allow the signal to stabilize.
- Check the signal quality and strength of the affected channels again.
- Continue making small adjustments until optimal reception is achieved for all channels.
Remember, even small movements can make a significant difference in the reception quality. Be patient and persistent in finding the best position for your attic antenna.
By following these steps to scan for available channels, check signal quality and strength, and adjust the antenna position if needed, you can ensure that your attic antenna is properly tuned for optimal performance and enjoyment of your favorite television programs.
Troubleshooting Common Issues
Installing an attic antenna can be a great way to enjoy high-quality television reception. However, like any technology, sometimes issues can arise. In this section, we will explore some common problems that you may encounter and provide troubleshooting tips to help you resolve them.
Poor reception or interference
One of the most frustrating issues you may face when installing an attic antenna is poor reception or interference. This can result in fuzzy or pixelated images, audio disruptions, or even complete signal loss. To troubleshoot this problem, try these steps:
- Check your antenna placement: Ensure that your antenna is positioned as high as possible and away from any obstructions such as walls or metal objects. Adjusting the angle or direction of the antenna may also help improve reception.
- Check your connections: Ensure that all cables and connections are securely plugged in. Loose or damaged cables can cause signal issues.
- Remove sources of interference: Eliminate any potential sources of interference such as electronic devices or appliances that emit electromagnetic waves. Moving these devices away from the antenna can improve reception.
- Consider using an amplifier: If you live in an area with weak signals, using a signal amplifier may help boost the reception. However, be cautious not to amplify any existing interference.
Signal loss or pixelation
Signal loss or pixelation can occur when there is a weak or unstable signal reaching your attic antenna. If you are experiencing this issue, try the following troubleshooting steps:
- Check your antenna position: Ensure that your antenna is pointed in the correct direction towards the broadcast towers. Adjusting its angle slightly may help improve the signal.
- Inspect your antenna and cables: Look for any signs of physical damage or wear and tear on your antenna and cables. Replace any damaged components as they can cause signal loss.
- Re-scan for channels: Sometimes, simply re-scanning for channels on your television or tuner can help restore a stable signal. This is especially important if new broadcast towers have been added to your area.
- Consider a different antenna: If all else fails, you may need to consider installing a different type or model of attic antenna that is better suited to receive signals in your location.
Grounding issues
Grounding plays a crucial role in ensuring the safety and proper functioning of your attic antenna system. If you suspect grounding issues, follow these troubleshooting steps:
- Verify proper grounding: Make sure that your antenna is properly grounded according to the manufacturer’s guidelines. A grounded antenna helps protect against potential lightning strikes and electrical surges.
- Check the grounding wire: Inspect the grounding wire for any breaks, loose connections, or corrosion. Replace any damaged or corroded wire to ensure a solid connection.
- Consult a professional: If you are unsure about grounding requirements or encounter any complex grounding issues, it is recommended to consult a professional installer or an electrician to ensure safety and compliance.
Troubleshooting common issues when installing an attic antenna requires patience and systematic effort. By following these troubleshooting tips, you can greatly improve your television reception and enjoy a crystal-clear viewing experience.
Maintaining Your Attic Antenna
Once you have installed your attic antenna, it is important to properly maintain it to ensure optimal performance. Regular inspection, checking connections and cables, and cleaning the antenna are key aspects of maintenance that will help prevent damage, signal degradation, and other issues. By taking these simple steps, you can prolong the lifespan of your attic antenna and enjoy uninterrupted television reception. Let’s explore each of these maintenance tasks in detail.
Regular Inspection for Damage or Wear
Performing regular inspections of your attic antenna is essential to identify any signs of damage or wear that may compromise its functionality. You should visually examine the antenna’s components, including the elements, brackets, and mounting hardware. Look for any signs of rust, corrosion, loose connections, or damaged elements. Pay close attention to any areas where cables are attached, as this is a common spot for wear and tear.
Additionally, check for any antenna misalignment caused by heavy winds, storms, or accidental knocks. Misalignment can lead to weaker signals or even complete signal loss. If you notice any issues during the inspection, address them promptly to rectify the problem and prevent further damage.
Checking Connections and Cables
The connections and cables of your attic antenna play a crucial role in ensuring a strong and reliable signal. Over time, these connections can loosen or become corroded, resulting in poor signal quality. Regularly check the connections between the antenna and your television or receiver, as well as any splitters or amplifiers in the setup.
Inspect the coaxial cables for any signs of wear, fraying, or damage. If you find any issues, replace the affected cables as they can significantly impact signal strength. Ensure the connections are firmly tightened to minimize signal loss and interference.
Cleaning the Antenna to Prevent Signal Degradation
Dust, dirt, and debris can accumulate on your attic antenna over time, affecting its performance and causing signal degradation. Regular cleaning of the antenna is essential to maintain optimal signal reception. Use a soft cloth or brush to gently remove any dirt or grime from the surfaces of the antenna elements.
For stubborn stains or buildup, you can use a mild soap solution and water to clean the antenna. However, be careful not to use abrasive materials or strong chemicals that could damage the antenna’s finish or components. After cleaning, thoroughly rinse the antenna to remove any residue. Allow it to dry completely before reconnecting or using it again.
Investing a little time and effort into maintaining your attic antenna can go a long way in ensuring excellent signal quality and a prolonged antenna lifespan. By regularly inspecting for damage or wear, checking connections and cables, and keeping the antenna clean, you can enjoy uninterrupted television reception and make the most of your attic antenna setup.
Frequently Asked Questions On How To Install Attic Antenna
Can I Install An Antenna In My Attic?
Yes, you can install an antenna in your attic.
Do Antennas Work Well In An Attic?
Yes, antennas can work well in an attic.
Is It Better To Put An Antenna In The Attic Or Roof?
It is better to put an antenna on the roof because it provides a higher elevation for better reception and less interference. Attics can block signals and reduce signal strength.
Does An Antenna In The Attic Need To Be Grounded?
Yes, an attic antenna needs to be grounded to ensure safety and proper functioning. Grounding helps protect against lightning strikes and provides a clear path for electric currents to flow, reducing the risk of damage to equipment and interference with signals.
Conclusion
To sum it up, installing an attic antenna is a simple and cost-effective solution for improving your TV reception. By following the step-by-step instructions provided in this guide, you can easily set up your antenna and enjoy free, high-quality broadcasts.
Remember to choose the right type of antenna, ensure proper positioning, and perform regular maintenance to optimize your viewing experience. With a little effort and patience, you’ll be able to enjoy a wide range of channels and programs without the need for a cable or satellite subscription.
Start enjoying crystal-clear TV signals today!