To install heat tape on a roof, start by cleaning the roof surface and ensuring proper insulation. Then, position the tape along the roof edge and secure it with mounting clips.
Finally, connect the tape to a power source and test it to ensure it is working effectively. Heat tape can help prevent ice dams and snow buildup on your roof, reducing the risk of damage and leaks. Installing it correctly is crucial for its effectiveness and longevity.
How Does Heat Tape Work?
Introduction to Heat Tape and Its Function
Heat tape, also known as heat cable or roof heating cable, is an innovative solution designed to protect roofs from ice dams and snow buildup. It utilizes a heating element that is installed on the roof edges, gutters, and downspouts, effectively preventing the formation of ice dams and the accumulation of snow.
Explanation of How Heat Tape Prevents Ice Dams and Snow Buildup on Roofs
Ice dams occur when heat escapes through the roof, causing the snow on top to melt and then refreeze at the edges and gutters. This refrozen water forms barriers, which prevent proper drainage and lead to water backups and leaks. Fortunately, heat tape comes to the rescue by generating heat that melts the snow and ice, allowing for proper drainage and preventing damage to the roof.
The heat tape is installed along the roof edges, gutters, and downspouts, which are the most vulnerable areas for ice dams. When the temperature drops and snow begins to accumulate, the heat tape activates automatically to melt the snow and prevent it from freezing along the roofline. This prevents the formation of ice dams and ensures that water is able to safely flow away from the roof, reducing the risk of leaks and damage to the property.
Benefits of Using Heat Tape for Roof Maintenance
Using heat tape for roof maintenance offers several benefits that make it an essential addition to any property.
- Preventing Ice Dams: Heat tape effectively prevents ice dams from forming on the roof by melting snow and allowing for proper drainage. This helps to protect the roof and prevent costly repairs.
- Avoiding Snow Buildup: By keeping the roof edges clear of snow, heat tape eliminates the weight and pressure that can cause structural damage. It also reduces the risk of leaks and ensures the safety of the property.
- Preventing Damage: The accumulation of snow and ice on the roof can lead to significant damage, such as roof leaks, water damage, and mold growth. Heat tape minimizes these risks, prolonging the lifespan of the roof and preserving the integrity of the property.
- Cost-Effective Solution: Installing heat tape is a cost-effective solution compared to repairing or replacing a damaged roof due to ice dams or snow buildup. It offers long-term protection and peace of mind.
- Easy Installation: Heat tape is easy to install and can be customized to fit the specific needs of the roof. With a simple installation process, it is a convenient solution for roof maintenance.
In conclusion, heat tape is a highly effective solution for preventing ice dams and snow buildup on roofs. By melting snow and allowing for proper drainage, it protects the roof, prevents damage, and ensures the safety of the property. With its numerous benefits, heat tape is a cost-effective and easy-to-install option for roof maintenance.
Factors To Consider Before Installing Heat Tape
When it comes to protecting your roof from ice dams and snow buildup, installing heat tape can be an effective solution. However, before you dive into the installation process, there are a few important factors to consider. Assessing the roof’s structure and condition, determining the suitable type and length of heat tape, and calculating the power requirements are crucial steps to ensure a successful installation. Let’s explore each of these factors in detail.
Assessing the roof’s structure and condition
Before installing heat tape on your roof, it is vital to assess its structure and condition. A thorough inspection will help you identify any weaknesses or areas prone to ice dams. Look for signs of water damage, such as water stains on the ceiling or peeling paint, as these can indicate potential problem areas. Additionally, examine the roof’s slope and design, as this can affect the effectiveness of the heat tape installation. Familiarize yourself with the roof’s material and make sure it is suitable for heat tape installation. Being aware of your roof’s condition will allow you to plan the installation process accordingly.
Determining the suitable type and length of heat tape
Choosing the right type and length of heat tape is essential for efficient installation. Consider the width of your roof and select a heat tape that can cover the entire span. Measure the length required by measuring the linear footage of the areas prone to ice dams. Different heat tape models have varying wattage outputs, so it is crucial to consult the manufacturer’s specifications to determine the appropriate size for your roof. Additionally, be sure to choose a heat tape model with a thermostat control feature, which will regulate the heat output and prevent excessive energy consumption.
Calculating the power requirements for efficient heat tape installation
Calculating the power requirements is an important step to ensure that your heat tape installation operates efficiently. Determining the voltage and amperage of the heat tape will help you select the right length and gauge of wire needed for installation. Consult an electrician or refer to the manufacturer’s guidelines to determine the power requirements for your specific heat tape model. It is crucial to have the appropriate power supply to prevent heat tape malfunction and ensure consistent, reliable performance throughout the winter season.
Taking these factors into consideration before installing heat tape on your roof will help you plan and execute the installation process more effectively. Assessing the roof’s structure and condition, determining the suitable type and length of heat tape, and calculating the power requirements are crucial steps toward protecting your roof from ice dams and snow buildup. By following these guidelines, you can ensure a successful and efficient heat tape installation.
Step-By-Step Guide To Installing Heat Tape
When it comes to protecting your roof from ice dams and potential water damage, installing heat tape is an effective solution. Heat tape, also known as heating cable, helps to melt ice and snow buildup along the roof’s edge, ensuring proper drainage and preventing costly damage. Follow this step-by-step guide to safely and efficiently install heat tape on your roof.
Preparing the roof surface for installation
Before you begin the installation process, it’s crucial to prepare your roof surface. This ensures a smooth and effective installation of the heat tape. Follow these steps:
- Clean the area: Start by removing any debris, leaves, and ice from the roof’s edge. This will provide a clean surface for the heat tape installation.
- Check for damages: Inspect the roof’s edge for any damages, such as loose shingles or gutter issues. Repair or replace them to ensure the heat tape installation has a sturdy base.
- Measure the length: Measure the length of the roof’s edge where you’ll be installing the heat tape. This will help you determine the amount of tape needed for the job.
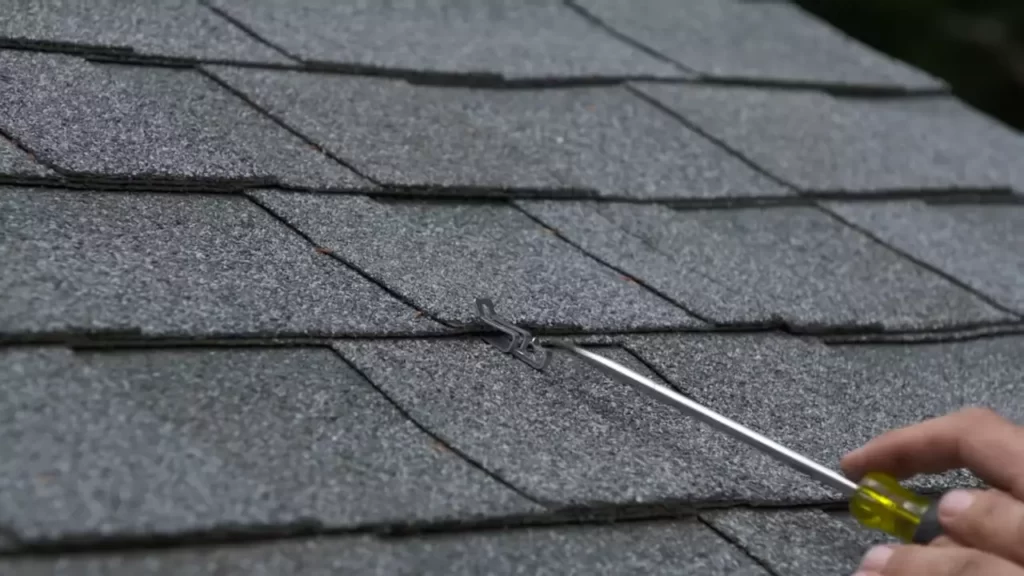
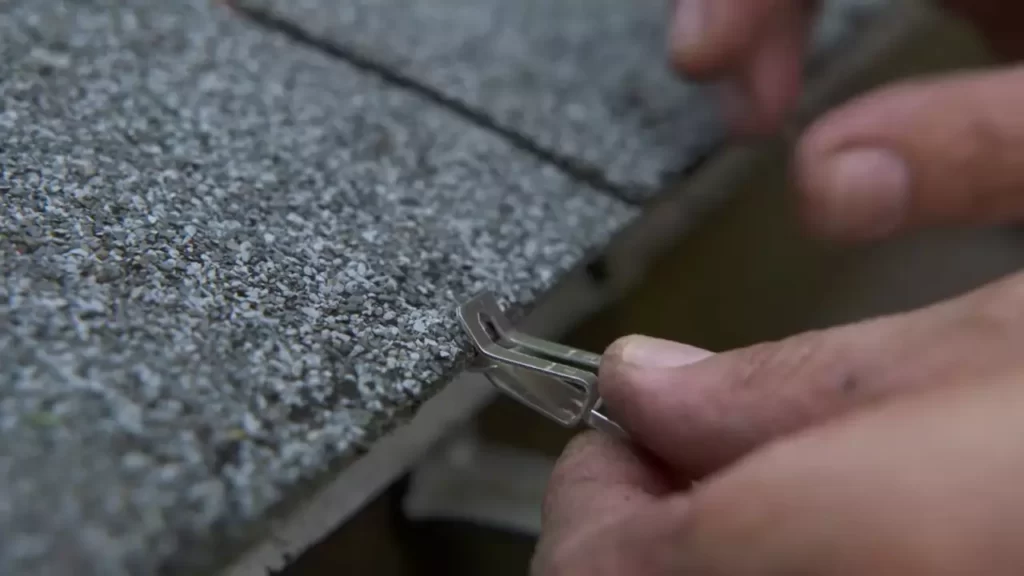
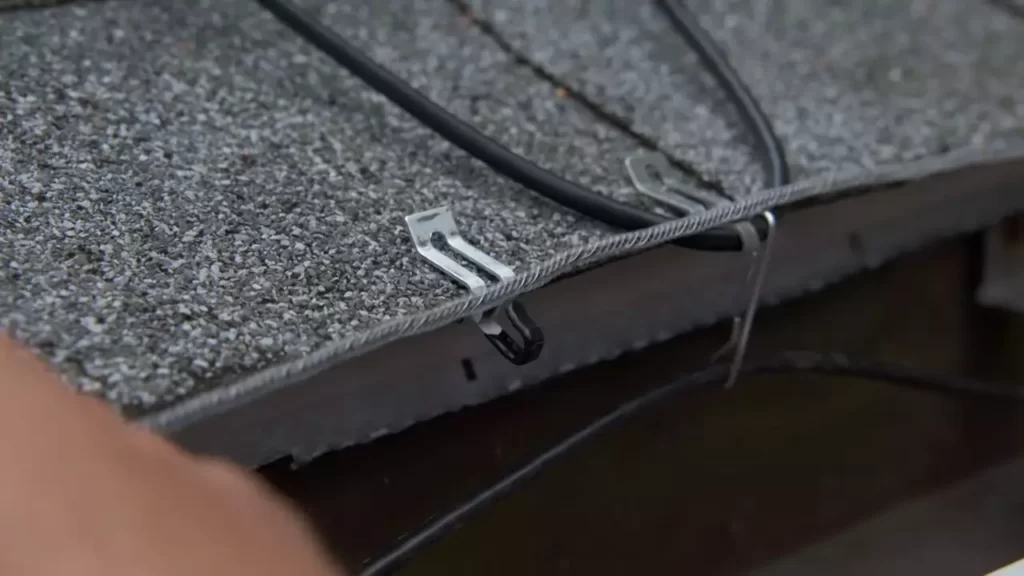
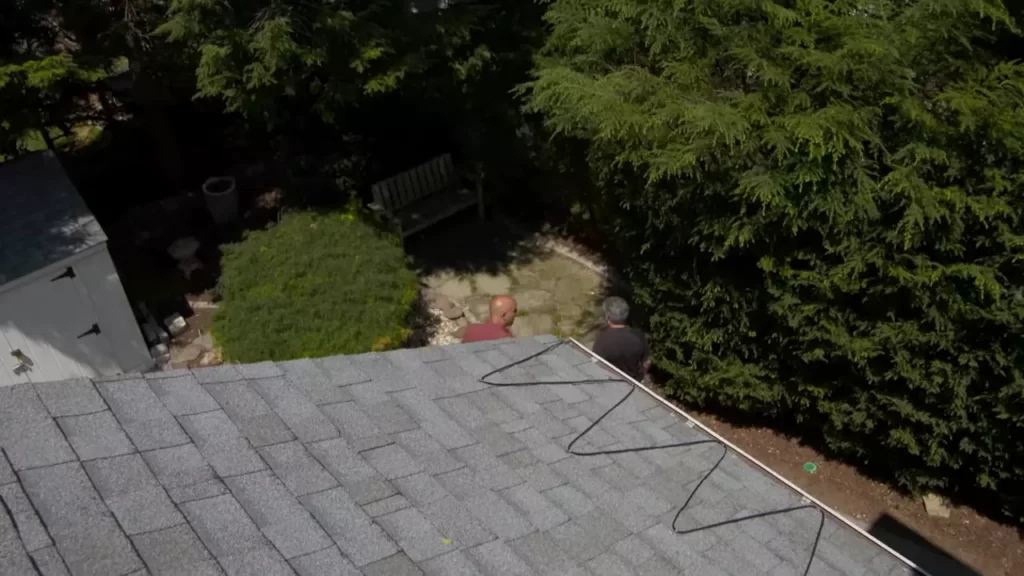
Securing the heat tape properly along the roof’s edge
Once you’ve prepared the roof surface, it’s time to secure the heat tape along the roof’s edge. Follow these steps to ensure the tape is properly installed:
- Start at the lowest point: Begin the installation process at the lowest point of the roof’s edge. This allows the melted ice and snow to flow easily towards the gutters.
- Secure with clips: Use clips or cable ties to secure the heat tape in place. Make sure the tape is evenly spaced and runs along the entire length of the roof’s edge. Avoid pulling the tape too tightly to prevent damage.
- Overlap connections: If needed, use connectors to overlap sections of heat tape. This ensures a continuous flow of heat and prevents any gaps along the roof’s edge.
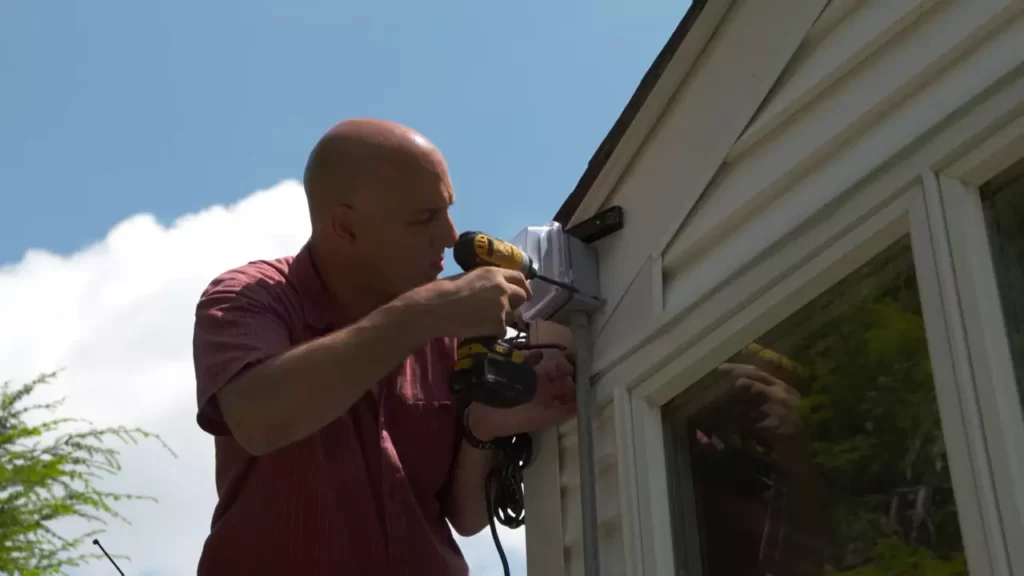
Connecting the heat tape to the power source
Once the heat tape is securely in place, it’s time to connect it to a power source. Follow these steps to ensure a proper connection:
- Locate the power source: Identify a nearby outdoor electrical outlet to connect the heat tape. It’s crucial to use a grounded outlet protected by a GFCI (Ground Fault Circuit Interrupter) to avoid electrical hazards.
- Measure the distance: Measure the distance between the outlet and the starting point of the heat tape. This will help you determine the length of cable needed to connect them.
- Connect the cable: Use a weatherproof electrical cable to connect the heat tape to the power source. Follow the manufacturer’s instructions and make sure the connections are tight and protected from the elements.
- Test the tape: Once the installation is complete, test the heat tape to ensure it’s functioning properly. Monitor the melting of ice and snow to confirm adequate heat distribution along the roof’s edge.
By following this step-by-step guide, you can easily install heat tape on your roof, providing protection against ice dams and potential water damage. Remember to always adhere to safety guidelines and consult a professional if you’re unsure about any step of the installation process.
Safety Precautions During Heat Tape Installation
Importance of following safety guidelines
When it comes to installing heat tape on your roof, safety should always be your top priority. Following the right safety precautions can help prevent accidents and ensure a smooth and successful installation process. By adhering to these safety guidelines, you can protect yourself and your property from potential risks.
Tips for working at heights safely
Working at heights can be challenging and dangerous if proper precautions are not taken. Here are some tips to ensure your safety while installing heat tape on your roof:
- Wear appropriate safety gear, including a hard hat, non-slip boots, and a safety harness, to prevent falls and injuries.
- Make sure to inspect the ladder or any other equipment you’ll be using before starting the installation. Ensure that they are sturdy and in good condition.
- Ensure that the area where you’ll be working is clear of debris, such as leaves or snow, to prevent slips and falls.
- If possible, work with a partner who can assist you and keep an eye out for any hazards.
Precautions for working with electrical connections
Working with electrical connections during the heat tape installation requires extra caution to avoid electrical shocks or fire hazards. Here are some precautions to keep in mind:
- Turn off the power supply before making any electrical connections. This will prevent any accidental shocks.
- Ensure that the heat tape and its components are designed for outdoor use and are rated for the voltage used in your home.
- Properly insulate the electrical connections using waterproof tape or heat shrink tubing to protect them from moisture and reduce the risk of short circuits.
- Regularly inspect the heat tape and connections to ensure they are functioning properly and to address any signs of damage or wear.
Remember, safety should always come first when installing heat tape on your roof. By following these safety guidelines, you can minimize risks and ensure a safe and successful installation process. Protect yourself, your property, and enjoy the benefits of a well-maintained roof throughout the winter months.
Maintenance And Troubleshooting Tips For Heat Tape
Regular maintenance is essential to ensure the optimal performance of heat tape installed on your roof. By taking a few simple steps, you can extend the lifespan of your heat tape and ensure it works efficiently when needed. In this section, we will discuss the regular maintenance to ensure optimal performance, the signs of potential issues with heat tape, and how to troubleshoot common problems during heat tape operation.
Regular maintenance to ensure optimal performance
- Clean the heat tape: Regularly clean the heat tape to remove any debris, leaves, or dirt that could block the heat output. A clean heat tape is more effective at preventing ice dams and reducing the risk of damage.
- Inspect for damage: Check the heat tape for any signs of damage, such as frayed wires or loose connections. Repair or replace any damaged sections promptly to maintain the best performance.
- Keep gutters and downspouts clear: Make sure the gutters and downspouts are free of debris and allow proper water flow. Blockages can cause water to accumulate, leading to ice dams and potential damage to the heat tape.
- Test the heat tape: Before the onset of winter, test the heat tape to ensure it is functioning correctly. Turn it on and monitor its performance to verify if it’s working as intended.
Signs of potential issues with heat tape
Recognizing early warning signs of potential issues with the heat tape can save you from dealing with more significant problems later. Keep an eye out for these signs:
- Uneven melting of snow or ice: If you notice patches of snow or ice remaining while the heat tape is running, it could indicate a malfunction or damage.
- Visible wear and tear: Examine the heat tape for any visible signs of wear and tear, such as cracks, gaps, or exposed wires. These could affect its performance.
- Inconsistent heat distribution: If the heat tape is not evenly distributing heat along the roof’s edges, it may be a sign that it needs attention or repair.
Troubleshooting common problems during heat tape operation
Despite regular maintenance, occasional problems may arise with your heat tape. Recognizing and troubleshooting these issues promptly can help restore proper functionality. Check out the following common problems and their solutions:
| Problem | Solution |
|---|---|
| The heat tape doesn’t turn on | Check the power source, plug connections, and ensure the thermostat is set to the correct temperature. If the issue persists, contact a professional electrician for further assistance. |
| Reduced heat output | Inspect the heat tape for damage or obstructions and clear them if necessary. Additionally, check the wiring connections to ensure everything is secured tightly. |
| The heat tape overheats | Ensure the heat tape is installed correctly and not overlapping itself. Check the thermostat settings, as overheating may occur if it is set too high. |
By following these maintenance guidelines, being vigilant for potential issues, and troubleshooting common problems, you can ensure your heat tape functions optimally and provides effective protection against ice dams on your roof.
Frequently Asked Questions For How To Install Heat Tape On Roof
How Long Does Heat Tape Last On Roofs?
Heat tape on roofs typically lasts for about 10 to 20 years. The exact lifespan depends on various factors such as the quality of the tape, installation technique, and weather conditions. Regular maintenance and inspection can help prolong its effectiveness and ensure optimal performance.
Can You Put Heat Tape On A Roof?
Yes, heat tape can be applied to a roof. It helps prevent ice dams by keeping the roof warm and melting the ice. It is important to follow the manufacturer’s instructions and have a professional install it properly.
How Far Apart Should Heat Tape Be On the Roof?
Heat tape on the roof should be spaced evenly, with approximately 6 to 12 inches of space between each strip. This allows for effective and uniform coverage, preventing ice dams and snow build-up. Proper spacing ensures optimal heat distribution and protects your roof from potential damage.
Does Roof Heat Tape Use A Lot Of Electricity?
Roof heat tape generally uses a moderate amount of electricity.
Conclusion
Installing heat tape on your roof is a crucial step in ensuring the protection and longevity of your property. By following the steps outlined in this guide, you can easily and safely install heat tape yourself. Remember to choose the right type of heat tape, properly clean and prepare the roof surface, and secure the tape correctly.
Regular maintenance and inspections will also help to keep your heat tape functioning effectively. Taking these measures will help prevent ice dams and potential damage to your roof during winter months.