To install floating shelves with brackets, you need to first decide on the placement and mark the wall where the shelves will be mounted. Then, drill pilot holes at the marked spots and attach the brackets securely using screws.
Finally, slide the shelves onto the brackets and make sure they are level and stable.
Choosing The Right Floating Shelves With Brackets
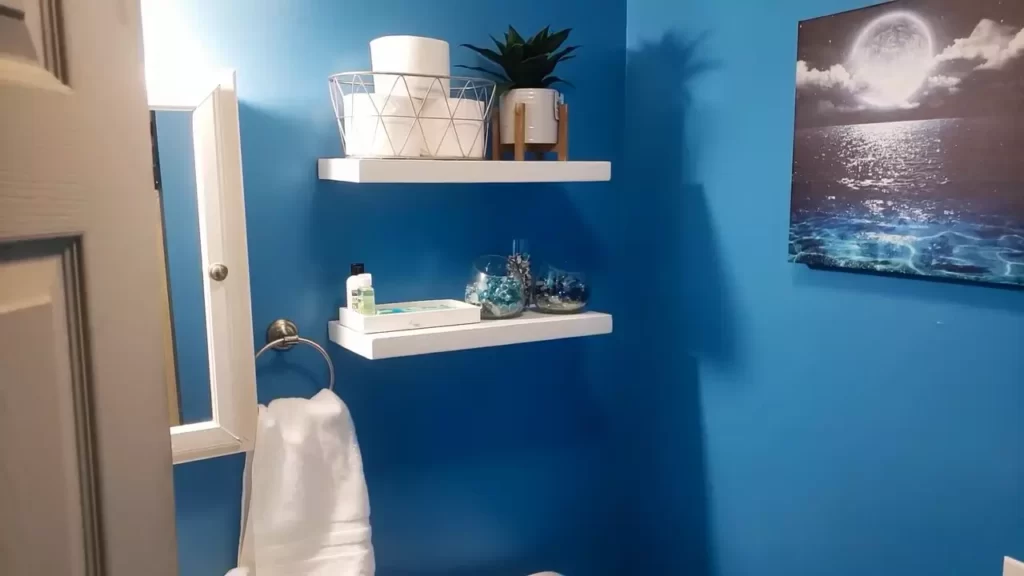
When it comes to enhancing the functionality and aesthetics of your space, floating shelves with brackets are a fantastic option. Not only do they provide a stylish way to display your belongings, but they also maximize the use of vertical wall space. However, with numerous options available in the market, it can be overwhelming to choose the right floating shelves with brackets for your needs.
In this article, we will discuss the key factors to consider when selecting these shelving solutions, including shelving material and finish options, weight capacity and size requirements, and style and design considerations. By considering these factors, you can make an informed decision and find the perfect floating shelves with brackets for your space.
Factors to Consider When Selecting Floating Shelves
Shelving Material and Finish Options: The first factor to consider when selecting floating shelves with brackets is the shelving material and finish options. There are various materials available, including wood, metal, glass, and laminate. Each material offers a different visual appeal and durability. Additionally, consider the finish options available, such as painted, stained, or natural finishes, to ensure the shelves complement your existing decor.
Weight Capacity and Size Requirements:
- Weight Capacity: Another crucial factor to consider is the weight capacity of the floating shelves. You need to determine the maximum weight you intend to place on each shelf and ensure that the shelves can support it without sagging or compromising their stability. Always check the weight capacity provided by the manufacturer to ensure it meets your specific requirements.
- Size Requirements: The size of the floating shelves is equally important to consider. Measure the available wall space in your room and determine the desired dimensions for your shelves. Take into account the items you plan to display on the shelves and ensure they will fit comfortably. Additionally, consider the spacing between each shelf to achieve a visually balanced arrangement.
Style and Design Considerations:
- Style: The style of the floating shelves with brackets should align with the overall aesthetic of your room. Consider the existing decor, whether it is modern, minimalist, rustic, or industrial, and choose shelves that complement that style. You can find floating shelves with various design elements, such as decorative brackets, curved edges, or unique shapes, to add personality to your space.
- Design: The design of the brackets themselves is also an important consideration. The brackets not only provide support but can also contribute to the overall style and appearance of the shelves. Choose brackets that suit your taste and align with the desired aesthetic. Some popular bracket designs include L-shaped, triangular, or decorative brackets that enhance the visual appeal of the shelves.
By considering these factors – shelving material and finish options, weight capacity and size requirements, and style and design considerations – you will be able to make an informed decision when selecting floating shelves with brackets. Remember to visualize how the shelves will look in your space and consider the practicality of the shelves in fulfilling your storage or display needs. With the right floating shelves with brackets, you can transform your walls into functional and stylish focal points.
Preparing For Installation
Before you can start installing your floating shelves with brackets, it’s important to make sure you have all the necessary tools and materials in place and to properly measure and mark the wall for accurate installation. This section will guide you through the process, step by step.
Gathering the Necessary Tools and Materials
Having the right tools and materials on hand is crucial for a successful installation. Here are the essential tools you’ll need:
- Drill
- Screwdriver (either manual or electric)
- Tape measure
- Level
- Pencil
- Stud finder
- Wall anchors
- Wood screws
- Floating shelf brackets
Make sure to gather these tools and materials before you start the installation process, as it will save you time and frustration later on.
Essential Tools for Installing Floating Shelves
When it comes to installing floating shelves, there are a few essential tools that you’ll need in order to complete the job effectively. These tools include:
- A drill will be used to create holes in the wall for the brackets and to attach the shelves.
- A screwdriver, either manual or electric, for tightening screws and securing the brackets onto the wall.
- A tape measure, which is necessary for accurate measurements of the wall and shelf placement.
- A level, to ensure that the shelves are installed straight and level.
- A pencil, for marking the wall and indicating where the brackets should be placed.
- A stud finder, to locate the studs in the wall and ensure proper support for the shelves.
With these tools in hand, you’ll be well-equipped to install your floating shelves with ease.
Required Materials for Bracket Installation
In addition to the essential tools, you’ll also need a few materials for the bracket installation. These materials include:
- Wall anchors are necessary for providing additional support and stability for the shelves.
- Wood screws, which will be used to attach the brackets to the wall.
- Floating shelf brackets, which come in various sizes and styles will ultimately hold the shelves in place.
Having these materials on hand will ensure that your bracket installation goes smoothly and that your shelves are securely mounted on the wall.
Measuring and Marking the Wall
Once you have gathered all the necessary tools and materials, the next step is to measure and mark the wall for installation. Start by determining the desired height and spacing for your shelves. Use a tape measure and a pencil to make light marks on the wall, indicating the positions where the brackets will be placed.
Determining Shelf Placement
Before proceeding with drilling and mounting the brackets, take some time to determine the ideal placement for your shelves. Consider the overall aesthetic of the room, the items you plan to display on the shelves, and the weight capacity of the brackets. This will help you decide the spacing between shelves and the distance from the floor or other furniture.
Using a Level and Tape Measure for Accuracy
When it comes to installing floating shelves, accuracy is key. By using a level and tape measure, you can ensure that your shelves are installed straight and evenly spaced. Use the level to make sure the brackets are plumb and the shelves are level. Use the tape measure to verify that the spacing between shelves is consistent. Paying attention to these details will result in a professional-looking installation.
Installing The Brackets And Anchors
Once you have gathered all the necessary materials and prepared your floating shelves, it’s time to install the brackets and anchors. This step is crucial as it provides the foundation for your shelves, ensuring they are sturdy and safe for use. In this section, we will walk you through the process of installing the brackets and anchors in a seamless manner, so let’s get started.
Selecting the Proper Bracket Position
Before you begin mounting the brackets, it’s important to select the proper position for placement. You want to ensure that the brackets are evenly spaced and properly aligned to provide adequate support for your shelves. Take into consideration the weight load your shelves will bear and the spacing recommendations specified by the manufacturer. Measure and mark the positions where your brackets will be installed, using a pencil or a marker for clear visibility.
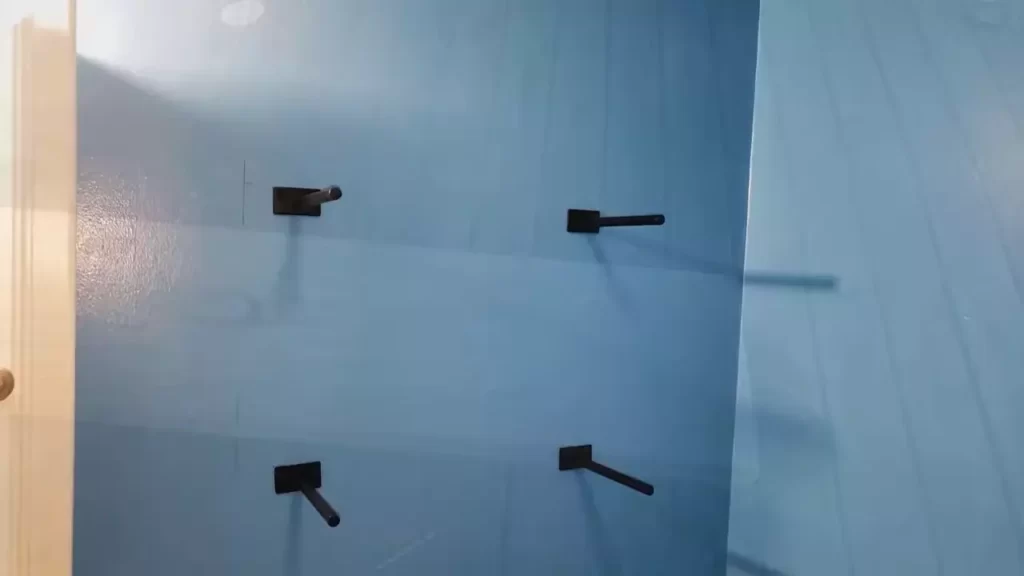
Determining the Distance between Brackets
The distance between brackets will depend on the length and weight-bearing capacity of your shelves. As a general rule, it’s recommended to install brackets at least 16 inches apart. However, for longer shelves or heavier objects, you may need to reduce the distance between brackets to ensure optimal support. Consider the weight distribution of the items you plan to display on your shelves and adjust the distance accordingly.
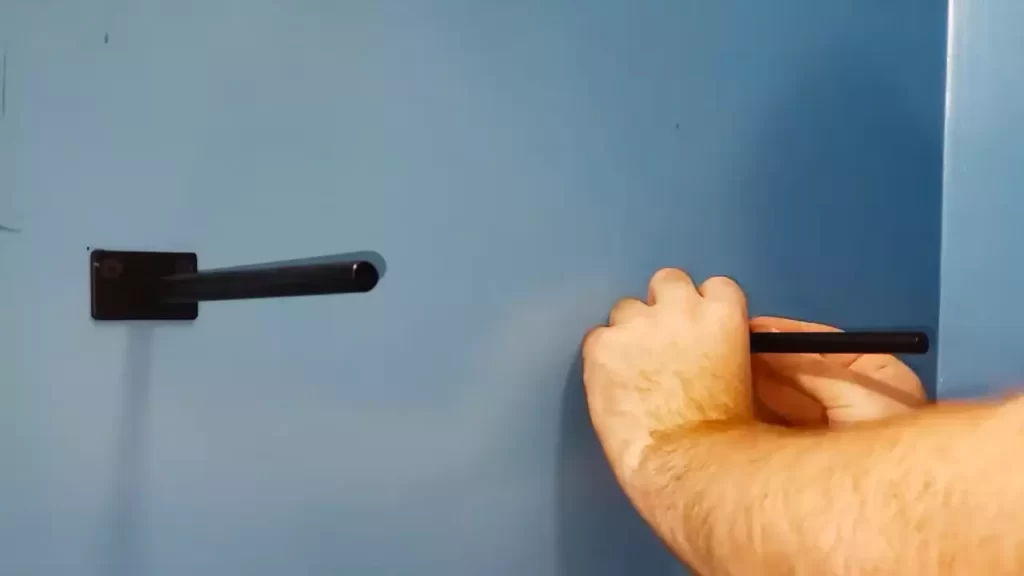
Marking and Aligning Bracket Placement on the Wall
Now it’s time to transfer the bracket positions marked on the wall onto your actual shelves. Place the brackets on the underside of your shelves and align them with the markings on the wall. Ensure that the brackets are centered and level, making any necessary adjustments. Once you are satisfied with the alignment, use a pencil to mark the screw holes on the shelves. This will serve as a guide for attaching the brackets securely.
Mounting the Brackets and Anchors
Using a drill equipped with the appropriate drill bit, create pilot holes on the marked screw hole locations on your shelves. These pilot holes will help facilitate easier installation of the screws later on. Make sure the drill bit is slightly smaller in diameter than the screws, as this will prevent the shelves from splitting or cracking during the mounting process.
After creating the pilot holes, it’s time to install the wall anchors and bracket supports. Wall anchors are essential for providing additional stability and support, especially when mounting shelves on drywall or plaster. Insert the wall anchors into the pilot holes, ensuring they are flush with the wall surface. Next, screw the bracket supports into the wall anchors until they are securely in place. Use a screwdriver or a drill with a screwdriver bit for this step, making sure not to overtighten and damage the wall or bracket.
Now that you have successfully installed the brackets and anchors, you are one step closer to having beautiful and functional floating shelves. In the next section, we will cover how to mount the shelves onto the brackets and provide some additional tips for a professional-looking installation.
Securing The Floating Shelves
Once you have installed the brackets for your floating shelves, the next step is to secure the shelves onto the brackets. This crucial step ensures that your shelves are stable, level, and capable of bearing the weight of your desired items.
In this section, we will discuss how to properly attach the floating shelf to the brackets, align it accurately, achieve a secure fit using screws or clips, test the shelf for stability and levelness, and verify its weight capacity using a level.
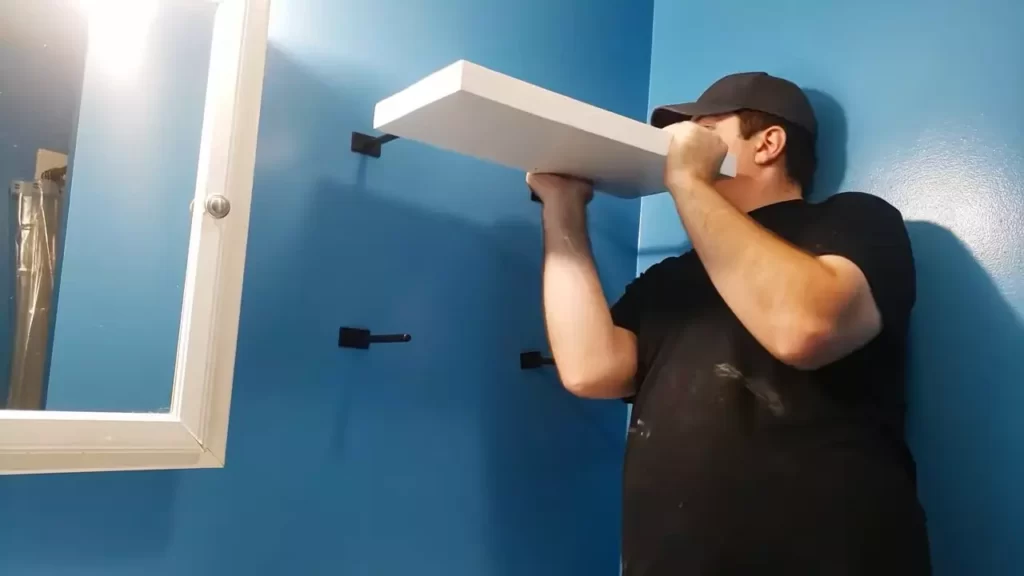
Attaching the Floating Shelf to the Brackets
Attaching the floating shelf to the brackets is a straightforward process. Place the shelf onto the brackets so that they are aligned, using the pre-drilled holes on the brackets if available. Use a pencil to mark the precise location of the bracket holes on the shelf.
Then, remove the shelf temporarily to create holes on the marked spots using a drill bit that matches the size of the screws you will use. Once the holes are drilled, place the shelf back onto the brackets and secure it using screws or clips. Ensure that the screws or clips are tightened firmly to provide a secure connection.
Aligning the Shelf with the Brackets
Proper alignment between the shelf and the brackets is essential for stability and aesthetic appeal. Begin by placing the shelf onto the brackets and check if it is positioned evenly and level. Use a bubble level to ensure that the shelf is perfectly horizontal. If the shelf is not aligned, adjust its position by sliding it slightly until it is centered and level. Once aligned, use the pencil to mark the spot where the shelf and brackets meet. This mark will help you maintain proper alignment during the attachment process.
Ensuring a Secure Fit with Screws or Clips
Once the shelf is aligned with the brackets, it is necessary to achieve a secure fit using screws or clips. Depending on the design of your floating shelves, you may have the option to use either method. For shelves with screw holes, insert the screws through the holes on the shelf and into the corresponding holes on the brackets.
Use a screwdriver or drill to tighten the screws until they are firmly secured. If your shelves have clips, attach them onto the brackets as per the manufacturer’s instructions. Ensure that the clips are locked securely onto the brackets to prevent any accidents or mishaps.
Testing the Shelf for Stability and Levelness
After securing the shelf to the brackets, it is essential to test its stability and levelness. Gently place some weight on the shelf and observe if it remains stable. If the shelf wobbles or feels unsteady, double-check the tightness of the screws or clips and make any necessary adjustments.
Additionally, use a bubble level to verify that the shelf is still perfectly horizontal. If adjustments are required, loosen the screws or clips, realign the shelf, and tighten them again. Repeat this process until the shelf feels stable and level.
Checking the Shelf’s Weight Capacity
Before fully utilizing your floating shelves, it is vital to verify their weight capacity. Different shelves have different weight limits, so it is essential to check the manufacturer’s guidelines. To test the weight capacity, add items gradually and ensure that the shelf remains steady.
Overloading the shelf beyond its weight capacity can lead to damage or accidents. Regularly check the shelf for any signs of strain or instability, especially if you plan on placing heavy objects on the shelves.
By following these steps, you can ensure that your floating shelves are securely attached to their brackets, aligned accurately, and capable of supporting the weight of your belongings. Remember to double-check the stability, levelness, and weight capacity of the shelves after installation to maintain a safe and functional storage solution.
Frequently Asked Questions Of How To Install Floating Shelves With Brackets
How Do You Hang A Floating Shelf With A Bracket?
To hang a floating shelf with a bracket, follow these steps:
- Determine the desired height and mark the wall accordingly.
- Attach the bracket to the wall using screws and a level for straightness.
- Slide the shelf onto the bracket and secure it in place.
- Ensure the shelf is stable and level before adding any items.
Do Floating Shelves Have To Go Into Studs?
Floating shelves do not have to go into studs. They can be installed using anchors, toggle bolts, or wall anchors. However, if you want to ensure maximum stability and weight capacity, it is recommended to install them into studs.
How Are Floating Shelves Anchored To The Wall?
Floating shelves are anchored to the wall using brackets or hardware. These supports are installed securely into the studs or using wall anchors. The shelves are then mounted onto the brackets, giving the appearance that they are floating. This ensures stability and prevents the shelves from sagging or falling.
How Far Apart Should Brackets Be On Floating Shelves?
Brackets on floating shelves should be spaced approximately 16-24 inches apart. This spacing provides sufficient support and stability for the shelves.
Conclusion
To sum up, installing floating shelves with brackets is an easy and practical way to add storage and style to any space. By following the step-by-step process described in this blog post, you can successfully mount your shelves and enhance the aesthetics of your home or office.
Remember to choose the right materials and tools, measure accurately, and securely attach the brackets. With a little effort, you can enjoy the functionality and beauty of floating shelves in no time.