To install vinyl bullnose on stairs, start by measuring and cutting the bullnose to fit each stair. Then, apply adhesive to the back of the bullnose and press it firmly onto the stair.
Gathering The Necessary Tools And Materials
Before you begin the process of installing vinyl bullnose on your stairs, it is essential to gather all the necessary tools and materials. This will ensure a smooth and efficient installation and prevent any delays or interruptions. In this section, we will guide you through the process of measuring and calculating the amount of vinyl bullnose needed, purchasing the required materials, and preparing the essential tools for the installation.
Measure and Calculate the Amount of Vinyl Bullnose Needed
The first step in installing vinyl bullnose on stairs is accurately measuring and calculating the amount of bullnose needed. This is important to avoid both underestimating and overestimating the quantity, saving you time and money. To get started, gather a measuring tape, pencil, and paper.
- Start by measuring the length of each stair tread. Take your measuring tape, align it along the front edge of the tread, and record the measurement in inches. Repeat this process for all the stair treads.
- Next, measure the depth of each stair tread, which is the horizontal distance from the front edge to the back or riser. Record these measurements as well.
- Once you have obtained the measurements for each stair tread, calculate the total length of bullnose required by adding the length of all the stair treads together.
Purchase the Required Vinyl Bullnose and Adhesive
Now that you have calculated the quantity of vinyl bullnose required, it’s time to purchase the materials. To ensure a successful installation, you will need to purchase enough vinyl bullnose to cover the total length of the stair treads. Additionally, you should also buy an appropriate adhesive for securing the bullnose in place. Be sure to choose an adhesive specifically designed for use with vinyl materials.
When purchasing the vinyl bullnose, consider buying a bit more than the calculated quantity to account for any potential errors or miscalculations. It is better to have some extra material on hand rather than running out during the installation process.
Prepare the Tools
Before you start with the installation, it is crucial to have the necessary tools readily available. Here are the essential tools you will need for installing vinyl bullnose on stairs:
- A measuring tape to accurately measure the dimensions of the stair treads.
- A utility knife to cut the vinyl bullnose to the required lengths.
- An adhesive spreader for evenly applying the adhesive onto the bullnose and stair treads.
Make sure that these tools are in good condition and easily accessible during the installation process. This will streamline the installation and ensure precise cuts and application of adhesive.
Preparing The Stairs
Clean the staircase thoroughly to remove any dirt or debris
Before starting the installation of vinyl bullnose on your stairs, it is crucial to ensure that the surface is clean and free from any dirt or debris. This will help the adhesive bond well with the stairs, creating a sturdy and long-lasting installation.
To clean the staircase, follow these simple steps:
- Start by sweeping the entire staircase to remove loose dirt and debris. Use a stiff-bristled broom or a vacuum cleaner to thoroughly clean every nook and corner.
- Next, wet a cloth or mop with warm water and a mild detergent. Wring out any excess water and gently wipe down the entire surface of the stairs. Pay special attention to any stains or sticky residues that may be present.
- Once you have cleaned the stairs, rinse off any soap residue by wiping the surface with a clean, damp cloth or mop.
- Finally, allow the stairs to air dry completely before moving on to the next step. This is important to ensure that the adhesive sticks properly and doesn’t get affected by moisture.
Remove existing trim or bullnose if necessary
If your stairs already have trim or a bullnose installed, you will need to remove them before proceeding with the installation of vinyl bullnose. This is necessary to achieve a seamless and professional-looking finish.
To remove existing trim or bullnose, follow these steps:
- Using a crowbar or a claw hammer, carefully pry off the trim or bullnose from the edge of the stairs. Be cautious not to damage the stairs or surrounding areas while doing this.
- If the trim or bullnose is secured with nails, use a pair of pliers or a nail puller to remove them.
- Once the trim or bullnose is removed, clean any adhesive residue or debris left behind using a scraper or a sanding block.
- Inspect the stairs and make sure they are in good condition before proceeding with the installation of vinyl bullnose.
Ensure that the stairs are dry and smooth before installation
Before applying the vinyl bullnose to the stairs, it is crucial to ensure that the surface is dry and smooth. This will allow the adhesive to bind properly and create a seamless finish. Here’s how you can prepare the stairs:
- Check the moisture level of the stairs using a moisture meter. Ensure that the moisture level is within the recommended range for your vinyl bullnose product.
- If the stairs are damp, allow them to dry naturally or use a dehumidifier to speed up the drying process.
- Inspect the stairs for any rough or uneven areas. Use a sanding block or sandpaper to smooth out any imperfections, such as bumps or splinters.
- If there are any holes or cracks in the stairs, fill them with a suitable wood filler and smooth the surface.
- Finally, wipe the stairs with a clean, dry cloth to remove any dust or debris before starting the installation process.
By following these steps, you can properly prepare your stairs for the installation of vinyl bullnose. Taking the time to clean, remove existing trim, and ensure a dry and smooth surface will result in a professional and durable finish.
Applying Adhesive To The Stair Edges
When it comes to installing vinyl bullnose on stairs, applying adhesive to the stair edges is a crucial step. The adhesive ensures that the bullnose stays firmly in place, providing a secure and seamless finish to your staircase. In this section, we will look at how to apply the adhesive on the edges of the stairs using the adhesive spreader, ensuring a consistent and even coverage.
Apply the adhesive on the edges of the stairs using the adhesive spreader
The first step in applying the adhesive is to prepare the surface of the stair edges. Make sure the edges are clean and free from any dust or debris. This will ensure better adhesion and a longer-lasting result.
Next, take the adhesive spreader and scoop a small amount of adhesive onto the edge of the spreader. Start at the bottom of the stairs and work your way up, applying the adhesive to each stair edge. Use the spreader to evenly distribute the adhesive, making sure to cover the entire surface of the edge.
While spreading the adhesive, make sure to apply firm pressure to ensure proper bonding. Press the spreader firmly against the edge of the stairs, moving it back and forth in a smooth motion. This will help to spread the adhesive evenly and avoid any uneven or lumpy areas.
Spread the adhesive evenly and consistently
Consistency is key when applying adhesive to the stair edges. The even distribution of adhesive will ensure a secure bond and prevent any gaps or weak spots. Take your time and work methodically, paying attention to each stair edge as you go along.
When spreading the adhesive, use a consistent amount on each stair edge. This will ensure that the bullnose adheres properly and gives a uniform finish. Too little adhesive may result in the bullnose coming loose over time, while too much adhesive can lead to a messy and unprofessional-looking installation.
Additionally, make sure to spread the adhesive right up to the edge of the stair, leaving no gaps or exposed areas. This will give the bullnose a seamless appearance and provide better durability.
After applying the adhesive, allow it to cure according to the manufacturer’s instructions. This will ensure that the adhesive sets properly and provides a strong bond. Once the adhesive is fully cured, you can proceed with installing the vinyl bullnose on the stairs.
Placing The Vinyl Bullnose On The Stairs
Now that you have prepared your stairs and applied the adhesive, it’s time to carefully position the vinyl bullnose on the stairs. This crucial step ensures a secure and visually appealing finish that will enhance the overall look of your staircase.
To start, make sure you have all the necessary tools and materials within reach. You’ll need your vinyl bullnose strips, a measuring tape, a utility knife, and a straight edge or ruler. Take a deep breath and let’s get started!
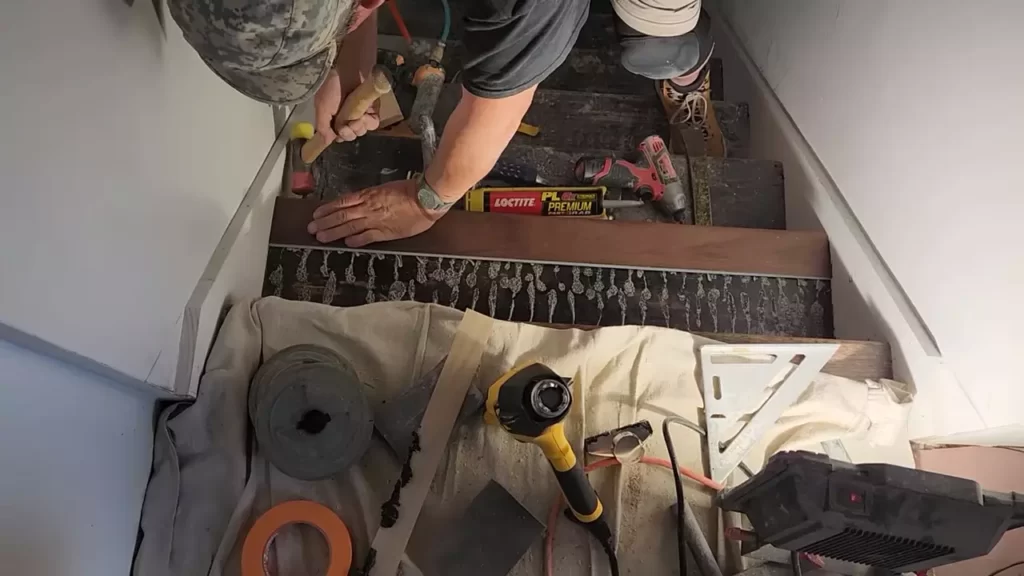
Carefully position the vinyl bullnose on the adhesive, starting from the bottom step
- Place the bottom edge of the vinyl bullnose strip on the adhesive, ensuring it aligns with the edge of the tread.
- Using your hands, gently press down on the bullnose strip to secure it to the adhesive.
- Make sure the bullnose strip is flush against the stair nosing, with no gaps or overlaps.
As you move up the staircase, repeat these steps for each step, carefully positioning each vinyl bullnose strip on the adhesive and ensuring a proper fit. Take your time and double-check each strip before proceeding to the next step. A little extra effort here will go a long way in achieving a seamless and professional-looking installation.
Press the bullnose firmly to ensure proper adhesion
Once you have positioned the vinyl bullnose strip in the correct place, it’s important to press it firmly to ensure proper adhesion. This step is crucial for the longevity of the installation and prevents any potential lifting or peeling in the future.
Using your hands, apply even pressure along the entire length of the bullnose strip. This will help the adhesive bond securely with the backside of the vinyl and the stair tread. Pay extra attention to the edges of the strip, as these areas are prone to lifting if not properly pressed.
If necessary, you can use a rolling pin or a hand roller to further enhance the adhesion. Simply roll it over the vinyl bullnose strip, applying gentle pressure across the entire surface. This will ensure a tight bond between the adhesive and the vinyl, leaving you with a professional and durable finish.
Continue this process for each vinyl bullnose strip, making sure to press firmly and evenly each time. Take breaks as needed, but try to maintain a consistent level of pressure throughout the installation process.
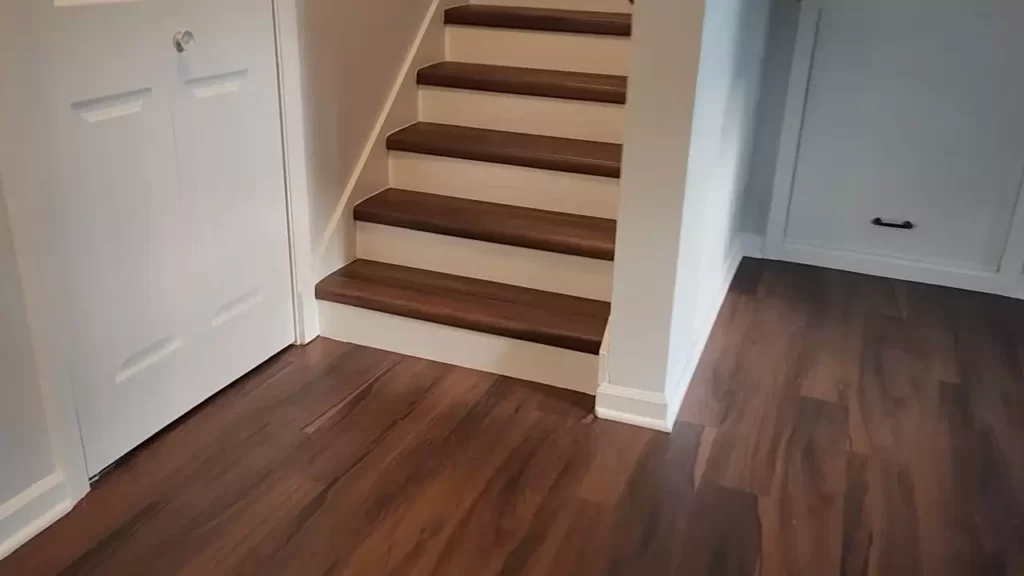
Congratulations, you have successfully placed the vinyl bullnose on the stairs! With careful positioning and proper adhesion, your staircase will now have a clean and polished look that adds both style and functionality to your home.
Continue to the next steps of the installation process to complete your vinyl bullnose project and transform your stairs into a stunning focal point in your space.
Trimming And Fitting The Bullnose
Measure and mark any excess bullnose that needs to be trimmed
Before you can begin installing the vinyl bullnose on your stairs, you’ll need to measure and mark any excess material that needs to be trimmed. To do this, take careful measurements of the stair’s width, making sure to account for any overhang. Use a pencil or marker to mark the areas that need to be trimmed.
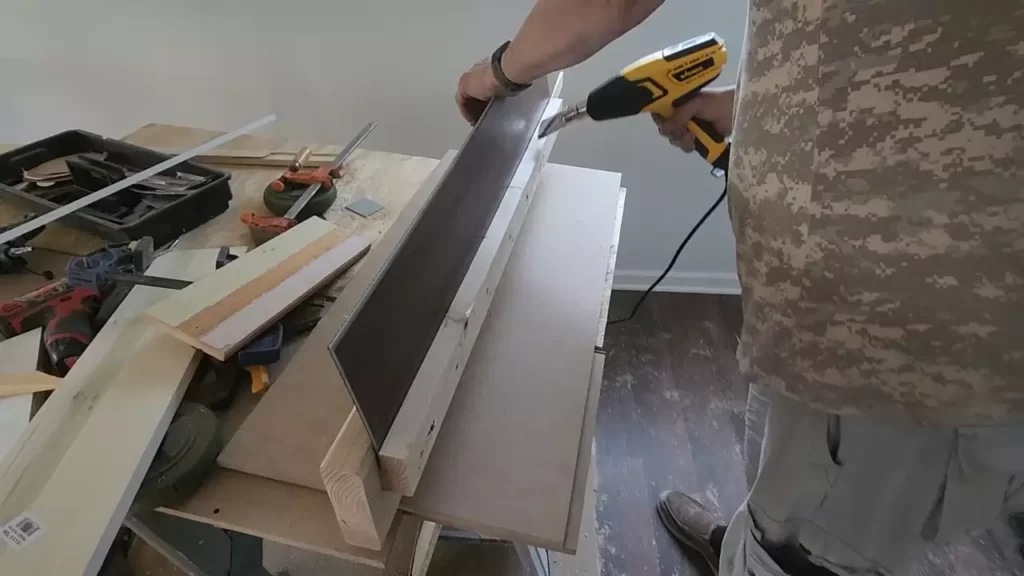
Use a utility knife to carefully trim the bullnose to the appropriate size
Once you’ve marked the areas that need to be trimmed, it’s time to use a utility knife to carefully cut away the excess bullnose. Make sure to use a sharp knife and apply even pressure while cutting. Take your time and make precise cuts to ensure a clean and accurate trim. Remember to follow the marked lines and pay attention to any intricate details or curves in the bullnose.
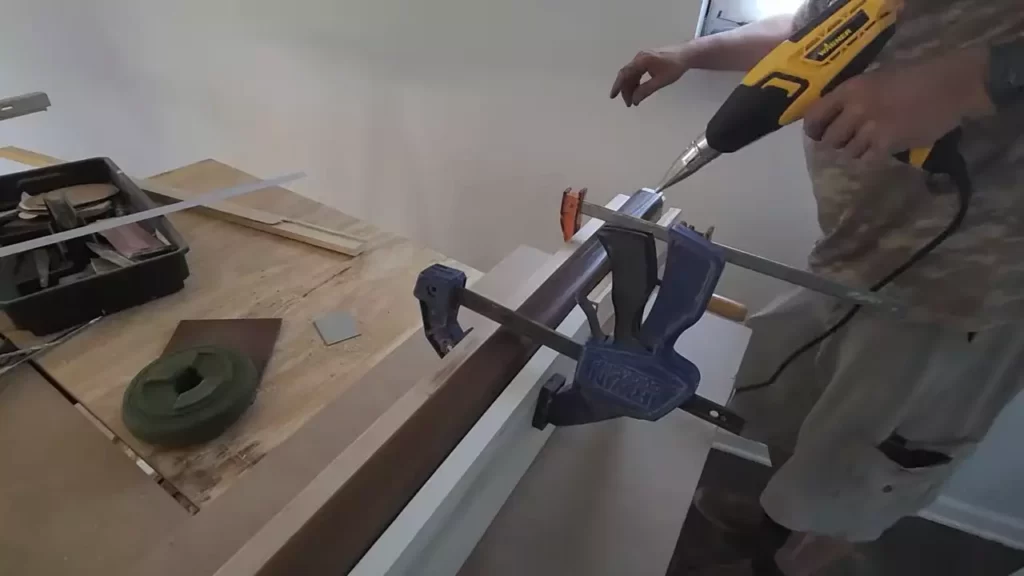
Fit the trimmed bullnose onto the stairs, ensuring a snug and seamless fit
Now that you have trimmed the bullnose to the appropriate size, it’s time to fit it onto the stairs. Start by positioning the bullnose at the bottom of the stairs and work your way up, ensuring that each piece is aligned properly and fits snugly against the stair riser. Use a rubber mallet or a hammer with a scrap piece of wood to gently tap the bullnose into place, ensuring a secure fit.
If necessary, use a coping saw or a file to smooth out any rough edges or adjust the shape of the bullnose to match the contours of the stairs. Take your time and double-check the alignment and fit along the entire length of the stairs to ensure a seamless and professional-looking installation.
Finally, step back and admire your newly installed vinyl bullnose on the stairs. With proper trimming and fitting, your bullnose will not only enhance the aesthetics of your stairs but also provide a durable and stylish finishing touch!
Ensuring Proper Adhesion And Sealing
One crucial aspect of installing vinyl bullnose on stairs is ensuring proper adhesion and sealing. By following these steps and techniques, you can ensure that the bullnose is securely attached to the stairs, preventing any future issues. Double-checking the adhesion, applying extra adhesive to weak areas, and sealing the edges and corners will not only enhance the durability of the bullnose but also give it a professional, finished appearance.
Double-check the adhesion of the bullnose to the stairs
It is important to ensure that the bullnose is securely adhered to the stairs before proceeding. This step will prevent any potential issues such as lifting or peeling in the future. To double-check the adhesion, gently press on the bullnose along its entire length to ensure it is firmly attached.
- Start by pressing from one end of the bullnose to the other, paying close attention to any areas that feel less secure.
- If you notice any spots where the bullnose is not adhering properly, it is necessary to address them before proceeding with the installation.
By addressing any adhesion issues upfront, you can ensure a strong foundation for the bullnose installation.
Apply extra adhesive to any areas that may not be firmly attached
In some instances, certain areas of the bullnose may not adhere as securely as others. To address these weak areas, it is recommended to apply extra adhesive.
- Before applying the extra adhesive, thoroughly clean the surface of the bullnose and the corresponding area on the stairs to remove any dirt or debris.
- Next, apply a small bead of adhesive along the underside of the bullnose in the areas that need additional support.
- Press firmly on the bullnose to ensure proper contact between the adhesive and the surface of the stairs.
- Allow the adhesive to dry according to the manufacturer’s instructions before moving forward with the installation.
By applying extra adhesive to weak areas, you can strengthen the bond between the bullnose and the stairs, ensuring a secure installation.
Seal the edges and corners of the bullnose for added durability
Sealing the edges and corners of the bullnose is essential for enhancing its durability and preventing any potential damage. This step will ensure that moisture and debris do not infiltrate the edges and cause lifting or cracking.
| Sealing Steps | Benefits | ||
|---|---|---|---|
| Start by applying a thin bead of silicone caulk along the edges of the bullnose, where it meets the stairs. | – Prevents moisture intrusion | – Enhances durability | – Maintains a clean appearance |
| Smooth out the caulk with a caulk smoothing tool or your finger to ensure an even seal. | – Provides a professional finish | – Minimizes the risk of peeling or lifting | |
| Allow the caulk to dry according to the manufacturer’s instructions before using the stairs. | – Ensures the seal is properly set | – Prevents premature wear and tear |
By sealing the edges and corners of the bullnose, you can greatly enhance its durability and prolong its lifespan, adding a final touch of professionalism to your installation.
Cleaning And Maintaining Vinyl Bullnose
Cleaning and maintaining vinyl bullnose is essential to keep the stairs looking pristine and extend the lifespan of the bullnose. Regular cleaning with appropriate cleaning agents, avoiding abrasive materials, and implementing preventive measures are key to ensuring the bullnose’s longevity. In this section, we will explore these steps in detail to help you keep your vinyl bullnose stairs in top condition.
1. Clean the installed bullnose regularly using appropriate cleaning agents:
Proper cleaning is crucial to remove dirt, dust, and stains that can accumulate on the vinyl bullnose. To clean the bullnose effectively, follow these steps:
- Start by sweeping or vacuuming the stairs to remove loose dirt and debris.
- Prepare a solution of warm water and mild dish soap or a vinyl-specific cleaning solution.
- Dip a soft-bristled brush or sponge into the solution and gently scrub the bullnose. Be sure to cover the entire surface, paying extra attention to any stains or high-traffic areas.
- Rinse the bullnose with clean water and wipe it dry with a clean cloth or allow it to air dry.
Regular cleaning will help maintain the appearance of the bullnose and prevent dirt from embedding into the surface.
2. Avoid using abrasive materials that may damage the vinyl surface:
While cleaning the bullnose, it’s crucial to avoid using abrasive materials that can scratch or damage the vinyl surface. Here are a few things to keep in mind:
- Do not use brushes with stiff bristles or abrasive scrubbing pads, as they can leave scratches.
- Avoid harsh chemicals such as bleach, ammonia, or abrasive cleaners, as they can cause discoloration or damage to the vinyl.
- Instead, opt for soft brushes, microfiber cloths, or sponges that won’t harm the surface.
By using gentle cleaning tools and agents, you can maintain the bullnose’s integrity and prevent any unwanted damage.
3. Implement preventive measures to maintain the bullnose’s longevity:
Prevention is key to preserving the condition of your vinyl bullnose over time. Here are some preventive measures you can take:
- Place doormats at the entry points of your home to trap dirt and debris before they are tracked onto the stairs.
- Consider using protective rugs or runners on the stairs, especially in high-traffic areas, to minimize wear and tear on the bullnose.
- Avoid dragging heavy furniture or sharp objects across the bullnose to prevent scratches or tears in the vinyl.
- If you have pets, keep their nails trimmed to minimize the risk of them scratching the bullnose.
By implementing these preventive measures, you can significantly extend the lifespan of your vinyl bullnose and keep it looking as good as new for years to come.
Final Inspection And Touch-Ups
After installing vinyl bullnose on your stairs, it’s important to perform a final inspection to ensure that the installation is perfect. This step will allow you to identify any imperfections or loose edges that may have been overlooked during the installation process. By conducting a thorough inspection, you can make any necessary adjustments or touch-ups to achieve a flawless finish. Here are the steps to follow for the final inspection and touch-ups:
Inspect the installed bullnose for any imperfections or loose edges
The first step in the final inspection is to carefully examine the installed bullnose for any imperfections or loose edges. Take your time to inspect each step and pay attention to details. Look for any visible gaps between the bullnose and the stairs, as well as any uneven seams or edges. These imperfections can compromise the overall appearance and longevity of your vinyl bullnose, so it’s crucial to identify them early on.
Make any necessary adjustments or touch-ups to ensure a flawless finish
If you notice any imperfections or loose edges during the inspection, it’s essential to make the necessary adjustments or touch-ups to achieve a flawless finish. Here are some common touch-ups you may need to perform:
- Tightly secure any loose edges or corners by applying adhesive underneath and pressing them firmly into place.
- If you come across any visible gaps between the bullnose and the stairs, use a small amount of adhesive to fill in the gaps and create a seamless appearance. Make sure to wipe away any excess adhesive promptly to avoid staining the vinyl.
- Smooth out any uneven seams or edges by using a utility knife to trim away any excess material. This will help create a smooth transition between each step, enhancing both the appearance and safety of your stairs.
- For minor scuffs or scratches on the vinyl bullnose, you can use a vinyl repair kit to blend in the damaged area with the surrounding surface. Follow the instructions provided by the manufacturer for the best results.
By taking the time to inspect the installed bullnose and perform any necessary touch-ups, you can ensure that your vinyl bullnose stairs have a flawless finish. Not only will this enhance the aesthetic appeal of your stairs, but it will also contribute to their longevity and durability. Now that you’ve successfully completed the installation and final inspection, you can enjoy your newly transformed stairs with confidence!
Frequently Asked Questions Of How To Install Vinyl Bullnose On Stairs
What Is The Best Adhesive For Vinyl Stair Nosing?
The best adhesive for vinyl stair nosing is a strong, quality construction adhesive. It is important to choose an adhesive specifically designed for vinyl materials to ensure a secure and long-lasting bond. Make sure to follow the manufacturer’s instructions for proper application and drying time.
How Do You Install Laminate Bullnose On Stairs?
To install laminate bullnose on stairs, follow these steps:
1. Measure each step and cut the laminate bullnose pieces accordingly.
2. Apply adhesive to the back of the bullnose and press it firmly onto the step.
3. Secure the bullnose using finishing nails or screws.
4. Repeat the process for each step.
5. Finally, clean any excess adhesive and enjoy your newly installed laminate bullnose on the stairs.
How Do You Attach Stair Nosing?
To attach stair nosing, follow these steps:
1. Measure and cut the nosing to fit the stairs.
2. Apply adhesive to the back of the nosing.
3. Place the nosing on the edge of the stair, aligning it properly.
4. Press firmly to ensure a secure bond.
5. Leave it to dry completely before using the stairs. Remember, safety should always be a priority when working on stairs.
Can You Add A Bullnose To the Stairs?
Yes, a bullnose can be added to stairs. It provides a rounded edge that enhances safety and aesthetics. Adding a bullnose can be done during the construction or renovation process. Professional contractors can help with this modification.
Conclusion
Installing vinyl bullnose on stairs is a simple and effective way to enhance the appearance and safety of your staircase. By following the step-by-step guide in this blog post, you can confidently tackle this project on your own. Remember to measure accurately, prepare the steps properly, and use the right adhesive to ensure a secure and long-lasting installation.
With the right tools and techniques, you can transform your stairs with vinyl bullnose and enjoy beautiful, slip-resistant stairs for years to come.