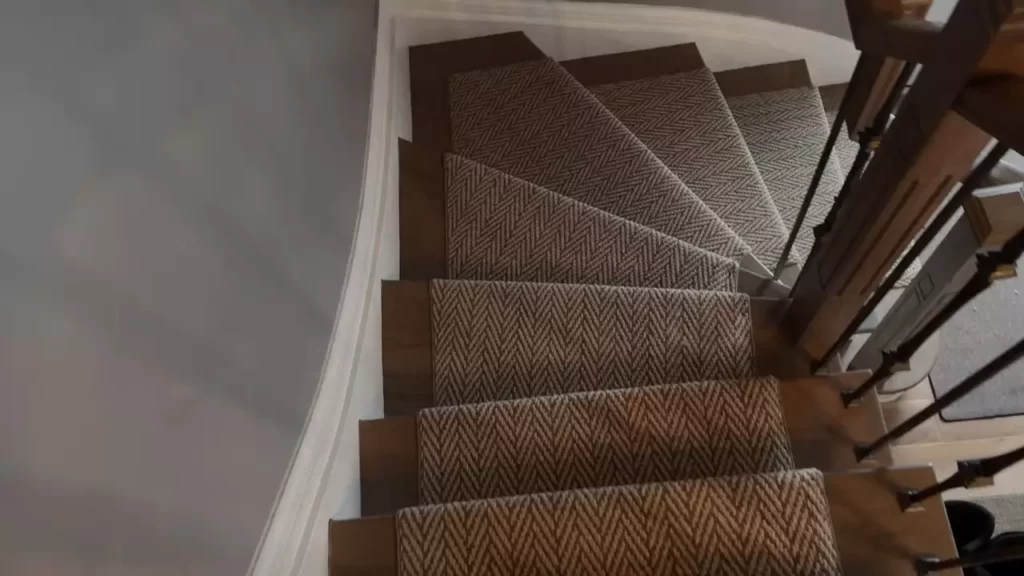
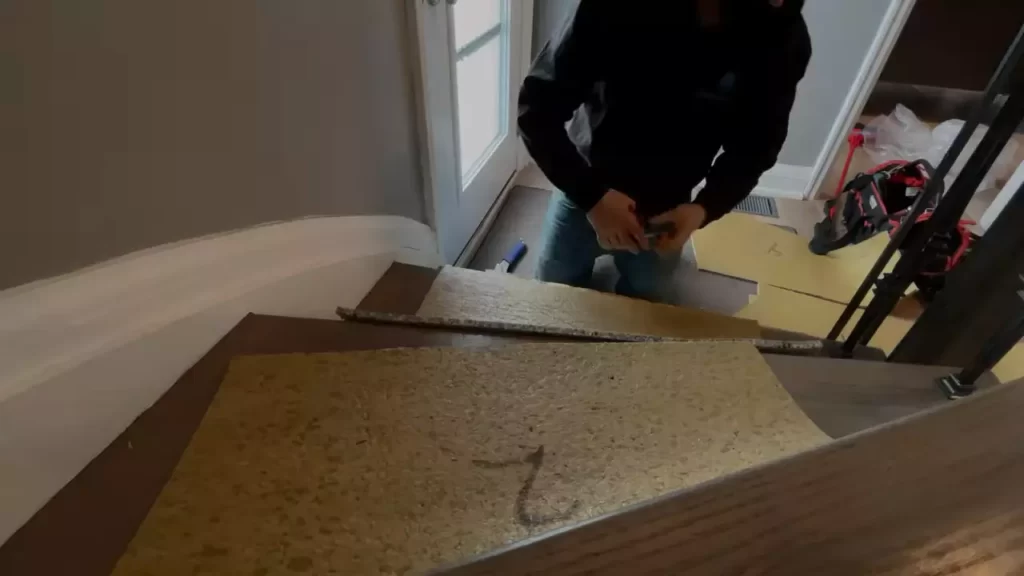
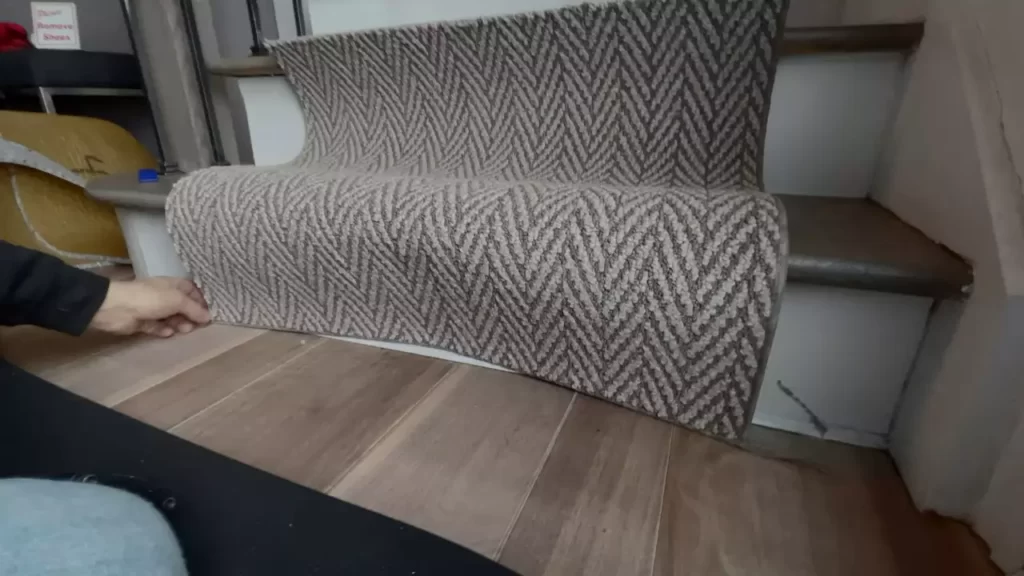
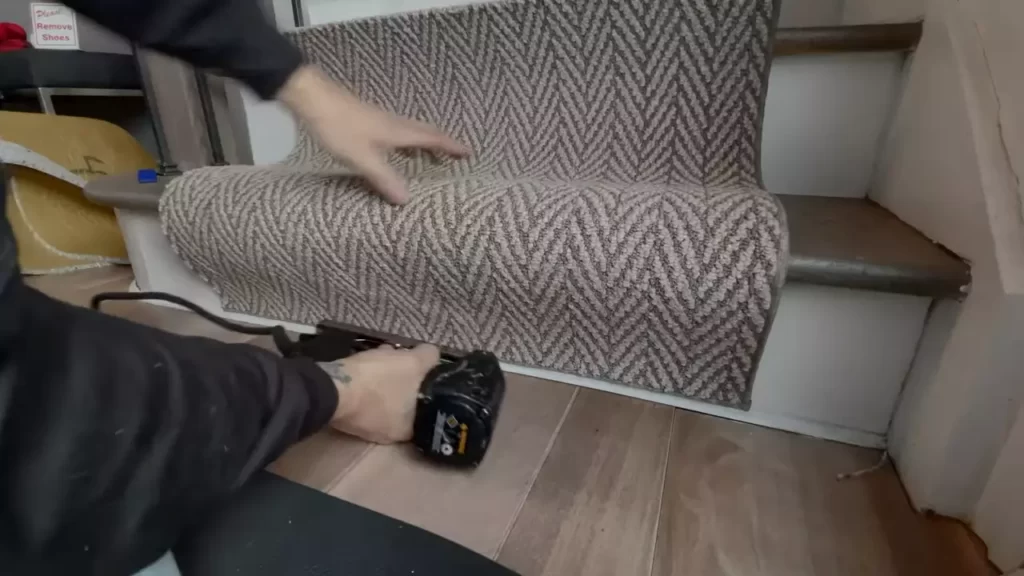
To install a stair runner with a turn, first measure and cut the runner to fit each section of the stairs, including the landing and any turns. Then, secure the runner in place using carpet tape or staples, making sure to smooth out any wrinkles or bubbles.
Finally, trim any excess material and secure the edges of the runner with carpet edging or adhesive.
How To Choose The Right Stair Runner For A Turn
Installing a stair runner with a turn requires careful consideration and planning. Choosing the right stair runner is crucial to ensure a seamless installation and create a visually appealing look for your staircase. By considering important factors and taking accurate measurements, you can select a stair runner that fits perfectly and enhances the overall aesthetics of your home.

Factors to consider when selecting a stair runner
Before diving into the installation process, it’s essential to choose a stair runner that complements your staircase. Here are some important factors to consider:
- Material: The material of the stair runner plays a significant role in its durability and appearance. You can choose from various options such as wool, sisal, nylon, or polyester. Consider factors like foot traffic, maintenance, and style preferences when selecting the material.
- Pattern and color: The pattern and color of the stair runner can significantly impact the overall look of your staircase. Opt for a pattern and color that coordinates with your existing decor and complements the style of your home.
- Width: Measure the width of your staircase accurately to determine the appropriate width of the stair runner. Keep in mind that the width should allow for a proper fit and installation without obstructing the stairs.
- Shape and size: Since you are planning to install a stair runner with a turn, it’s crucial to consider the shape and size of your staircase. Take note of any curves or landings, as these will affect the length and cut of the stair runner.
- Underlay: Don’t forget to consider the type of underlay or padding that is suitable for your stair runner. The underlay helps provide cushioning, reduce noise, and prevent slipping, so choose one that is appropriate for your needs.
Measuring and planning for a turn in your staircase
Proper measurement and planning are essential before installing a stair runner with a turn. Here’s a step-by-step guide to help you:
- Measure the width: Measure the width of each individual step and the overall width of your staircase. This will help determine the appropriate width of the stair runner.
- Mark the turn: Identify the point where your staircase makes a turn. Mark this point clearly to ensure precise measurements and a seamless installation.
- Measure the length: Measure the length required for each section of your staircase, including the straight portion and the curved section. This will help you determine the length of the stair runner needed for the turn.
- Cut the stair runner: Based on your measurements, cut the stair runner to fit each section of your staircase. Pay attention to any patterns or designs in the stair runner to ensure a seamless transition at the turn.
- Secure the stair runner: Use appropriate tools and installation techniques to secure the stair runner in place, making sure it is firmly attached at the turn and along the rest of the staircase.
By carefully considering the factors mentioned above and accurately measuring and planning for the turn, you can choose the right stair runner and install it seamlessly on your staircase. Remember to follow proper installation guidelines and seek professional assistance if needed for a successful and visually pleasing outcome.

Preparation And Tools Needed
Gathering the necessary tools for installation
When it comes to installing a stair runner with a turn, it’s important to gather all the necessary tools beforehand. This will ensure a smooth and efficient installation process. Here is a list of tools you will need:
- Measuring tape: Measure the length and width of each step accurately to determine the size of the runner you will need.
- Straightedge: This tool will help you create straight and precise lines when cutting the runner.
- Carpet knife: A sharp carpet knife will be needed to cut the runner to the correct size and shape.
- Heavy-duty stapler: Use a heavy-duty stapler to secure the runner to each step securely.
- Staple remover: In case you need to adjust or reposition the runner, a staple remover will come in handy.
- Hammer: Sometimes, a gentle tap with a hammer may be needed to ensure the runner is in place and secure.
- Stair rods/hardware: Depending on your preference and the style you want to achieve, stair rods or other hardware may be necessary to hold the runner in place.
Preparing the stairs for the runner
Before you can begin the installation process, it’s crucial to prepare the stairs properly. Here are the steps to ensure your stairs are ready for the runner:
- Clean the stairs: Thoroughly clean each step, removing any dust, dirt, or debris. A clean surface will ensure better adhesion of the runner.
- Remove any existing carpet: If there is any existing carpet on the stairs, it needs to be removed before installing the runner. Use a utility knife or carpet knife to carefully cut and remove the carpet.
- Repair any damages: Inspect the stairs for any damages such as loose or squeaky steps. Address these issues before installation to create a solid foundation for the runner.
- Apply a primer (optional): If the surface of the stairs is very slick or painted, applying a primer may increase the adhesion of the runner. Consult the manufacturer’s instructions before applying any primer.
- Measure and cut the runner: Use the measurements taken earlier to cut the runner to the appropriate size. Ensure each piece is cut accurately, allowing for any turns or landings.
By gathering the necessary tools and preparing the stairs properly, you will be well-prepared to install a stair runner with a turn. Let’s move on to the next step of this installation guide!
Installing The Stair Runner With A Turn
When it comes to adding a touch of elegance and practicality to your staircase, a stair runner can be a great choice. Installing a stair runner along a straight staircase is relatively straightforward, but what if your staircase has a turn? In this guide, we’ll walk you through the steps of installing a stair runner with a turn.
Securing the runner at the starting point
The first step in installing a stair runner with a turn is to secure the runner at the starting point. Begin by measuring the width of the staircase and cut the runner to the appropriate size. Make sure to leave some extra material for trimming and adjustments.
Next, apply double-sided carpet tape along the length of the staircase, starting from the bottom step. This will help hold the runner in place as you work your way up. Carefully position the runner at the bottom step, making sure it’s centered and aligned with the edge of the step. Press it firmly onto the tape to secure it in place.
Navigating the turn and aligning the runner
Navigating the turn can be a bit trickier, but with some attention to detail, it can be done smoothly. Start by folding the runner neatly at the corner of the turn. Use your hand or a smooth object, such as a ruler, to create a crisp fold. This will ensure a clean and professional look at the turn.
To align the runner around the turn, carefully position it along the edge of each step as you go. Use a staple gun or carpet tacks to secure the runner in place, ensuring it stays aligned and taut. Take your time with this step to ensure a seamless transition from one step to the next. Remember, the key is to smooth out any wrinkles and keep the runner centered on the steps.

Installing the runner along the remainder of the staircase
Once you’ve navigated the turn, continue installing the runner along the remainder of the staircase. Use the same process of aligning, stapling, and smoothing out any wrinkles. As you work your way up, periodically stop to check the alignment and adjust if necessary. The goal is to maintain a consistent look and secure fit throughout the entire staircase.
Finishing Touches And Maintenance
Trimming and securing the runner at the end of the staircase
Once you have successfully installed a stair runner with a turn, the next step is to ensure that it is properly trimmed and secured at the end of the staircase. This will not only give your staircase a polished and finished look, but it will also prevent any potential tripping hazards. Here are the steps to follow:
- Measure and trim: Start by measuring the excess length of the runner at the end of the staircase. This will allow you to determine how much needs to be trimmed. Use a sharp utility knife or scissors to carefully cut the runner to the desired length. Make sure to leave a small allowance for tucking the trimmed edge under the stair nosing.
- Tuck and secure: Once the runner is trimmed, gently lift the edge of the stair nosing and tuck the trimmed end of the runner underneath it. This will create a clean and seamless appearance. To ensure that the runner stays in place, use small nails or carpet tacks to secure it to the underside of the staircase. Make sure to space the nails or tacks evenly and avoid placing them too close to the edge to prevent any damage to the runner.
Proper maintenance and care for your stair runner
Maintaining and caring for your stair runner is essential to keep it looking fresh and prolong its lifespan. Here are some tips to help you properly maintain your stair runner:
- Vacuum regularly: Regular vacuuming is crucial to remove dirt, dust, and debris that may accumulate on the surface of the runner. Use a vacuum cleaner with a brush attachment to gently clean the runner and make sure to pay extra attention to the edges and corners where dirt tends to accumulate.
- Spot clean spills: Accidental spills happen, but it’s important to act quickly to prevent stains. Use a clean white cloth or paper towel to blot the spill and avoid rubbing, as this can spread the stain. For stubborn stains, you can use a mild carpet cleaner specifically designed for synthetic fibers. Make sure to test the cleaner on a small, inconspicuous area of the runner first to ensure it doesn’t cause any discoloration.
- Rotate furniture: If you have furniture placed on your stair runner, make an effort to rotate it regularly. This will help distribute the weight evenly and prevent excessive wear in one area. Additionally, consider using furniture coasters or pads to reduce the pressure on the runner.
- Protect from direct sunlight: Prolonged exposure to sunlight can cause fading and discoloration of your stair runner. Consider using blinds, curtains, or UV-protective window film to shield your staircase from direct sunlight.
By following these simple tips, you can ensure that your stair runner remains beautiful and well-maintained for years to come. Regular cleaning, prompt spill treatment, furniture rotation, and sun protection are key to preserving the appearance and longevity of your stair runner.

Additional Tips And Considerations
When it comes to installing a stair runner with a turn, there are some additional tips and considerations that can help ensure a smooth and successful installation. These tips will not only enhance the overall aesthetic appeal of your stair runner but also help you troubleshoot and overcome common challenges that may arise.
Enhancing the Aesthetic Appeal of the Stair Runner
Installing a stair runner with a turn provides a fantastic opportunity to enhance the overall aesthetic appeal of your staircase. With careful consideration of colors, patterns, and materials, you can create a beautiful and inviting focal point within your home. Here are a few tips to help you achieve a visually stunning result:
- Coordinate the colors and patterns of the stair runner with the existing décor of your home. Choose colors that complement the surrounding walls, flooring, and furnishings to create a cohesive and harmonious look.
- Consider the size and scale of your staircase when selecting the pattern for your runner. For smaller staircases, opt for smaller patterns to avoid overwhelming the space. On the other hand, larger staircases can handle bolder and more intricate designs.
- Experiment with different materials to achieve the desired aesthetic. Traditional runners are often made of wool, which offers a luxurious and timeless feel. Synthetic materials like nylon or polyester are durable and stain-resistant, making them ideal for high-traffic areas.
- Don’t be afraid to mix and match patterns and textures if you want to create a more eclectic and personalized look. Combining stripes with floral motifs or introducing a textured runner can add visual interest and depth.
Troubleshooting and Common Challenges in Installing a Runner with a Turn
Installing a stair runner with a turn can be a bit trickier compared to a straight runner installation. However, with the right approach, you can overcome common challenges and ensure a seamless installation process. Here are some troubleshooting tips to help you navigate any difficulties:
- Measure twice, cut once: Accurate measurements are crucial when installing a stair runner with a turn. Take precise measurements of each step, riser, and landing to ensure your runner fits snugly and smoothly.
- Use a template: Creating a template of each step and landing before cutting the runner can help you visualize the layout and ensure a precise fit. This template can be made using craft paper or cardboard, tracing the exact shape of each step and riser.
- Secure the runner properly: Use carpet tape, staples, or stair rod brackets to secure the runner firmly in place. Pay extra attention to the corners and turns, ensuring the runner is stretched tautly and held securely.
- Trimming and finishing: Once the runner is installed, carefully trim any excess material using a sharp utility knife. Use a carpet tucker to neatly tuck the edges of the runner along the walls or risers for a polished and professional finish.
- Maintenance and cleaning: Regularly vacuum and spot clean your stair runner to keep it looking fresh and vibrant. Follow the manufacturer’s guidelines for specific care instructions to prolong the lifespan of your runner.
By following these additional tips and considerations, you can ensure a successful installation of a stair runner with a turn. Not only will it enhance the aesthetic appeal of your staircase, but it will also provide a functional and stylish addition to your home. Now, let’s get started and transform those stairs into a stunning focal point!
Frequently Asked Questions For How To Install A Stair Runner With A Turn
Can You Put A Carpet Runner On Stairs That Turn?
Yes, you can put a carpet runner on stairs that turn. It is important to choose a flexible runner that can fit the shape of the stairs. Make sure to secure it properly to prevent any slips or trips.
How Do You Mitre A Stair Runner?
To mitre a stair runner, follow these steps:
1. Measure and cut the runner to fit each stair, allowing for an extra 2 inches for folding.
2. Use a mitre saw to cut a 45-degree angle on the ends of each runner.
3. Place the runners on the stairs, ensuring a snug fit.
4. Fold the edges of the runner over the stair nose and secure with carpet tacks or adhesive.
5. Repeat for each step.
How Do Stair Runners Stay In Place?
Stair runners stay in place with the help of several techniques including using adhesive tapes, rods, or carpet padding underlays. These methods ensure that the runner remains secure and prevent it from slipping or moving when it is walked on, creating a safe and stable surface for the stairs.
Can You Have Stair Runner Without Stair Rods?
Yes, you can have a stair runner without stair rods. Stair rods are not necessary for all types of stair runners.
Conclusion
Installing a stair runner with a turn may seem like a daunting task, but with the right guidance, it can be accomplished with ease. By following the step-by-step instructions provided in this blog post, you will be able to transform your staircase into a stunning focal point.
Whether you are a seasoned DIY enthusiast or a beginner, this guide ensures that the installation process is straightforward and stress-free. Get ready to impress your guests with a beautifully wrapped staircase that adds character and charm to your home.
