To install a handrail for stairs, measure the desired height and position of the handrail, mark the wall with a pencil, and determine the location of the studs. Next, attach the mounting brackets to the studs using screws and hang the handrail onto the brackets.
Equipment Needed For Installing A Handrail For Stairs
When it comes to installing a handrail for stairs, having the right equipment is essential. Without the proper tools, you may encounter difficulties or even risks during the installation process. In this section, we will discuss the necessary tools, types of handrails available, and the materials needed to ensure a successful installation.
Necessary Tools for the Installation Process
Before you begin installing a handrail for stairs, it is important to gather the necessary tools. Having these tools on hand will make the process easier and more efficient. Here are the essential tools you will need:
| Tool | Description |
|---|---|
| Measuring tape | A measuring tape is crucial for accurately measuring the length and height of the handrail. |
| Level | A level will ensure that the handrail is installed in a straight and level manner, providing safety and stability. |
| Pencil | A pencil is needed for marking the wall or surface where the handrail will be installed. |
| Drill | A drill will be used to create holes for the brackets or anchor points of the handrail. |
| Screwdriver | A screwdriver is necessary for tightening the screws that secure the handrail and brackets in place. |
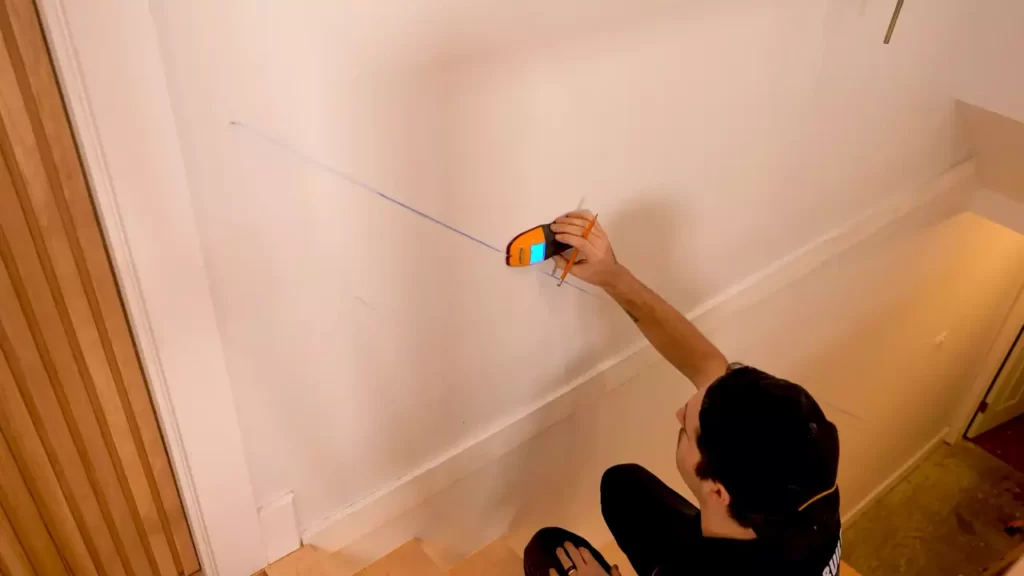
| Stud finder | A stud finder will help locate the studs in the wall, ensuring a sturdy and secure installation. |
Types of Handrails Available for Stairs
Handrails for stairs come in a variety of styles and materials, each offering their own unique benefits. Here are some common types of handrails:
- Wooden handrails: Wooden handrails provide a traditional and elegant look, with options such as oak, maple, or pine.
- Metal handrails: Metal handrails offer a sleek and modern appearance, with options such as stainless steel or wrought iron.
- Glass handrails: Glass handrails provide a contemporary and minimalist design, often used in modern or industrial settings.
It is important to consider the style and aesthetic of your staircase and home when choosing a handrail type.
Materials Required for Installing a Handrail
When installing a handrail for stairs, you will need the following materials:
- Handrail: The main component of the installation, the handrail can be made of various materials such as wood, metal, or glass.
- Brackets: Brackets are used to support the handrail and secure it to the wall or surface.
- Screws: Screws are necessary for attaching the brackets and handrail to the wall or surface.
- Anchor points: Depending on the type of installation, anchor points may be required for added stability and support.
By gathering these materials beforehand, you will ensure a smooth and successful installation process.
Preparing The Stairs For Handrail Installation
Before installing a handrail for your stairs, it is important to properly prepare the stairs to ensure a secure and functional installation. This involves inspecting the stairs for suitability, measuring and marking the correct height for the handrail, and identifying the proper location for the handrail.
Inspecting the stairs for suitability
The first step in preparing the stairs for handrail installation is to inspect them for suitability. Take a close look at the condition of the stairs to ensure they are sturdy and free from any damage or loose components. Look out for any signs of rot, cracks, or structural issues that may compromise the installation of a handrail. It is important to address any repairs or fixes before proceeding with the installation.
Measuring and marking the correct height for the handrail
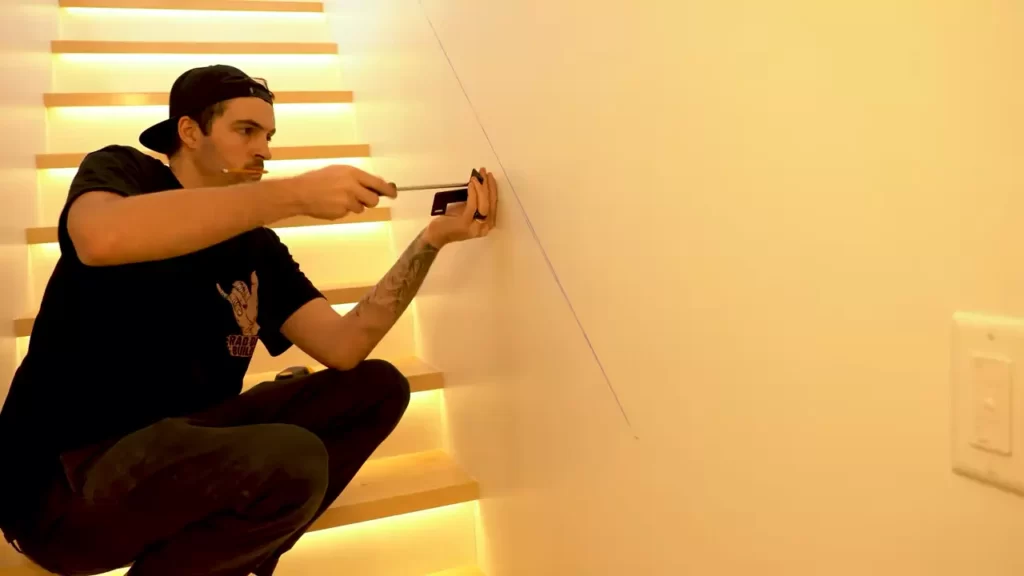
Accurate measurements are crucial when installing a handrail for stairs. Start by measuring the height of the stairs, from the bottom step to the top landing. This will give you a reference point for determining the correct height for the handrail. The standard height for a handrail is typically around 34 to 38 inches from the nosing of the stair treads. Use a measuring tape to mark this height at various points along the staircase, ensuring it is consistent and easily reachable for users of all heights.
Identifying the proper location for the handrail
The next step is to identify the proper location for the handrail. The handrail should be installed on the side of the staircase that provides the most support and stability. In most cases, this will be the side that is closest to the wall. However, if your stairs are open on one side, you may need to install a handrail on both sides for maximum safety. Take into consideration the layout and design of your stairs, as well as any building codes or regulations that may dictate the placement of the handrail.
Once you have inspected the stairs for suitability, measured and marked the correct height for the handrail, and identified the proper location, you are now ready to proceed with the installation of the handrail. Following these steps will help ensure a smooth and dependable handrail installation for your stairs.
Installing The Handrail For Stairs
Installing a handrail for stairs is an important safety measure that can provide support and stability, especially for those with mobility issues or young children. While the process may seem daunting, it’s actually quite manageable if you follow the right steps. In this guide, we will take you through the process of installing a handrail for stairs, focusing on securing the handrail brackets to the wall, attaching the handrail to the brackets, and ensuring proper alignment and stability of the handrail.
Securing the Handrail Brackets to the Wall
The first step in installing a handrail for stairs is securing the handrail brackets to the wall. These brackets serve as the support system for the handrail, so it’s crucial to ensure they are securely fastened. Here’s how you can do it:
- Start by determining the ideal height for your handrail. In general, the handrail should be positioned between 34 to 38 inches above the stairs.
- Using a measuring tape, mark the desired height on the wall at the top and bottom of the stairs.
- Next, locate the wall studs where you’ll be installing the brackets. It’s important to anchor the brackets to the studs for maximum stability.
- Once you’ve located the studs, place the first bracket against the wall at the top of the stairs, aligning it with the marked height.
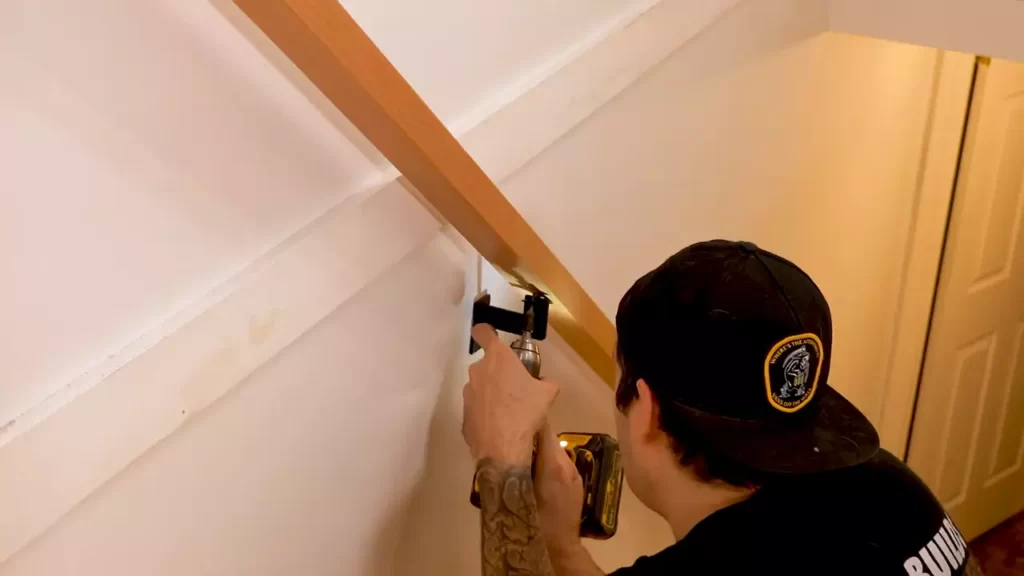
- Using a drill and screws, secure the bracket to the wall, making sure it’s tightly attached.
- Repeat the process for the remaining brackets, ensuring they are evenly spaced along the staircase.
Now that the brackets are securely fastened to the wall, you can proceed to attach the handrail. Follow these steps to complete this stage of the installation:
- Place the handrail on top of the brackets, ensuring it is centered and aligns with the brackets’ screw holes.
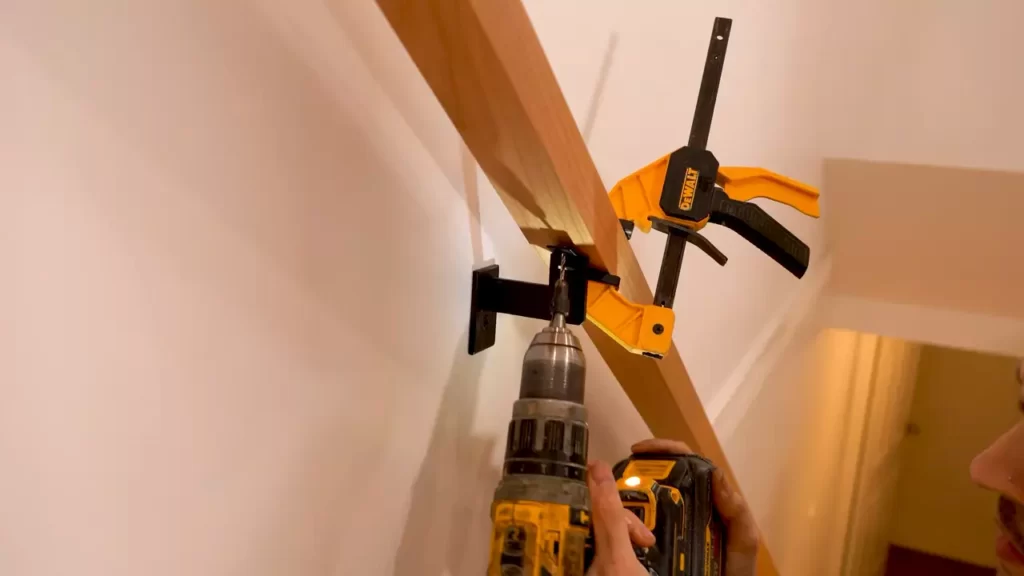
- Using a drill, insert screws through the brackets’ screw holes and into the handrail, securing them tightly. Be sure to use appropriate size screws that will securely hold the handrail in place.
- Double-check the alignment and stability of the handrail by giving it a gentle tug or applying pressure. It’s crucial that the handrail is firm and does not wobble or shift.
Ensuring Proper Alignment and Stability of the Handrail
Once the handrail is attached to the brackets, it’s important to ensure its proper alignment and stability. Here are a few tips to ensure a secure handrail:
- Inspect the handrail for any signs of wobbling or instability. If you notice any issues, tighten the screws connecting the bracket to the handrail.
- Make sure the handrail aligns with the height markers on the wall and remains level along the entire staircase. Adjust as necessary.
- If the handrail is particularly long, consider adding additional brackets for added support and stability.
- Finally, give the handrail a thorough test by applying pressure and ensuring it can bear the weight and resistance it’s designed for.
By following these steps and ensuring proper alignment and stability of the handrail, you can create a safe and functional stairway that provides added support when needed. Remember, safety should always be the top priority when it comes to any home improvement project, and installing a handrail for stairs is no exception.
Positioning The Handrail Brackets
When it comes to installing a handrail for stairs, one of the most important steps is positioning the handrail brackets. Proper positioning ensures that the handrail will be secure and provide adequate support for anyone using the stairs. In this section, we will discuss determining the appropriate spacing for the brackets, marking and drilling holes for the brackets, and installing the brackets securely to the wall.
Determining the Appropriate Spacing for the Brackets
Before you begin installing the brackets, it is crucial to determine the appropriate spacing for them. The spacing will depend on various factors, including the length of the handrail and the length of the staircase.
To determine the spacing, you can use the following equation:
| Length of Handrail | Number of Brackets |
|---|---|
| Under 4 feet | 2 brackets |
| Between 4 and 8 feet | 3 brackets |
| Over 8 feet | 4 brackets |
These guidelines will help you determine the minimum number of brackets required. However, if you feel that additional support is needed, you can add more brackets as necessary.
Marking and Drilling Holes for the Brackets
Once you have determined the appropriate spacing for the brackets, the next step is to mark and drill holes for them. To do this, follow these simple steps:
- Use a measuring tape to mark the desired position of each bracket on the wall.
- Ensure that the brackets are level by using a bubble level or laser level.
- Once the brackets are properly positioned, use a pencil or marker to mark the center of each bracket on the wall.
- With a power drill and the appropriate drill bit, carefully drill holes at each marked position. Make sure the holes are deep enough to securely hold the brackets.
Installing the Brackets Securely to the Wall
After marking and drilling the holes, it’s time to install the brackets securely to the wall. Follow these steps to ensure a secure installation:
- Insert wall anchors into each drilled hole to provide extra stability for the brackets.
- Align the holes in the brackets with the drilled holes in the wall.
- Securely attach each bracket to the wall using screws or bolts. Make sure they are tightened firmly.
- Use a level to double-check the alignment of the brackets before tightening the screws completely.
By following these steps, you can properly position the handrail brackets and ensure a secure installation. Remember to take your time and double-check your work to ensure the handrail is safe and sturdy.
Attaching The Handrail To The Brackets
Once you have successfully installed the brackets for your handrail, it’s time to securely attach the handrail to the brackets. This step is crucial as it ensures the stability and strength of the handrail, providing a safe support for anyone using the staircase. In this section, I will guide you through the process of placing the handrail onto the brackets, securing it with screws or other fasteners, and checking its stability.
Placing the Handrail onto the Brackets
To start, you need to carefully place the handrail onto the brackets. Ensure that the handrail is positioned at a comfortable height, allowing for a firm grip and convenient use. Gently line up the holes on the brackets with the corresponding holes on the handrail.
Once the alignment is correct, place the handrail onto the brackets, making sure it rests securely. Take a moment to verify that the handrail is level and centered along the length of the staircase. Use a level tool to ensure accuracy. Adjust the position if necessary, making sure it is aesthetically pleasing as well as functional.
Securing the Handrail with Screws or Other Fasteners
With the handrail in place, it’s time to secure it to the brackets using screws or other appropriate fasteners. Be sure to use screws or fasteners that are suitable for the material of your handrail and brackets. This will ensure a strong and durable attachment.
Start by inserting the screws or fasteners through the holes on the handrail and into the corresponding holes on the brackets. Use a screwdriver or an appropriate tool to tighten the screws firmly. It’s advisable to use at least two screws per bracket to ensure sufficient strength and stability.
As you tighten the screws, make sure that the handrail remains level and properly aligned. Take care not to overtighten, as this can damage the handrail or strip the screw holes. Over time, periodically check the handrail and tighten any loose screws to maintain its stability.
Checking the Stability and Strength of the Handrail
Once the handrail is securely attached to the brackets, it’s essential to check its stability and strength before considering the installation complete. Test the handrail by applying gentle pressure and ensuring that it remains steady and secure. Verify that it can support the weight of an individual using the stairs.
Visually inspect the attachment points to ensure there are no signs of movement, such as noticeable gaps or loose screws. If any issues are found, promptly address them by tightening screws or adjusting the handrail’s position. This extra attention to detail will ensure the long-lasting stability and safety of your handrail.
By diligently following these steps, you can confidently attach the handrail to the brackets, providing a reliable and secure support system for your staircase. Remember, the safety of yourself and others should always be a top priority when tackling any DIY installation project.
Finishing Touches And Safety Measures
When it comes to installing a handrail for stairs, the finishing touches and safety measures are just as important as the installation itself. These final steps ensure that the handrail not only looks great but also provides a secure and safe support for those using the stairs. In this section, we will discuss two crucial aspects: sanding and smoothing any rough edges on the handrail and applying a protective finish. Additionally, we will delve into installing additional safety features such as end caps or handrail extensions.
Sanding and Smoothing any Rough Edges on the Handrail
Before applying any finish, it is essential to prepare the handrail by sanding and smoothing any rough edges. Rough edges can not only be unappealing to the touch but also pose a safety hazard. Here’s a step-by-step guide:
- Gather the necessary tools: Sandpaper (grit according to the wood type), a sanding block, and safety goggles
- Inspect the handrail: Carefully examine the handrail for any splinters, rough spots, or imperfections. Ensure that it is fully secured to the stairs.
- Sanding: Begin by sanding the rough edges with sandpaper, using a sanding block for better control and even pressure. Sand in the direction of the grain, applying gentle, consistent strokes. Remember to wear safety goggles to protect your eyes from dust.
- Smooth the surface: After removing the roughness, switch to a finer grit sandpaper to achieve a smooth and polished surface. This will enhance both the visual appeal and the safety of the handrail.
- Remove dust: Once you have finished sanding, wipe away any dust or debris using a clean, lint-free cloth. This will ensure a clean surface for the next step.
Applying a Protective Finish to the Handrail
Applying a protective finish to the handrail not only enhances its appearance but also safeguards the wood from everyday wear and tear, moisture, and damage. Follow these steps to apply a protective finish:
- Select the appropriate finish: Consider factors such as the wood type, environment, and personal preference when choosing a finish. Common options include varnish, polyurethane, or water-based finishes.
- Prepare the area: Ensure proper ventilation in the workspace by opening windows or using a fan. Cover the surrounding area with drop cloths or newspaper to protect it from any spills or drips.
- Apply the finish: Using a high-quality brush or a lint-free cloth, apply the chosen finish in long, even strokes, following the direction of the grain. Take care to prevent drips or pooling of the finish.
- Allow drying time: Leave the handrail undisturbed for the recommended drying time specified by the finish manufacturer. This will ensure that the finish cures properly and provides optimal protection.
- Apply additional coats if necessary: Depending on the type of finish and desired level of protection, it may be necessary to apply multiple coats. Follow the manufacturer’s instructions for drying time between coats.
Installing Additional Safety Features
In addition to sanding, smoothing, and applying a protective finish, you may choose to install additional safety features to further enhance the handrail’s functionality and security. Here are two common options:
- End caps: End caps are small, discreet accessories that are attached to the ends of the handrail. They not only provide a finished look but also prevent potential injuries by eliminating sharp edges.
- Handrail extensions: Handrail extensions can be installed to extend the length of the handrail beyond the last step. This provides extra support and stability for individuals with varying heights or mobility needs.
By completing these finishing touches and safety measures, you can ensure that your handrail not only looks appealing but also serves its purpose effectively, providing a secure grip and reliable support for anyone using the stairs.
Testing And Inspection Of The Handrail
Verifying the Stability and Strength of the Handrail
Once you have installed the handrail for your stairs, it is crucial to thoroughly test and inspect its stability and strength. This step is vital to ensure the safety of anyone using the stairs and to prevent any accidents or mishaps.
To verify the stability of the handrail, apply pressure by pushing and pulling on it firmly. The handrail should not move or give way under normal pressure. If you notice any excessive movement or instability, it may indicate that the handrail has not been properly installed or that there are underlying structural issues.
Another important aspect to test is the strength of the handrail. This can be done by applying gradual and increasing pressure on different sections of the handrail. It should hold up without bending or breaking. Keep in mind that the handrail should be able to withstand the weight of an adult leaning on it for support.
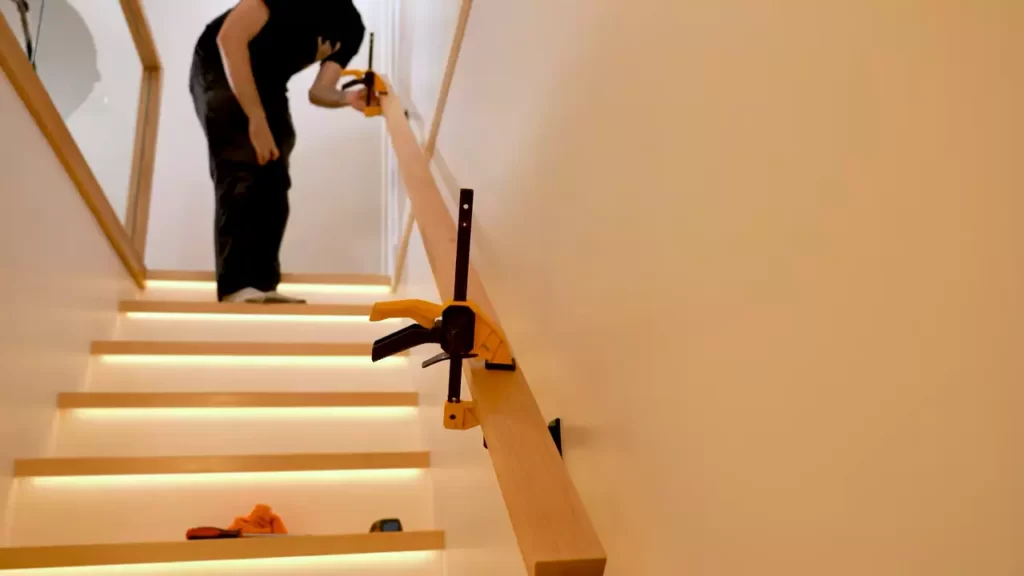
Checking for any Loose or Wobbly Sections
As part of the testing and inspection process, it is crucial to check for any loose or wobbly sections in the handrail. These areas can compromise the stability and functionality of the handrail, posing a potential safety risk.
Begin by visually examining the handrail for any visible signs of looseness or wobbling. Pay close attention to the connection points of the handrail to the wall or supporting brackets. If you notice any gaps or movement, further investigation is required.
To check for loose or wobbly sections, firmly grasp the handrail at various points along the staircase and apply slight pressure. If you feel any movement or hear creaking sounds, it is a clear indication that there are issues that need to be addressed.
Making Adjustments if Necessary to Ensure Proper Functionality
If during the testing and inspection process, you discover any stability or strength issues with the handrail, it is important to rectify them before considering the installation complete. Making the necessary adjustments will ensure that the handrail functions properly and provides the necessary support.
To address loose or wobbly sections, tighten any screws or bolts that may have become loose during the installation process. Use a screwdriver or wrench to secure the connection points of the handrail firmly.
If the problem persists, it may be necessary to reinforce the handrail by adding additional brackets or supports. Consult a professional or refer to the manufacturer’s instructions for guidance on how to strengthen the handrail.
Lastly, after making any adjustments, repeat the testing process to verify that the handrail is now stable, strong, and functioning as intended. Do not neglect this crucial step, as it ensures the safety and stability of the handrail for years to come.

Maintenance And Care For Handrails
Regular maintenance and care of handrails is crucial for their longevity and safety. By incorporating a routine of cleaning, inspecting, and repairing, you can ensure that your handrails remain in top condition and provide reliable support on your stairs. Here are some essential steps you can follow to maintain and care for your handrails:
Regular cleaning and upkeep of the handrail
Regular cleaning of handrails is essential to remove dirt, dust, and other potential contaminants. To clean your handrail, follow these simple steps:
- Start by wiping down the handrail with a soft cloth or sponge to remove any loose debris.
- Prepare a solution of warm water and mild soap, and use this mixture to clean the handrail thoroughly.
- Gently scrub the handrail with a non-abrasive brush to remove any stubborn dirt or grime.
- Rinse the handrail with clean water and wipe it dry with a clean cloth.
Regular cleaning not only keeps your handrail looking its best, but also helps maintain its structural integrity by preventing the buildup of corrosive substances.
Inspecting for any damage or wear over time
Regular inspections are crucial to identify any signs of damage or wear on your handrail. It is recommended to inspect your handrail at least once every few months or as needed. During the inspection, pay attention to the following:
- Check for any loose or wobbly fittings. Make sure that all screws, bolts, and brackets are securely fastened.
- Look for signs of rust or corrosion, especially in outdoor handrails or in areas with high humidity.
- Inspect the handrail for any cracks, splinters, or other signs of damage that might compromise its stability.
- Ensure that the handrail is properly aligned and not skewed or leaning to one side.
If you notice any signs of damage or wear during the inspection, it is important to address them promptly to prevent further deterioration and ensure the safety of your handrail.
Performing necessary repairs or replacements as needed
If your inspection reveals any damage or wear, it is crucial to carry out the necessary repairs or replacements to maintain the handrail’s functionality and structural integrity. Here are some steps you can follow:
- If any fittings are loose or damaged, tighten the screws or replace the fittings with new ones.
- If you notice rust or corrosion, use a rust remover or sandpaper to eliminate the corrosive buildup. Afterward, apply a coat of rust-resistant paint or sealant to protect the handrail.
- If there are cracks or splinters, consider sanding them down and applying a fresh coat of varnish or paint to reinforce the handrail.
- In cases of severe damage or wear, it might be necessary to replace the entire handrail. Consult a professional if needed.
By promptly addressing any repairs or replacements, you can ensure that your handrail remains sturdy and reliable for years to come.
Remember, regular cleaning, thorough inspections, and necessary repairs are essential steps to maintain and care for your handrails. By investing time and effort into their upkeep, you can enjoy safe and secure stairs for yourself and your loved ones.
Frequently Asked Questions Of How To Install A Handrail For Stairs
How Do You Attach A Handrail To Stairs?
To attach a handrail to stairs, first, gather the necessary tools and materials. Next, measure and mark the desired height and position of the handrail. Then, drill pilot holes and attach the handrail brackets securely to the wall. Finally, slide the handrail onto the brackets and secure it in place using screws or other appropriate fasteners.
What Side Of The Stairs Should A Handrail Be On?
A handrail should be on the side of the stairs opposite to the wall or barrier. It provides stability and support for individuals using the stairs.
How Do You Attach A Handrail To A House?
Attach a handrail to a house by following these steps: 1. Determine the proper height for the handrail. 2. Mark the location for the brackets on the wall. 3. Drill pilot holes and attach the brackets. 4. Slide the handrail onto the brackets.
5. Secure the handrail in place with screws.
How Far Off The Stairs Should A Handrail Be?
A handrail should be installed alongside stairs and positioned no more than 4 inches away from the vertical edge of the stairs. This ensures proper support and safety for individuals using the stairs.
Conclusion
Installing a handrail for stairs is not only a safety measure but also a crucial part of the overall aesthetics of your home. By following the step-by-step guide mentioned above, you can easily install a handrail and add a touch of elegance to your staircase.
Remember, safety should always be your top priority, so it is essential to ensure a secure and sturdy installation. Don’t hesitate to seek professional assistance if needed. With the right tools and instructions, you can enhance the functionality and appearance of your stairs effortlessly.
