To install stair spindles, measure the height of the railings and mark the spots where they will be inserted. Then, insert the spindles into the appropriate holes, making sure they are secure and level.
Now, let’s dive into the detailed steps for installing stair spindles. Home renovations often include updating stairways, and one aspect that can make a big difference is installing new stair spindles. These decorative vertical posts support the handrail and add a stylish touch to the staircase.
If you’re wondering how to install stair spindles, this guide will walk you through the process, step by step. Whether you’re replacing old spindles or starting from scratch, with the right tools and techniques, you can easily install stair spindles in your home. Let’s explore the process in detail to ensure a successful installation.
Factors To Consider
When it comes to installing stair spindles, there are several factors to consider to ensure a successful and visually appealing installation. These factors include the style and design of the spindles, the material, and durability, as well as the importance of code compliance. By keeping these factors in mind, you can make informed decisions that will not only enhance the overall look of your staircase but also ensure the safety and longevity of your installation.
Style and Design
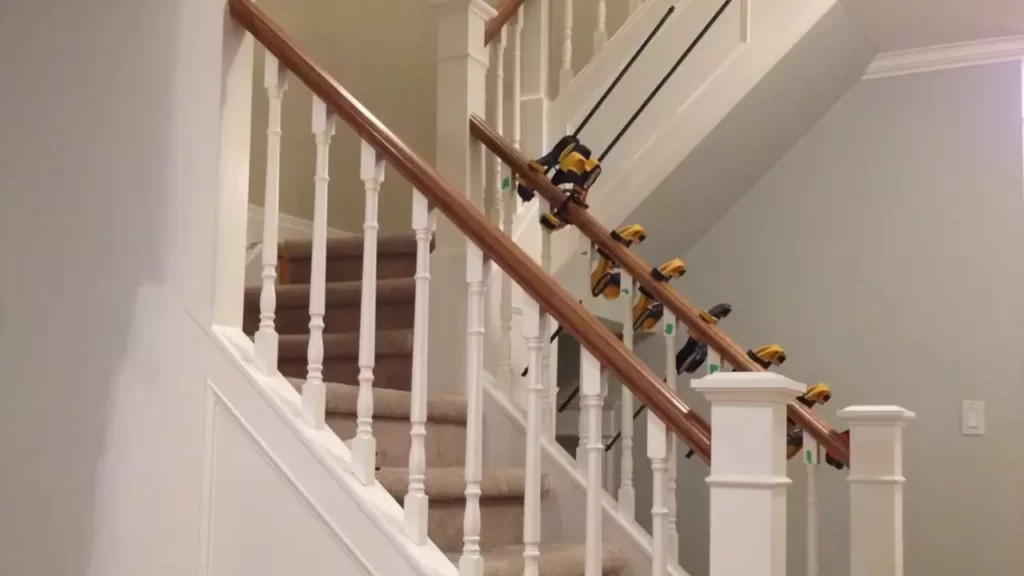
The style and design of your stair spindles play a fundamental role in the overall aesthetic appeal of your staircase. Whether you prefer a traditional, contemporary, or even a custom design, there are a wide variety of options to choose from. Consider the existing style and architecture of your home to ensure that the spindles you select complement the overall design scheme. Additionally, take into account the spacing and arrangement of the spindles to create a visually pleasing and balanced look.
Material and Durability
Material and durability are crucial factors to consider when selecting spindles for your staircase. The material you choose will not only impact the appearance but also the longevity of your installation. Some common materials used for stair spindles include wood, iron, and glass. Each material comes with its own set of benefits and considerations. Wood is a popular choice for its natural beauty and versatility, while iron offers strength and durability.
Glass can provide a sleek and modern look, but it may require more maintenance. Consider your lifestyle, budget, and maintenance preferences when choosing the material that best suits your needs.
Code Compliance
Ensuring code compliance is a crucial step when installing stair spindles. Building codes and regulations vary by location, and it’s essential to familiarize yourself with them before starting the installation process. These codes often dictate the height, spacing, and strength requirements of the spindles. Adhering to these codes is not only vital for the safety of those using the stairs but also to avoid any potential legal or insurance issues. Consulting with a professional or doing thorough research can help you understand and meet the necessary code requirements.
Measuring For Stair Spindles
Properly measuring for stair spindles is essential to ensure a secure and visually appealing staircase. Taking accurate measurements allows you to determine the spacing between spindles, calculate the number of spindles needed, and measure the length of each spindle to fit perfectly.
Determining the Spacing
Before you start installing stair spindles, it’s crucial to determine the spacing between them. By following the guidelines outlined in your local building codes and regulations, you can ensure the safety and compliance of your staircase.
Typically, the spacing is measured in inches and refers to the distance between the centers of each spindle. This measurement ensures that there is enough space for airflow and prevents small children from getting stuck between them. In most cases, the maximum spacing allowed is 4 inches.
To determine the spacing for your stair spindles, you can use the following steps:
- Measure the length of the handrail or the distance between the newel posts at the top and bottom of the staircase.
- Subtract the thickness of the newel post from the measured length.
- Divide the resulting measurement by the desired spacing plus one (to include the starting or ending spindle).
The formula would look like this: (Measured length – Newel post thickness) / (Spacing + 1)
Calculating the Number of Spindles needed
After determining the spacing between spindles, the next step is to calculate the number of spindles needed for your staircase. This calculation ensures that you have an even distribution of spindles along the handrail, creating a balanced and aesthetically pleasing appearance.
To calculate the number of spindles, you can follow these steps:
- Measure the length of the handrail or the section where the spindles will be installed.
- Divide the measured length by the spacing between spindles plus one (to include the starting or ending spindle).
- Round up the result to the nearest whole number.
The formula would look like this: Rounded up (Measured length / (Spacing + 1))
Measuring the Length of the Spindle
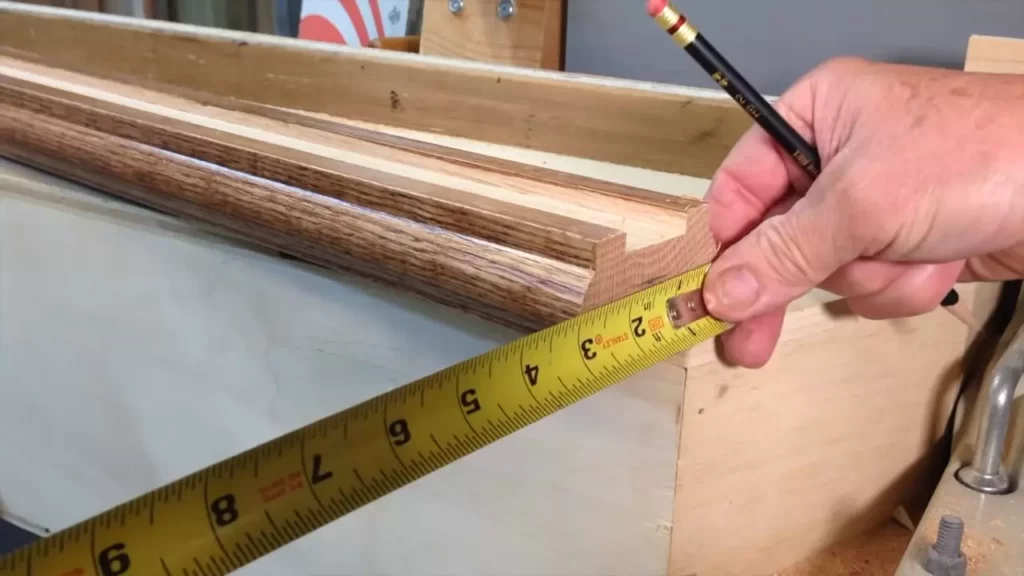
Now that you have determined the spacing and calculated the number of spindles needed, it’s time to measure the length of each spindle. Measuring accurately ensures that each spindle fits perfectly and contributes to the overall strength and stability of the staircase.
The length of the spindle is measured from the bottom of the handrail to the top of the stair tread or the landing surface. It’s important to measure each spindle individually, as there may be slight variations in the heights of the stair treads.
When measuring the length of each spindle, it is recommended to add an extra inch or so for ease of installation and to ensure a snug fit.
By following these measuring techniques, you can ensure that your stair spindles are installed correctly, creating a beautiful and safe staircase for your home.
Tools
Before you begin installing stair spindles, you’ll need a few essential tools to ensure a smooth and successful installation process. Having the right tools on hand will make your job easier and help you achieve professional-looking results. Here are some must-have tools for installing stair spindles:
Tape Measure
One of the first tools you’ll need is a reliable tape measure. This essential tool will help you accurately measure the height and width of your staircase and determine the spacing between each spindle. A tape measure with clear markings and a locking mechanism will allow you to take precise measurements every time.
Screwdriver
A screwdriver is another tool that you’ll frequently use during the installation process. It will come in handy for removing any existing spindles or screws, as well as securing the new spindles in place. Consider having both a Phillips head and a flathead screwdriver in your toolkit to accommodate different types of screws.
Drill
A drill is an essential tool for creating pilot holes before inserting screws. It will save you time and effort and ensure that the spindles are securely attached to both the stair treads and the handrail. Look for a drill with adjustable speed settings and a variety of drill bits to accommodate different materials.
Miter Saw
A miter saw is a specialized tool that will help you achieve clean and precise cuts when trimming the spindles to the desired length. This tool is especially useful when dealing with angled or curved staircases. Make sure to use the appropriate safety precautions, such as wearing protective goggles and using clamps to hold the spindles securely in place.
Carpenter’s Level
A carpenter’s level is an essential tool for ensuring that your stair spindles are installed correctly and are level. It will help you avoid any gaps or unevenness that can compromise the overall appearance and safety of your staircase. A long level with a sturdy frame and clear bubble vials will provide accurate readings and help you achieve professional results.
Pliers
Pliers are versatile tools that can be used for a variety of tasks during the installation process. They can help you remove nails, bend wire, tighten screws, and adjust the positioning of the spindles. Look for pliers with comfortable grips and a strong cutting edge to handle different materials and make your job easier.
With these tools in your arsenal, you’ll be well-equipped to tackle the installation of stair spindles and create a stunning and safe staircase in your home. Before you get started, double-check that you have all the necessary tools on hand to avoid any unnecessary delays or interruptions during the installation process.
Materials
Before you start installing stair spindles, it’s important to make sure you have all the necessary materials. Having everything on hand will save you time and make the installation process smoother. Here are the materials you will need:
Stair Spindles
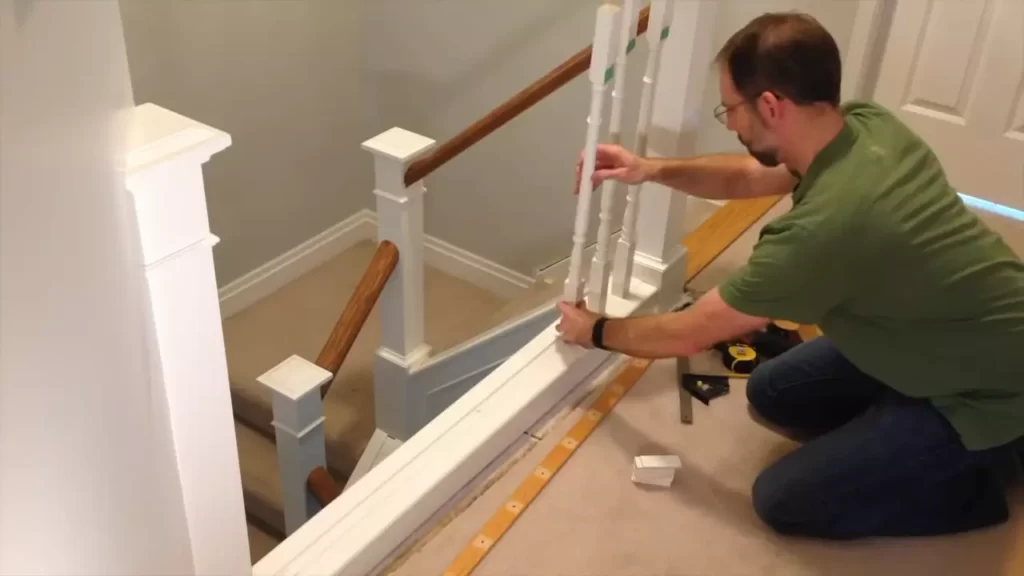
The main component of your staircase, stair spindles are vertical supports that run between the handrail and the base rail. They are available in a variety of materials, such as wood, iron, and aluminum. Choose the type of stair spindles that best match your staircase design and personal style.
Baluster Shoes
Baluster shoes, also known as spindle shoes or landing shoes, are small metal attachments that connect the bottom of the spindle to the base rail. These shoes not only provide stability but also add an aesthetic touch to the overall look of your staircase. Baluster shoes come in different shapes and styles, so choose ones that complement your stair spindles.
Wood Glue
Wood glue is essential for securing the stair spindles in place. A strong and reliable wood glue will ensure that the spindles stay securely attached to the base rail and handrail, preventing any wobbling or potential accidents. When purchasing wood glue, make sure it is suitable for the type of wood you are working with.
Screws
Screws are another method of securing stair spindles to the base rail and handrail. They provide additional reinforcement and stability. It is recommended to use screws in conjunction with wood glue for a stronger bond. Choose screws that are appropriate for the type of wood you are working with and ensure they are the right length to securely attach the spindles.
Baluster Connectors
Baluster connectors are small metal pieces that connect the top of the spindles to the handrail. These connectors ensure a secure and stable connection between the spindles and handrail, reducing any movement or wobbling. Baluster connectors are available in different designs, so choose ones that match the style of your stair spindles and handrail.
Removing Existing Spindles
Removing the Shoe Molding
Before you can start removing the old spindles from your staircase, you’ll need to remove the shoe molding first. Shoe molding is the trim that covers the gap between the stairs and the wall, and it needs to be taken off to access the spindles.
- Begin by using a small pry bar to gently pry off the shoe molding. Insert the pry bar at one end of the trim and carefully apply pressure to loosen it. Work your way along the molding, gently prying it away from the stairs.
- If the shoe molding is attached with nails, use a small nail puller to remove the nails. Place the nail puller under the head of the nail and pry it out, being careful not to damage the surrounding wall or stairs.
- Once all of the shoe molding has been removed, set it aside in a safe place. You may need to replace it later, so be sure to keep it in good condition.
Unscrewing the Old Spindles
Now that you have removed the shoe molding, it’s time to unscrew the old spindles from the staircase. Spindles are typically secured with screws, and removing them is a relatively straightforward process.
- First, locate the screws that are holding the old spindles in place. These screws are usually found at the top and bottom of each spindle.
- Using a screwdriver that matches the type of screw head, such as a Phillips or flathead screwdriver, carefully unscrew the screws that are holding the spindles in place.
- As you remove the screws, set them aside in a container or baggie so that they don’t get lost. It’s important to keep track of these screws, as you will need them later when installing the new spindles.
- Repeat this process for each of the old spindles until all of them have been unscrewed and removed from the staircase.
Cleaning the Staircase
With the old spindles removed, it’s a good time to give your staircase a thorough cleaning. Over time, stairs can accumulate dust, dirt, and debris, so taking the time to clean them will help ensure a smooth and successful installation of the new spindles.
- Start by vacuuming the stairs to remove any loose dirt and dust. Use a soft brush attachment to gently sweep along the edges of the stairs and in between the balusters.
- Next, use a damp cloth or sponge to wipe down the staircase. Pay close attention to the areas where the old spindles were attached, as there may be some residual dirt or marks.
- If there are any stubborn stains or sticky residue on the stairs, you can use a mild detergent mixed with water to gently scrub them away. Just be sure to rinse off the soap afterwards to avoid any slippery surfaces.
- Allow the staircase to dry completely before moving on to the next step. This will ensure that the new spindles adhere properly and that there is no moisture trapped under them.
By following these steps to remove the shoe molding, unscrew the old spindles, and clean the staircase, you’ll be well on your way to installing new stair spindles and giving your staircase a refreshed look. Stay tuned for the next section, where we’ll guide you through the process of installing the new spindles!
Preparing The New Spindles
Sanding and Finishing
Before installing your new stair spindles, it is important to properly prepare them to ensure a polished and professional-looking result. One crucial step in this process is sanding and finishing. This helps to smoothen any rough edges or imperfections, and it also enhances the overall appearance of the spindles.
To start, grab some fine-grit sandpaper and gently sand the surface of each spindle. Make sure to pay extra attention to any areas that may be uneven or splintered. Sanding not only provides a smooth finish but also creates an ideal surface for paint or stain to adhere to.
Here are a few key points to keep in mind during the sanding process:
- Use a sanding block or sanding sponge for better control and even pressure.
- Always sand in the direction of the grain to avoid creating scratches.
- Start with a coarse-grit sandpaper and gradually work your way towards a finer grit for a stunning result.
- After sanding, use a clean cloth to wipe away any dust or debris.
Painting or Staining
Once you have sanded the spindles to perfection, you can move on to the exciting part: painting or staining. This step allows you to add a personal touch to your staircase and tie it into the overall design of your home.
If you prefer a traditional look, you can opt for staining. This not only brings out the natural beauty of the wood but also adds depth and richness to the spindles. Choose a stain color that complements the existing color scheme of your staircase and home.
On the other hand, if you want to add a pop of color or create a more contemporary feel, painting the spindles is the way to go. Consider using a high-quality paint that is specifically formulated for wood surfaces. This will ensure a durable and long-lasting finish.
Here’s what you should keep in mind when painting or staining your stair spindles:
- Protect the surrounding areas with masking tape or plastic sheeting to prevent accidental splatters.
- Apply paint or stain evenly, following the manufacturer’s instructions.
- Consider applying multiple coats for a more vibrant and professional finish.
- Allow each coat to dry completely before applying the next.
- Once you are satisfied with the color and finish, seal the spindles with a clear varnish or polyurethane for added protection.
By sanding and finishing your new stair spindles, you can achieve a flawless and eye-catching result. Whether you choose to stain or paint them, these steps ensure that your spindles will not only be visually appealing but also stand the test of time.
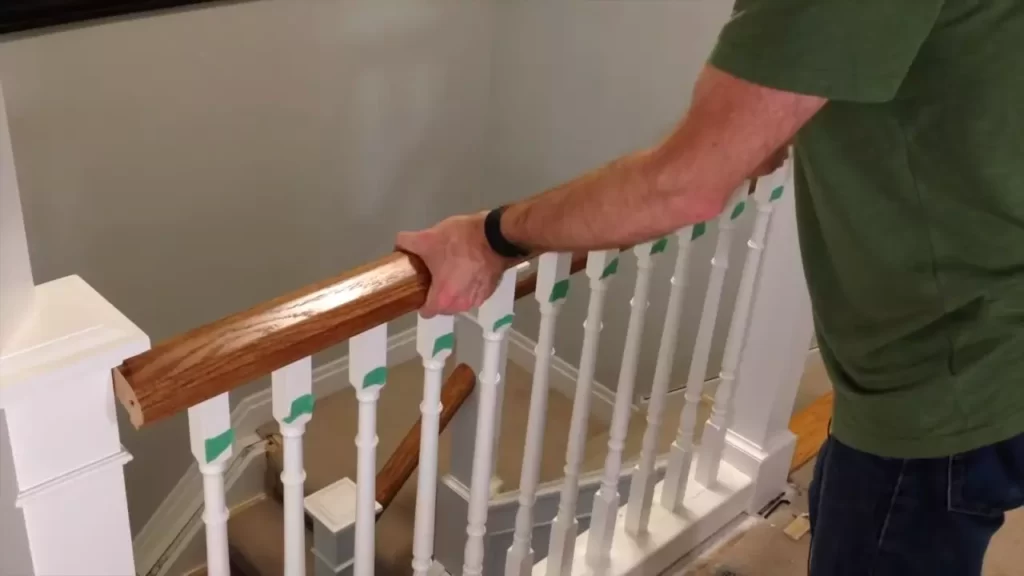
Installing The New Spindles
Once you have removed the old stair spindles, it’s time to install the new ones. This is an important step in your staircase renovation project as it will determine the overall look and stability of your stairs. In this section, we will guide you through the installation process to ensure a successful and secure outcome.
Pre-drilling Holes
The first step in installing the new stair spindles is pre-drilling holes. Pre-drilling allows for easier installation and prevents splitting or cracking of the wood. Here’s how you can do it:
- Measure and mark the desired position of the spindle on the handrail and the base of the staircase.
- Using a drill bit that matches the diameter of your spindles, carefully drill a hole through the marked positions on the handrail and the base.
- Ensure that the depth of the hole is slightly shorter than the length of your spindle to allow for a secure fit.
- Repeat this process for each spindle, ensuring equal spacing between them.
Attaching the Spindles
Once you have pre-drilled the holes, it’s time to attach the spindles. Follow these steps to ensure a proper installation:
- Apply a small amount of wood glue to the bottom end of the spindle.
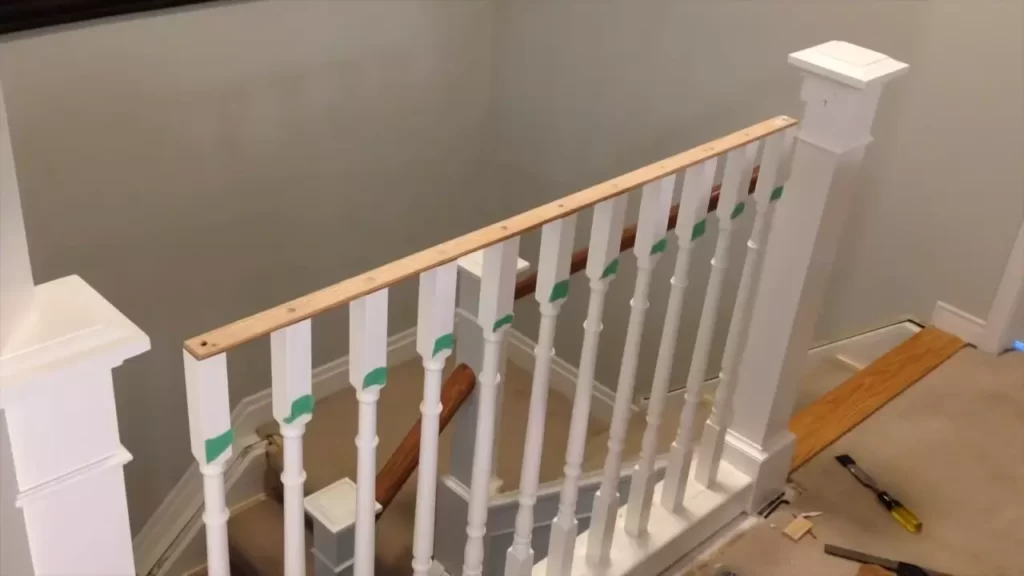
- Insert the spindle into the pre-drilled hole on the base of the staircase, aligning it with the corresponding hole on the handrail.
- Gently tap the spindle with a hammer to secure it in place.
- Repeat this process for each spindle, making sure they are all positioned correctly.
Securing with Screws or Glue
After attaching the spindles, it’s important to ensure additional stability by securing them with screws or glue. Here are two methods you can choose from:
| Securing Method | Procedure |
|---|---|
| Using Screws |
|
| Using Glue |
|
Choose the securing method that suits your preferences and the type of spindles you are installing. Whichever method you choose, ensure that the spindles are securely fastened to provide maximum safety and durability.
By following these steps, you can easily install new stair spindles and give your staircase a fresh and updated look. Make sure to take your time, be careful, and regularly check the alignment and stability of the spindles throughout the installation process for the best results.
Installing Baluster Shoes
When it comes to installing stair spindles, one crucial step is attaching the baluster shoes. Baluster shoes not only add an aesthetic touch to your staircase but also provide stability to the spindles by securing them to the treads. This step-by-step guide will walk you through the process of installing baluster shoes, ensuring a sturdy and visually appealing staircase.
Measuring and Marking
The first step in installing baluster shoes is to measure and mark the positions where they will be attached to the treads. For accurate placement, it is important to measure the distance between each spindle and ensure they are evenly spaced. Use a measuring tape to measure the distance from the edge of the tread to the center of each spindle, making note of the measurements.
Next, mark the positions of the baluster shoes on the treads using a pencil or a marker. To ensure accuracy, use a level and a square to make sure the marks are aligned vertically and horizontally. It is recommended to double-check your measurements and markings before proceeding to the next step.
Attaching the Shoes to the Treads
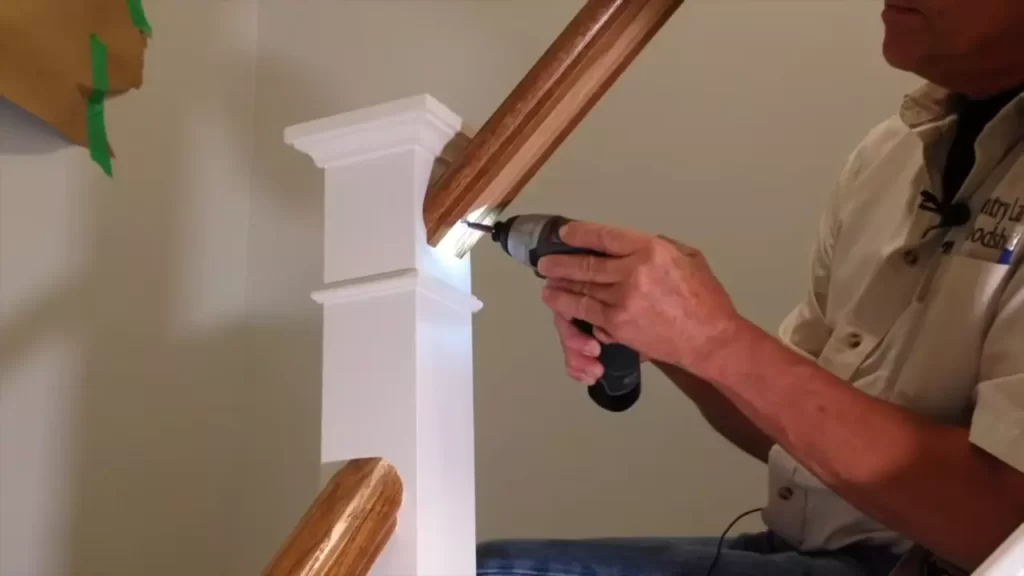
Now that the markings are in place, it’s time to attach the baluster shoes to the treads. Place the shoe on the mark you made, ensuring it is level and aligned with the vertical line. Use a drill with a suitable bit to make pilot holes through the holes in the shoe and into the tread. This will prevent any splitting of the wood when you insert the screws.
After drilling the pilot holes, secure the shoe to the tread by driving screws through the shoe and into the pilot holes. Make sure the shoe is tightly fastened to ensure stability. Repeat this process for each marked position, until all baluster shoes are securely attached to the treads.
Securing the Spindles to the Shoes
With the baluster shoes in place, it’s time to secure the spindles to the shoes. Carefully insert the bottom end of each spindle into the corresponding shoe, making sure they fit snugly. Apply a small amount of wood glue to the top end of each spindle before gently inserting them into the handrail, ensuring a secure connection.
To enhance the longevity and stability of the spindles, drive a finishing nail through the top of each spindle into the handrail. This will provide an extra level of security and prevent any wobbling or loosening over time. Repeat this process for each spindle until all spindles are securely attached to the baluster shoes and handrail.
In conclusion, installing baluster shoes is a crucial step in securing and enhancing the overall appearance of your staircase. By following the steps outlined in this guide, you can ensure a sturdy and visually appealing staircase that will stand the test of time.
Finishing Touches
Finishing touches are essential in any home improvement project, and installing stair spindles is no exception. These final steps not only add visual appeal but also ensure the long-lasting durability of your newly installed spindles. In this section, we will discuss three crucial finishing touches that will complete your staircase renovation: checking alignment with the level, filling holes and sanding, and applying the final finish.
Checking Alignment with the Level
Before moving on to the final touches, it’s important to double-check the alignment of your stair spindles. To ensure precision and stability, follow these simple steps:
- Place a level against the installed spindles, ensuring it is perfectly upright.
- Adjust the spindles as needed until they are aligned vertically, making sure there is no noticeable leaning or tilting.
- Use a carpenter’s pencil to mark any areas that require adjustment.
By meticulously checking the alignment with a level, you can guarantee a visually pleasing and secure staircase for years to come.
Filling Holes and Sanding
Next, it’s time to address any holes or gaps that may have been created during the installation process. Follow these steps to achieve a seamless look:
- Inspect the spindle joints and any areas where screws or nails were used.
- If necessary, use wood putty or filler to fill in the holes or gaps.
- After the putty has dried, carefully sand the filled areas until smooth and flush with the surface.
Sanding not only ensures a flawless appearance but also minimizes the risk of splinters and enhances the safety of your staircase.
Applying Final Finish
The last step of your stair spindle installation journey is applying the final finish, which will protect and beautify your spindles. Follow these tips for a professional-looking result:
- Clean the surfaces of the spindles with a damp cloth to remove any sawdust or debris.
- Choose a finish that complements your staircase and matches your personal style.
- Apply the finish using a brush or sponge, following the manufacturer’s instructions for drying time and number of coats.
- Allow sufficient time for the finish to dry before using the staircase.
Applying a final finish not only enhances the natural beauty of the wood but also protects it from wear and tear, extending the lifespan of your stair spindles.
Careful Measurement And Planning
Before starting the installation of stair spindles, it’s essential to take accurate measurements and create a detailed installation plan. This crucial step will ensure that your stair spindles fit perfectly and provide a safe and aesthetically pleasing result.
Taking Accurate Measurements
Accurate measurements are the foundation of a successful staircase project. Before you begin, gather the necessary tools, including a measuring tape and a level. Start by measuring the height of the handrail from the nosing of the lowest step to the top. Ensure that you measure in a straight line and not along the slope of the staircase.
Next, measure the distance between the handrail and the bottom step or landing. Make sure to take measurements at various points along the handrail to account for any inconsistencies in the staircase’s structure. Write down these measurements and calculate the average to ensure accuracy.
Once you have the height and distance measurements, you need to determine the spacing between the spindles. The general rule of thumb is to have no more than four inches of space between each spindle to prevent small children from getting their heads stuck. Measure the distance between the spindles already in place and use that as a guide for your new installation.
Creating a Detailed Installation Plan
With accurate measurements in hand, it’s time to create a detailed installation plan. This plan will help you visualize the layout of the spindles and ensure a smooth installation process.
Start by creating a diagram of your staircase, indicating the locations of the existing spindles and handrails. Use a pencil and graph paper or a digital drawing tool to sketch out the design. This diagram will serve as a guide for the installation and allow you to identify any potential issues or modifications that may be required.
Once you have the diagram, mark the precise locations where each new spindle will be installed. This can be done by measuring the spacing between the existing spindles and replicating it on your diagram. Additionally, consider the aesthetic aspect and distribute the spindles evenly to create a visually appealing design.
Having a detailed installation plan will save you time and effort during the actual installation process. It will also help you troubleshoot any potential challenges and ensure that the end result of your stair spindle installation is both functional and attractive.
Proper Installation Techniques
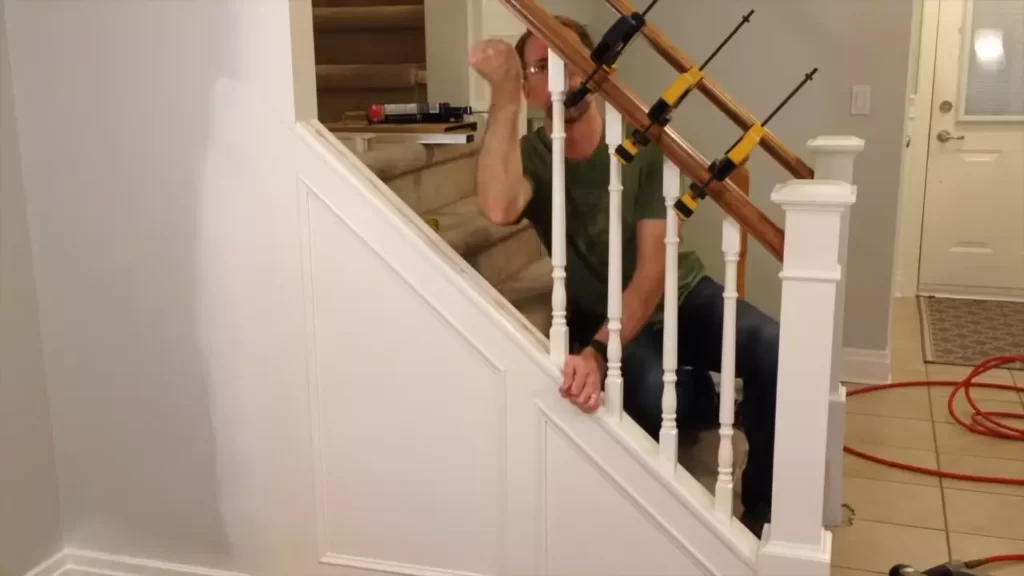
Installing stair spindles is an essential step when it comes to enhancing the overall look and safety of your staircase. However, it is crucial to follow proper installation techniques to ensure a secure and long-lasting installation. In this guide, we will discuss the importance of using the right tools and following the manufacturer’s instructions.
Using the Right Tools
Before you begin the installation process, it is essential to gather the right tools that will make the job easier and more efficient. Here are some tools you will need:
- Power drill
- Drill bits
- Tape measure
- Hammer
- Chisel
- Screwdriver
- Level
- Safety goggles
- Protective gloves
Having these tools at your disposal will ensure that you can complete the installation effectively and in a timely manner. Remember to wear safety goggles and gloves to protect yourself from any potential injuries.
Following the Manufacturer’s Instructions
The manufacturer’s instructions should be your go-to resource when it comes to installing stair spindles. Each manufacturer may have specific guidelines and recommendations that you need to follow. Here are some general steps to keep in mind:
- Measure the distance between each spindle to ensure equal spacing.
- Mark the positions where the spindles will be installed using a pencil or chalk.
- Drill pilot holes into the marked positions using the appropriate drill bit size.
- Insert the spindles into the pilot holes and make sure they are tightly secured.
- Use a level to ensure that the spindles are straight and aligned with the handrail.
- Secure the spindles in place by tightening the screws or using adhesive as recommended by the manufacturer.
- Give the adhesive enough time to dry or the screws to fully tighten before applying any weight or pressure.
- Once the installation is complete, inspect the spindles for any loose fittings or defects.
Following these steps will help you achieve a proper and secure installation of your stair spindles, ensuring the safety of anyone using the staircase.
In conclusion, proper installation techniques are crucial when it comes to installing stair spindles. By using the right tools and following the manufacturer’s instructions, you can achieve a secure and aesthetically pleasing result. So, gather your tools, read the instructions carefully, and transform your staircase with the installation of stylish and functional stair spindles.
Regular Maintenance And Inspection
Checking for Loose Spindles
In order to ensure the safety and stability of your staircase, it’s important to regularly inspect and check for any loose spindles. Loose spindles can compromise the structural integrity of your staircase and pose a risk of accidents or injuries. Here are a few simple steps to help you identify and fix any loose spindles:
- Start by visually inspecting each spindle, paying close attention to any noticeable wobbling or movement.
- Next, give each spindle a gentle shake to determine if it feels loose or unstable.
- If you identify a loose spindle, you’ll need to tighten it. This can usually be done by tightening the screws or bolts that secure the spindle to the staircase.
- Using a screwdriver or wrench, tighten the screws or bolts until the spindle feels secure and stable. Be careful not to overtighten, as this can cause damage to the spindle or the staircase.
- Once you’ve tightened all the loose spindles, give them another shake to ensure they are firmly in place.
Regularly checking for and addressing any loose spindles will not only enhance the safety of your staircase but also prolong the lifespan of your spindles.
Repairing or Replacing Damaged Spindles
Over time, spindles can become damaged due to wear and tear or accidental impacts. If you notice any cracked, splintered, or broken spindles during your regular maintenance checks, it’s important to take immediate action to repair or replace them. Here’s a step-by-step guide on how to repair or replace damaged spindles:
- First, remove the damaged spindle from the staircase by unscrewing or unbolting it.
- If the spindle is repairable, clean the damaged area and apply wood glue to the cracks or splinters.
- Once the glue has dried, sand the repaired area until it’s smooth and matches the rest of the spindle.
- Alternatively, if the spindle is beyond repair, you’ll need to replace it.
- Measure the length of the old spindle to ensure you purchase a replacement of the correct size.
- Install the new spindle by attaching it to the staircase using screws or bolts.
- Finally, give the repaired or replaced spindle a thorough inspection to ensure it is secure and stable.
By promptly repairing or replacing damaged spindles, you can maintain the aesthetic appeal and safety of your staircase.
Frequently Asked Questions Of How To Install Stair Spindles
Is It Easy To Install Stair Spindles?
Installing stair spindles is fairly easy. You can do it yourself with basic tools and some patience. Just follow the provided instructions carefully, ensure proper alignment, and secure them firmly in place. It’s a simple and rewarding project that can enhance the look of your staircase.
How Do You Install Wood Spindles On Stairs?
To install wood spindles on stairs, follow these steps:
1. Measure and mark the spacing for the spindles on the handrail and the stair treads.
2. Drill holes in the handrail and treads to insert the spindles.
3. Apply wood glue to the holes and insert the spindles firmly.
4. Secure the spindles with screws or nails.
5. Sand and finish the wood spindles for a polished look.
How Do You Attach Spindles To Stair Railings?
To attach spindles to stair railings, follow these steps:
1. Measure and mark the placement of each spindle on the railing.
2. Drill pilot holes at the marked spots.
3. Apply adhesive to the bottom of each spindle and insert them into the pilot holes.
4. Secure the spindles in place by fastening screws into the railing.
5. Allow the adhesive to dry completely before using the stairs.
Do You Glue Stair Spindles?
Yes, stair spindles are typically glued in place for stability and security. Glue provides a strong bond between the spindle and the stair railing, ensuring it stays in position securely. It is important to use the appropriate type of glue for the material of the spindles and to follow the manufacturer’s instructions for proper installation.
Conclusion
To sum up, installing stair spindles can be a straightforward DIY project with the right tools and steps. By carefully measuring, cutting, and securing the spindles, you can enhance the safety and aesthetic appeal of your staircase. Remember to choose a design that complements your home’s style and consider hiring a professional if you’re not confident in your abilities.
Enjoy the process and the beautiful transformation of your staircase!
