To install cable railing on stairs, first, measure and mark the height and spacing for the railing posts. Then, attach the posts to the stair treads and secure them with screws or anchors.
Finally, thread the cables through the posts and tighten them using a cable tensioning kit. Are you looking to add a modern and stylish touch to your staircase? Cable railing is a great option that provides both safety and visual appeal.
Whether you’re a DIY enthusiast or a professional contractor, installing cable railing on stairs is a straightforward process that can be completed with the right tools and materials. We will guide you through the steps to install cable railing on stairs and enhance the overall look of your home or commercial space.
Benefits Of Cable Railing For Stairs
Installing cable railing on your stairs comes with several compelling benefits. Not only does it offer a unique and modern aesthetic, but it also provides practical advantages that enhance both safety and visual appeal. In this section, we will explore the key benefits of choosing cable railing for your stairs.
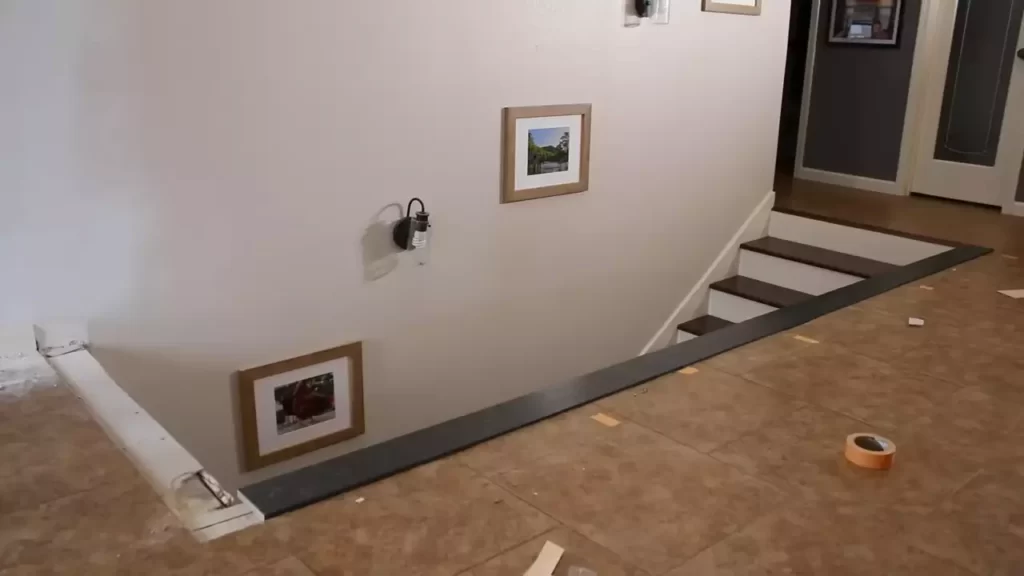
Less obstructive than traditional railing options
Cable railing is an excellent choice for stairs because it is less obstructive compared to traditional railing options. The slim profile of cable railing allows for unobstructed views, creating an open and airy feel in your home. Unlike solid railings that can block sightlines and make spaces feel cramped, cable railing preserves the flow of light and space, making it ideal for showcasing beautiful staircase designs, architectural features, or scenic views.
Allows for unobstructed views
One of the most impressive benefits of cable railing for stairs is its ability to provide unobstructed views. With cable infill, your staircases become visually transparent, allowing you to appreciate the surrounding environment without compromise. Whether you have a stunning backyard, breathtaking landscapes, or an artistic interior, cable railing ensures that you can fully enjoy the view with minimal interference.
Provides a modern and sleek aesthetic
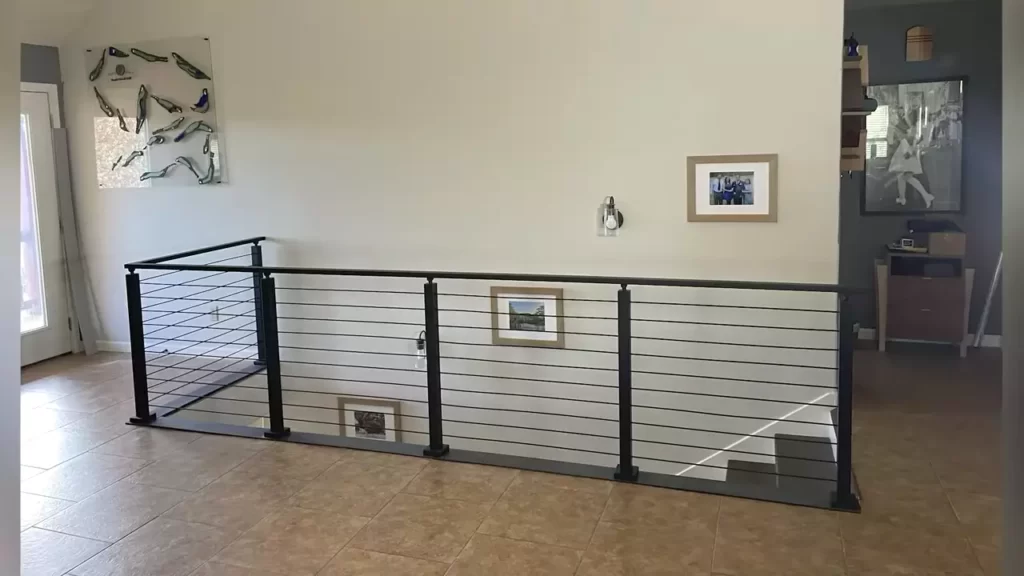
When it comes to aesthetics, cable railing is unmatched. With its clean lines and minimalist design, cable railing adds a touch of modernity and sophistication to any staircase. The sleek appearance of stainless steel cables paired with stylish post options creates a visually stunning contrast that complements both contemporary and traditional interior designs. By choosing cable railing, you can elevate the overall look of your staircase and make it a focal point of your home.
Measuring And Estimating Materials
Determining the Length of Cable Needed
Before you begin installing cable railing on your stairs, it’s important to accurately determine the length of cable you’ll need. This will ensure that you don’t buy too much and waste money, or buy too little and have to make additional purchases later on.
To determine the length of cable needed, start by measuring the total length of your stair railing. This includes both the horizontal section and the vertical section of the stairs. Measure from the top of the top post to the bottom of the bottom post, making sure to account for any corners or bends along the way. It’s always better to overestimate slightly than to underestimate, as you can always trim excess cable later.
Pro Tip: Add a few extra inches to your measurement to account for any tensioners or turnbuckles that you’ll be using to tighten the cable. This will ensure that you have enough slack to properly tension the railing.
Calculating the Number of Cable Fittings and Hardware
Next, you’ll need to calculate the number of cable fittings and hardware that you’ll need for your cable railing installation. This includes items such as cable end fittings, tensioners, turnbuckles, and any other hardware required to secure the cable to your stair posts.
Start by determining the number of stair posts you have. Count both the top and bottom posts, as well as any intermediate posts along the railing. Once you have this number, multiply it by two. This is because you’ll need two fittings for each post – one at the top and one at the bottom.
Additionally, take into account the number of corners or bends in your stair railing. Each corner or bend will require an additional fitting to accommodate the change in direction. Make sure to include these in your calculations
Pro Tip: It’s always a good idea to buy a few extra fittings and hardware pieces, just in case of any mishaps during installation.
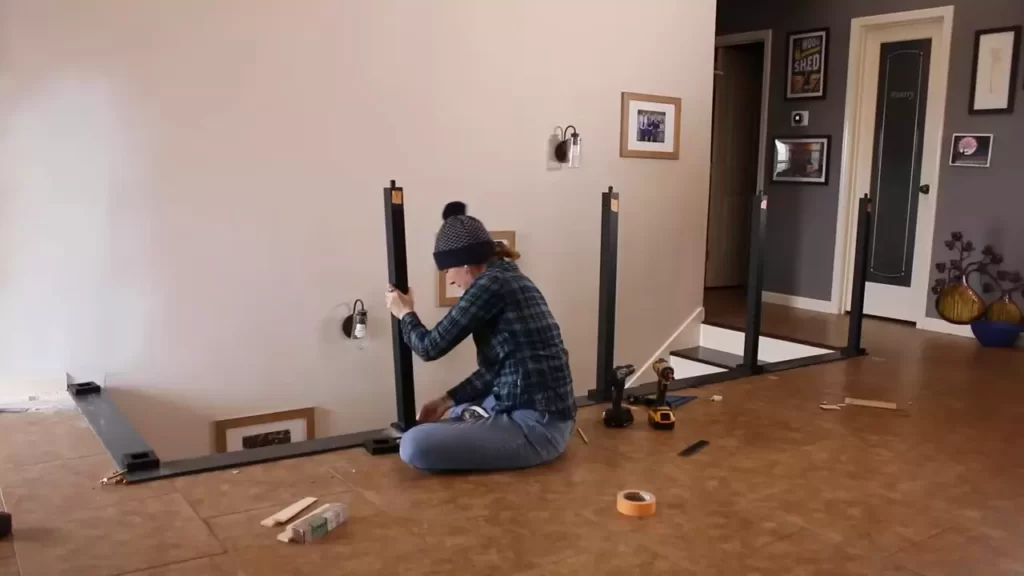
Assessing the Structural Integrity of the Stairs
Before proceeding with the installation of cable railing on your stairs, it’s essential to assess the structural integrity of the stairs themselves. This is crucial for ensuring the safety and stability of the cable railing system.
Start by thoroughly inspecting the stair posts, handrails, and the overall design of the stair structure. Look for any signs of damage, such as cracks, rot, or weakened areas. If you notice any issues, it’s important to address them before proceeding with the installation.
Pro Tip: If you’re unsure about the structural integrity of your stairs, it’s best to consult a professional to ensure that your cable railing installation is not compromising the safety of your stairs.
Obtaining The Necessary Tools And Materials
Before you begin installing cable railing on your stairs, it’s important to make sure you have all the right tools and materials on hand. This will ensure that the installation process goes smoothly and that your railing is secure and sturdy. In this section, we’ll go over the list of tools required for the installation, the types of cables and fittings available, and selecting the right materials for your specific staircase.
List of tools required for installation
Here is a list of essential tools you will need for installing cable railing on your stairs:
| Tool | Description |
| Drill | A power drill will be needed to create holes in your staircase posts for the cable fittings. |
| Wrench | You’ll need a wrench to tighten the cable fittings and secure them in place. |
| Measuring Tape | A measuring tape will help you accurately measure the lengths of cable needed for your railing. |
| Level | To ensure that your railing is straight and level, a bubble level is essential. |
| Wire Cutters | Wire cutters will be used to trim the cable to the correct lengths. |
| Allen Wrench | An Allen wrench is necessary to tighten the set screws on the cable fittings. |
Types of cables and fittings available
There are various types of cables and fittings available for cable railing installations. The type you choose will depend on factors such as the desired aesthetic, the level of durability required, and the style of your staircase. Common types of cables include stainless steel cables and coated cables, with stainless steel being the most popular choice due to its strength and corrosion resistance.
When it comes to fittings, there are a few options to choose from. These include terminal fittings, which are used to anchor the cables to the staircase posts, and tension fittings, which are used to tighten the cables and keep them taut. Each type of fitting has its own advantages and it’s important to choose the right ones for your specific installation.
Selecting the right materials for your specific staircase
When selecting materials for your cable railing installation, it’s crucial to consider the specific requirements of your staircase. Factors such as the shape of the stairs, the material of the posts, and the overall design of your home will impact your material choices. Stainless steel is a popular choice for posts, as it offers durability and a sleek, modern look. For the cables, you’ll want to choose a material that complements your posts and adds to the overall aesthetic of your staircase.
Additionally, it’s important to ensure that the materials you choose are compliant with local building codes and regulations. This will help to ensure that your cable railing is safe and meets all necessary standards. Take the time to research and select high-quality materials that are suitable for your specific staircase and will provide long-lasting beauty and functionality.
Preparing The Stairs For Installation
Before you can begin the installation process for cable railing on your stairs, it’s important to properly prepare the stairs. This involves cleaning the surfaces and removing any existing railing, as well as sanding and repairing any imperfections. By taking the time to complete these steps, you’ll ensure a smooth and sturdy foundation for your new cable railing.
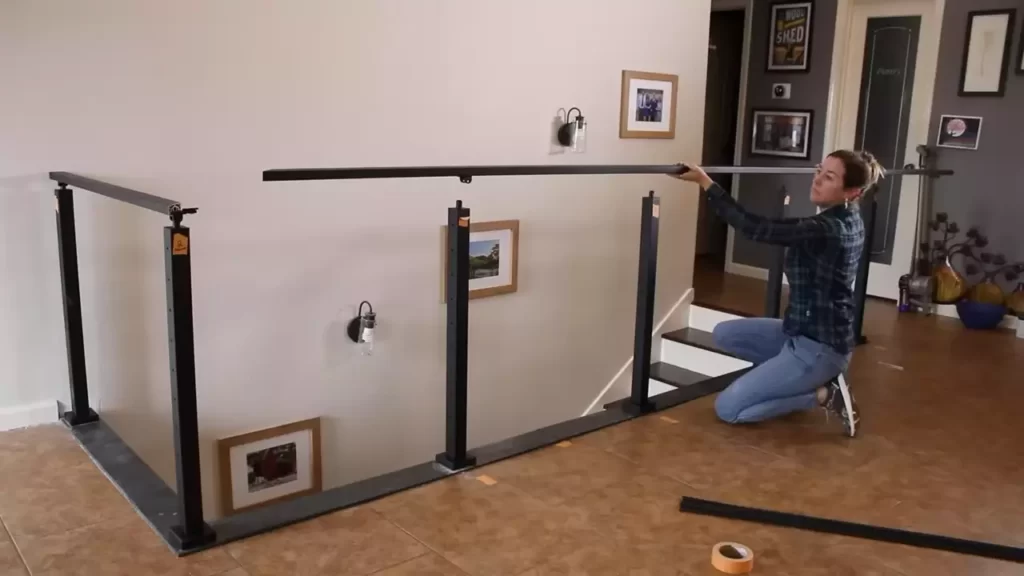
Cleaning the Surfaces and Removing Any Existing Railing
The first step in preparing your stairs for cable railing installation is to thoroughly clean the surfaces and remove any existing railing. This will provide a clean slate for your new railing and ensure proper adhesion.
Here’s a simple step-by-step process to clean the surfaces:
- Start by removing any debris or loose dirt from the stairs. You can use a broom or vacuum cleaner for this task.
- Next, use a mild detergent mixed with warm water to clean the entire surface of the stairs. Scrub gently with a soft-bristled brush to remove any stubborn stains or grime.
- Once the stairs are clean, rinse the surfaces thoroughly with clean water to remove any residue from the cleaning solution.
- Allow the stairs to dry completely before moving on to the next step. This will ensure proper adhesion of the cable railing components.
Sanding and Repairing Any Imperfections
After cleaning the surfaces and removing any existing railing, it’s important to assess the condition of the stairs to identify any imperfections that need to be addressed. This could include cracks, dents, or uneven surfaces.
To sand and repair the imperfections, follow these steps:
- Start by sanding the entire surface of the stairs using a medium-grit sandpaper. This will help create a smooth and even finish.
- If there are any cracks or dents, use a suitable filler to repair them. Choose a filler that matches the color of your stairs for a seamless finish.
- Apply the filler to the cracks or dents, following the manufacturer’s instructions. Use a putty knife or a similar tool to spread the filler evenly.
- Once the filler is dry, sand the repaired areas using a fine-grit sandpaper to create a smooth surface.
- After sanding, wipe down the stairs to remove any dust or debris. This will ensure proper adhesion of the cable railing.
By cleaning the surfaces and removing any existing railing, as well as sanding and repairing any imperfections, you’ll have a solid foundation for installing cable railing on your stairs. Taking the time to complete these preparatory steps will ensure a professional and long-lasting installation.
Marking Cable Railing Locations
When it comes to installing cable railing on stairs, one of the crucial steps is marking the locations where the cables will be installed. Properly marking these locations will ensure a secure and aesthetically pleasing railing system. In this section, we will discuss two important aspects of marking cable railing locations: determining the spacing between posts and ensuring consistent tension throughout the entire railing system.
Determining the spacing between posts
Before you start marking the cable railing locations, it is essential to determine the spacing between posts. The spacing of the posts will depend on several factors, including building codes and personal preference. Generally, it is recommended to space the posts no more than four to six feet apart to prevent excessive deflection of the cables. However, it is always a good idea to check your local building codes for specific requirements.
Here are the steps to determine the spacing between posts:
- Measure the total length of the railing where the cables will run.
- Divide the total length by the desired spacing between posts.
- If the result is a non-whole number, round it to the nearest whole number to determine the number of posts required.
- Mark the locations for each post along the stair railing, ensuring they are evenly spaced.
Ensuring consistent tension throughout the entire railing system
Consistent tension is crucial for a secure and visually appealing cable railing system. If the tension varies between cables, it can lead to an unbalanced and less stable railing. Therefore, it is vital to ensure consistent tension throughout the entire railing system when marking cable railing locations.
Here are some tips to ensure consistent tension:
- Use a tensioning gauge to measure the tension of each cable during installation.
- Adjust the tension of each cable as needed to ensure they are all tightened to the same level.
- Regularly inspect the tension of the cables after installation, especially during the first few weeks, and make any necessary adjustments.
By following these guidelines, you can mark the cable railing locations accurately, ensuring proper spacing between posts and consistent tension throughout the entire railing system. This will result in a safe and visually appealing cable railing installation on your stairs.
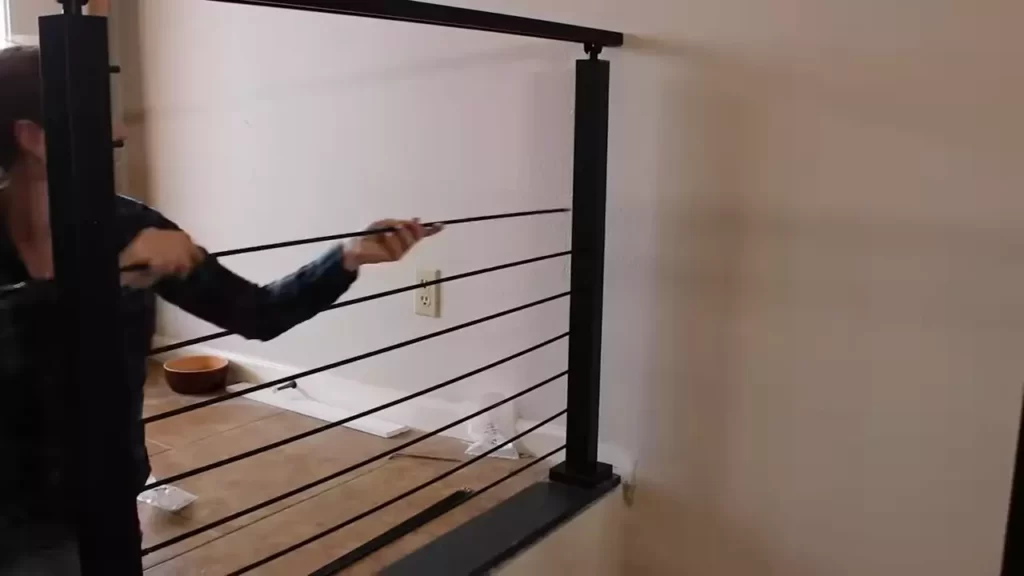
Installing Posts And Anchors
When it comes to installing cable railing on stairs, one of the crucial steps is installing posts and anchors. These components provide the necessary support and stability for the railing system, ensuring both safety and aesthetics. In this section, we will guide you through the process of determining the best location for posts, securing them to the stairs or floor, and installing anchors for cable tensioning.
Determining the best location for posts
Determining the best location for posts is crucial to the overall success of your cable railing installation. Before you begin, carefully consider the layout and design of your stairs. Take into account factors such as the angle of the stairs, the position of any handrails, and the desired height of the cable railing. By mapping out the locations of your posts, you can ensure that the railing system will be sturdy and visually appealing. Use the following steps as a guideline:
- Measure the length of the stairs and divide it into equal sections. This will help you determine how many posts you will need.
- Consider the local building codes and regulations regarding post spacing. This will ensure compliance and safety.
- Mark the desired locations for the posts using a pencil or tape measure.
Securing posts to the stairs or floor
Securing posts to the stairs or floor is a critical step in ensuring the stability and strength of your cable railing system. By securely fastening the posts, you can be confident that the railing will withstand regular use and meet safety requirements. Follow these steps to secure the posts:
- Using a drill and appropriate drill bit, create pilot holes in the marked locations for the posts.
- Position the post base over the pilot holes and align it with the markings.
- Secure the post base to the stairs or floor using suitable screws or anchors.
- Repeat the process for each post, ensuring that they are all aligned and level.
Installing anchors for cable tensioning
Installing anchors for cable tensioning is crucial to the overall functionality and appearance of your cable railing system. Anchors allow for proper tensioning of the cables, ensuring a taut and secure railing. Follow these steps to install the anchors:
- Using a drill and appropriate drill bit, create pilot holes in the designated locations for the anchors.
- Insert the anchors into the pilot holes and ensure they are flush with the surface.
- Tighten the anchor screws using an appropriate screwdriver or wrench.
- Verify that the anchors are securely in place and able to hold the desired tension.
By following these steps, you can successfully install the posts and anchors for your cable railing on stairs. Remember to consult the manufacturer’s instructions and local building codes throughout the process. Stay tuned for the next section on cable installation and tensioning!
Attaching The Cable And Fittings
Once you have prepared the posts and anchors for your cable railing system, the next step is attaching the cable and fittings. This crucial step ensures the stability and safety of your railing, so it’s important to follow the correct procedure. In this section, we will guide you through cutting and threading the cable, securing the cable ends to posts and anchors, and properly tensioning the cables.
Cutting and threading the cable
To begin, measure the length of the cable required for each section of the stairs. Remember to add a few extra inches of cable to account for tensioning. Use a cable cutter to cut the cable to the desired length.
Next, thread the fittings onto the ends of the cable. Start by inserting the cable into the threaded stud of one fitting until it reaches the other end. Then, thread the locking nut onto the fitting and tighten it securely using a wrench. Repeat this process for the other end of the cable with another fitting.
Securing the cable ends to posts and anchors
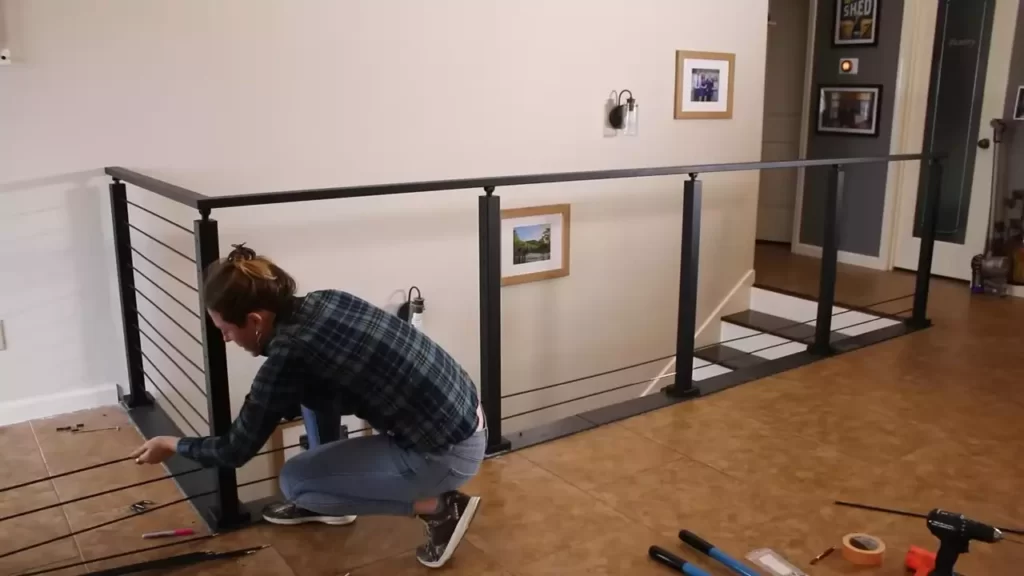
Now that the cable is cut and threaded with the fittings, it’s time to secure the cable ends to the posts and anchors. Insert one end of the cable into the pre-drilled hole in the post or anchor, ensuring the fitting is flush against the surface. Use a wrench to tighten any screws or nuts provided with the post or anchor to secure the cable in place. Repeat this process for the other end of the cable with the remaining post or anchor.
Properly tensioning the cables for safety and stability
With the cables securely attached to the posts and anchors, the final step is properly tensioning them. Tensioning is crucial for ensuring the safety and stability of the railing. Begin by turning the tensioning device, typically located near the post, clockwise to engage the tensioning mechanism. This will exert pressure on the cable, tightening it.
Please note that each cable may have different tensioning requirements, so refer to the manufacturer’s instructions for the specific tensioning procedure. However, in general, you want the cables to be taut with minimal deflection when pressure is applied. Avoid over-tightening, as this can lead to excessive stress on the fittings and compromise the integrity of the system.
Once you have achieved the desired tension, secure the tensioning device in place to lock the cables in position. Lastly, double-check all fittings, posts, and anchors to ensure they are properly secured and tightened to guarantee the overall safety and stability of your cable railing installation.
Finishing And Maintenance
Once you have installed cable railing on your stairs, it is important to properly finish and maintain it to ensure its longevity and keep it looking its best. Here are some key aspects to consider when it comes to finishing and maintaining your cable railing:
Trim and seal exposed cable ends
When installing cable railing on stairs, you may have some exposed cable ends that need to be trimmed and sealed. This is an important step to prevent fraying and ensure the safety of your railing. To do this:
- Use cable cutters to trim the excess cable, leaving about 1-2 inches.
- Apply a small amount of epoxy or adhesive sealant to the trimmed end of the cable to prevent fraying.
- Allow the sealant to dry completely before moving on to the next step.
Painting or staining posts and other components
Another important aspect of finishing your cable railing is painting or staining the posts and other components. This not only enhances the overall aesthetic appeal of your railing but also protects the materials from weathering and wear. Here’s how to do it:
- Clean the surfaces of the posts and other components to remove any dirt or debris.
- Apply a coat of primer to ensure proper adhesion of the paint or stain.
- Allow the primer to dry according to the manufacturer’s instructions.
- Apply the paint or stain using a brush or roller, following the grain of the wood or the direction of the metal.
- Apply additional coats if necessary, allowing each coat to dry before applying the next one.
- Finish by applying a clear sealant to protect the painted or stained surfaces.
Regular maintenance and inspections to ensure longevity
To ensure the longevity and safety of your cable railing, it is important to perform regular maintenance and inspections. By doing so, you can identify any issues early on and prevent them from turning into bigger problems. Here are some maintenance tasks you should consider:
- Regularly inspect the cables, posts, and other components for signs of wear, damage, or loose fittings.
- Tighten any loose fittings or replace them if necessary.
- Clean the cables and surfaces regularly to remove dirt, grime, and other debris.
- Check the tension of the cables and adjust if needed.
- Inspect and lubricate the fittings and tensioners to ensure smooth operation.
- Keep an eye out for any signs of rust or corrosion, and take appropriate action to prevent further damage.
By following these finishing and maintenance tips, you can ensure that your cable railing on stairs remains sturdy, beautiful, and safe for years to come.
Building Code And Safety Regulations
When it comes to installing cable railing on stairs, it is crucial to understand and adhere to the local building codes and safety regulations. These codes and regulations are put in place to ensure the safety of individuals and to maintain the structural integrity of the railing. By following these guidelines, you can install cable railing on stairs that not only looks great but is also safe for use.
Understanding Local Building Codes and Regulations
The first step in installing cable railing on stairs is to familiarize yourself with the local building codes and regulations. Each municipality may have its own set of requirements, so it is essential to research and understand what is expected in your area. This step will ensure that you are compliant with the rules and regulations enforced by your local authorities.
Ensuring Compliance with Safety Standards
Alongside building codes, safety standards are another vital aspect to consider when installing cable railing on stairs. These standards are designed to prevent accidents and promote the well-being of individuals using the stairs. By adhering to these safety standards, you can provide a secure and reliable railing system that meets the expectations.
Here are some key points to keep in mind when ensuring compliance with safety standards:
- Proper cable spacing: The spacing between each cable should be in accordance with the safety guidelines. This ensures that small children or pets cannot slip through the gaps.
- Sufficient tension: The cables should be tensioned properly to prevent sagging, which can compromise the safety of the railing.
- Secure anchoring: The posts and anchor points should be securely installed to withstand the required load and prevent any wobbling or instability.
- Height requirement: The height of the railing should meet the specified requirements to prevent falls and provide adequate support.
By taking these measures to ensure compliance with safety standards, you can create a cable railing system on your stairs that not only meets the necessary regulations but also provides a safe and secure environment for everyone in your home.
Maintenance And Cleaning Of Cable Railing
When it comes to maintaining and cleaning cable railing on stairs, proper care is essential to prolong its lifespan and keep it looking its best. By following recommended cleaning methods for different materials and regularly inspecting and replacing damaged cables or fittings, you can ensure the safety and durability of your cable railing.
Recommended Cleaning Methods for Different Materials
As cable railing is available in various materials such as stainless steel, aluminum, and bronze, each requires different cleaning techniques to maintain its appearance and structural integrity.
Stainless Steel Cable Railing:
To clean stainless steel cable railing, start by removing any loose dirt or debris with a soft brush or cloth. Then, mix a mild detergent with warm water in a bucket and use a sponge or non-abrasive cloth to gently scrub the surface. Make sure to rinse thoroughly with clean water to remove any residue. Avoid using harsh chemicals, abrasive cleaners, or steel wool, as these can scratch or corrode the stainless steel.
Aluminum Cable Railing:
To clean aluminum cable railing, begin by wiping away any loose dirt or grime with a cloth or soft brush. Then, create a solution of mild soap and warm water in a bucket. Dip a sponge or cloth into the solution and gently scrub the railing to remove dirt and stains. Rinse thoroughly with clean water and dry with a soft cloth. Avoid using abrasive cleaners or scrub brushes that may scratch the aluminum surface.
Bronze Cable Railing:
When cleaning bronze cable railing, start by dusting off any loose dirt or debris with a soft cloth. Then, mix a solution of mild soap and warm water in a bucket. Use a soft cloth or sponge to moisten the railing with the soapy solution and gently scrub away dirt or stains. Rinse thoroughly with clean water and dry with a soft cloth. Avoid using abrasive cleaners, acidic substances, or abrasive cleaning tools, as these can damage the bronze finish.
Inspecting and Replacing Damaged Cables or Fittings
To ensure the safety and functionality of your cable railing, it’s important to regularly inspect and replace any damaged cables or fittings. Damaged cables or fittings can weaken the railing system and compromise its ability to withstand tension and load. Here’s how you can effectively inspect and replace damaged components:
- Visual Inspection: Begin by visually inspecting the entire length of the cable railing system, looking for any signs of wear, fraying, or corrosion. Pay close attention to areas where cables connect to fittings, as these are common points of stress.
- Tension Test: If you notice any loose cables, perform a tension test by gently pushing or pulling on the cable. A properly tensioned cable should not easily move or deflect. If a cable feels loose or shows signs of excessive movement, it may need to be replaced.
- Replacing Damaged Cables or Fittings: If you identify any damaged cables or fittings during the inspection, it’s crucial to replace them promptly. Contact a professional cable railing installer or supplier to ensure you obtain the correct replacement parts and follow the manufacturer’s instructions for installation.
Regular maintenance and timely replacement of damaged cables or fittings will help to ensure the longevity of your cable railing system and maintain its safety and aesthetic appeal. By following these tips and techniques, you can keep your cable railing on stairs in excellent condition for years to come.
Enhancing The Aesthetic Appeal Of Cable Railing
When it comes to home improvement projects, installing cable railing on stairs not only offers a sleek and modern look but also enhances the overall aesthetic appeal of your living space. Cable railing is known for its clean lines, unobstructed views, and versatility. In this article, we will explore various ways to further enhance the visual appeal of your cable railing installation, including choosing the right cable and post finishes and adding accessories and decorative elements.
Choosing the right cable and post finishes
One of the key elements in enhancing the aesthetic appeal of your cable railing is selecting the right cable and post finishes. Here are some factors to consider:
- Cable Finishes: Opt for a finish that complements your home’s interior or exterior decor. Some popular options include stainless steel, brushed nickel, black powder-coated, or bronze.
- Post Finishes: Like cable finishes, the choice of post finishes plays a vital role in the visual impact of your cable railing. Whether you prefer a sleek and glossy look or a textured and rustic appearance, there are various options to suit your style. Consider finishes like polished stainless steel, matte black, or even wood for a natural and warm touch.
Adding accessories and decorative elements
To further elevate the aesthetic appeal of your cable railing installation, consider adding various accessories and decorative elements. Here are a few ideas:
- Post Caps: Enhance the look of your posts by adding stylish post caps. These decorative elements come in different shapes and materials, such as metal or wood, allowing you to customize the appearance of your cable railing.
- Handrail Options: Consider incorporating a handrail to not only provide safety but also add a touch of elegance. Choose from materials like wood, stainless steel, or glass, depending on your desired aesthetic and budget.
- Planters or Flower Boxes: Integrate greenery into your cable railing installation by attaching planters or flower boxes to the railing posts. This not only adds a pop of color but also creates a visually appealing contrast between the natural elements and the sleek cable railing.
By carefully selecting the right cable and post finishes and incorporating various accessories and decorative elements, you can enhance the aesthetic appeal of your cable railing on stairs. Remember, the key is to consider your personal style, existing home decor, and the overall desired ambiance of your living space. Take your time to explore different options and create a cable railing installation that not only looks visually appealing but also reflects your unique sense of style.
Frequently Asked Questions For How To Install Cable Railing On Stairs
What Is The Easiest Cable Railing To Install?
The easiest cable railing to install is the pre-assembled cable railing system. With all components already assembled, it saves installation time and effort. Simply attach the pre-drilled posts, thread the cables through the holes, and secure them with the provided hardware.
Is Cable Railing Hard To Install?
No, the cable railing is not hard to install. It is a relatively straightforward process that can be done by following the instructions provided. With basic tools and a bit of patience, you can easily install a cable railing system.
How Far Apart Should Cable Be On Handrail?
Cables on handrails should be spaced evenly, with a recommended distance of 3 to 4 inches apart. This provides sufficient stability and safety.
What Is The Cable Spacing For Stairs?
The cable spacing for stairs depends on local building codes and regulations. It is important to consult with your local authorities or a professional to determine the specific requirements for your area. Compliance with these guidelines ensures the safe and secure installation of stair cables.
Conclusion
In a nutshell, installing cable railing on stairs can add a modern and sleek touch to your home design. By following the step-by-step process outlined in this guide, you can achieve a professional and secure installation. Whether you’re a DIY enthusiast or hiring a professional, cable railing provides both style and functionality.
So, go ahead and transform your staircase into a stunning focal point that will impress all who enter your home. Don’t wait any longer – get started now!
