Install wooden steps by measuring and marking the location, digging holes for the support posts, setting the posts in concrete, attaching the stringers, and securing the steps to the stringers. Wooden steps are a great addition to any outdoor space, providing both function and aesthetic appeal.
Whether you want to enhance the access to your deck, garden, or patio, installing wooden steps can be a relatively simple process. By following a few basic steps, you can create a sturdy and durable set of steps that will withstand the test of time.
We will guide you through the process of installing wooden steps, from measuring and marking the location to securing the steps in place. Let’s get started!
Planning For Wooden Steps Installation
Before diving into the process of installing wooden steps, it is essential to have a well-thought-out plan in place. Without proper planning, you may encounter unnecessary roadblocks along the way or end up with a final result that falls short of your expectations. This section will walk you through the crucial steps involved in planning for wooden steps installation.
Assessing the area where you intend to install your wooden steps is the first step in the planning process. Take a close look at the space and consider factors such as the terrain, existing structures, and any potential obstacles that might affect the installation. By doing so, you can anticipate and address these issues in advance, ensuring a smooth installation process.
Once you have assessed the area, the next step is to measure the space accurately. Using a tape measure, measure the width and depth of the area where the steps will be placed. Keep in mind that the depth of each step should provide a comfortable and safe stride, typically around 11 inches.
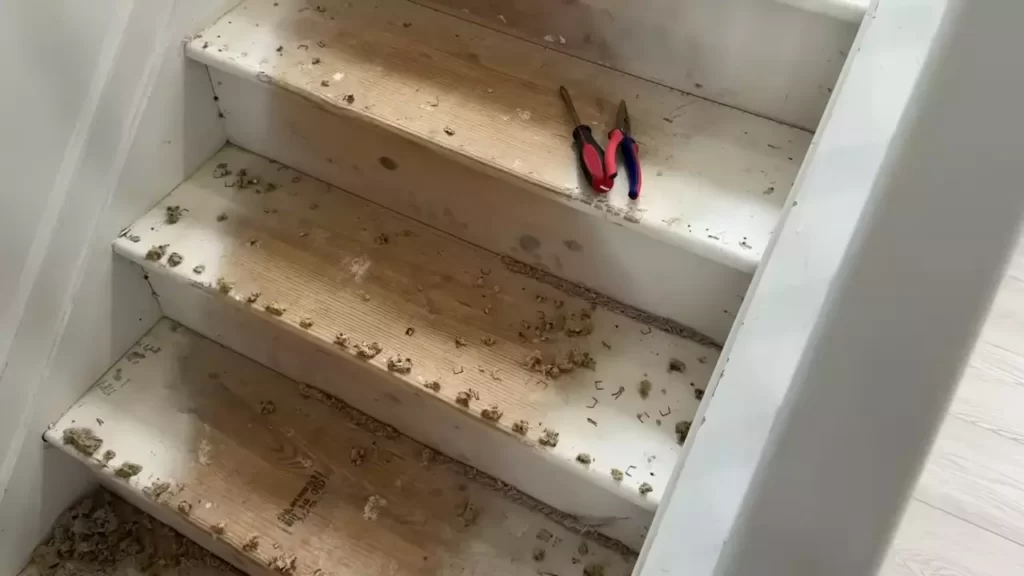
Assessing The Area And Measuring The Space
Understanding the requirements for wooden steps
Installing wooden steps can be a great way to enhance the aesthetics and functionality of your outdoor space. However, before you dive into the installation process, it’s important to assess the area and measure the space to ensure a proper fit. This will not only help you determine the number of steps needed but also ensure that the dimensions are accurate for a safe and secure installation.
Evaluating the space and determining the number of steps needed
To assess the area and determine the number of steps needed, start by visualizing the final look and functionality of your wooden steps. Consider the overall height of the area, the transition between different levels, and the desired rise and run of each step.
Next, walk around the area and carefully evaluate the slope and terrain. Take note of any potential obstructions such as trees, plants, or existing structures that may affect the placement and layout of your steps.
Once you have a clear understanding of the space, you can calculate the number of steps needed. One way to do this is by dividing the total height of the area by the desired rise (typically between 6-8 inches) of each step. Remember to factor in the landing space at the top and bottom of the staircase for a comfortable and safe ascent and descent.
Measuring the length, width, and height of the area
With the number of steps determined, it’s time to measure the length, width, and height of the area. This will ensure that each step fits perfectly and provides a seamless transition between different levels.
Start by measuring the overall length of the area where the steps will be installed. This can be done using a measuring tape or, for longer distances, a measuring wheel. Be sure to account for any curves or turns in the area when taking measurements.
Next, measure the width of the area. This will determine the width of each individual step and can be adjusted based on personal preference and space constraints.
Lastly, measure the height of the area. This will help you determine the exact rise of each step and ensure a consistent and comfortable staircase.
By carefully assessing the area and measuring the space, you can lay the foundations for a successful wooden step installation. Taking the time to understand the requirements and evaluate the space will not only result in a visually appealing staircase but also a safe and functional addition to your outdoor space.
Gathering The Necessary Tools And Materials
Gathering the necessary tools and materials is the first step towards successfully installing wooden steps. Before diving into the installation process, it’s crucial to ensure that you have all the tools and materials needed to complete the task efficiently. In this section, we will provide you with a comprehensive list of tools required for the installation process and help you identify the materials needed, such as wooden boards and screws.
Listing the tools required for the installation process
To install wooden steps, you will need the following tools:
- Drill machine: A drill machine is essential for creating holes to secure the wooden boards in place. Make sure you have a drill with a bit that is suitable for your screws.
- Measuring tape: Accurate measurements are crucial for achieving a level and balanced set of wooden steps. A measuring tape will help you measure the dimensions and ensure precise cuts.
- Circular saw: A circular saw is ideal for cutting the wooden boards to the desired sizes. This power tool allows for efficient and clean cuts, making your installation process much easier.
- Screwdriver: Depending on the type of screws you’re using, you may need either a Phillips or flathead screwdriver. A screwdriver is essential for driving the screws into the wooden boards securely.
- Level: A level is crucial for ensuring that your wooden steps are perfectly horizontal and even. It will help you maintain the integrity of the staircase and provide stability.
- Safety goggles and gloves: Safety should always be a priority when working with tools. Protect your eyes with safety goggles and your hands with gloves to prevent any accidents or injuries.
Identifying the materials needed, such as wooden boards and screws
In addition to the tools mentioned above, you will need the following materials to install wooden steps:
- Wooden boards: Choose high-quality wood boards that are suitable for outdoor use. Opt for a sturdy wood type that can withstand the weight and weather conditions.
- Screws: Select screws that are specifically designed for outdoor applications. Ensure that the length of the screws is appropriate to securely attach the wooden boards to the stairs’ support structure.
- Wood sealer or stain: To protect your wooden steps from moisture and sun damage, consider applying a wood sealer or stain. This will enhance the durability and aesthetic appeal of your steps.
Ensure all the necessary components are available before starting the installation process. Having everything ready will help you complete the task smoothly and efficiently. Double-check the list of tools and materials to avoid any delays or interruptions during the installation process.
Remember, the key to a successful installation lies in thorough preparation. By gathering the necessary tools and materials, you’re setting the foundation for flawless wooden steps that will stand the test of time.
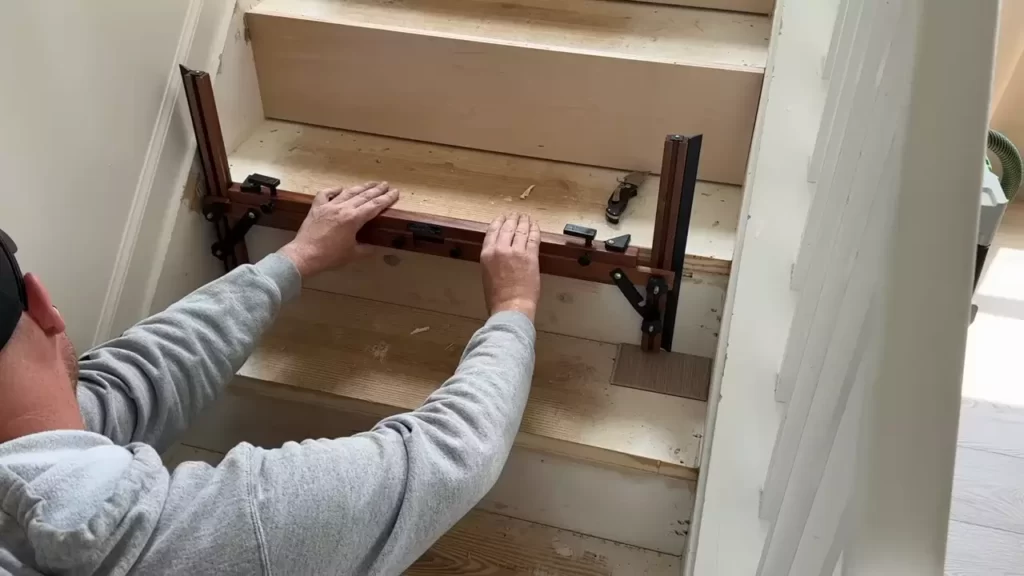
Preparing The Site For Installation
Before you begin the installation process for wooden steps, it is crucial to prepare the site to ensure a smooth and stable foundation. This involves clearing the designated area of debris and obstructions, leveling the ground, and removing any existing steps or structures. By following these steps, you can help to ensure a successful installation and a safe and durable set of wooden steps.
Clearing the designated area of debris and obstructions
The first step in preparing the site is to clear the designated area of any debris or obstructions. This includes removing rocks, sticks, and any other objects that may hinder the installation process or pose a safety risk. Take the time to thoroughly inspect the area and clear away any potential obstacles. This will help to create a clean and clear space for the installation of your wooden steps.
Leveling the ground for a stable foundation
Once the area is clear, the next step is to level the ground to create a stable foundation for your wooden steps. Use a shovel or garden hoe to remove any high spots and fill in any low spots. Pay close attention to the slope of the ground and make any necessary adjustments to ensure that the steps will be level and safe to use. A level ground will provide a solid base for your steps and help prevent any potential issues in the future.
Removing any existing steps or structures
If there are any existing steps or structures in the designated area, it is important to remove them before proceeding with the installation. This may involve breaking down old steps, dismantling structures, or removing any attachments that may be in the way. Ensure that the area is completely cleared before you begin the installation of your new wooden steps. By removing any existing obstacles, you can create a clean slate for your project and avoid any potential complications or safety hazards.
Now that you have prepared the site for installation, you are ready to move on to the next step in the process. Make sure to refer to the installation instructions provided by the manufacturer to ensure that you are installing your wooden steps correctly and safely.
Constructing The Wooden Steps
When it comes to adding wooden steps to your outdoor space, it’s important to ensure that they are not only functional but also aesthetically pleasing. Constructing the wooden steps requires careful planning and attention to detail. In this section, we will guide you through the process of building the foundation and base, installing the risers and treads, and securing the steps while adding finishing touches to create sturdy and beautiful steps that will stand the test of time.
Building the foundation and base
The first step in constructing wooden steps is to build a strong foundation and base. This will provide stability and support for the steps. Start by clearing the area where the steps will be installed and ensure that the ground is level and free from debris. Mark the positions of the steps using stakes and string, and dig holes at each step location.
Next, create a sturdy base by pouring concrete into each hole. Use a level to ensure that the tops of the concrete bases are even. Allow the concrete to fully cure according to the manufacturer’s instructions before moving on to the next step.
Installing the risers and treads
Once the foundation and base are in place, it’s time to install the risers and treads. Risers are the vertical parts of the steps, while treads are the horizontal parts that you step on. Measure the height and depth of each step, ensuring equal measurements for a uniform look.
Using a circular saw, cut the risers to the desired height and the treads to the desired depth. Apply a coat of wood preservative to protect the steps from moisture and rot. Then, secure the risers to the base using construction adhesive and nails. Attach the treads on top of the risers, making sure that they are level and evenly spaced.
Securing the steps and adding finishing touches
With the risers and treads in place, it’s time to secure the steps and add finishing touches. Use a level to check the alignment of the steps, adjusting as necessary. Secure the steps to the base using screws or nails, ensuring a strong and secure connection.
Once the steps are securely attached, add any desired finishing touches. This may include applying a protective sealant or stain to enhance the wood’s natural beauty and protect it from the elements. Consider adding non-slip strips or treads to improve safety, especially if the steps will be used in wet or icy conditions.
In conclusion, constructing wooden steps involves building a solid foundation and base, installing the risers and treads, securing the steps, and adding finishing touches. By following these steps and paying attention to the details, you can create beautiful and functional wooden steps that will enhance your outdoor space for years to come.
Building The Foundation And Base
When it comes to installing wooden steps, building a solid foundation and base is crucial for their stability and longevity. In this section, we will discuss the key steps involved in creating a strong foundation and base for your wooden steps.
Determining the appropriate foundation type
Before you start the installation process, it’s essential to determine the appropriate foundation type for your wooden steps. This will depend on various factors such as the soil conditions, climate, and local building codes. Here are a few common foundation types to consider:
| Foundation Type | Description |
|---|---|
| Concrete slab | A solid concrete base that provides excellent stability and durability. |
| Concrete piers | Individual concrete supports that are strategically placed to distribute the weight of the wooden steps. |
| Poured concrete footings | Dug holes filled with concrete to support the weight of the steps. |
| Gravel base | A layer of gravel that provides a stable and well-draining base for the wooden steps. |
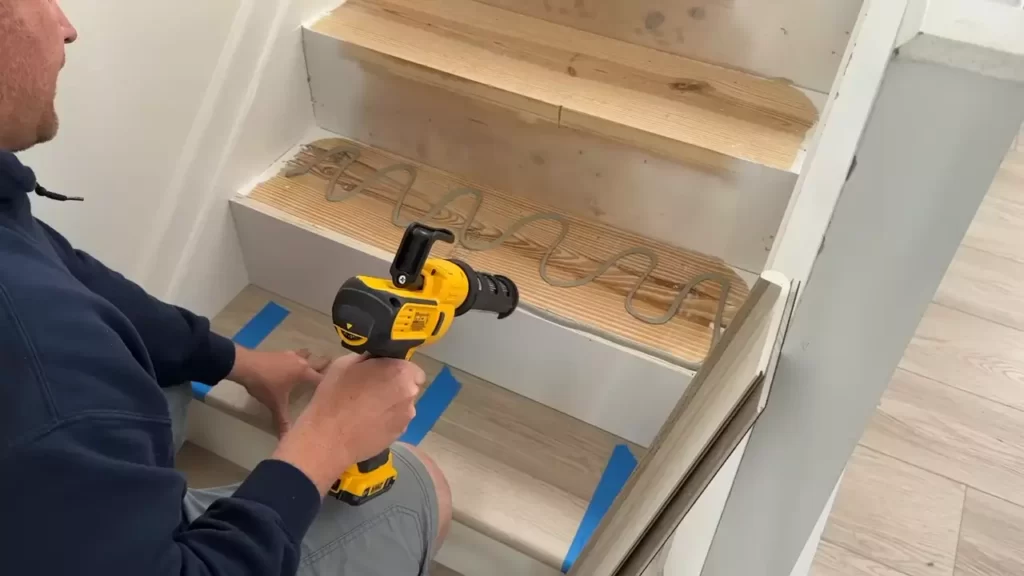
Creating a sturdy base using concrete or gravel
Once you have determined the appropriate foundation type, it’s time to create a sturdy base for your wooden steps. This can be accomplished using either concrete or gravel:
- If you have opted for a concrete foundation, start by excavating the area according to the building codes and pouring the concrete. Ensure that the surface is level and allow it to cure properly before proceeding further.
- If you have chosen a gravel base, begin by excavating the area to the desired depth and width. Remove any vegetation or debris, then evenly spread a layer of gravel and compact it using a tamper. Repeat this process until you achieve the desired height and ensure the surface is level.
Ensuring proper drainage for long-lasting steps
Proper drainage is critical for the longevity of your wooden steps. Without proper drainage, water can accumulate, causing the wood to rot and the steps to become unstable. Here are a few ways to ensure proper drainage:
- Ensure that the foundation or base slopes away from the steps to allow water to naturally flow away.
- If necessary, install a French drain or drain pipe system to redirect water away from the steps.
- Consider adding a layer of landscape fabric or gravel beneath the wooden steps to aid in drainage.
By following these steps to create a solid foundation and base for your wooden steps, you can ensure their stability and longevity. Taking the time to plan and execute this crucial stage of the installation process will result in safe and durable steps for years to come.
Installing The Risers And Treads
Installing the risers and treads is a crucial step in the process of installing wooden steps. This is where you will create the foundation of your staircase, ensuring that each step is secure, even, and properly aligned. In this section, we will guide you through the process of measuring and cutting the risers to the correct size, attaching them securely to the foundation, and installing the treads evenly and securely. Let’s get started!
Measuring and cutting risers to the correct size
The first step in installing the risers is to measure and cut them to the correct size. To do this, you will need a measuring tape and a circular saw. Make sure to wear protective eyewear and gloves while cutting the risers.
- Start by measuring the height of each riser, ensuring that they are all the same size for a uniform appearance.
- Using the measurements, mark the risers on the wooden boards.
- Set up your circular saw with a fine-toothed blade, aligning it with the marked lines.
- Take your time and make slow, controlled cuts along the marked lines to avoid any splintering or uneven edges.
Attaching the risers securely to the foundation
Once you have cut the risers to the correct size, it’s time to attach them securely to the foundation. This ensures the stability and durability of your wooden steps. Here’s how:
- Align the first riser with the bottom of the staircase, ensuring it is plumb and level.
- Use a drill to make pilot holes on the riser and then secure it in place with screws. Make sure to use long enough screws to penetrate the foundation and provide a strong connection.
- Repeat the above steps for each riser, making sure to measure and align them properly.
Installing the treads evenly and securely
Now that the risers are securely in place, it’s time to install the treads. The treads are the actual steps that you will be walking on, so it’s important to ensure they are installed evenly and securely. Follow these steps:
- Measure and mark the length and width of each tread, ensuring they are all the same size.
- Apply construction adhesive to the top of each riser, creating a solid base for the treads.
- Place each tread on top of the risers, aligning them with the marks you made earlier.
- Use a nail gun or screws to secure the treads to the risers, making sure they are firmly attached.
By following these steps, you will successfully install the risers and treads of your wooden steps. Remember to take your time, measure accurately, and ensure everything is securely fastened for a safe and long-lasting staircase.
Securing The Steps And Adding Finishing Touches
When it comes to installing wooden steps, it is crucial to not only ensure their stability but also add the perfect finishing touches that enhance both the appearance and functionality. In this article, we will discuss three important steps in securing the wooden steps and adding those essential finishing touches. Reinforcing steps with brackets or anchors for stability, applying a protective coat or finish to the wooden steps, and adding handrails and balusters for safety and aesthetics.
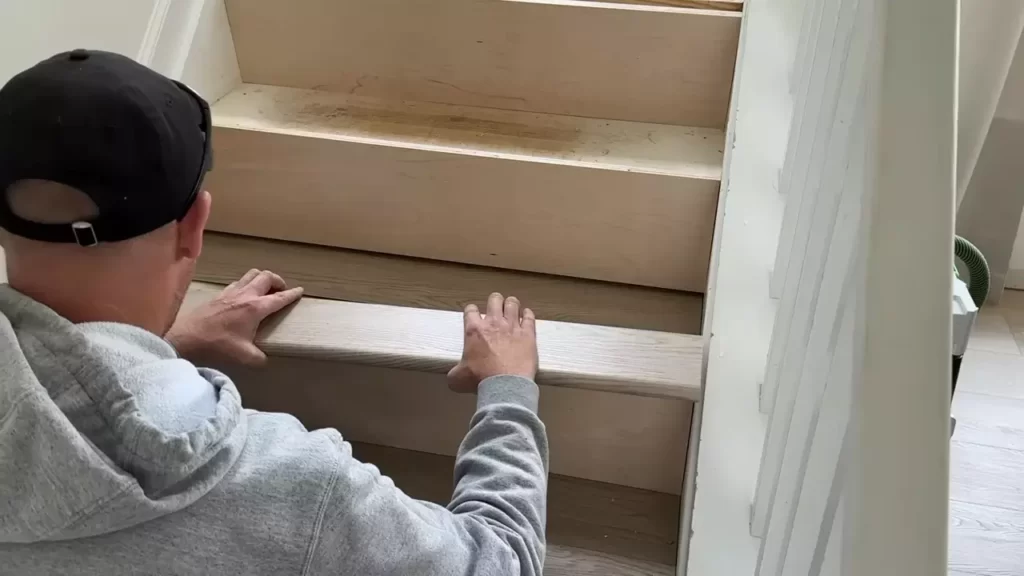
Reinforcing steps with brackets or anchors for stability
One key element to consider when installing wooden steps is reinforcing them with brackets or anchors. This ensures the steps remain stable and secure, providing a reliable foundation for anyone using them. Brackets or anchors can be installed on the underside of the steps, connecting them securely to the ground or supporting structure.
To reinforce the steps with brackets, follow these steps:
- Measure and mark the exact location for the brackets.
- Pre-drill holes for the brackets.
- Secure the brackets with screws or bolts, ensuring they are properly aligned and flush with the steps.
- Repeat the process for each step, ensuring consistent reinforcement throughout.
If anchors are preferred, follow these steps:
- Dig holes underneath each step, ensuring they are deep enough to support the anchors.
- Place the anchors in the holes and fill them with concrete or other suitable materials.
- Allow the concrete to dry and cure fully before using the steps.
Applying a protective coat or finish to the wooden steps
To prolong the lifespan of your wooden steps and enhance their natural beauty, it is important to apply a protective coat or finish. This not only protects them from the damaging effects of moisture, sunlight, and wear but also adds a polished look to the overall appearance. Here’s a step-by-step guide on how to apply a protective coat or finish:
- Clean the wooden steps thoroughly, removing any dirt, dust, or debris.
- Sand the steps gently to smooth out any rough surfaces or imperfections.
- Choose a suitable protective coat or finish, such as varnish, polyurethane, or outdoor wood sealer.
- Apply the coat or finish evenly and carefully, following the manufacturer’s instructions.
- Allow sufficient drying time between each coat, applying multiple coats if necessary.
Adding handrails and balusters for safety and aesthetics
Handrails and balusters not only provide a visual appeal to the wooden steps but also ensure safety for anyone using them. Installing handrails and balusters is a crucial step, especially if your steps are higher or located in an area where safety is a concern. Here’s how you can add handrails and balusters:
- Measure and mark the desired location for the handrails and balusters.
- Attach the handrail brackets to the supporting structure securely using screws or bolts.
- Slide the handrail onto the brackets, ensuring it is level and centered.
- Secure the handrail in place by tightening the screws or bolts.
- Attach the balusters to the handrail and the lower rail, spaced evenly to ensure safety.
- Secure the balusters using screws or nails, ensuring they are firmly in place.
Maintaining And Extending The Lifespan
Maintaining and Extending the Lifespan
Proper maintenance is essential to ensure the longevity of your wooden steps. By taking a proactive approach, you can prevent damage caused by wear and tear, moisture, and pests. In this section, we will explore three key aspects of maintaining wooden steps: cleaning and maintenance, protecting them from moisture and pests, and regular inspections and repairs.
Cleaning and maintaining wooden steps
Regular cleaning is vital to keep your wooden steps in top condition. Follow these simple steps to keep them looking great:
- Sweep away debris and dirt using a stiff broom or brush.
- Remove any stains or marks using a mild detergent and warm water.
- Rinse thoroughly with clean water, ensuring all detergent is removed.
- Dry the steps completely with a clean cloth or allow them to air dry.
- Apply a protective coat of paint, stain, or sealant to enhance their durability and appearance.
To maintain your steps effectively, make sure to clean them at least once a month or more frequently if they are exposed to heavy foot traffic or inclement weather.
Protecting the steps from moisture and pests
Moisture and pests can cause significant damage to wooden steps. Here are some measures you can take to protect them:
- Ensure proper drainage around the steps by clearing away leaves and debris.
- Seal any cracks or gaps to prevent water infiltration.
- Regularly inspect for signs of termite or insect infestations and treat as necessary.
- Consider installing gutter systems above the steps to divert water away.
- Apply a waterproofing sealant to provide an additional layer of protection against moisture.
By taking these preventive measures, you can safeguard your wooden steps and extend their lifespan.
Preventing wear and tear with regular inspections and repairs
Regular inspections and repairs are crucial to prevent wear and tear on your wooden steps. Here’s what you should do:
- Inspect the steps for any loose boards, nails, or screws. Tighten or replace them if necessary.
- Check for signs of rot or decay, such as soft spots or discoloration. Replace affected areas promptly.
- Sand down any rough surfaces and apply a fresh coat of sealant or paint to maintain their smoothness.
- Consider adding non-slip tread covers to enhance safety and reduce the risk of accidents.
Addressing these issues promptly will help prevent further damage and ensure the stability and safety of your wooden steps.
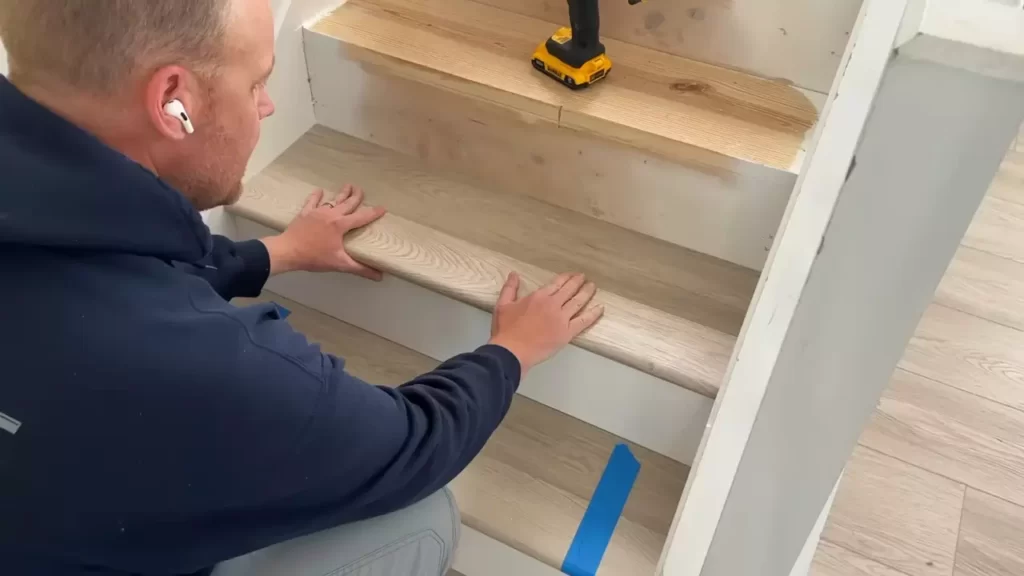
Cleaning And Maintaining Wooden Steps
Cleaning and maintaining wooden steps is essential for their longevity and aesthetic appeal. Regular care can help prevent dirt, debris, and weathering from damaging the wood, keeping your steps looking beautiful for years to come. In this section, we’ll explore some simple yet effective ways to clean and maintain wooden steps, including removing dirt and debris regularly, sweeping or power washing when necessary, and applying wood sealant or stain for added protection against weathering.
Removing dirt and debris regularly
To keep your wooden steps looking clean and well-maintained, it’s important to remove dirt and debris on a regular basis. This prevents the accumulation of particles that can scratch or damage the wood’s surface over time. Here are some steps you can follow:
- Sweep the steps thoroughly using a broom with stiff bristles. Start from the top and work your way down, ensuring you remove all the loose dirt and dust. Pay extra attention to the crevices and corners where dirt tends to accumulate.
- Use a soft bristle brush or an old toothbrush to gently scrub any stubborn dirt or stains. Make sure to use a mild cleaning solution, such as diluted dish soap or wood cleaner. Avoid using harsh chemicals or abrasive cleaners, as they can damage the wood.
- Rinse the steps with clean water using a hose or a bucket. Be careful not to saturate the wood, as excessive moisture can lead to rot or warping. Allow the steps to air dry completely before proceeding to the next step.
Sweeping or power washing the steps when necessary
In addition to regular dirt removal, occasionally sweeping or power washing the steps can help eliminate deeper stains or grime. Here’s how to do it properly:
- If your steps have accumulated a significant amount of dirt or stains that cannot be removed by normal sweeping, consider using a power washer. Before you start, ensure that the pressure is set to a level suitable for your wooden steps to avoid causing any damage.
- Hold the power washer nozzle at a distance from the steps and move it in a sweeping motion to remove the dirt and grime. Start from the top step and work your way down, making sure to cover the entire surface evenly.
- Once you’ve finished power washing, inspect the steps for any remaining stains or dirt. If necessary, repeat the process or use a soft brush to scrub away any stubborn areas.
- After power washing or sweeping, allow the steps to dry completely before applying any protective coatings or sealants.
Applying wood sealant or stain to protect against weathering
To ensure your wooden steps withstand the elements and retain their natural beauty, it’s crucial to apply a protective wood sealant or stain. This creates a barrier against moisture, UV rays, and other environmental factors that can cause the wood to deteriorate. Follow these steps for applying sealant or stain:
- Clean the steps thoroughly and make sure they are completely dry.
- Choose a high-quality wood sealant or stain that is specifically formulated for outdoor use. Read and follow the manufacturer’s instructions carefully.
- Using a paintbrush or roller, apply a thin and even coat of the sealant or stain on the entire surface of the steps. Make sure to work in the direction of the wood grain for a smooth finish.
- Allow the first coat to dry as per the manufacturer’s instructions.
- If desired, apply a second coat for added protection and a more vibrant color.
- Once the sealant or stain is dry, periodically check the steps for any signs of wear or damage. If needed, reapply the protective coating to ensure the longevity of your wooden steps.
By following these simple steps for cleaning and maintaining your wooden steps, you can keep them looking pristine and protected against the elements. Taking the time to care for your steps will not only enhance their appearance but also extend their lifespan, providing you with safe and visually appealing entryways to your home.
Protecting The Steps From Moisture And Pests
When it comes to installing wooden steps, it is crucial to take measures to protect them from moisture and pests. This not only helps in maintaining the durability and longevity of the steps but also ensures the safety of those using them. In this section, we will discuss some essential steps you can take to safeguard your wooden steps from potential water damage and pests.
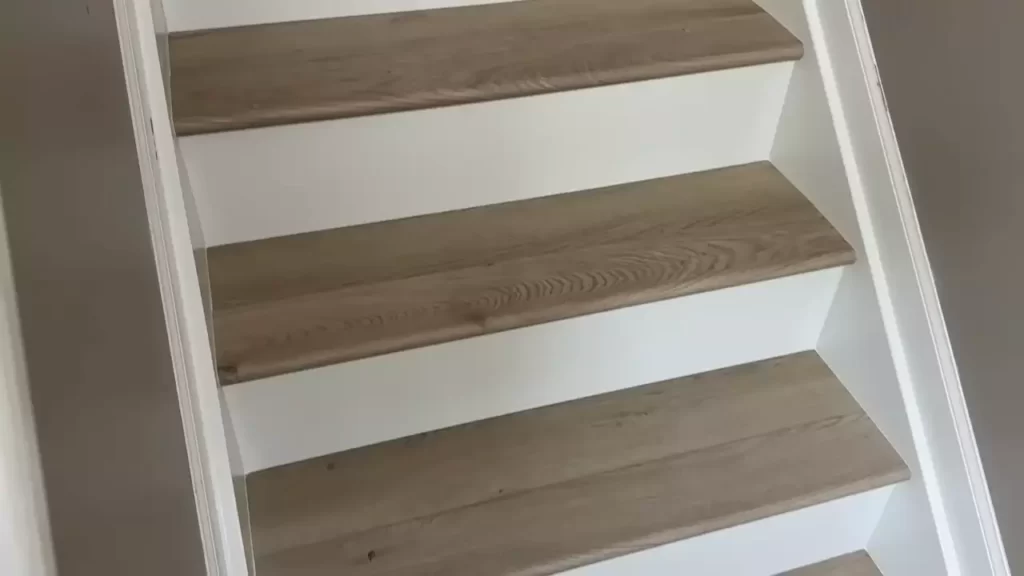
Applying waterproofing sealant to prevent water damage
One of the most effective ways to protect wooden steps from moisture is by applying a waterproofing sealant. A waterproofing sealant creates a protective barrier on the surface of the wood, preventing water from seeping in and causing damage. Here’s how you can apply a waterproofing sealant:
- Start by cleaning the steps thoroughly to remove any dirt or debris.
- Apply the waterproofing sealant according to the manufacturer’s instructions, using a brush or sprayer.
- Ensure that you cover all surfaces of the steps, including the top, sides, and underneath, to create a complete seal.
- Allow the sealant to dry completely before allowing any foot traffic on the steps.
By regularly applying a waterproofing sealant, you can protect your wooden steps from water damage and prolong their lifespan.
Using pest repellents or treatments to deter insects and pests
Insects and pests can cause significant damage to wooden steps if not addressed promptly. To deter them from infesting your steps, you can use pest repellents or treatments. Here are a few options you can consider:
- Apply a pest repellent spray specifically designed for outdoor wooden surfaces. These sprays contain ingredients that repel common pests like termites, ants, and beetles.
- Use natural pest deterrents such as citrus peels, vinegar, or cedar oil. These natural remedies can help discourage pests from making your wooden steps their home.
- If you notice signs of an existing pest infestation, it’s essential to consult a professional pest control service to assess the situation and recommend appropriate treatments.
Taking proactive measures to deter pests from your wooden steps can help prevent costly damages and maintain the visual appeal of your outdoor space.
Checking for signs of rot or decay and addressing promptly
Wood is susceptible to rot and decay, especially when exposed to moisture for extended periods. Regularly checking your wooden steps for signs of rot or decay is crucial to catch any issues early on and address them promptly. Here are some key signs to look out for:
| Signs of Rot or Decay | Actions to Take |
|---|---|
| Soft or spongy spots on the wood | Remove the affected area and replace it with new wood. |
| Discoloration or black spots | Inspect the area thoroughly and determine the extent of the damage before taking appropriate action. |
| Visible fungus or mold growth | Apply a fungicide or contact a professional to address the issue. |
By addressing signs of rot or decay promptly, you can prevent further damage and ensure the structural integrity of your wooden steps.
Protecting your wooden steps from moisture and pests is an essential part of the installation process. By following the steps mentioned above and taking proactive measures to address any potential issues, you can enjoy durable and beautiful wooden steps for years to come.
Preventing Wear And Tear With Regular Inspections And Repairs
Proper maintenance is crucial to ensure the longevity and safety of your wooden steps. By regularly inspecting and repairing any signs of damage or wear, you can prevent minor issues from turning into major headaches. This section will guide you through the essential steps of inspecting for damage, repairing loose boards or broken parts, and performing routine maintenance to extend the lifespan of your steps.
Inspecting the steps for signs of damage or wear
Regularly inspecting your wooden steps for signs of damage or wear is the first line of defense to prevent further deterioration. Conduct a thorough visual examination of each step, paying close attention to the following:
- Cracks or splits in the wood
- Loose or raised nails
- Rot or decay
- Uneven or sagging steps
Look for any signs of structural weakness or instability that may compromise the safety of the steps. By catching problems early on, you can address them promptly and avoid costly repairs down the line.
Repairing loose boards or broken parts promptly
If you notice any loose boards or broken parts during your inspection, it is crucial to address these issues promptly. Failing to do so can lead to further damage and even accidents. Follow these steps to repair loose boards or broken parts:
- Remove any loose or raised nails using a hammer or pry bar.
- Replace any broken or damaged boards with new ones, ensuring they are the same size and type of wood.
- Secure the boards in place using galvanized screws or nails, making sure they are flush with the surface.
- Finish the repair by sanding the board’s edges and applying a protective sealant or paint to match the rest of the steps.
Remember, prompt repairs are key to maintaining the integrity of your wooden steps and preventing further damage.
Performing routine maintenance to extend the lifespan of the steps
Performing routine maintenance is essential for extending the lifespan of your wooden steps. Follow these maintenance tips to keep your steps in optimal condition:
- Sweep the steps regularly to remove dirt, debris, and leaves that may accumulate and cause decay.
- Apply a fresh coat of protective sealant or paint every few years to shield the wood from moisture and UV rays.
- Inspect and replace any damaged or worn-out non-slip treads or grips to ensure optimal safety.
- Regularly check the stability of handrails, ensuring they are securely fastened and show no signs of damage or weakness.
- Trim tree branches or foliage that may be in close proximity to the steps to prevent excess moisture buildup and potential damage.
By incorporating these routine maintenance tasks into your schedule, you can extend the lifespan of your steps and keep them looking great for years to come.
Frequently Asked Questions On How To Install Wooden Steps
How To Build Outdoor Wooden Steps?
To build outdoor wooden steps, follow these steps:
1. Measure the area and determine the number of steps needed.
2. Gather the necessary materials such as pressure-treated lumber, screws, and a circular saw.
3. Mark and cut the stringers according to your measurements.
4. Attach the stringers to a sturdy base and secure them with screws.
5. Install the step treads and secure them to the stringers.
How Do You Install Wooden Stair Treads?
To install wooden stair treads, follow these steps:
1. Measure and mark the treads for accurate fitting.
2. Remove existing treads, if any.
3. Apply construction adhesive on the riser and attach the tread securely with nails or screws.
4. Repeat for all treads.
5. Sand and finish as desired.
How Much Does It Cost To Install Wood Steps?
Installing wood steps can cost anywhere from $300 to $1,000 per step, depending on the material, complexity, and location. It’s essential to consider additional expenses, such as labor, supplies, and any modifications required. The total cost will vary based on these factors.
What Do You Put On Outdoor Wooden Steps?
For outdoor wooden steps, you can put a coating of waterproof sealant or paint to protect them from weather damage. Additionally, adding non-slip treads or mats can improve safety. Regular cleaning and maintenance are also important to keep them looking good and durable.
Conclusion
Installing wooden steps can be a rewarding project that adds both functionality and aesthetic appeal to your space. By following the step-by-step process outlined in this guide, you can ensure a successful installation. Remember to assess the area, gather the necessary materials, measure accurately, and secure the steps properly.
With some patience and careful attention to detail, you can create a beautiful and safe set of wooden steps that will enhance your home or outdoor area for years to come.
