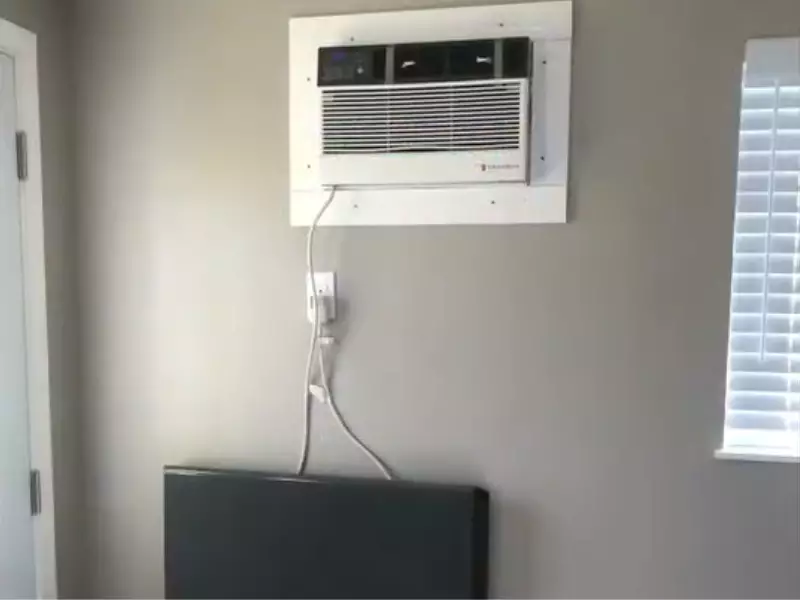
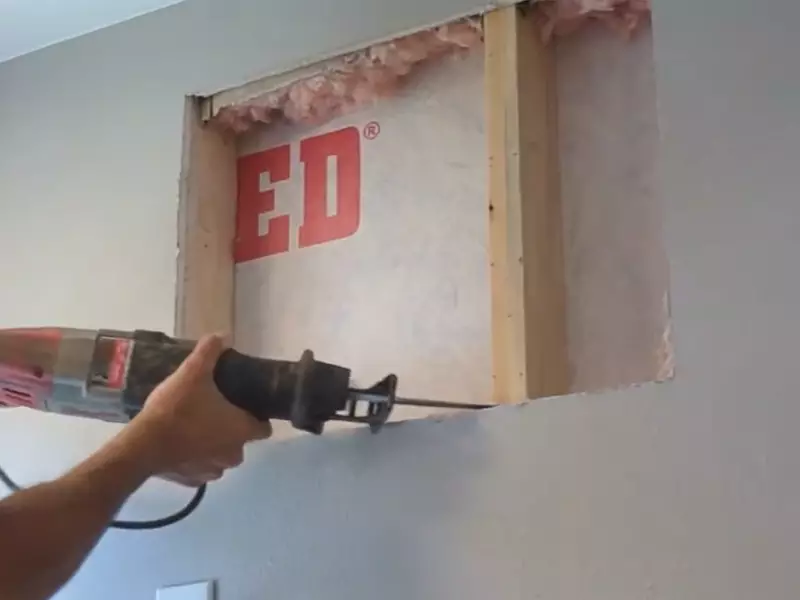
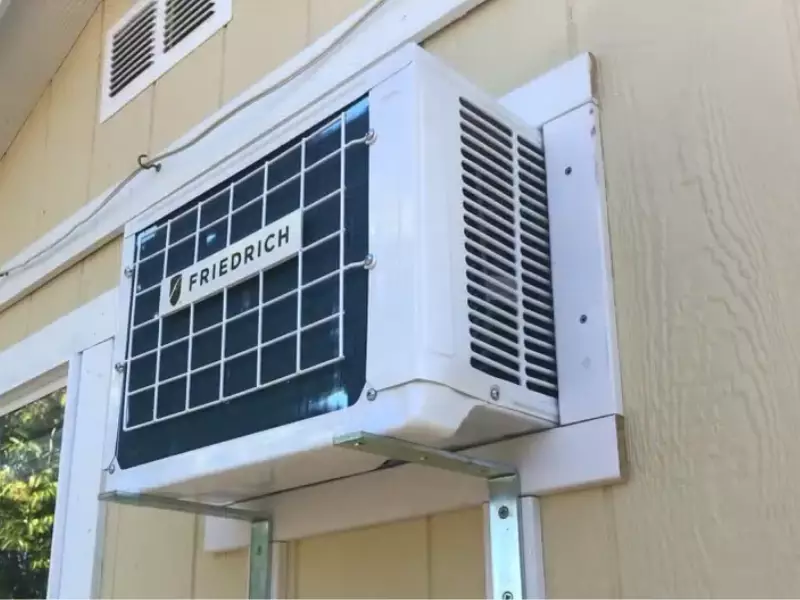
To install a window AC in a wall, follow these steps: measure and mark the desired location on the wall, cut an appropriately sized hole, mount a support bracket, secure the AC unit, and ensure proper sealing to prevent air leakage. This installation process allows you to conveniently and effectively cool your room without using a window.
Whether you’re looking to maximize window space, maintain aesthetics, or enhance security, installing a window AC unit in a wall provides a practical solution. By following these simple steps, you can enjoy the benefits of a wall-installed air conditioner for enhanced comfort and convenience.
Factors To Consider Before Installing
Before you start the installation process for your wall-mounted air conditioning unit, there are several important factors to consider. These factors will help ensure that you choose the right type of AC unit and that the installation process goes smoothly. Here are three key factors to keep in mind:
Room size and cooling capacity requirements |
Location and size of existing windows |
Evaluating the electrical setup |
|---|---|---|
| Determining the size of the room where you plan to install the AC unit is crucial. A larger room will require a unit with a higher cooling capacity to effectively cool the space. Measure the square footage of the room and refer to the manufacturer’s specifications to ensure you choose an AC unit with the appropriate cooling capacity for your needs. Investing in an AC unit that is too small for the room will result in inadequate cooling, while an oversized unit can lead to energy waste. | The location and size of the existing windows in the room are important considerations for installing a wall-mounted AC unit. The unit should be installed near a window to facilitate proper ventilation and exhaust. Check if the window opening aligns with the dimensions of the AC unit. Moreover, make sure there are no obstructions near the window that could impede the installation process. | Evaluating the electrical setup of the room is essential to ensure that there is sufficient power to support the AC unit. Wall-mounted AC units typically require a dedicated circuit and may have specific electrical requirements. Evaluate the room’s electrical capacity and consult with a professional electrician if necessary to ensure the electrical setup can accommodate the AC unit without overloading the existing circuit. |
By considering these factors before installing a wall-mounted AC unit, you can ensure that the installation is successful and that the unit will effectively cool your space. Taking the time to assess the room size, location of windows, and electrical setup will ultimately contribute to the optimal functioning and longevity of your new AC unit.
Gather The Necessary Tools And Materials
Before you start installing a window AC unit in a wall, it is important to gather all the necessary tools and materials. Having everything you need at hand will make the installation process much smoother and efficient. Here are the tools and materials that you will need:
Window AC unit
The most essential item you will need is the window AC unit itself. Ensure that you have chosen the right size and type of unit for your specific needs. Consider factors such as the size of the room and the cooling capacity required.
Measuring tape
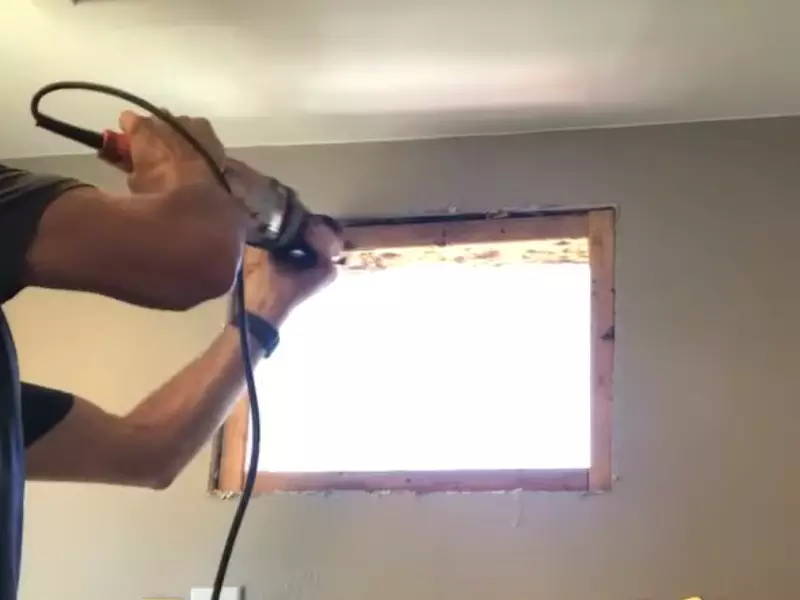
A measuring tape is crucial for taking accurate measurements of the wall and the window opening. This will help you determine the exact dimensions needed for installing the AC unit.
Screwdriver
A screwdriver is necessary for removing any screws or fasteners that may be holding the window in place. You may also need it for attaching brackets or support frames to the wall.
Level
Using a level will ensure that the AC unit is installed correctly and that it is perfectly balanced. This will prevent any issues with water drainage and the overall performance of the unit.
Brackets or support frame
Brackets or a support frame will be required to securely hold the AC unit in place. These will provide stability and prevent any movement or vibrations during operation.
Foam insulation strips
Foam insulation strips are used to seal any gaps or spaces around the AC unit. This helps to improve energy efficiency and prevents air leakage.
Caulk or sealant
Applying caulk or sealant around the edges of the AC unit will further enhance the seal and prevent any air leaks. Choose a high-quality caulk or sealant that is compatible with both the AC unit and the wall material.
By gathering all the necessary tools and materials before you begin, you will save time and ensure a successful installation of your window AC unit in the wall. This will result in a more comfortable and efficient cooling experience.
Measuring And Preparing The Window Opening
Installing a window air conditioner in a wall can be a cost-effective and efficient way to cool down your space. However, before you can enjoy the cool breeze, you’ll need to correctly measure and prepare the window opening to ensure a proper fit. In this section, we will guide you through the process step by step.
Assessing the window dimensions
The first step in preparing the window opening is to accurately measure its dimensions. This will help you determine the appropriate size of the AC unit and ensure a snug fit. Grab your measuring tape and follow these steps:
- Start by measuring the width of the window opening from one side to the other. Be sure to take measurements at the top, bottom, and middle for any discrepancies.
- Then, measure the height of the window opening from the top to the bottom. Again, take measurements at different points to ensure accuracy.
- Write down the measurements and take note of the smallest width and height values. These will be the dimensions you will use when selecting your window AC unit.
By following this simple process, you can avoid any potential headaches caused by an ill-fitting AC unit.
Cleaning and clearing the window area
Now that you have assessed the window dimensions, it’s time to prepare the window opening. Start by clearing out any obstructions and cleaning the window area to create a clean and safe installation environment. Here’s what you need to do:
- Remove any curtains, blinds, or other window coverings that may obstruct the installation process.
- Thoroughly clean the window sill, frame, and surrounding area to remove any dirt, dust, or debris that could interfere with the AC unit’s proper installation or performance.
- Check for any loose or damaged parts of the window, such as cracked panes or worn-out frames, and address these issues before proceeding further.
It’s important to create a clean and well-prepared space to ensure a smooth installation process and optimal performance of your window AC unit.
Adjusting the window sash
Depending on the type of window you have, you may need to make some adjustments to the window sash to accommodate the AC unit. Here’s what you need to do:
- If your window has a double-hung sash, carefully raise the lower sash and secure it in place using a wooden block or other suitable device.
- If your window has a sliding sash, you may need to remove the sash completely or partially to create the necessary space for the AC unit installation.
- Refer to the manufacturer’s instructions or seek professional advice if you’re unsure about how to adjust the window sash properly.
By making these adjustments, you can ensure that your window AC unit will fit securely and function optimally within the window opening.
Installing the support brackets or frame
The last step in preparing the window opening is to install the necessary support brackets or frame to provide stability and prevent any unwanted movement or accidents. Follow these steps:
- Consult the manufacturer’s instructions to determine the specific type and number of support brackets or frame required for your AC unit model.
- Attach the support brackets or frame securely to the window sill or frame, following the manufacturer’s guidelines and using the appropriate mounting hardware.
- Ensure that the brackets or frame are level and firmly in place before proceeding to install the AC unit.
Properly installing the support brackets or frame will provide the necessary stability for your window AC unit and ensure safe and efficient operation.
By measuring the window dimensions accurately, cleaning and clearing the window area, adjusting the window sash if needed, and installing the support brackets or frame correctly, you’re now ready to install your window AC unit and enjoy a comfortably cool space. Stay tuned for our next section on the actual installation process!
Inserting And Securing The Ac Unit
Now that you have prepared the wall and gathered the necessary tools and materials, it’s time to install your window AC unit. This step-by-step guide will walk you through the process of inserting and securing the AC unit, ensuring that it is properly aligned and stable for maximum performance.
Placing the AC unit in the window
The first step in installing your window AC unit is positioning it correctly in the window opening. Follow these steps:
- Open the window fully and remove any obstacles that may be in the way.
- Place the AC unit on the windowsill, ensuring that it is centered and level.
- Slowly and carefully, push the unit further into the opening until it reaches the desired depth.
Aligning the unit
Once the AC unit is in place, it’s important to ensure that it is properly aligned. Follow these steps:
- Check the sides of the unit to ensure that they are parallel to the window frame.
- Use a level to verify that the unit is positioned straight and not tilted to either side.
- Make any necessary adjustments by gently repositioning the unit until it is properly aligned.
Securing the unit in position
With the AC unit properly aligned, it’s time to secure it in position. Follow these steps:
- Refer to the manufacturer’s instructions to determine the recommended method for securing your specific AC unit.
- Depending on the design of your unit, you may need to use brackets, screws, or other locking mechanisms to hold it in place.
- Ensure that the unit is securely fastened to prevent any movement or vibration during operation.
Testing for stability
Before considering the installation complete, it’s crucial to test the stability of the AC unit. Follow these steps:
- Gently shake the unit to check for any loose fittings or signs of instability.
- Verify that the unit does not move excessively or make unusual noises when shaken.
- If any issues are detected, review the installation steps and make the necessary adjustments to ensure stability.
By following these steps to insert and secure your window AC unit, you can ensure a successful installation that will provide efficient and reliable cooling for your space.
Insulating And Sealing The Gaps
Applying Foam Insulation Strips
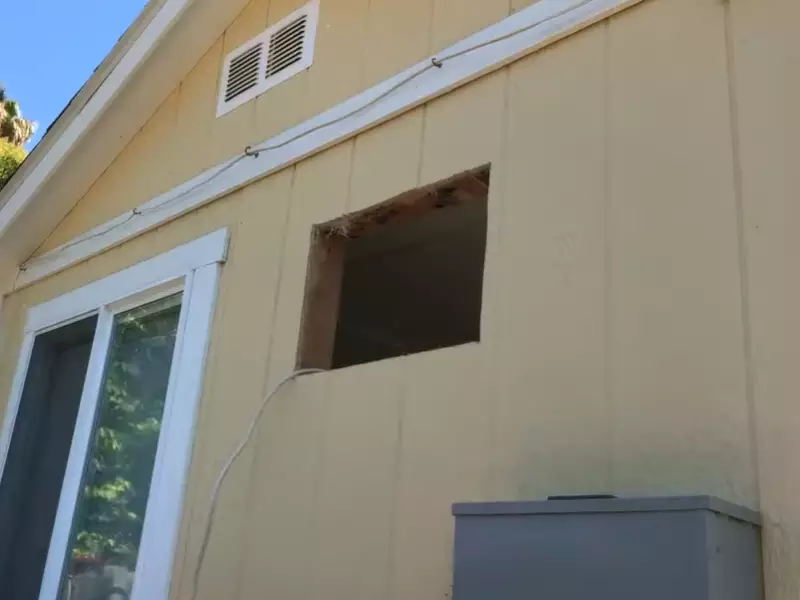
One important step in installing a window AC unit in a wall is insulating and sealing the gaps around it. This helps to prevent air leaks, improve energy efficiency, and maintain a comfortable indoor temperature. One effective method for insulating the gaps is by applying foam insulation strips.
Sealing Gaps with Caulk or Sealant
In addition to foam insulation strips, another way to seal the gaps around the window AC unit is by using caulk or sealant. This provides an extra layer of protection against air leaks and helps to create an air-tight seal. Before applying caulk or sealant, ensure that the gaps are clean and free of any debris or dust.
Ensuring Proper Insulation and Air-Tightness
To ensure proper insulation and air-tightness for your window AC installation, it is important to pay attention to detail. Make sure that the foam insulation strips are applied evenly and cover all gaps around the unit. Similarly, when applying caulk or sealant, ensure that it is applied thoroughly and fills any remaining gaps or cracks.
Additionally, it is important to carefully follow the manufacturer’s instructions for both the foam insulation strips and caulk or sealant. This will ensure that you use the proper amount and apply them correctly.
To further enhance insulation and air-tightness, you may also consider using weatherstripping around the window frame. This will help to create a tight seal when the window is closed, preventing air leaks.
In conclusion, insulating and sealing the gaps when installing a window AC unit in a wall is crucial to maximize energy efficiency and maintain a comfortable indoor environment. By applying foam insulation strips, sealing gaps with caulk or sealant, and considering additional measures like weatherstripping, you can ensure proper insulation and air-tightness.
Connecting The Electrical Components
Installing a window AC in a wall requires careful attention to detail, especially when it comes to connecting the electrical components. This step is crucial to ensure your AC unit functions properly and safely. In this section, we will guide you through the process of locating the electrical outlet, ensuring proper wiring connections, and testing the electrical setup.
Locating the electrical outlet
Before you start the installation process, it is important to locate an appropriate electrical outlet near the intended position of your wall-mounted AC. Ideally, the outlet should be within reach of the power cord provided with the unit. Additionally, it is essential to ensure that the outlet can handle the electrical load of the AC without overloading the circuit.
Ensuring proper wiring connections
Once you have identified the electrical outlet, the next step is to establish proper wiring connections. It is crucial to follow the manufacturer’s instructions and guidelines to avoid any electrical mishaps. Here is a step-by-step guide to help you through the process:
- Turn off the power: Before starting any electrical work, make sure to turn off the power supply at the main circuit breaker. This precautionary measure will protect you from any potential electrical hazards.
- Mount the electrical box: Securely mount an electrical box near the unit and route the electrical wires to it. This box will house the electrical connections and protect them from any external elements.
- Strip the wires: Carefully strip the insulation from the ends of the electrical wires using wire strippers. This will expose the copper conductors for a proper connection.
- Connect the wires: Connect the corresponding wires from the AC unit to the electrical box. Typically, these connections are color-coded for easy identification. Ensure a secure connection by using wire nuts or terminal screws and tighten them firmly.
- Insulate the connections: Wrap the wire connections with electrical tape or use heat-shrink tubing to insulate them. This extra layer of protection will prevent any accidental contact and enhance the safety of your electrical setup.
Testing the electrical setup
After completing the wiring connections, it is crucial to test the electrical setup before fully installing the AC unit. This step will help identify any potential issues or defects in the wiring, ensuring the integrity and safety of the installation. Here are the key steps to follow:
- Turn on the power: Restore the power supply at the main circuit breaker and switch on the electrical outlet connected to the AC unit.
- Check for proper functioning: Turn on the AC unit and ensure that all electrical components, such as the control panel, fan, and compressor, are functioning correctly. Pay attention to any unusual noises or signs of malfunction.
- Monitor voltage and current: Use a voltage tester or multimeter to measure the voltage and current at the outlet. Compare the readings with the manufacturer’s specifications to ensure they fall within the acceptable range.
- Conduct regular inspections: Regularly inspect the electrical connections and wiring for any signs of overheating, loose connections, or damage. Additionally, keep an eye out for any unusual smells or sparks, which may indicate a problem.
By following these steps and adhering to the manufacturer’s instructions, you can confidently connect the electrical components of your wall-mounted AC unit. This careful approach will not only ensure optimal performance but also guarantee the safety and longevity of your installation.
Ventilation And Airflow Optimization
Proper ventilation and airflow optimization are crucial factors in ensuring efficient cooling and optimal performance of your wall-mounted air conditioning unit. By following a few simple steps, you can make the most out of your window AC installation and create a comfortable living environment.
Positioning the AC unit to maximize airflow
When it comes to installing your window AC unit, positioning plays a significant role in optimizing airflow. Ideally, you want to place the unit in a location that allows for unrestricted airflow around the condenser and evaporator coils.
To maximize airflow, it’s recommended to install the AC unit at least 2 feet away from any obstructions. This distance ensures proper air circulation and prevents obstructed airflow, which can impede the cooling efficiency.

Clearing obstructions from vents
In addition to positioning, it’s important to clear any obstructions from the vents of your wall-mounted AC unit. Over time, dust, debris, or furniture can accumulate and block the vents, hindering the airflow and causing your unit to work harder than necessary.
To maintain optimum airflow, regularly inspect and clean the vents. Use a soft brush or vacuum cleaner to remove any accumulated dust or debris. This simple maintenance routine will help the AC unit perform at its best and extend its lifespan.
Utilizing fans for enhanced circulation
In some cases, utilizing fans can further enhance air circulation and improve the cooling efficiency of your window AC unit. Placing a fan near the AC unit can help distribute the cooled air throughout the room, ensuring even temperature control.
Additionally, using ceiling fans or portable fans in conjunction with your AC unit can create a more comfortable environment by providing a gentle breeze and facilitating the evaporation of sweat from your skin.
Utilize fans strategically by positioning them in areas where stagnant air tends to accumulate, such as corners or areas far from the AC unit. This will help improve overall airflow and prevent hotspots.
By considering these ventilation and airflow optimization techniques, you can ensure that your wall-mounted AC unit functions efficiently and keeps your space comfortably cool even during scorching summer days.
Regular Maintenance And Care
Maintaining your window AC unit is essential to ensure optimal performance and longevity. By following a few simple steps, you can keep your unit running efficiently and enjoy cool, crisp air for years to come. In this section, we will discuss the importance of cleaning the AC unit and filters, changing the filters periodically, and inspecting for leaks or damage.
Cleaning the AC unit and filters
Regular cleaning of your window AC unit and filters is crucial to keep it working efficiently and prevent the accumulation of dirt, dust, and debris. Follow these steps to ensure a thorough and effective cleaning:
- Start by turning off the AC unit and unplugging it from the power source for safety.
- Using a soft brush or cloth, gently remove any visible dirt or debris from the exterior of the unit.
- Next, remove the front panel or grille to access the filters.
- Carefully remove the filters and rinse them under running water to remove any dust particles. You can also use a mild detergent for a thorough cleaning.
- Allow the filters to air dry completely before reinserting them into the unit.
- Finally, clean the exterior and front panel using a damp cloth to remove any remaining dirt or grime.
Changing the filters periodically
Regularly changing the filters in your window AC unit helps maintain clean and fresh air while preventing the unit from overworking. Here are the steps for changing the filters:
- Turn off the AC unit and unplug it from the power source.
- Open the front panel or grille to access the filters.
- Remove the dirty filters and dispose of them properly.
- Insert new, clean filters into the unit, making sure they fit securely.
- Close the front panel or grille and plug in the AC unit.
Inspecting for leaks or damage
Regularly inspecting your window AC unit for leaks or damage is essential to prevent any potential issues or malfunctions. Follow these steps to ensure a thorough inspection:
- Turn off the AC unit and unplug it from the power source.
- Visually inspect the unit and its components for any signs of leaks, such as water stains or puddles.
- Check the electrical cords and connections for any damage or fraying.
- Inspect the cooling fins and coils for any bent or damaged areas.
- If you notice any leaks, damage, or other issues, it’s essential to contact a professional for repairs or maintenance.
Regular maintenance and care of your window AC unit can significantly extend its lifespan and ensure optimal performance. By cleaning the AC unit and filters, changing the filters periodically, and inspecting for leaks or damage, you can enjoy cool and refreshing air for years to come.
Troubleshooting Common Issues
Installing a window AC unit in a wall can provide much-needed relief during hot summer months. However, like any other appliance, it may encounter some common issues that require troubleshooting. It is important to address these problems promptly to ensure optimal cooling performance and prevent further damage. In this section, we will discuss the most common issues that may arise when installing a window AC in a wall and provide effective solutions.
Troubleshooting inadequate cooling
If your window AC unit is not providing the expected level of cooling, there are a few possible causes that you can troubleshoot:
- Make sure that the unit is properly sized for the room. An undersized unit will struggle to cool a large area effectively.
- Check the air filters. Dirty or clogged filters can restrict airflow and reduce cooling performance. Clean or replace the filters as needed.
- Inspect the condenser coils. Over time, these coils can become dirty and hinder the unit’s ability to cool efficiently. Clean the coils using a soft brush or vacuum cleaner.
- Ensure that the unit is not obstructed by furniture or curtains. Blocked airflow can impede cooling effectiveness.
- Check for any gaps or leaks around the unit. Improper sealing can allow warm air to enter the room, reducing cooling efficiency.
Addressing unusual noises or vibrations
If you notice strange noises or vibrations coming from your window AC unit, it is important to address the issue promptly:
- Inspect the fan blades. Loose or damaged blades can cause noisy vibrations. Tighten any loose screws or replace damaged blades.
- Check for any objects or debris that may have entered the unit. Foreign objects can cause unusual noises and vibrations. Remove any obstructions carefully.
- Ensure that the unit is properly installed. A loose or unbalanced installation can result in excessive vibrations. Adjust the unit and secure it firmly in place.
- Inspect the compressor. A malfunctioning compressor can produce unusual sounds. Contact a professional technician to diagnose and repair any compressor issues.
Dealing with electrical malfunctions
If you encounter electrical malfunctions with your window AC unit, it is crucial to address them carefully to avoid any safety hazards:
- Check the power supply. Ensure that the unit is properly plugged in and that the outlet is providing electricity. Also, check for any tripped circuit breakers or blown fuses.
- Inspect the power cord for any visible damage. If the cord is frayed or worn out, it should be replaced immediately.
- Test the control panel. Make sure the buttons or switches on the panel are functioning correctly. If not, the control panel may need to be repaired or replaced.
- If you suspect any internal electrical issues, it is best to consult a qualified technician. Attempting to repair electrical components yourself can be dangerous and may void the warranty.
By troubleshooting these common issues, you can ensure that your window AC unit installed on a wall functions properly and provides efficient cooling. Regular maintenance and prompt problem-solving will help prolong the lifespan of the unit and maximize its performance.
Frequently Asked Questions Of How To Install Window AC in Wall
Can You Install A Window Air Conditioner on a Wall?
Yes, you can install a window air conditioner on a wall. It is a viable option and can be done with proper installation. Just make sure to follow the instructions carefully and ensure that the wall can support the weight of the unit.
Can You Install An Air Conditioner On An Inside Wall?
Yes, you can install an air conditioner on an inside wall. It is a feasible option for cooling a room, especially if window installation is not available or desired. It is important to hire a professional to ensure proper installation and consider factors such as electrical requirements and proper insulation.
Can I Use A Window Ac Unit Without A Window?
No, a window AC unit cannot be used without a window. The unit requires proper ventilation and a window provides the necessary air circulation. It is essential to install window AC units in a window to ensure their efficient and safe operation.
Do You Need A Sleeve For Wall Air Conditioner?
Yes, you need a sleeve for a wall air conditioner. It acts as a protective casing and ensures proper installation. A sleeve prevents air leakage and provides stability for the unit. Make sure to choose a sleeve that matches the specific model and size of your air conditioner for optimal performance and efficiency.
Conclusion
Installing a window AC in the wall may seem daunting, but with the right steps, it can be a breeze. By following the guidelines mentioned in this blog post, you can successfully install a window AC unit on your wall.
Remember to measure accurately, prepare the wall properly, and follow the manufacturer’s instructions for a secure and efficient installation. With a little patience and attention to detail, you’ll soon be enjoying the cool comfort of your newly installed window AC unit.
