To install a ventless fireplace, start by checking local building codes and regulations. Then, select a suitable location for the fireplace and ensure there is sufficient space and ventilation.
Planning The Installation
When it comes to installing a ventless fireplace, proper planning is key to ensure a seamless and safe installation process. This begins with gathering the necessary tools and materials, followed by determining the ideal location for your ventless fireplace. In this section, we will explore each step in detail so you can plan your installation effectively and enjoy the warmth and ambiance of your fireplace.
Gathering the Necessary Tools and Materials
Before starting the installation process, it is essential to gather all the tools and materials required. Here is a list of items you will need:
| Tools | Materials |
|---|---|
|
|
Once you have gathered all the necessary tools and materials, you will be prepared for a smooth installation process. Make sure to double-check that you have everything on the list before proceeding.
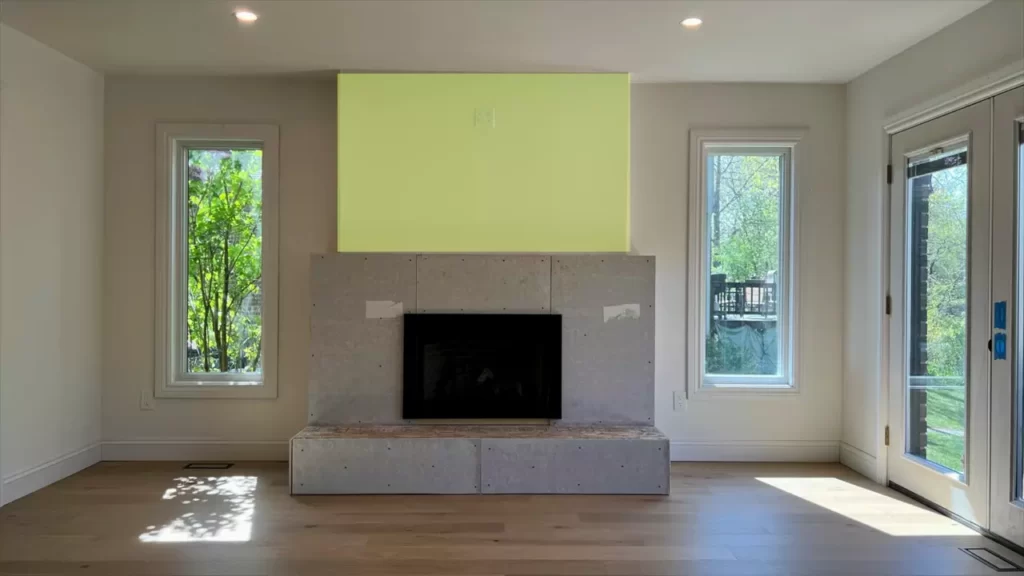
Determining the Location for the Ventless Fireplace
Determining the ideal location for your ventless fireplace is crucial for both functionality and aesthetics. Consider the following factors when choosing a spot:
- Safety: Ensure that the location adheres to the manufacturer’s safety regulations and guidelines. Keep in mind the clearance requirements for combustible materials and ventilation.
- Accessibility: Choose a location that is easily accessible for maintenance and future gas line inspections. This will make it convenient for any necessary servicing or repairs.
- Ventilation: While a ventless fireplace does not require a chimney or vent, sufficient airflow is still necessary. Make sure the chosen location has proper ventilation to prevent the buildup of harmful gases.
- Aesthetics: Consider the overall design and layout of the room when selecting the location. A fireplace can serve as a focal point, so choose a spot that enhances the visual appeal of the space.
By carefully considering these factors, you can determine the most suitable location for your ventless fireplace. This will ensure both the functionality and beauty of your new addition to your home.
Preparing The Area
When it comes to installing a ventless fireplace, preparing the area is an essential first step. This includes clearing the space and ensuring proper ventilation. By following these steps, you can create a safe and inviting environment for your new fireplace.
Clearing the Space
Before installing a ventless fireplace, it’s important to clear the space where the fireplace will be placed. This ensures that there are no obstructions nearby that could pose a fire hazard. Here are a few key steps to take:
- Remove any furniture or decor that is in the vicinity of the fireplace. This includes rugs, curtains, and other fabrics that could potentially catch fire.
- Check the surrounding walls and ceilings for any flammable materials. If necessary, cover these areas with non-combustible materials such as stone, tile, or brick.
- Measure the dimensions of the fireplace and mark the area where it will be installed. This will help you visualize the final result and ensure that you have enough space for the unit.
Ensuring Proper Ventilation
Proper ventilation is crucial for the safe operation of a ventless fireplace. Without adequate airflow, the unit can produce harmful gases such as carbon monoxide. Here’s what you need to do to ensure proper ventilation:
- Determine if your space meets the minimum requirements for ventilation. This information can typically be found in the manufacturer’s instructions or specifications.
- If your space doesn’t meet the requirements, you may need to install additional ventilation options such as a window or venting system.
- Consult with a professional if you are unsure about the ventilation needs of your specific fireplace model or if you need assistance with installation.
By properly preparing the area for your ventless fireplace, you can enjoy the warmth and ambiance it provides with peace of mind. Clearing the space and ensuring proper ventilation are essential steps that should not be overlooked. Now that you have completed the necessary preparations, you are ready to move on to the next phase of the installation process.
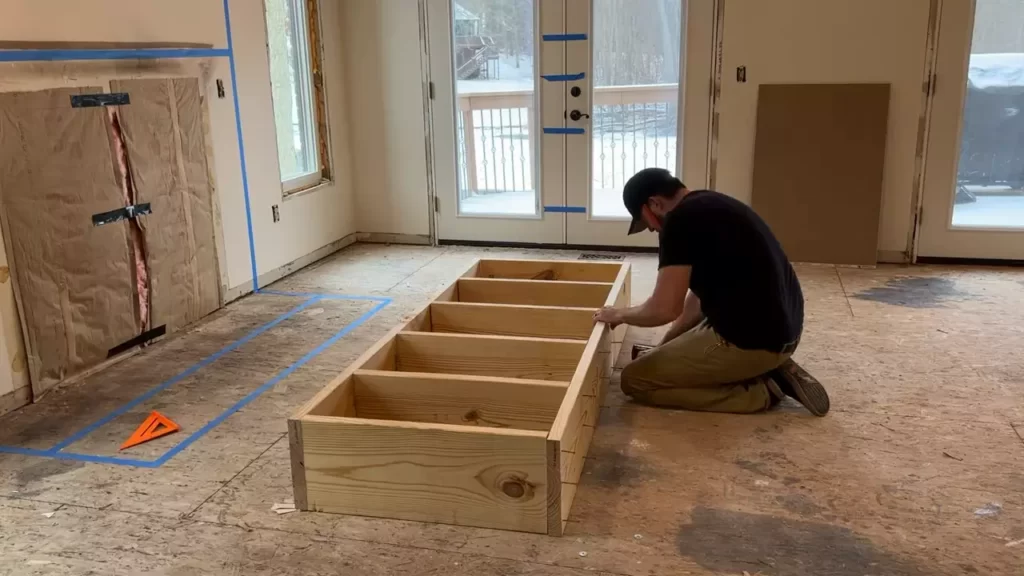
Assembling The Ventless Fireplace
Proper assembly is crucial when installing a ventless fireplace. Following the manufacturer’s instructions carefully ensures a safe and efficient installation. Here is a step-by-step guide to help you assemble your ventless fireplace:
Following the Manufacturer’s Instructions for Assembly
Each ventless fireplace comes with specific manufacturer’s instructions for assembly. It is essential to read these instructions thoroughly before beginning the assembly process. These instructions are designed to guide you through the process and ensure that the fireplace is assembled correctly.
Here are some general guidelines to keep in mind:
- Gather all the parts: Check that you have received all the necessary parts listed in the instruction manual. This includes the fireplace unit, logs or decorative materials, gas line, ventless gas burner, and any other components that may be included.
- Prepare the assembly area: Clear the area where you will be assembling the ventless fireplace. Ensure that the floor is clean and level, and make sure you have enough space to work comfortably.
- Identify the components: Familiarize yourself with the different components of the fireplace. Use the instruction manual as a reference to identify each part and become acquainted with their unique functionalities.
- Assemble the base: Start by assembling the base or stand of the fireplace, following the instructions provided. This may involve attaching legs or brackets and securing them properly.
- Connect gas line: If your ventless fireplace is gas-powered, you will need to connect the gas line. Carefully follow the instructions to ensure a proper and secure connection. It is crucial to use a certified gas technician for this step if you are not confident in your own ability.
- Install the ventless gas burner: Place the ventless gas burner inside the fireplace according to the manufacturer’s instructions. Make sure it is positioned correctly and securely.
- Arrange the logs or decorative materials: If your ventless fireplace includes artificial logs or decorative materials, arrange them in a visually appealing way. Follow the provided instructions to ensure proper placement.
Remember, each ventless fireplace may have specific assembly requirements, so it is essential to rely on the manufacturer’s instructions throughout the process. By following the instructions carefully, you can assemble your ventless fireplace correctly and enjoy a cozy and efficient source of heat in your home.
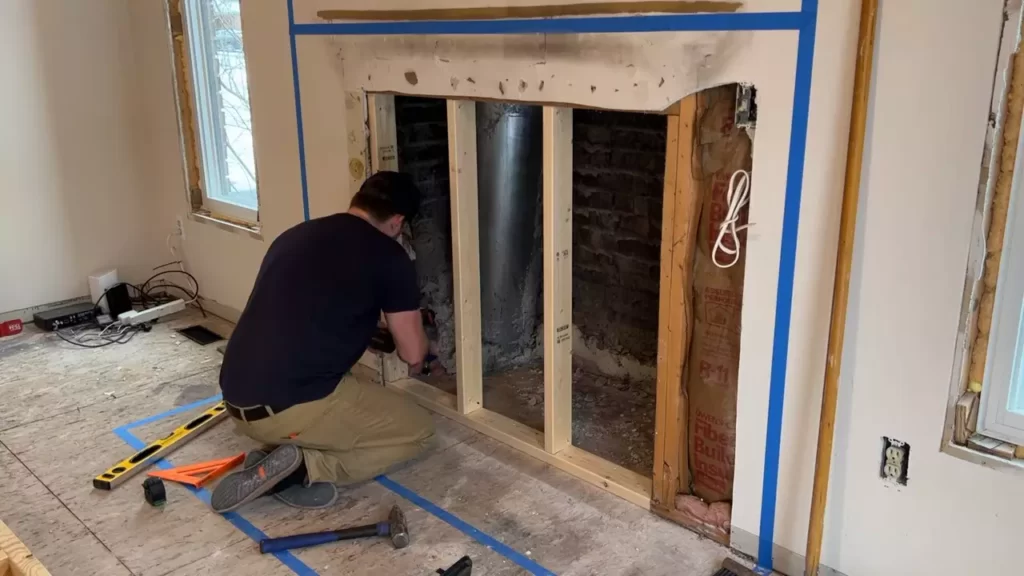
Installing The Gas Line
Checking Local Building Codes and Regulations
Before you begin installing a ventless fireplace and its gas line, it is crucial to familiarize yourself with the local building codes and regulations. These codes vary by location and are put in place to ensure the safety and compliance of gas installations.
Start by researching and reviewing the building codes and regulations specific to your area. These codes typically cover aspects such as the type of gas line required, allowable locations for the gas line, and proper ventilation for the fireplace. By adhering to these regulations, you can ensure a safe and legal installation.
Hiring a Qualified Gas Technician for Safety Compliance
Installing a gas line for a ventless fireplace can be a complex task that requires specific knowledge and expertise. To ensure safety compliance and avoid any potential hazards, it is highly recommended to hire a qualified gas technician.
A professional gas technician has the necessary skills and experience to install the gas line correctly and in accordance with the local building codes and regulations. Additionally, they are equipped with the proper tools and equipment to handle gas-related installations safely.
Hiring a qualified gas technician not only guarantees a proper installation but also provides you with peace of mind knowing that the job is being done by an expert. They will also be able to answer any questions you may have regarding the installation process, ensuring that you are well informed throughout.
Remember, when it comes to installing the gas line for your ventless fireplace, it is always better to prioritize your safety and compliance with local regulations. By checking the building codes and regulations and hiring a qualified gas technician, you can enjoy the warmth and ambiance of your fireplace with confidence.
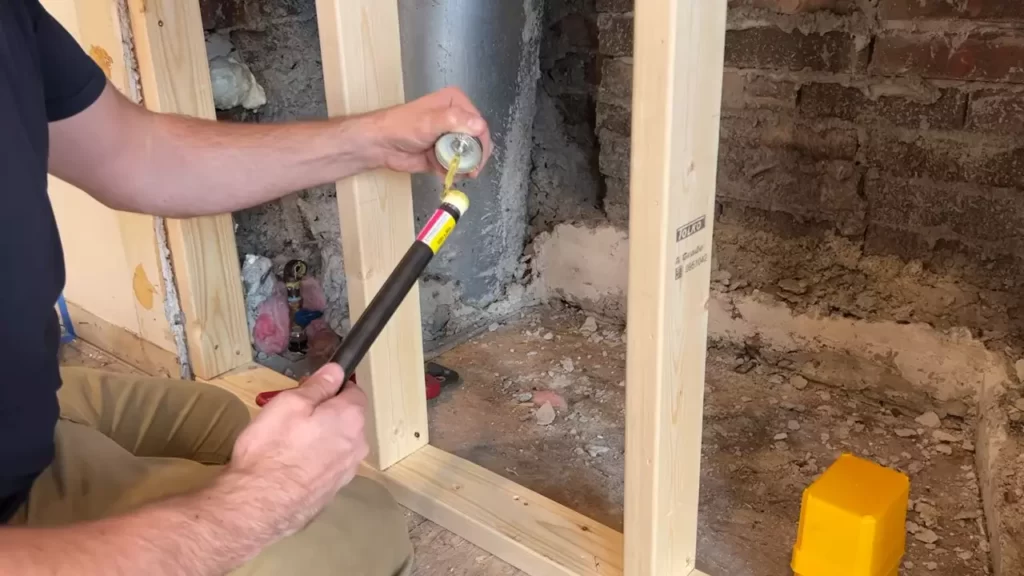
Measuring And Cutting The Pipe
When it comes to installing a ventless fireplace, one crucial step is measuring and cutting the pipe for the gas line. This is an important aspect of the installation process as it ensures that your fireplace functions efficiently and safely. In this section, we will explore two key factors to consider during this step – taking accurate measurements for the gas line and using the correct tools to cut the pipe.
Taking Accurate Measurements for the Gas Line
Before you can begin cutting the pipe, it is essential to take accurate measurements for the gas line. This will ensure that the pipe fits perfectly and eliminates the risk of leaks or other potential hazards. To do this, follow these steps:
- Start by identifying the location where the pipe will be installed. Measure the distance from the gas source to the ventless fireplace to determine the length of the pipe needed.
- Next, consider any bends, corners, or obstacles that the pipe will need to navigate. Measure and mark these points on the pipe to ensure proper fitting.
- Remember to account for the necessary clearance around the pipe to comply with safety regulations and to allow for proper ventilation.
- Double-check your measurements to ensure accuracy before proceeding to cut the pipe.
Using the Correct Tools to Cut the Pipe
Once you have taken accurate measurements for the gas line, it is time to cut the pipe. To successfully complete this task, it is essential to use the correct tools. Here’s what you’ll need:
- Measuring Tape: A measuring tape will help you ensure precise measurements for the pipe’s length and the location of bends or obstacles.
- Pipe Cutter: Invest in a high-quality pipe cutter designed for the specific material of your gas line pipe. This tool will ensure clean and accurate cuts.
- Deburring Tool: After cutting the pipe with a pipe cutter, use a deburring tool to smoothen and remove any sharp edges or burrs. This will prevent any obstructions or damage to the gas flow.
- Protective Gear: Always prioritize safety by wearing protective gear such as gloves and safety glasses when handling and cutting pipes.
Now that you have the correct tools and measurements, you are ready to cut the pipe for your ventless fireplace. Remember to work carefully and precisely, ensuring that your cuts are clean and accurate for a successful installation.
Connecting The Gas Line
Connecting the gas line is a crucial step when installing a ventless fireplace. It is important to ensure the connections are secure and meet all safety regulations. This step involves attaching the pipe to the gas valve and securing the connections with approved fittings.
Attaching the Pipe to the Gas Valve
Before you begin attaching the pipe to the gas valve, ensure that the gas supply is turned off. Safety should always be the top priority when working with gas lines. Once the gas supply is disconnected, follow these steps:
- Inspect the pipe and the gas valve for any damage or debris. Clean them if necessary.
- Apply pipe thread sealant on the threads of the gas valve. This will help create a tight and leak-free connection.
- Gently screw the pipe onto the gas valve until it is securely tightened. Use a wrench to ensure a tight fit but be cautious not to overtighten, as it can damage the valve or the pipe.
Securing the Connections with Approved Fittings
Once the pipe is securely attached to the gas valve, it is essential to secure the connections with approved fittings. Here’s how to proceed:
- Inspect the fittings to ensure they are clean and in good condition.
- Apply pipe joint compound to the threads of the fittings. This compound helps to create a strong and gas-tight seal.
- Gently screw the fittings onto the pipe, making sure they are properly aligned.
- Use a wrench to fully tighten the fittings, ensuring a secure connection. Be careful not to overtighten, as it can damage the fittings or the pipe.
After securing the connections, it’s essential to perform a thorough leak test to ensure there are no gas leaks. Apply a solution of soapy water to the connections and observe if any bubbles form. If you notice any leaks, immediately turn off the gas supply and consult a professional before proceeding.
Connecting the gas line for your ventless fireplace requires attention to detail and adherence to safety guidelines. By following these steps carefully, you will ensure a secure and efficient connection, providing you with a safe and enjoyable fireplace experience.
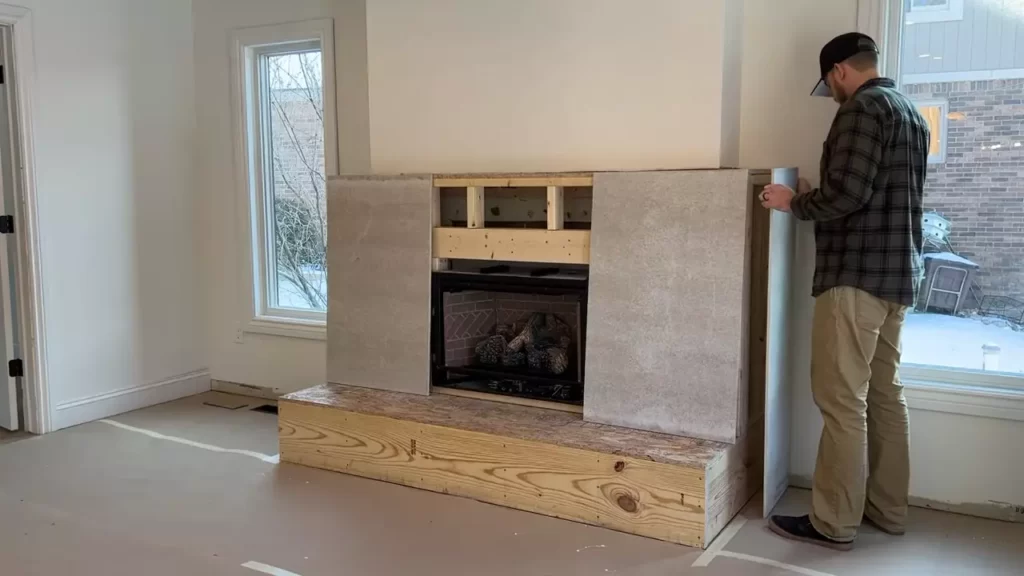
Installing The Ventless Fireplace
Installing a ventless fireplace can be a stylish and efficient way to add warmth and ambiance to your home. With the absence of a chimney or venting system, these fireplaces can be easily placed in any room you desire. In this section, we will guide you through the process of positioning the fireplace in the designated area and securing it to the wall or floor.
Positioning the Fireplace in the Designated Area
Before you start the installation process, it is crucial to select the perfect spot for your ventless fireplace. Consider the following factors when positioning the fireplace:
- Clearance: Ensure that the area around the fireplace is free from any combustible materials such as curtains or furniture. Leave enough space to allow proper airflow.
- Accessibility: Choose a location that allows easy access to the fireplace for maintenance and cleaning purposes.
- Aesthetics: Think about how the fireplace will fit into the overall design of your room. Consider the size, style, and color to ensure it complements the existing decor.
Once you have identified the ideal position, mark the area where the fireplace will be placed using a pencil or masking tape.
Securing the Fireplace to the Wall or Floor
Now that you have determined the perfect location for your ventless fireplace, it’s time to ensure its stability. [Company Name] recommends following these steps to secure the fireplace:
- Wall Mounting:
- Refer to the manufacturer’s instructions to identify the best method for wall mounting the fireplace. Make sure the wall can support the weight of the fireplace.
- Use a stud finder to locate the wall studs and mark their positions on the wall.
- Align the mounting bracket with the marked studs and use screws to secure it in place.
- Attach the fireplace to the mounting bracket, following the specific instructions provided by the manufacturer.
- Floor Installation:
- If you choose to install the ventless fireplace on the floor, ensure the surface is level and stable.
- Place a non-combustible material, such as a hearth pad or tile, underneath the fireplace to protect the floor.
- Follow the manufacturer’s instructions to secure the fireplace to the floor using the recommended brackets or anchors.
After securing the ventless fireplace, double-check its stability by gently shaking it. If it feels secure, you can proceed with connecting the gas line or plugging in the electrical cord, depending on the type of fireplace you have.
With the ventless fireplace successfully installed, you can now sit back, relax, and enjoy the warmth and beauty it brings to your living space.
Connecting The Gas Line To The Fireplace
One crucial step in installing a ventless fireplace is connecting the gas line to the fireplace. This process ensures that the fireplace receives the necessary fuel to provide warmth and ambiance. It is imperative to follow proper safety precautions and adhere to all local codes and regulations when handling gas connections. In this section, we will guide you through two essential steps: attaching the gas line to the fireplace valve and testing for any gas leaks to ensure proper connections.
Attaching the Gas Line to the Fireplace Valve
Before connecting the gas line, make sure you have the appropriate tools for the job. You will need an adjustable wrench, a pipe wrench, yellow Teflon tape, and a gas shut-off valve. Additionally, it’s essential to wear safety goggles and gloves to protect yourself during this process.
- Locate the gas line coming from your house and connect a shut-off valve to it. This valve will allow you to control the flow of gas to the fireplace.
- Apply yellow Teflon tape to the threaded end of the gas line. This tape helps create a tight seal and prevents gas leaks.
- Carefully attach the gas line to the fireplace valve, ensuring a secure connection. Use an adjustable wrench to tighten the fittings firmly, but avoid over-tightening, as it can damage the threads.
- Once the gas line is securely attached, double-check the connection to ensure there are no visible gaps or leaks.
Testing for any Gas Leaks and Ensuring Proper Connections
After attaching the gas line, it is vital to test for potential gas leaks and ensure all connections are secure. This step is critical to ensure the safety of your home and prevent any hazardous situations.
- Prepare a solution of water and dish soap in a spray bottle.
- Turn on the gas supply and apply the soapy solution to all the gas connections.
- Look for any bubbling or foaming, as this indicates a gas leak. If you notice any leaks, immediately turn off the gas supply and consult a professional technician to address the issue.
- If no leaks are found, conduct one final check by smelling around the fireplace for any gas odor. Although gas is odorless, an additive called mercaptan is often used to give it a distinct smell.
By following these steps, you can ensure the gas line is properly connected to your ventless fireplace, and that all connections are secure without any gas leaks.
Testing And Final Adjustments
Once you have successfully installed your ventless fireplace, it is important to perform testing and final adjustments to ensure its proper functioning and safety. This step is crucial as it allows you to check the ignition system and flame appearance, as well as adjust the gas pressure if necessary. By following the instructions below, you can confidently test your fireplace and make the required adjustments for optimal performance.
Checking the Ignition System and Flame Appearance
Begin by checking the ignition system of your ventless fireplace. Start by making sure that the gas valve is in the “off” position. Then, carefully turn on the gas supply and ensure that there are no leaks by inspecting the gas connections. If you detect any leaks, it is important to fix them immediately before proceeding.
With the gas supply properly connected and secured, proceed to light the fireplace by following the manufacturer’s instructions. Pay close attention to the ignition process, making sure that the pilot light ignites and that the main burner lights up as well.
Now, observe the flames and check their appearance. They should be steady, evenly distributed, and blue. If you notice any abnormalities such as flickering, yellow flames, or uneven burning, there may be an issue with the fuel-air mixture. In such cases, it is recommended to consult a professional technician who can help you address the problem.
Adjusting the Gas Pressure if Necessary
If the flame appearance appears to be incorrect, you may need to adjust the gas pressure. This adjustment is essential for achieving the desired flame characteristics and ensuring efficient combustion. However, it is important to note that gas pressure adjustments should only be done by trained professionals using specialized equipment.
To determine if a gas pressure adjustment is necessary, you can check the manufacturer’s guidelines or consult with a qualified technician. They will be able to measure the gas pressure using a manometer and make the necessary adjustments if required. Attempting to adjust the gas pressure without proper knowledge and equipment can result in hazardous conditions and should be avoided.
By thoroughly testing your ventless fireplace and making any necessary final adjustments, you can enjoy a safe and efficient heating source in your home. Remember, always prioritize safety and consult professionals when in doubt.
Cleaning And Maintenance
Welcome to another informative section of our blog post on how to install a ventless fireplace. In this section, we will focus on the crucial aspect of cleaning and maintenance. Proper cleaning and regular maintenance ensure the efficient and safe operation of your ventless fireplace. By following a few simple steps, you can keep your fireplace looking beautiful and functioning at its best for years to come. Let’s dive into the details!
Regular Cleaning to Maintain Efficiency
Regular cleaning is essential to maintain the efficiency of your ventless fireplace. Without proper cleaning, the unit may accumulate dust, dirt, and debris, which can hinder its performance and impact the air quality in your home. Here are a few steps to effectively clean your ventless fireplace:
- Turn off the fireplace: Before you begin cleaning, make sure the fireplace is completely turned off and has cooled down. This will ensure your safety during the cleaning process.
- Remove any loose debris: Using a soft brush or a handheld vacuum cleaner with a brush attachment, gently remove any loose debris, such as ashes, soot, or dust, from the fireplace’s interior and exterior surfaces.
- Wipe down the glass: The glass panel on the front of your ventless fireplace can accumulate fingerprints, smudges, and dirt over time. Clean it with a non-abrasive glass cleaner and a soft, lint-free cloth to restore its sparkling clarity.
- Clean the burner: The burner is a critical component of your ventless fireplace. Carefully remove it, following the manufacturer’s instructions, and wipe it clean with a damp cloth to remove any residue that may impair its performance.
- Inspect the fuel supply: Check the fuel supply line for any signs of damage or blockage. If you notice any issues, contact a professional for assistance.
- Replace the logs or embers: If your ventless fireplace uses decorative logs or embers, check them regularly for wear and tear. Replace any damaged or discolored pieces to ensure a realistic and attractive flame display.
Scheduling Professional Inspections and Servicing
In addition to regular cleaning, it is crucial to schedule professional inspections and servicing for your ventless fireplace. Professional technicians have the expertise and knowledge to identify potential issues that may affect the performance and safety of your unit. Here’s why you should consider professional inspections and servicing:
- Prolonged lifespan: Regular professional inspections and servicing can help prolong the lifespan of your ventless fireplace by addressing any minor problems before they escalate and cause major damage.
- Assurance of safety: Professional technicians can thoroughly inspect the combustion system, ventilation, and fuel supply to ensure everything is working safely and efficiently. This helps prevent the risk of carbon monoxide leaks or other hazardous situations.
- Optimal performance: A professional servicing can optimize the performance of your ventless fireplace by cleaning internal components, adjusting gas pressure, and ensuring proper burner operation.
- Warranty compliance: If your ventless fireplace is under warranty, regular professional servicing may be required to keep the warranty valid. Check the manufacturer’s guidelines for specific requirements.
By following these cleaning and maintenance guidelines and scheduling regular professional inspections, you can keep your ventless fireplace in peak condition and enjoy its warmth and beauty for many years to come.
Safety Precautions
When it comes to installing a ventless fireplace, ensuring safety precautions are in place is of utmost importance. Ventless fireplaces can provide warmth and ambiance to any home, but it’s crucial to understand the risks associated with them and take necessary safety measures to prevent accidents. In this section, we will explore the key safety precautions you need to be aware of when installing a ventless fireplace.
Understanding the Risks
Before proceeding with the installation, it’s vital to understand the potential risks of having a ventless fireplace. While these fireplaces offer convenience, cost-effectiveness, and ease of installation, they also have their drawbacks. One primary concern is the emission of combustion byproducts, such as carbon monoxide and nitrogen dioxide, into the air. These gases can be harmful if not properly ventilated. It’s essential to be aware of these risks to ensure the safety of your household.
Taking Necessary Safety Measures
To mitigate the risks associated with ventless fireplaces, taking adequate safety measures is imperative. Here are some important steps to follow:
- Professional Installation: Always have your ventless fireplace installed by a licensed professional. They have the knowledge and expertise to ensure the correct installation, seal any potential leaks, and comply with local building codes.
- Regular Maintenance: Perform regular maintenance checks on your ventless fireplace. This includes cleaning the burner and heat exchanger, inspecting the gas lines for any leaks, and ensuring the ventilation system is functioning properly.
- Carbon Monoxide Detector: Install a carbon monoxide detector near your ventless fireplace. This will alert you if there are any dangerous levels of this odorless gas in your home, allowing you to take necessary action promptly.
- Keep Flammable Objects Away: Maintain a safe distance between your ventless fireplace and any flammable objects such as furniture, curtains, or decorations. This helps prevent accidents and potential fire hazards.
- Supervision: Never leave a ventless fireplace unattended, especially when children or pets are present. Ensure someone responsible is always present and capable of monitoring the fire.
Educating Household Members about Fireplace Usage
Aside from taking safety measures yourself, it’s crucial to educate all household members about the proper usage and precautions associated with ventless fireplaces. Ensure everyone understands the potential risks, how to operate the fireplace safely, and what to do in case of an emergency. Providing this knowledge and awareness to your family members will contribute to maintaining a safe and enjoyable environment.
Troubleshooting Common Issues
If you have recently installed a ventless fireplace or are currently using one, chances are you may encounter some common issues along the way. It is important to address these issues promptly to ensure the safe and efficient operation of your fireplace. In this section, we will discuss two common problems you may face with your ventless fireplace and provide you with simple solutions to fix them.
Identifying and Resolving Gas Flow Problems
One of the most common issues with ventless fireplaces is gas flow problems. If you notice that the flame is weak or not igniting at all, it is likely due to a gas flow issue. To identify and resolve this problem, follow these steps:
- Check the gas supply: Ensure that the gas supply valve is fully open and there are no obstructions or leaks in the gas line.
- Clean the burner: Over time, debris and dust can accumulate on the burner, leading to poor gas flow. Clean the burner using a soft brush or a vacuum cleaner to remove any blockages.
If the above steps do not resolve the gas flow problem, it is advisable to contact a professional technician to inspect and repair your fireplace.
Addressing Issues with Pilot Lights and Ignition Systems
Another common issue with ventless fireplaces is problems with the pilot light or ignition system. If the pilot light does not stay lit or the ignition system fails to ignite the fire, follow these troubleshooting steps:
- Check the gas valve: Ensure that the gas valve for the pilot light is turned on. If it is turned off, turn it back on and try relighting the pilot light.
- Clean the pilot light: A dirty or clogged pilot light can prevent it from staying lit. Gently clean the pilot light using a soft brush or compressed air to remove any debris.
- Inspect the thermocouple: The thermocouple is a safety device that senses the pilot flame. If it is faulty or damaged, it may not allow the gas valve to open. Check the thermocouple for any signs of corrosion or wear and replace it if necessary.
If you have followed the above troubleshooting steps and are still experiencing issues with the pilot light or ignition system, it is recommended to consult a professional for further assistance.
Frequently Asked Questions Of How To Install A Ventless Fireplace
Is It Hard To Install A Ventless Gas Fireplace?
Installing a ventless gas fireplace is not difficult. It can be done easily and quickly. Just follow the manufacturer’s instructions, ensure proper ventilation, and have the necessary tools on hand. Always consult a professional if needed.
Can You Put A Ventless Fireplace Anywhere?
Yes, ventless fireplaces are versatile as they don’t require a chimney or venting system. They can be installed in various locations to bring warmth and ambiance to any room.
Can You Install Ventless Fireplace?
Yes, you can install a ventless fireplace. It requires no vent or chimney and can be easily installed in any room. Ventless fireplaces are a cost-effective and convenient way to add warmth and ambiance to your space.
What Are The Rules For Ventless Fireplaces?
Ventless fireplaces must follow specific rules for safety and compliance. These include ensuring proper ventilation, using approved fuels, regular maintenance, and keeping flammable materials away. It’s vital to adhere to these guidelines to ensure the safe and efficient operation of a ventless fireplace.
Conclusion
Installing a ventless fireplace is a great way to add warmth and ambiance to your home without the need for a chimney or venting system. By following the step-by-step guide provided in this blog post, you can confidently tackle the installation process on your own.
Remember to prioritize safety and consult a professional if needed. With a ventless fireplace, you can create a cozy and inviting atmosphere in your living space while also enjoying the convenience and cost-saving benefits it offers. Start your DIY project today and transform your home into a comfortable oasis.