To install a window unit AC, first, measure the dimensions of the window opening. Then, place the unit into the window, secure it with brackets, and seal any gaps with weather stripping or insulation.
This will ensure proper installation and efficient cooling. Installing a window unit AC can be a straightforward process if approached with the right steps. A properly installed unit can provide much-needed relief during hot summer months. Whether you’re a DIY enthusiast or just looking for a cost-effective cooling solution, learning how to install a window unit AC can save you time and money.
By following the correct steps and ensuring a proper fit, you can enjoy a comfortable and cool indoor environment all summer long. We will guide you through the installation process, offering valuable tips to make the process easier and more efficient. So let’s jump right in and explore how to install a window unit AC.
Selecting The Right Window Unit Ac
Installing a window unit AC can be a game-changer, offering you a cost-effective cooling solution for your space. However, with so many options available on the market, it can be overwhelming to find the perfect fit for your needs. That’s where selecting the right window unit AC comes into play. By considering factors such as sizing and capacity, energy efficiency ratings, and determining the BTU for your space, you can ensure that you make a well-informed decision.
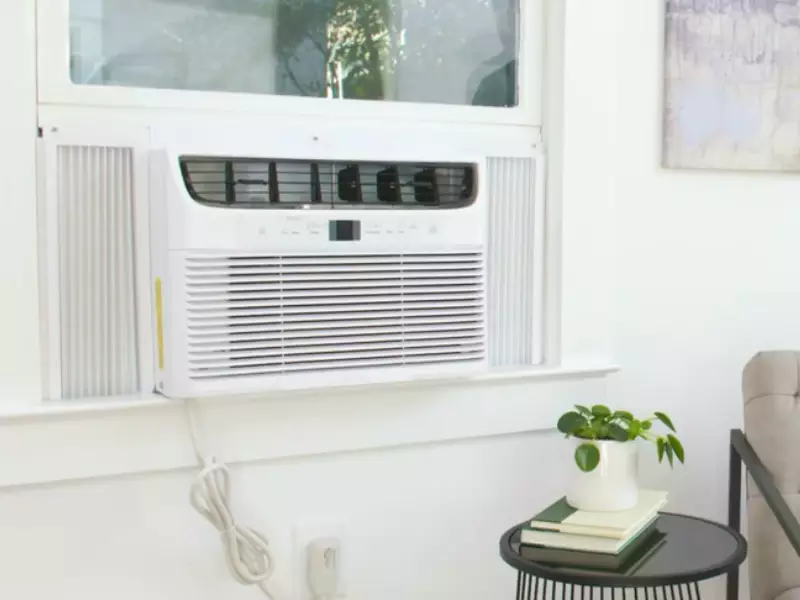
Factors to Consider for Sizing and Capacity
When it comes to selecting the right window unit AC, sizing and capacity are crucial factors to consider. Choosing an AC that is too small will struggle to cool your space adequately, while one that is too large will significantly increase your energy consumption. To get it just right, keep the following factors in mind:
- The size of the room: Measure the length, width, and ceiling height of the room to calculate its square footage. This information will help you determine the ideal BTU (British Thermal Unit) for the AC.
- Insulation: Assess the insulation in your space. If it’s poor, you may need to select an AC with higher cooling capacity to compensate for the heat gain.
- Sunlight exposure: Rooms that receive more sun exposure will require an AC with higher BTU to combat the additional heat.
- Number of occupants: If the room is frequently occupied by a larger number of people, you may need to consider an AC with higher cooling capacity.
- Kitchen usage: If you’re installing the AC in a kitchen, keep in mind that the heat generated from cooking appliances may require a higher BTU for effective cooling.
Energy Efficiency Ratings: What to Look for
Energy efficiency is a vital aspect to consider when selecting a window unit AC. An energy-efficient AC will not only help you save on your energy bills but also reduce your carbon footprint. Here are some key aspects to look for when assessing the energy efficiency of an AC:
- Energy Star certification: Look for the Energy Star label on the AC unit. This certification indicates that the AC meets the energy efficiency standards set by the Environmental Protection Agency (EPA).
- EER rating: Check the Energy Efficiency Ratio (EER) rating of the AC. A higher EER rating indicates a more energy-efficient unit.
- Low power consumption: Consider units that have energy-saving features like programmable timers or sleep modes for reduced power usage.
- Unit size: Generally, smaller units tend to be more energy-efficient compared to larger ones.
Determining the BTU for Your Space
BTU stands for British Thermal Unit, which measures the cooling capacity of an AC unit. It’s essential to determine the appropriate BTU for your space to ensure optimal cooling performance. To calculate the BTU for your room:
- Measure the length, width, and ceiling height of the room.
- Multiply the room’s square footage by 25 BTU.
- Add extra BTUs for specific factors like sunlight exposure, poor insulation, or high occupancy levels.
By following these steps, you can accurately determine the ideal BTU needed to cool your space effectively.
Now that you have a better understanding of what to consider when selecting the right window unit AC, you can make an informed decision based on your specific requirements. Remember, proper sizing, energy efficiency, and determining the BTU are key factors that contribute to a successful installation and optimal cooling comfort.
Preparation Before Installation
Before you embark on installing a window unit AC, it’s crucial to ensure that you have completed the necessary preparations to guarantee a smooth and hassle-free installation process. This section will cover the three key steps you need to take before starting the installation: gathering the necessary tools and materials, measuring the window opening for a proper fit, and ensuring proper electrical wiring and outlets.
Gathering the Necessary Tools and Materials
One of the most important steps before installing a window unit AC is gathering all the required tools and materials. By having everything you need on hand, you can complete the installation without any unnecessary delays or complications.
Here’s a list of the essential tools and materials you will need:
| Tools | Materials |
|---|---|
|
|
Measuring the Window Opening for Proper Fit
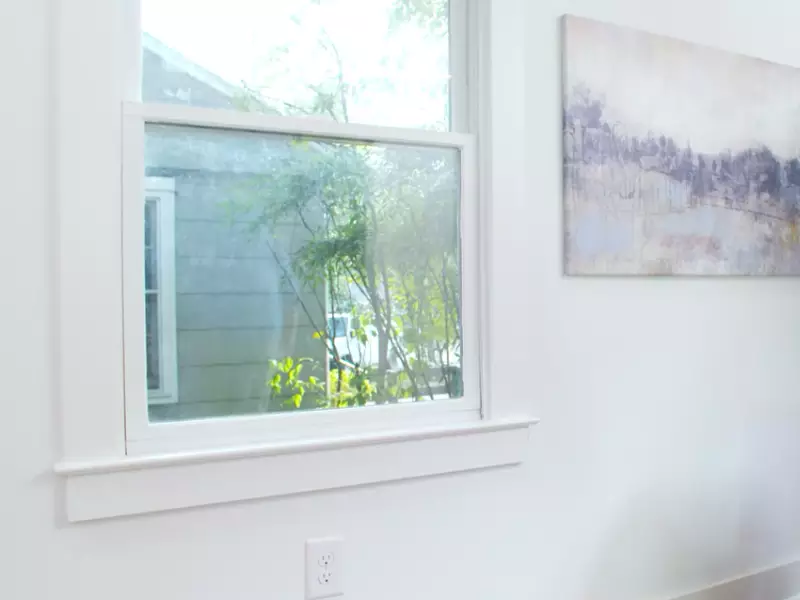
To ensure a proper fit for your window unit AC, accurate measurements of the window opening are crucial. Before you purchase a unit, measure the width, height, and depth of the window accurately. This will help you choose a unit that fits perfectly and avoid any gaps or moisture leakage.
Here’s how you can measure your window opening:
- Open the window and clear any obstructions.
- Measure the width from the inside of the window frame, from one side to the other. Record the measurement.
- Measure the height from the sill to the top of the window frame. Record the measurement.
- Measure the depth of the window sill. This measurement will determine the maximum depth of the unit you can install.
Ensuring Proper Electrical Wiring and Outlets
Proper electrical wiring and outlets are crucial for the safe and efficient functioning of your window unit AC. Before installation, make sure the electrical wiring can handle the power requirements of the AC unit.
Here are some key steps to take to ensure proper electrical wiring:
- Ensure that there is a nearby electrical outlet compatible with the voltage and amperage requirements of the AC unit.
- Check the condition of the existing wiring and outlet. If there are any signs of wear or damage, consider hiring a professional electrician to install a new outlet.
- Ensure that the circuit breaker or fuse for the AC unit is in good working condition and can handle the load.
- If necessary, consult with a licensed electrician to ensure compliance with local electrical codes.
By following these steps, you will be well-prepared for the installation of your window unit AC. Next, we will dive into the step-by-step process of actually installing the unit, so you can start enjoying cool and comfortable air in no time.
Installing The Window Unit Ac
Installing a window unit AC is a straightforward process that can bring much-needed relief during the hot summer months. With a few simple steps, you can have a cool and comfortable space in no time. In this guide, we will walk you through the process of installing a window unit AC, from removing the window sash to securing the unit in the window opening.
Removing the Window Sash and Cleaning the Area
The first step in installing a window unit AC is to remove the window sash. This is the movable part of the window that slides up and down. Remove any curtains or blinds from the window and open the sash completely. Use a screwdriver or a pry bar to loosen and remove any screws or nails securing the sash.
Once the sash is removed, take the time to clean the area around the window. Dust and debris can accumulate over time, so it’s important to clean the window sill and the surrounding area to ensure a proper fit for the unit. Use a damp cloth or a vacuum cleaner to remove any dirt or debris.
Positioning the Unit for Installation
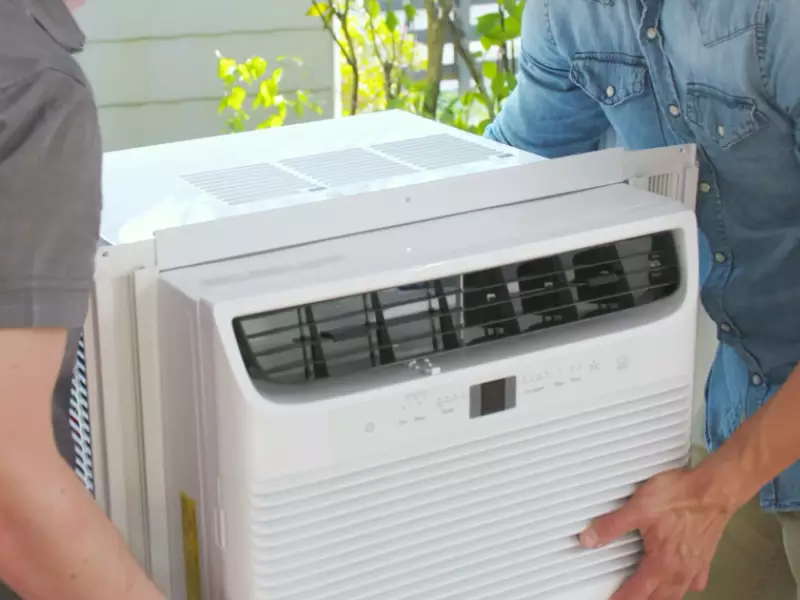
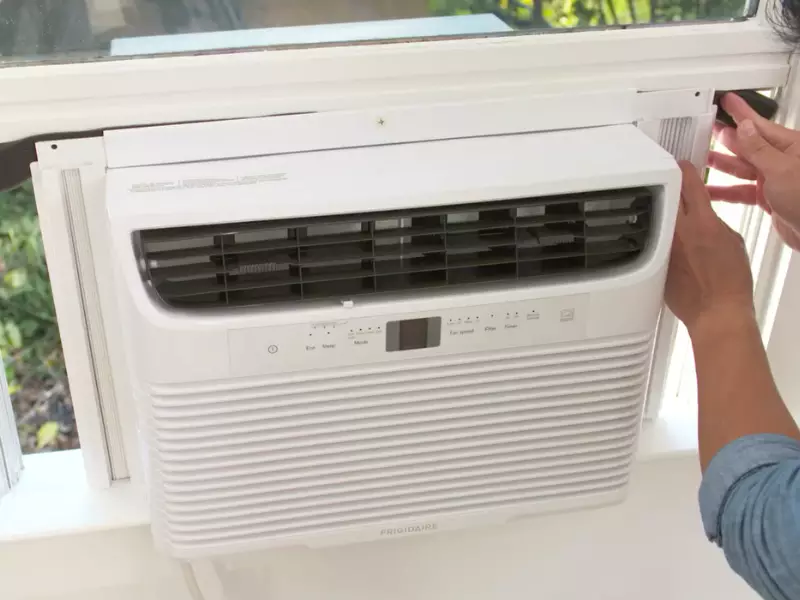
After cleaning the area, it’s time to position the window unit AC for installation. Carefully lift the unit and place it on the window sill, making sure that it is centered and level. The unit should be positioned with the front facing into the room and the back facing outside.
Check that there is enough clearance between the unit and any obstructions, such as furniture or window treatments. The unit should be at least 6 inches away from any objects to ensure proper airflow. Make sure the unit is positioned close enough to reach the electrical outlet without stretching or straining the power cord.
Securing the Unit in the Window Opening
Once the unit is properly positioned, it’s time to secure it in the window opening. Most window units come with mounting brackets or support brackets for this purpose. Attach the brackets to the unit according to the manufacturer’s instructions and secure them firmly to the window frame.
For added security, you can also use a foam strip or weatherstripping to seal any gaps between the unit and the window frame. This will help prevent air leakage and improve the efficiency of your AC unit.
Finally, close the window sash onto the unit and make sure it fits snugly. If necessary, use weatherstripping or foam tape to seal any gaps between the sash and the unit. This will help keep the cool air inside and prevent any drafts from entering your space.
With the unit securely installed, you can now enjoy the cool comfort it provides. Remember to regularly clean and maintain your window unit AC to ensure optimal performance and longevity. Follow these simple steps, and you’ll be well on your way to a cool and comfortable summer!
Connecting And Sealing The Unit
Properly connecting and sealing your window unit AC is essential to ensure its efficient and effective operation. In this section, we will guide you through the necessary steps to install and seal your window unit AC for optimal performance.
Installing the Window Kit and Sealing the Gaps
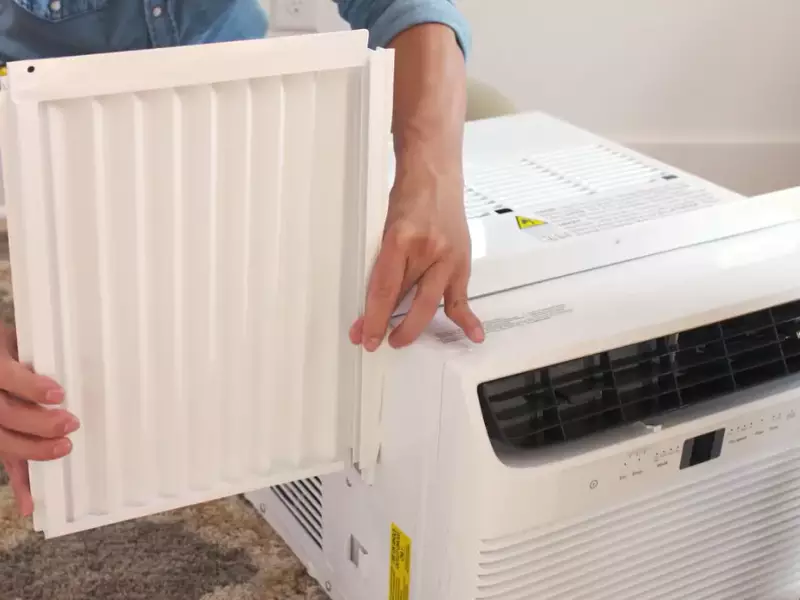
To begin, you’ll need to install the window kit provided with your AC unit. The window kit consists of a few essential components, including the window panel, side curtains, and securing brackets. Follow these steps to install the window kit:
- Measure the width of your window opening and adjust the window panel accordingly.
- Place the window panel against the window frame, aligning it with the opening.
- Secure the window panel using the included brackets, ensuring a snug fit.
- Attach the side curtains to the window panel, effectively sealing the sides of the window.
It’s crucial to seal any gaps between the window kit and the window frame to prevent drafts and maintain energy efficiency. Use weatherstripping or foam insulation to fill these gaps, ensuring a tight seal.
Connecting the Unit to the Power Source
Once the window kit is installed and properly sealed, it’s time to connect your unit to the power source. Follow these simple steps:
- Locate the power cord coming from your window unit AC.
- Plug the power cord into a nearby electrical outlet, ensuring it has a dedicated circuit.
- Ensure that the electrical outlet can handle the AC unit’s power requirements by checking the voltage and amperage.
- Double-check the connections for any loose or frayed wires, tightening or replacing as necessary.
By ensuring a secure and proper power connection, you’ll avoid electrical hazards and potential damage to your AC unit.
Proper Insulation to Maximize Efficiency
In order to maximize the energy efficiency of your window unit AC, proper insulation is key. Here are some important tips:
- Inspect the area around the window kit and AC unit for any gaps that may allow air leakage.
- Use caulk or weatherstripping to seal these gaps, preventing cool air from escaping and warm air from entering.
- Consider using insulating film or curtains to further enhance energy efficiency and block out sunlight.
- Regularly check and replace any damaged insulation to maintain optimal performance.
By taking these steps to properly insulate your window unit AC, you’ll not only maximize its cooling efficiency but also save on energy costs.
Testing And Maintenance
Testing and Maintenance
Once you have successfully installed your window unit AC, it is crucial to perform regular testing and maintenance to ensure its optimal performance and longevity. This will not only help in keeping your room cool and comfortable but also extend the lifespan of your AC unit. Let’s explore the essential testing and maintenance tips to get the most out of your window unit AC.
Powering On the Unit and Adjusting Settings
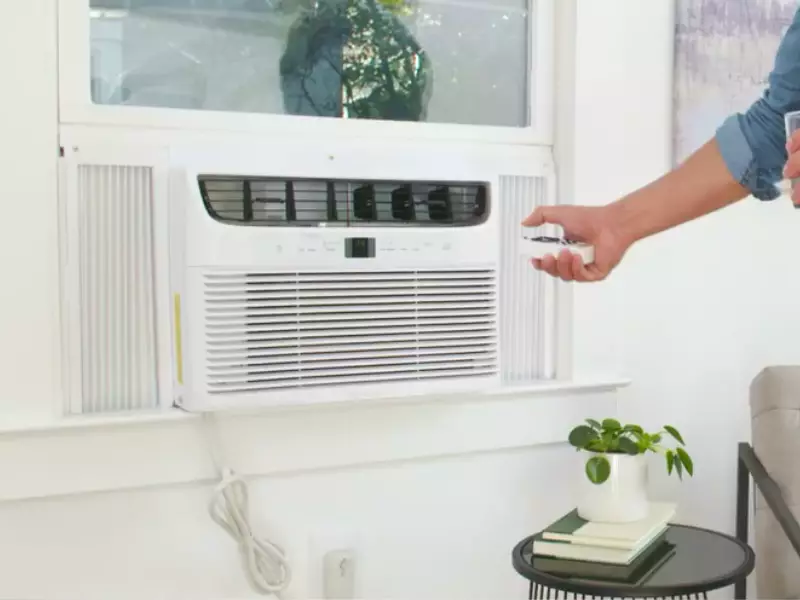
To start your window unit AC, locate the power button or switch usually located on the control panel. Most AC units have a digital display that allows you to easily adjust temperature, fan speed, and mode. Ensure that the unit is properly powered on, and then set your desired temperature and fan speed by navigating through the control panel.
Checking for Proper Cooling and Airflow
After powering on your window unit AC and adjusting the settings, it is important to check for proper cooling and airflow. Stand in front of the unit and feel the air blowing out. The airflow should be strong and cool. If you notice weak airflow or warm air coming out, it may indicate a problem with the unit. In such cases, make sure the filter is clean and not clogged with dust or debris. Cleaning or replacing the filter regularly can help maintain proper airflow and keep your AC running efficiently.
In addition to airflow, check the cooling performance of your window unit AC. Ideally, the temperature inside the room should decrease gradually after turning on the AC. Place a thermometer near the air outlet vent and monitor the temperature. If you notice that the temperature is not dropping as expected, it may indicate a refrigerant leak or other issue. In such cases, it is best to contact a professional technician for repair.
Regular Maintenance Tips for Longevity
Regular maintenance plays a vital role in maximizing the lifespan of your window unit AC. Here are some maintenance tips to keep in mind:
- Clean the filter: As mentioned earlier, a dirty or clogged filter can obstruct airflow and reduce cooling efficiency. Clean or replace the filter every month or as recommended by the manufacturer.
- Clear the condensate drain: Window unit ACs have a condensate drain that removes excess moisture from the unit. Over time, the drain can get clogged with dirt or algae. Regularly check and clean the drain to prevent water leakage or mold growth.
- Inspect the exterior: Make sure the exterior of your AC unit is free from debris, leaves, or any obstructions that may restrict airflow. Clear any debris and keep the area around the unit clean.
- Check for unusual noises: While operating your window unit AC, listen for any unusual noises such as rattling, buzzing, or grinding. These noises may indicate mechanical issues that require professional attention.
- Schedule professional maintenance: It is recommended to schedule annual maintenance by a professional technician. They can perform a thorough inspection, clean the internal components, and address any potential issues before they become major problems.
By following these testing and maintenance tips, you can ensure that your window unit AC operates efficiently, provides optimal cooling, and lasts for years to come.
Safety And Troubleshooting
When it comes to installing a window unit AC, it’s important to prioritize safety and be prepared to handle any common issues or troubleshoot problems that may arise. This section will guide you through the necessary safety precautions, explain how to handle the unit with care, provide troubleshooting solutions for common issues, and help you determine when it’s time to call in a professional.
Handling the Unit with Care and Safety Precautions
To ensure a safe installation process, it’s vital to handle the window unit AC with care and follow these safety precautions:
- Before starting the installation, make sure to read the manufacturer’s instructions carefully.
- It’s important to have someone assist you during the installation, especially when lifting or positioning the AC unit.
- Wear proper protective gear, such as gloves and safety goggles, to prevent any injuries while handling the unit.
- Never lift the unit by the control panel or any of the fragile parts. Always use sturdy handles or grips provided by the manufacturer.
- When positioning the unit into the window, make sure the window is securely closed behind it to prevent any accidents or damage.
- Ensure there is a stable support bracket or mounting kit in place to securely hold the AC unit in position.
Following these safety precautions will reduce the risk of injury and ensure a smooth installation process.
Common Issues and Troubleshooting Solutions
Even with proper installation, occasional issues may arise. Here are some common problems you may encounter and their troubleshooting solutions:
| Issue | Troubleshooting Solution |
|---|---|
| The AC unit is not cooling the room |
|
| Strange noises coming from the AC unit |
|
| Water leakage from the unit |
|
These troubleshooting solutions can often resolve common issues with window unit ACs, but if problems persist or if you’re unsure about any step, it may be best to seek professional assistance.
When to Seek Professional Help
While some minor issues can be resolved on your own, there are situations where it is better to call in a professional HVAC technician. Consider seeking professional help if:
- The troubleshooting solutions don’t resolve the problem.
- You encounter electrical issues or wiring complexities.
- The unit repeatedly trips the circuit breaker or blows fuses.
- You notice refrigerant leaks.
- You lack the necessary tools or expertise to tackle the problem.
Calling a professional in these situations will ensure the safety of yourself and your AC unit, while also avoiding potentially damaging it further.
With these safety precautions, troubleshooting solutions, and knowing when to seek professional help, you can install and maintain your window unit AC with confidence and enjoy cool comfort throughout the year.
Final Thoughts
Benefits of Installing a Window Unit Ac
Installing a window unit AC can bring numerous benefits to your home or office space. Not only does it provide instant relief from the scorching heat, but it also improves the overall air quality indoors. Here are some key benefits of installing a window unit AC:
- Energy Efficiency: Window unit ACs are known for their energy efficiency. Unlike central AC systems, these units only cool the area they are installed in, thereby reducing energy waste. This can lead to significant cost savings on utility bills.
- Easy Installation: When compared to other cooling alternatives, window unit ACs offer a hassle-free installation process. You don’t need to hire professionals, as window units come with straightforward instructions for mounting on your own.
- Cost-Effective: Window unit ACs are generally more affordable than central air conditioning systems. They require a lower upfront investment and can be an excellent option for individuals on a budget.
- Portability: If you frequently change residences or prefer to have the flexibility of moving your cooling unit around, window ACs are a fantastic portable solution. You can easily uninstall and reinstall them when needed.
- Individual Zoning: Window unit ACs offer the advantage of individual zoning, allowing you to control the temperature in specific areas of your home. This feature enables personalized comfort and energy conservation.
- Cooling on Demand: With a window AC, you have the convenience of cooling on demand. You can quickly cool down a room as soon as you enter it, without the need to wait for the entire house to cool.
Steps to Save Energy and Optimize Performance
To ensure that your window AC unit operates efficiently and saves energy, it’s essential to follow these steps:
- Proper Sizing: Make sure to choose the right-sized unit for your room. An undersized unit will struggle to cool the space efficiently, while an oversized one will consume excess energy.
- Regular Maintenance: Clean the air filters and coils of your window AC unit regularly. This will improve its performance, increase energy efficiency, and extend the lifespan of the unit.
- Seal Air Leaks: Insulate your room properly to prevent air leaks, which can lead to energy loss. Weatherstripping around windows and doors can effectively seal gaps and improve cooling efficiency.
- Utilize Fans: Use ceiling fans or portable fans alongside your window AC unit. Fans help circulate the cool air effectively, allowing you to set the temperature higher and save energy.
- Programmable Thermostats: Consider installing a programmable thermostat to regulate the temperature automatically. This will prevent unnecessary cooling and optimize energy usage.
- Set Temperature Properly: Find the ideal temperature setting that balances comfort and energy savings. Avoid setting the AC unit too low, as each degree lower significantly increases energy consumption.
By adhering to these steps, you can optimize your window unit AC’s performance, reduce energy consumption, and enjoy a comfortable and cost-effective cooling experience.
Frequently Asked Questions Of How To Install Window Unit Ac
Can You Install A Window AC unit By Yourself?
Yes, you can install a window AC unit by yourself. It is a simple process that involves measuring the window, positioning the unit correctly, securing it in place, and connecting it to a power source.
How Do You Install A Window Air Conditioner In A Window?
To install a window air conditioner in a window, follow these steps:
1. Measure the window opening and ensure the AC unit fits.
2. Clean the window and remove any obstacles or curtains.
3. Attach the upper bracket and side panels to the AC unit.
4. Lift the unit into the window and secure it using the lower bracket.
5. Close the window to seal it. Enjoy the cool air!
Can I Use A Window Ac Unit Without Putting It In A Window?
No, it is not recommended to use a window AC unit without putting it in a window. The unit needs proper ventilation and support to function efficiently and safely. Installing it in a window ensures proper airflow and prevents any potential hazards.
Can You Plug A Window Air Conditioner Into A Regular Outlet?
Yes, you can plug a window air conditioner into a regular outlet.
Conclusion
Installing a window unit AC can greatly improve the comfort of your home during hot summer months. By following these simple steps and precautions, you can easily and safely install your own AC unit. Remember to choose an appropriate location, prepare the area, and secure the unit correctly to ensure efficient cooling and longevity.
With the right tools and a little patience, you’ll have a cool and cozy space in no time. Stay cool!
