To install an AC vent in a ceiling, follow these steps: Cut a hole in the ceiling using a template, insert the vent, secure it in place, and connect the ductwork to the vent opening. Are you looking to install an AC vent in your ceiling?
This step-by-step guide will show you how to do it. Adding a vent to your ceiling allows for better air circulation and temperature control. With just a few tools and materials, you can have a functional AC vent in no time.
In this guide, we will walk you through the installation process, from cutting the hole in the ceiling to connecting the ductwork. So, let’s get started and improve the airflow in your space.
Assessing The Space
Before you start the installation process for an AC vent in your ceiling, it is crucial to assess the space properly. This involves measuring the ceiling area where the vent will be installed and determining the optimal location for it. These initial steps are essential to ensure that the installation is successful and the AC vents work efficiently.
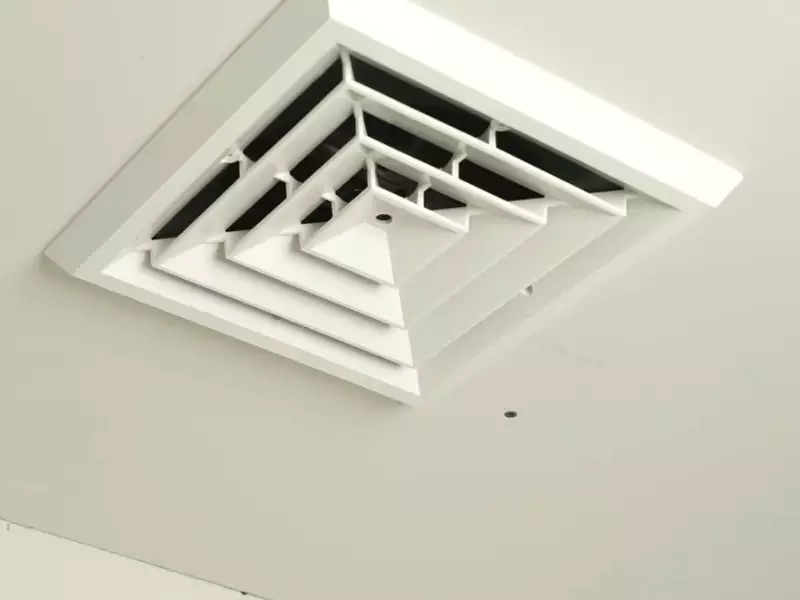
Measuring the ceiling area for the AC vent installation
The first step in assessing the space is to measure the ceiling area where the AC vent will be installed. This will help you understand the dimensions and ensure that the vent fits properly. Here’s how you can do it:
- Start by using a measuring tape to measure the length and width of the ceiling area where the AC vent will be placed.
- Note down these measurements accurately, ensuring that you include any obstacles in the area, such as beams or light fixtures. Consider the space required for the vent and any additional clearance needed for proper airflow.
By measuring the ceiling area accurately, you will have a clear idea of the available space and can proceed accordingly with the installation process.
Determining the optimal location for the AC vent
Once you have measured the ceiling area, the next step is to determine the optimal location for the AC vent. Placing the vent in the right spot is crucial for maximizing its efficiency and ensuring even cooling throughout the room. Follow these steps to identify the best location:
- Consider the room layout and the areas that require the most cooling. For example, if you have a living room with a seating area, placing the vent near the seating area would be ideal.
- Take into account any obstacles in the ceiling, such as structural components or electrical wiring, as you want to avoid these when installing the vent.
- Ensure that the chosen location allows for proper airflow without any obstructions or impediments.
- Consult with a professional if you are unsure about the optimal location or need advice on the best placement for your specific AC system.
By determining the optimal location for the AC vent, you can create a comfortable and well-distributed airflow in your space.
Assessing the space is an important first step when installing an AC vent in the ceiling. By accurately measuring the ceiling area and determining the optimal location, you can ensure a successful installation that enhances the cooling efficiency of your AC system.
Gathering The Necessary Tools And Materials
Before you start the installation process of an AC vent in your ceiling, it’s essential to gather all the necessary tools and materials. Having everything prepared beforehand will make the process smooth and hassle-free. In this section, we will discuss the list of tools needed for the installation as well as the types of AC vents available in the market.
List of tools needed for the installation
To install an AC vent in your ceiling, you will need the following tools:
| Tools | Description |
|---|---|
| Screwdriver | A Phillips or flathead screwdriver will be required for removing or adjusting screws during the installation process. |
| Tape Measure | You will need a tape measure to accurately measure the dimensions of the vent opening in your ceiling. |
| Safety Glasses | Protect your eyes from any debris or dust by wearing safety glasses throughout the installation. |
| Pencil or Marker | Use a pencil or marker to mark the location of the vent opening on your ceiling. |
| Drill | A drill with the appropriate drill bits is necessary to create the vent opening in your ceiling. |
| Drywall Saw | A drywall saw will be required to cut the opening in your ceiling for the AC vent. |
| Stud Finder | Use a stud finder to locate and mark the position of the ceiling joists before installing the vent. |
| Caulk Gun | A caulk gun is needed to apply caulk around the edges of the vent to ensure a tight seal. |
| Caulk | Choose a high-quality caulk to seal the edges of the vent and prevent any air leakage. |
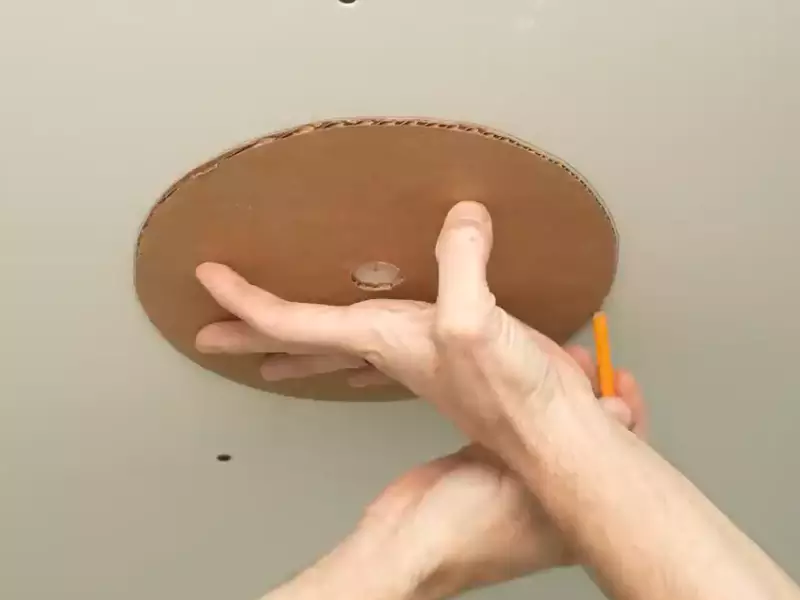
Types of AC vents available in the market
When it comes to AC vents, there are various types available in the market to suit different needs and preferences. Here are a few common types you can consider for your ceiling installation:
- Adjustable Vents: These vents allow you to control the direction and flow of air. They are ideal for rooms where you want to have control over the direction of the airflow.
- Ceiling Diffusers: These vents are designed to disperse air evenly throughout the room. They are usually round or square in shape and blend seamlessly with the ceiling.
- Return Vents: Return vents are larger in size and are installed on the ceiling or wall to pull air back into the air conditioning system. They help maintain proper air circulation in the room.
- Register Vents: These vents are commonly used in residential settings and offer a sleek and modern design. They come in various sizes and shapes to match the aesthetics of your room.
By understanding the different types of AC vents available, you can choose the one that best fits your needs and complements your interior design. Now that you have gathered the necessary tools and materials and learned about the types of AC vents, you are ready to move on to the next step of the installation process.
Marking The Location
Marking the center point for the vent opening
Before you start the installation process for your AC vent in the ceiling, it is crucial to mark the center point for the vent opening. This step ensures that the vent is positioned correctly and efficiently distributes cool air throughout the room.
To mark the center point, follow these steps:
- Measure the width and length of the room to determine the center point.
- Add these two measurements together and divide the result by two. This will give you the center point coordinates.
- Use a measuring tape to mark the center point on the ceiling surface.
Ensuring that you accurately mark the center point sets the foundation for a successful AC vent installation.
Ensuring proper alignment with other ceiling features
Another important aspect of installing an AC vent in the ceiling is ensuring proper alignment with other ceiling features. This step ensures that the vent blends seamlessly with the overall aesthetics of the room. Here’s how you can ensure proper alignment:
- Measure the distance from nearby walls, windows, or other ceiling fixtures to determine the appropriate placement for the vent.
- Use a level to ensure that the vent is perfectly aligned with these features.
- Make any necessary adjustments to the placement of the vent to achieve a visually balanced look.
By diligently aligning the AC vent with existing ceiling features, you create a cohesive and visually pleasing atmosphere in your space.
Creating The Opening
Using a drywall saw to cut through the ceiling
Before installing an AC vent in your ceiling, creating the opening is the first important step. To begin, you will need a drywall saw, which is a tool specifically designed for cutting through drywall.
Using your measurements as a guide, mark the location where you want the AC vent to be installed on the ceiling. Ensure that the location is free from any beams or other obstructions that may interfere with the installation. Once you have determined the precise spot, take the drywall saw and carefully cut along the marked lines.
Remember to work slowly and steadily, allowing the saw to do the work. Applying excessive force or rushing the process can lead to uneven cuts or damage to the surrounding area. Take your time and ensure that the opening is smooth and clean.
Removing any debris and smoothing the edges
After cutting through the ceiling, you may notice some debris or rough edges around the opening. It is crucial to remove any loose particles to create a clean and tidy workspace for the installation process.
Using a vacuum cleaner or a soft brush, carefully remove any dust or debris that may have accumulated during the cutting process. This will not only ensure a neater installation but also prevent any potential damage to the AC vent or airflow obstruction caused by debris.
Next, focus on smoothing the edges of the opening. This step is essential to ensure a proper fit for the AC vent and a seamless integration into the ceiling. A rough edge can affect the placement and stability of the vent, leading to potential air leaks or an unattractive finish.
Using sandpaper, gently sand the edges of the opening to create a smooth surface. Avoid applying excessive force, as this can damage the surrounding area or create an uneven edge. Take your time, and periodically check the smoothness of the edges until you are satisfied with the result.
Once you have removed any debris and smoothed the edges of the opening, you are now ready to proceed to the next step of installing the AC vent in the ceiling.
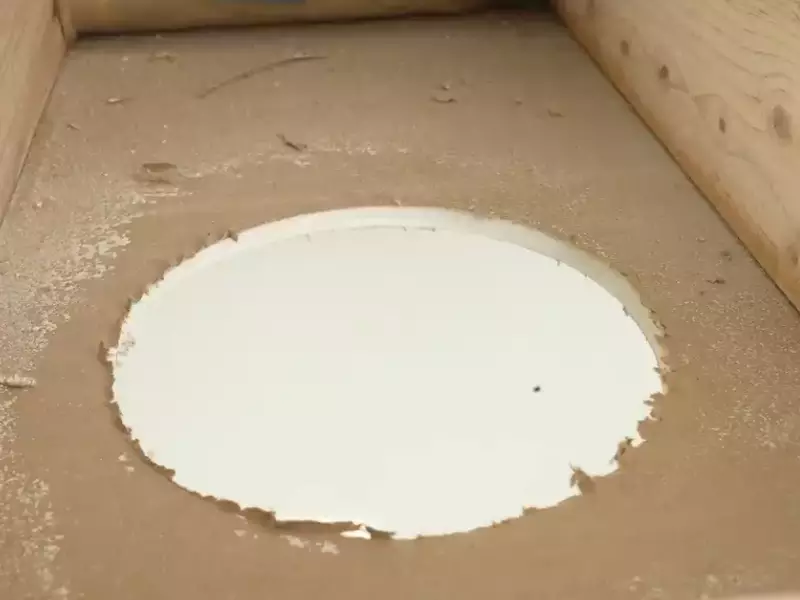
Preparing The Vent
Properly preparing the AC vent is crucial for a successful installation in the ceiling. This section will guide you through the necessary steps to ensure a seamless installation process. Checking the compatibility of the AC vent with the HVAC system, adjusting the vent size if necessary, will be covered in detail to help you complete the preparation effectively.
Checking the compatibility of the AC vent with the HVAC system
Before starting the installation, it’s essential to check the compatibility of the AC vent with your HVAC system. Not all vents are compatible with all systems, so it’s crucial to ensure a proper fit. Here are the key steps to follow:
- Identify the type of HVAC system: Determine if you have a central air conditioning system, a heat pump, or a ductless mini-split system. This information will help you determine the type of AC vent you need.
- Check the vent size requirements: Consult the manufacturer’s specifications or user manual of your HVAC system to determine the required size of the AC vent. This is typically expressed in inches and refers to the diameter of the vent. Make sure the vent you choose matches the size requirements of your HVAC system.
- Consider the airflow capacity: Take into account the airflow capacity of your HVAC system when choosing the AC vent. The vent should be able to handle the volume of air that the system outputs. Insufficient airflow can lead to reduced efficiency or even system damage.
Adjusting the vent size if necessary
After checking the compatibility of the AC vent with your HVAC system, you may need to adjust the vent size to ensure a perfect fit. Follow these steps to achieve the proper size:
- Measure the opening in the ceiling: Use a measuring tape to determine the dimensions of the opening where the vent will be installed. This will help you determine if the vent needs to be adjusted.
- Compare the measurements: Compare the dimensions of the opening with the size of the AC vent you have. If there’s a significant difference, you’ll need to adjust the vent accordingly. Consider consulting a professional if you’re unsure about the adjustments needed.
- Resize the vent: If resizing is necessary, use appropriate tools, such as tin snips or a saw, to trim the AC vent to the desired dimensions. Be cautious and take safety measures while making these adjustments.
By following these steps and ensuring the AC vent is compatible with your HVAC system and properly sized, you’ll be ready for the next stage of your installation. Now that the vent is prepared, you can move on to the actual installation process, which will be covered in the next section of this guide.
Attaching The Vent To The Ceiling
Once you have planned and prepared for your AC installation, it’s time to move on to attaching the vent to the ceiling. This step is crucial to ensure proper airflow and prevent any air leakage. In this section, we will discuss how to secure the vent in place using screws or nails, as well as how to achieve a tight fit that will keep your system running efficiently.
Securing the Vent in Place using Screws or Nails
To begin, make sure you have the necessary tools for this task. You will need a power drill or a hammer, along with screws or nails, depending on the type of vent you are installing. Check the manufacturer’s instructions for the recommended size and type of fasteners.
Once you have gathered your tools, position the vent in the designated spot on the ceiling. Use a pencil to mark the screw or nail holes on the vent and the corresponding spots on the ceiling. This will ensure accurate placement.
Next, securely attach the vent to the ceiling using screws or nails. Start by aligning the holes and placing the fasteners through both the vent and the ceiling. Use your power drill or hammer to drive the screws or nails in, but be careful not to overtighten them as it could damage the vent or the ceiling.
Repeat this process for each hole, making sure the vent is firmly secured in place. This will ensure that the vent stays fixed and does not move or fall off over time, providing a stable foundation for your AC system.
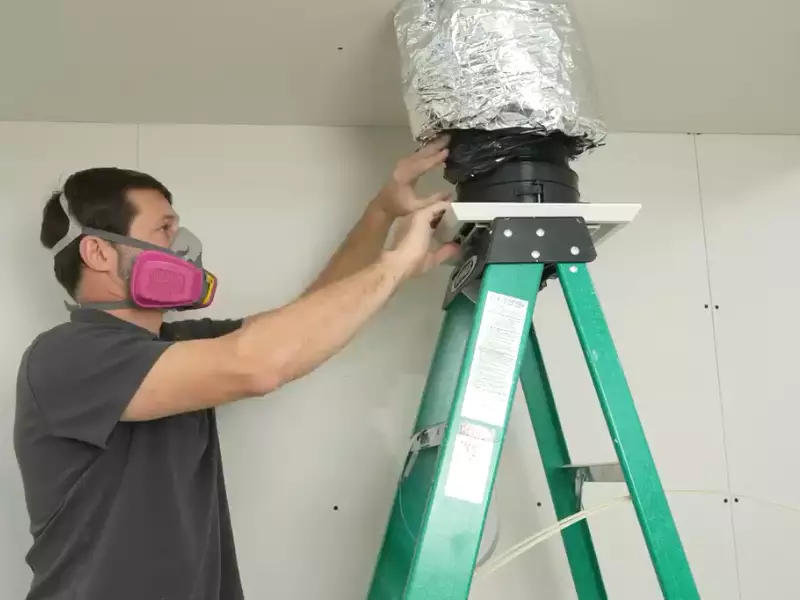
Ensuring a Tight Fit to Prevent Air Leakage
After attaching the vent to the ceiling, it is crucial to ensure a tight fit to prevent any air leakage. Even the smallest gaps can compromise the effectiveness of your AC system and result in wasted energy.
Inspect the area around the vent to check for any gaps or cracks. If you find any, you can use caulk or sealant to fill them in. Apply a thin, even layer around the edges of the vent, creating a barrier between the vent and the ceiling.
Once you have sealed any gaps, press the vent firmly against the ceiling to create a tight seal. This will further prevent any air leakage and optimize the airflow within your space.
Remember, a properly installed and sealed AC vent will not only enhance the efficiency of your cooling system but also improve the overall comfort of your home or office.
Connecting The Ductwork
Connecting the ductwork is an important step when installing an AC vent in the ceiling. This ensures proper airflow and distribution of cool air throughout the room. To connect the ductwork efficiently, follow these steps:
Attaching the ductwork to the back of the AC vent
The first step in connecting the ductwork is to attach it to the back of the AC vent. Start by positioning the AC vent in the desired location on the ceiling. Ensure that there is enough clearance for the ductwork to connect smoothly.
Next, determine the size of ductwork required for your AC system and cut it to the appropriate length. Make sure to account for any bends or turns that may be necessary to route the ductwork properly.
Once you have the correct length of ductwork, carefully attach it to the back of the AC vent. Slide the ductwork over the opening on the back of the vent, ensuring a snug fit. Secure the connection using duct tape or clamps, making sure it is tight and leak-free.
Securing the ductwork with tape or clamps
After attaching the ductwork to the AC vent, it is essential to secure it in place to prevent any movement or disconnection. This can be done using duct tape or clamps.
If using tape, wrap it around the joint where the ductwork connects to the AC vent, ensuring a tight seal. Make sure to cover the entire joint area to prevent any air leaks. Apply pressure to the tape to ensure it adheres properly.
If using clamps, place them over the joint and tighten them securely. This will hold the ductwork in place firmly, preventing any shifting or disconnection over time.
It is important to secure the ductwork adequately to ensure proper airflow and efficiency of the AC system. Poorly secured ductwork may result in air leaks, reducing the effectiveness of the AC vent. Regularly inspect the connections to ensure they remain secure and make any necessary adjustments or repairs.
By following these steps and properly connecting the ductwork, you can ensure optimal performance of your AC vent and enjoy cool and comfortable air throughout your space.
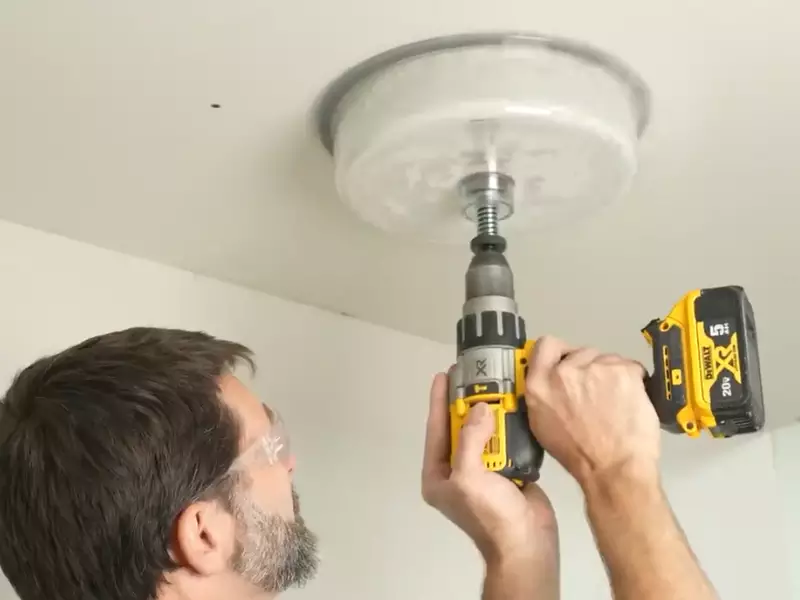
Testing And Adjustments
Switching on the HVAC system to check airflow
After successfully installing the AC vent in the ceiling, the next step in the process is to test the airflow and ensure it is functioning properly. This involves switching on the HVAC system and checking for any issues or irregularities. By following a few simple steps, you can determine if the airflow is sufficient and whether any adjustments need to be made.
- First, switch on the HVAC system and set it to the desired temperature. Allow the system to run for a few minutes to ensure it reaches optimal operating conditions.
- Once the system has been running for a while, stand underneath the newly installed AC vent and feel the airflow. Pay close attention to the intensity and direction of the air coming from the vent.
- If you notice weak airflow or if the air is not reaching the intended area, there may be an issue with the vent or its installation. Some common problems could include obstructions or blockages in the ductwork, incorrectly sized ducting, or a misaligned vent.
- To further investigate and troubleshoot the issue, it is recommended to consult a professional HVAC technician. They will have the necessary expertise and tools to identify and rectify any problems with the airflow.
Making any necessary adjustments to the vent direction
Once the HVAC system has been tested and any issues have been addressed, it is important to ensure that the AC vent is directing the airflow in the desired direction. This step helps maximize the efficiency of the system and ensures optimum comfort within the room. Follow these steps to make any necessary adjustments:
- Determine the desired direction of the airflow. Take into consideration the room layout, furniture placement, and other factors that may influence the airflow.
- Locate the adjustment mechanism on the AC vent. This could be a lever, knob, or a set of directional louvers.
- Gently adjust the vent in the desired direction. Take care not to apply too much force or bend the mechanism.
- Switch on the HVAC system again and observe the airflow. Confirm if the adjustments have resulted in the desired direction of airflow.
- If further adjustments are necessary, repeat the process until the airflow is properly directed.
- If you encounter any difficulties or are unsure about making adjustments, it is best to seek professional assistance. An HVAC technician can provide guidance and ensure that the adjustments are made correctly.
By switching on the HVAC system and testing the airflow, as well as making any necessary adjustments to the vent direction, you can effectively install an AC vent in your ceiling. This will ensure proper cooling or heating throughout your space, providing optimal comfort for you and your family.
Patching And Finishing
Once you have successfully cut the hole for your AC vent in the ceiling, the next step is to patch and finish the area. This is an important step in the installation process as it ensures a seamless and professional-looking result. In this section, we will discuss how to apply a joint compound to cover the cut edges and how to sand and paint the patched area to match the ceiling.
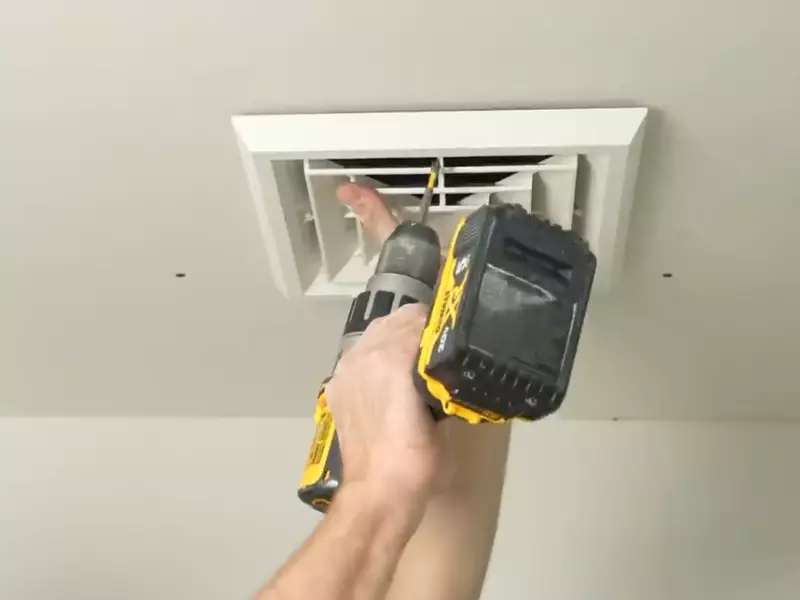
Applying joint compound to cover the cut edges
Applying joint compound is an essential part of patching the area around the AC vent cutout. The joint compound helps to fill in any gaps or cracks and provides a smooth surface for painting. Here’s how to do it:
- Clean the area around the cut edges to remove any dust or debris.
- Using a putty knife, apply a thin layer of joint compound over the cut edges. Make sure to feather the edges to create a smooth transition between the patch and the ceiling.
- Allow the joint compound to dry completely. This usually takes around 24 hours, but it’s best to consult the manufacturer’s instructions for specific drying times.
- Once the joint compound is dry, apply a second and possibly third coat, making sure to sand the patched area between coats. This will help to achieve a seamless finish.
Sanding and painting the patched area to match the ceiling
After the joint compound has dried and you have achieved a smooth finish, it’s time to sand and paint the patched area to match the rest of the ceiling. Here’s what you need to do:
- Using fine-grit sandpaper, gently sand the patched area to smooth out any imperfections and create a uniform surface.
- Wipe away any dust with a damp cloth to ensure a clean surface for painting.
- Apply a coat of primer to the patched area. This will help the paint adhere better and ensure an even finish.
- Once the primer is dry, apply a coat of paint that matches the color of the ceiling. It’s recommended to use the same type of paint that was originally used on the ceiling to ensure a seamless blend.
- Allow the paint to dry completely, and then inspect the patched area to ensure it matches the surrounding ceiling.
- If necessary, apply additional coats of paint until the patched area is indistinguishable from the rest of the ceiling.
By following these steps, you can successfully patch and finish the area around your newly installed AC vent in the ceiling. Remember to take your time and pay attention to detail to achieve a professional-looking result that seamlessly integrates with the rest of your ceiling.
Frequently Asked Questions Of How To Install Ac Vent In Ceiling
Can You Install An Air Vent On The Ceiling?
Yes, you can install an air vent on the ceiling. It helps to circulate and improve air quality in the room.
How Do You Secure A Ceiling Air Vent?
To secure a ceiling air vent, follow these steps:
1. Start by turning off the HVAC system.
2. Use a screwdriver to remove the vent cover.
3. Clean the vent and the surrounding area.
4. Measure the vent size and buy a matching vent cover.
5. Install the new cover by screwing it into place securely.
What Is The Disadvantage Of Having Ducts In The Ceiling?
Ducts in the ceiling can be disadvantageous as they take up valuable space and can be difficult to access for maintenance or repairs. Additionally, they may cause uneven cooling or heating throughout a room and can be noisy when air flows through them.
Are HVAC Vents Better In The Ceiling Or Floor?
HVAC vents are more commonly installed in the ceiling because they provide better air distribution and improve overall comfort in the room. Floor vents can create uneven temperature distribution and may be less efficient.
Conclusion
Installing an AC vent in the ceiling can greatly improve the cooling efficiency and overall comfort of your space. By following the step-by-step process outlined in this blog post, you can easily accomplish this task. Remember to gather the necessary tools, measure and mark the location, make the proper cuts, and carefully connect the vent.
With a little time and effort, you’ll be enjoying a well-ventilated space in no time.
