Installing a pre-charged AC unit involves connecting the refrigerant lines and electrical wiring. A well-rounded Want to install a pre-charged AC unit?
Look no further. We’ve got you covered with a step-by-step guide on how to install it. Installing a pre-charged AC unit is a cost-effective and convenient way to cool your space without the need for a professional technician. By following the instructions provided, you’ll be able to enjoy a cool and comfortable environment in no time.
So, let’s get started and dive into the process of installing a pre-charged AC unit. Just make sure you have the necessary tools and equipment before you begin.
Understanding Pre Charged AC Units
Explanation of Pre Charged AC Units
Pre charged AC units are a convenient and hassle-free solution for installing air conditioning in your home or office. These units come pre-filled with the necessary refrigerant, eliminating the need for professional refrigerant charging during installation. This means that you can save time and money by avoiding the services of a refrigeration technician. With a pre charged AC unit, you can easily install it yourself or hire a regular HVAC technician to do the job.
Benefits of Using Pre Charged AC Units
There are several benefits to using pre charged AC units for your cooling needs. Here are a few reasons why they are a popular choice:
- Simplicity: Pre charged AC units are designed to be user-friendly and straightforward to install. With comprehensive installation instructions provided, even those with minimal technical knowledge can set up these units without any difficulty.
- Cost-effective: By eliminating the need for refrigerant charging services, pre charged AC units help you save money on installation costs. You can avoid additional expenses associated with hiring a professional technician to handle refrigerant filling and charging.
- Efficiency: Since pre charged units are factory-filled with the correct amount of refrigerant, you can expect optimal performance and energy efficiency right from the start. This ensures that your AC unit operates at its best and provides effective cooling for your space.
- Time-saving: Installing a pre charged AC unit is a time-saving solution compared to traditional units that require refrigerant charging. With everything ready to go, you can have your unit up and running in no time.
Common Applications of Pre Charged AC Units
Pre charged AC units are suitable for a variety of applications, offering flexibility and convenience. Here are some common scenarios where pre charged units are often used:
- Residential Use: Many homeowners prefer pre charged AC units when they need to replace or upgrade their existing air conditioning system. The simplicity of installation makes it an accessible option for DIY enthusiasts or those who want to save on installation costs.
- Commercial Buildings: Pre charged AC units are also commonly used in small to medium-sized commercial spaces such as offices, retail stores, and restaurants. With their cost-effectiveness and ease of installation, they provide an efficient cooling solution without the need for complex refrigerant charging.
- Rental Properties: Landlords and property managers often choose pre charged AC units for their rental properties. These units allow for quick and hassle-free installation, enabling them to provide comfortable living spaces for tenants without much downtime.
- Temporary Cooling: Whether it’s for events, construction sites, or temporary structures, pre charged AC units offer a portable and efficient cooling solution. They can be easily set up and removed when they are no longer needed, making them a practical choice for temporary cooling needs.
Overall, pre charged AC units offer convenience, cost savings, and efficiency, making them a popular choice for both residential and commercial cooling needs. With their user-friendly installation process and numerous applications, they provide an effective solution for anyone in need of reliable and hassle-free air conditioning.
Step-By-Step Guide To Installing Pre Charged AC Units
Installing a pre charged AC unit can be a straightforward process if you have the right tools and follow a step-by-step approach. In this guide, we will walk you through the process of installing a pre charged AC unit, ensuring that you have all the necessary information to complete the installation successfully. From preparing the installation area to testing the unit’s functionality, each step is crucial in ensuring a smooth and efficient installation. Let’s dive in!
Necessary tools and equipment for installation
Before you begin the installation process, it’s essential to ensure you have all the necessary tools and equipment on hand. Here’s a list of items you will need for a seamless installation:
– Screwdriver set
– Drill and appropriate drill bits
– Level
– Tape measure
– Pliers
– Pipe cutter
– Pipe insulation
– Mounting brackets
– Electrical wire and connectors
– Test lamp or multimeter
– Safety gloves and goggles
By gathering all these tools and equipment beforehand, you can eliminate any delays during the installation process and ensure that everything is within arm’s reach when needed.
Preparing the installation area
The first step in installing a pre charged AC unit is to prepare the installation area. Here’s what you need to do:
- Clear the area: Remove any obstructions or debris from the designated installation area, both indoors and outdoors.
- Measure and mark the mounting locations: Use a tape measure to identify the precise spots where the indoor and outdoor units will be mounted. Mark these locations using a pencil or marker.
- Check for proper support: Ensure that the wall or surface where the units will be mounted can support the weight of the AC units and is structurally sound.
- Secure the mounting brackets: Following the manufacturer’s instructions, install the mounting brackets securely on the wall. Use a drill and appropriate drill bits to create pilot holes for the brackets and screws.
By adequately preparing the installation area, you can set a strong foundation for the AC unit installation and ensure its long-term stability.
Installing the indoor unit
Once the installation area is ready, it’s time to proceed with installing the indoor unit. Follow these steps:
- Remove the front cover: Take off the front cover of the indoor unit by loosening and removing the screws or clips that hold it in place. Set the cover aside for later reinstallation.
- Attach the mounting plate: Align the mounting plate with the brackets on the wall and secure it using screws. Ensure that the plate is level to prevent any issues in the future.
- Connect the pipes and wiring: Carefully connect the refrigerant pipes and electrical wiring to the indoor unit. Refer to the manufacturer’s instructions for proper connections. Remember to insulate the pipes using pipe insulation.
- Mount the indoor unit: Lift the indoor unit and hook it onto the mounting plate. Ensure that it is securely attached and level by using a level. Reattach the front cover, making sure to tighten all screws or clips.
By completing these steps, you will have successfully installed the indoor unit of your pre charged AC system. The next step is to connect the refrigerant lines.
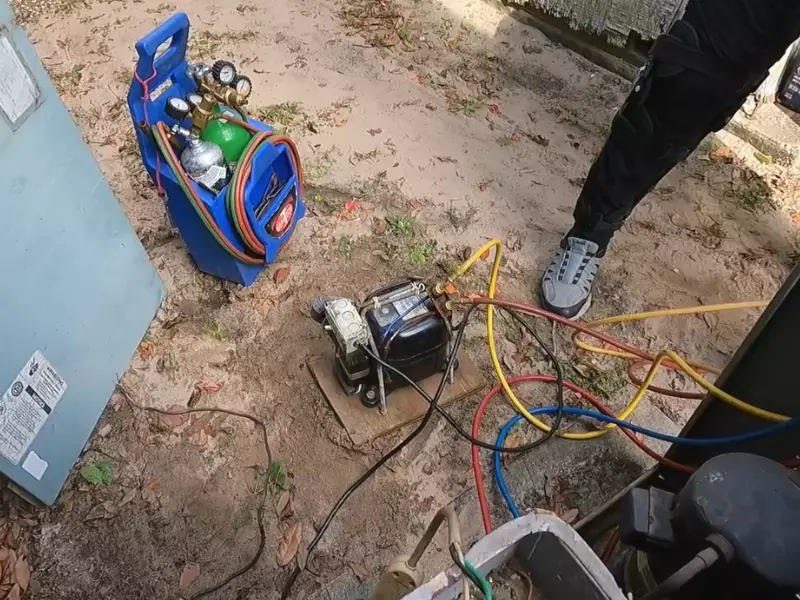
Connecting the refrigerant lines
Properly connecting the refrigerant lines is crucial for the efficient and effective operation of your AC system. Follow these steps:
- Determine the pipe lengths: Measure and cut the refrigerant pipes according to the distance between the indoor and outdoor units. Use a pipe cutter for accurate cuts.
- Ensure clean and secure connections: Clean the pipe ends and fittings using a brush, ensuring that there is no debris or contaminants. Connect the pipes to the indoor and outdoor units using appropriate fittings and secure them tightly.
- Insulate the refrigerant lines: Slide pipe insulation over the refrigerant lines, covering the connected sections. Use tape to secure the insulation, ensuring there are no gaps.
By following these steps, you will have successfully connected the refrigerant lines of your pre charged AC unit. The next step involves positioning and securing the outdoor unit.
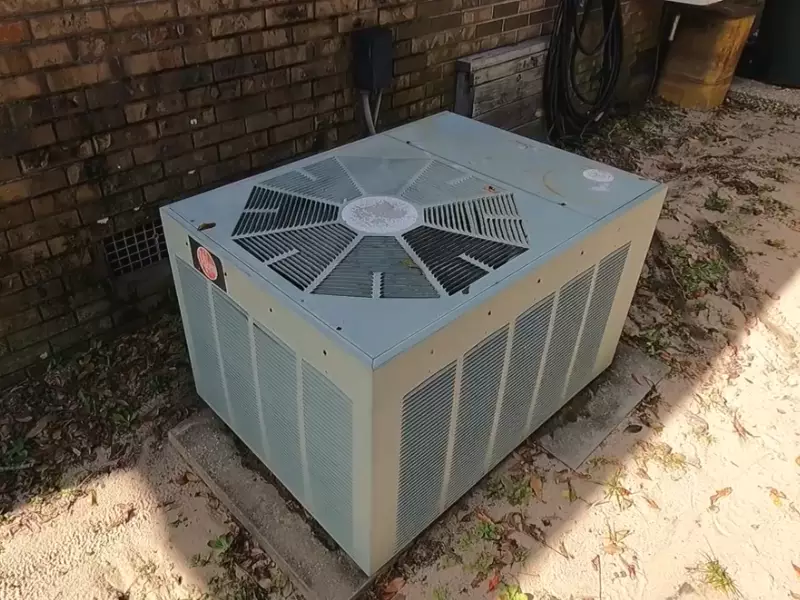
Positioning and securing the outdoor unit
The outdoor unit plays a vital role in the cooling process, and it’s essential to position and secure it correctly. Here’s what you need to do:
- Choose a suitable location: Select a spot for the outdoor unit where it will receive proper airflow and is clear from any obstructions. Ensure that the unit is positioned on a flat and stable surface.
- Place rubber pads or vibration mounts: To reduce vibration and noise, place rubber pads or vibration mounts under the outdoor unit. This helps to stabilize the unit and minimize any potential disturbances.
- Secure the outdoor unit: Use brackets or mounting hardware to secure the outdoor unit to the surface. Make sure it is level and securely fastened to prevent any movement or accidents.
By carefully positioning and securing the outdoor unit, you can ensure optimal performance and longevity of your pre charged AC unit. The next step involves connecting the electrical wiring.
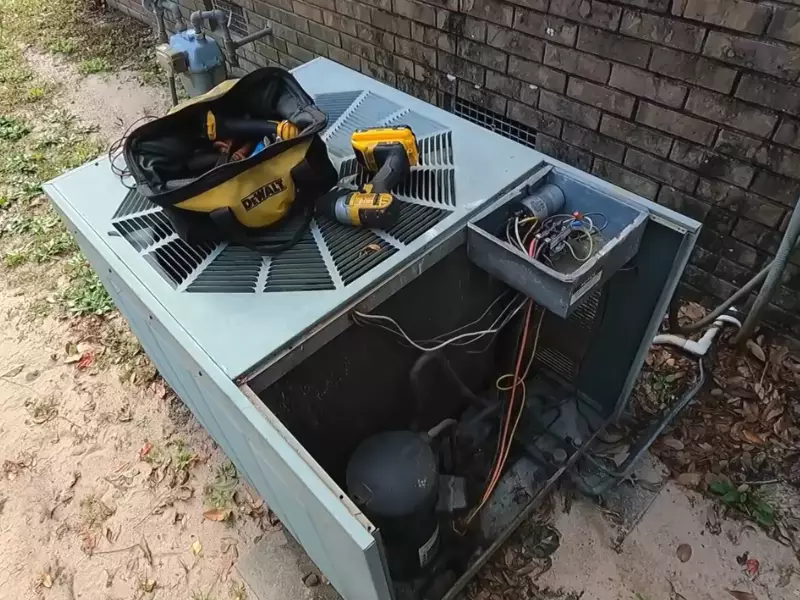
Connecting electrical wiring
The electrical wiring connections are a crucial part of the installation process. Follow these steps to connect the electrical wiring correctly:
- Turn off the power supply: Before working with electrical connections, turn off the power supply to prevent electrical shock and damage to the AC unit.
- Connect the wiring: Refer to the manufacturer’s instructions for the specific wiring connections. Use wire connectors to join the corresponding wires from the indoor and outdoor units with the electrical supply.
- Double-check the connections: Ensure that all electrical connections are secure and properly insulated. Use electrical tape to wrap exposed wires and connectors, providing an extra layer of protection.
By properly connecting the electrical wiring, you can ensure the safe and effective operation of your pre charged AC unit. The final step involves testing the unit and ensuring its proper functionality.
Testing the unit and ensuring proper functionality
After completing the installation, it’s vital to test the AC unit to ensure everything is functioning correctly. Here’s what you need to do:
- Turn on the power supply: Restore the power supply and switch on the AC unit.
- Test the cooling and airflow: Set the desired temperature on the indoor unit and check if the air conditioner is producing cold air. Verify that the airflow is circulating correctly.
- Check for any leaks or unusual noises: Inspect the refrigerant lines for any leaks or signs of damage. Additionally, listen for any unusual noises coming from the unit, which could indicate a problem.
- Monitor for proper operation: Let the AC unit run for a while and observe its performance. Ensure that it reaches and maintains the desired temperature effectively.
By conducting these tests and evaluations, you can confirm that your pre charged AC unit is installed correctly and is functioning as intended.
Installing a pre-charged AC unit may seem daunting at first, but by following this step-by-step guide, you can complete the installation with confidence. Remember to consult the manufacturer’s instructions for any specific guidelines related to your AC unit model. With the right tools and a methodical approach, you’ll be enjoying the cool comfort of your AC system in no time.
Troubleshooting And Maintenance Of Pre Charged Ac Units
Proper troubleshooting and maintenance of pre charged AC units are essential to ensure optimal performance and longevity. By identifying common installation mistakes, checking for leaks in the refrigerant lines, maintaining cleanliness, cleaning or replacing filters, regularly inspecting and maintaining components, and troubleshooting common issues, you can keep your AC unit running smoothly and efficiently. Below, we will discuss each aspect in detail.
Identifying Common Installation Mistakes
During the installation process, it is crucial to be mindful of common mistakes that can affect the performance and efficiency of your pre charged AC unit. Some common installation mistakes include:
- Improper sizing of the AC unit for the room or space
- Inadequate insulation around the refrigerant lines
- Incorrect placement of the unit, blocking airflow or exposure to direct sunlight
- Failure to properly seal gaps or leaks in the unit
To ensure a successful installation, it is important to work with a professional HVAC technician who can help you avoid these common mistakes.
Checking for Leaks in the Refrigerant Lines
Refrigerant leaks can significantly impact the performance and efficiency of your pre charged AC unit. To check for leaks, you can:
- Inspect the refrigerant lines for any visible signs of leakage, such as oil stains or frost accumulation
- Use a refrigerant leak detector to identify leaks that may not be visible to the naked eye
- If a leak is detected, it is essential to contact a professional technician to repair the leak and recharge the refrigerant.
Maintaining the Cleanliness of the Units
Keeping your pre charged AC unit clean is vital for its overall performance and efficiency. Regular cleaning helps prevent dust and debris buildup, which can obstruct airflow and affect the cooling capacity. Here are some tips for maintaining cleanliness:
- Regularly clean the outdoor condenser coil using a soft brush or vacuum cleaner to remove dirt and debris
- Clear any obstructions around the unit, such as leaves or branches
- Ensure proper airflow by keeping the unit clear of any objects or furniture
- Regularly remove and clean the indoor air filters according to the manufacturer’s instructions
Cleaning or Replacing Filters
Dirty or clogged filters can restrict airflow and reduce the efficiency of your AC unit. To maintain optimal performance, it is important to clean or replace the filters regularly. Here’s how:
- Turn off the AC unit and locate the filter compartment
- Remove the filter and clean it using a vacuum cleaner or by rinsing it with water
- If the filter is damaged or cannot be cleaned, replace it with a new one of the same size and type recommended by the manufacturer
- Make sure to reinstall the filter correctly and securely
Regularly Inspecting and Maintaining Components
In addition to cleaning filters and maintaining cleanliness, it is important to regularly inspect and maintain other components of your pre charged AC unit. This includes:
- Inspecting electrical connections for any signs of damage or loose connections
- Checking the thermostat settings and calibrating if necessary
- Inspecting the fan blades for any buildup of dirt or debris
- Monitoring the condensate drain line and clearing any clogs to prevent water leakage
Troubleshooting Common Issues and Solutions
Even with proper maintenance, issues may arise with your pre charged AC unit. By troubleshooting common issues promptly, you can prevent further damage and ensure a comfortable indoor environment. Some common issues and solutions include:
| Issue | Solution |
|---|---|
| The AC unit is not cooling effectively | Check for clogged filters, clean or replace them if necessary. Also, ensure that the thermostat is set to the correct temperature and that there are no obstructions blocking airflow. |
| The AC unit is producing strange noises | Inspect the fan blades for any loose or damaged components. Tighten any loose screws and clean any dirt or debris on the blades. |
| The AC unit is not turning on | Check the power supply and ensure the AC unit is plugged in. If the problem persists, contact a professional technician to inspect the electrical connections. |
By following these troubleshooting steps and addressing common issues promptly, you can easily maintain your pre charged AC unit and ensure it operates at its best.
Frequently Asked Questions On How To Install Pre Charged Ac Unit
Do Air Conditioning Units Come Pre-Charged?
Yes, air conditioning units come pre-charged with refrigerant.
Can I Install My Ac Myself?
No, it is not recommended to install your AC yourself. Professional installation ensures proper setup, reduces the risk of damage or injury, and maximizes efficiency. It is crucial to hire professionals for safe and effective installation.
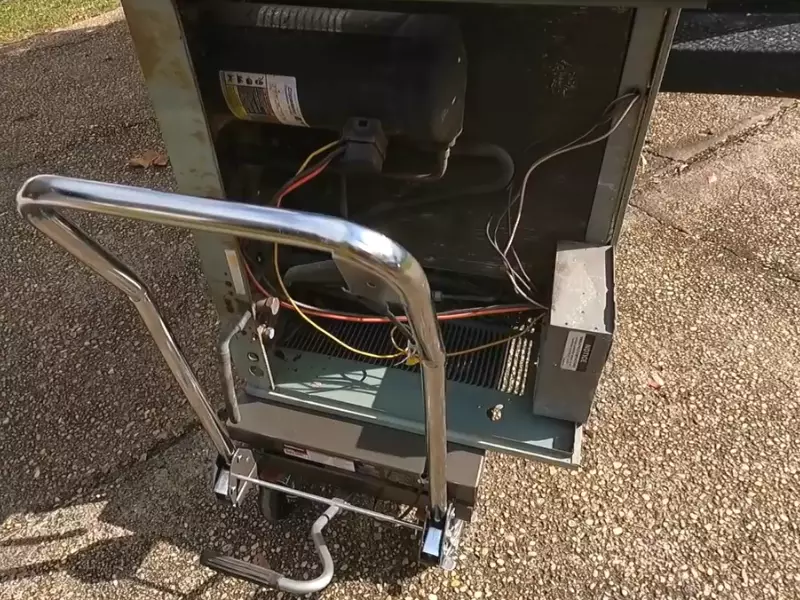
How Do You Release Gas From An AC Compressor?
To release gas from an AC compressor, follow these steps:
- Turn off the AC unit and unplug it.
- Locate the service valves on the compressor.
- Wear safety gloves and goggles.
- Attach a refrigerant recovery unit to the valves.
- Open the valves to release the gas safely.
Do You Open High Side Or Low Side First?
To properly open a system, you should start with the low side. Opening the high side first can result in high-pressure gas release, which can be dangerous.
Conclusion
Installing a pre-charged AC unit is a straightforward process that can provide comfort and convenience during hot summer months. By following the steps outlined in this guide, you can ensure a successful installation without the need for professional assistance. Whether you’re a DIY enthusiast or simply wish to save on installation costs, this guide has equipped you with the necessary knowledge to get the job done efficiently.
Stay cool and enjoy the benefits of a properly installed pre-charged AC unit!